Sewing is one of those rare abilities that no one can perfect. Sewing is a vital skill that should not be overlooked. It’s a need for maintaining the appearance and functionality of your wardrobe. The significance of sewing has changed throughout the years, as people increasingly utilize stitches for decoration as well as for functional purposes. Threads and needles were used for stitching before the invention of sewing machines. Things began to get easier after the introduction of sewing machines. Sewing using a needle and thread can be replaced entirely by using a sewing machine.
How To Release Clutch On Sewing Machine
Determine if your handwheel grip is loose or tight by inspecting it. It is also possible to use a clutch lever to alter the handwheel grip. It is necessary to hold the clutch knob until the handwheel is loose and tight enough for sewing purposes. If you’re using a servomotor machine, you’ll also need to press down on your machine’s foot. Once you’ve figured out the correct handwheel position, carefully release the clutch.
Steps To Release Clutch On Sewing Machine
If you don’t know how to use a modern sewing machine, it can be a challenge. Sewing machines are equipped with a variety of mechanisms that can come in handy when things become tough. Almost every sewing machine these days comes equipped with a safety clutch, making it an essential part of the machine. Clutch knobs can help you with any form of sewing problem that involves a hook or thread. Some times the handwheel is too tight and the cloth is caught and looped by it instead of being released promptly. An really challenging situation. Finding a solution is possible with the clutch knob, though.
Bạn đang xem: How To Release Clutch On Sewing Machine?
You can unlock your handwheel with the clutch by following the procedures outlined below.
Step 1 – Take Precautions
It’s important to catch a problem with your handwheel before it causes damage to the fabric by not turning and sewing improperly. If the bobbin race has been spinning for a long time, stop sewing, remove the needle, and wash your fabric.
Step 2 – Check The Bobbin Case Clearly
Remove the presser footplate and the bobbin doors to gain access to the bobbin’s interior. Make sure there aren’t any long turns. Switch off your machine and turn off the motor when you’ve confirmed that it’s safe.
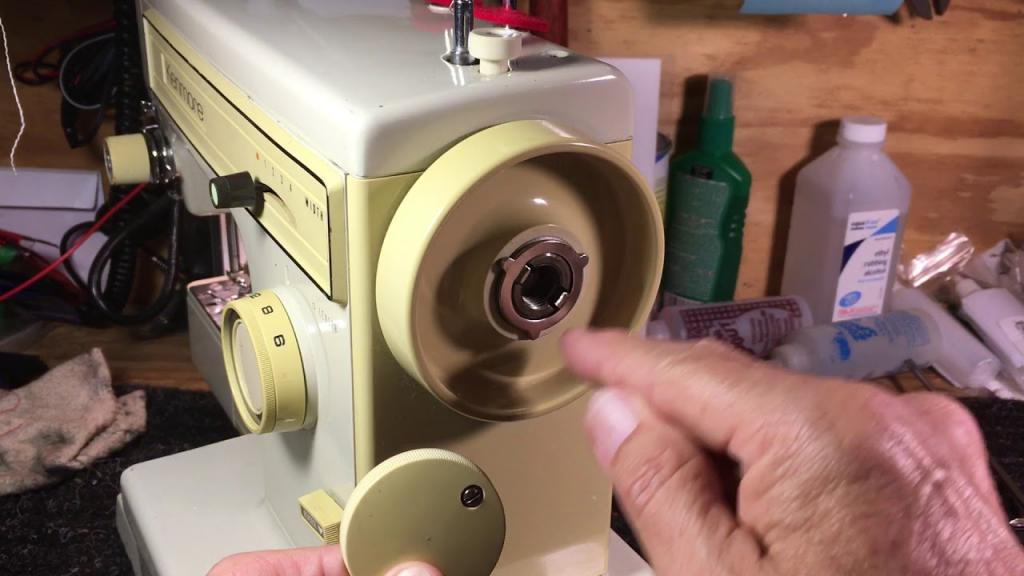
Step 3 – Reach Out For Clutch
The next step is to access the device’s clutch, which may be found on the bottom plate. There’s a giant silver button on the back of the jacket. Before adjusting your handwheel, be sure to press the button fully and hold it in place. The foot of your machine will also need to be pushed in order to work on your servo motor.
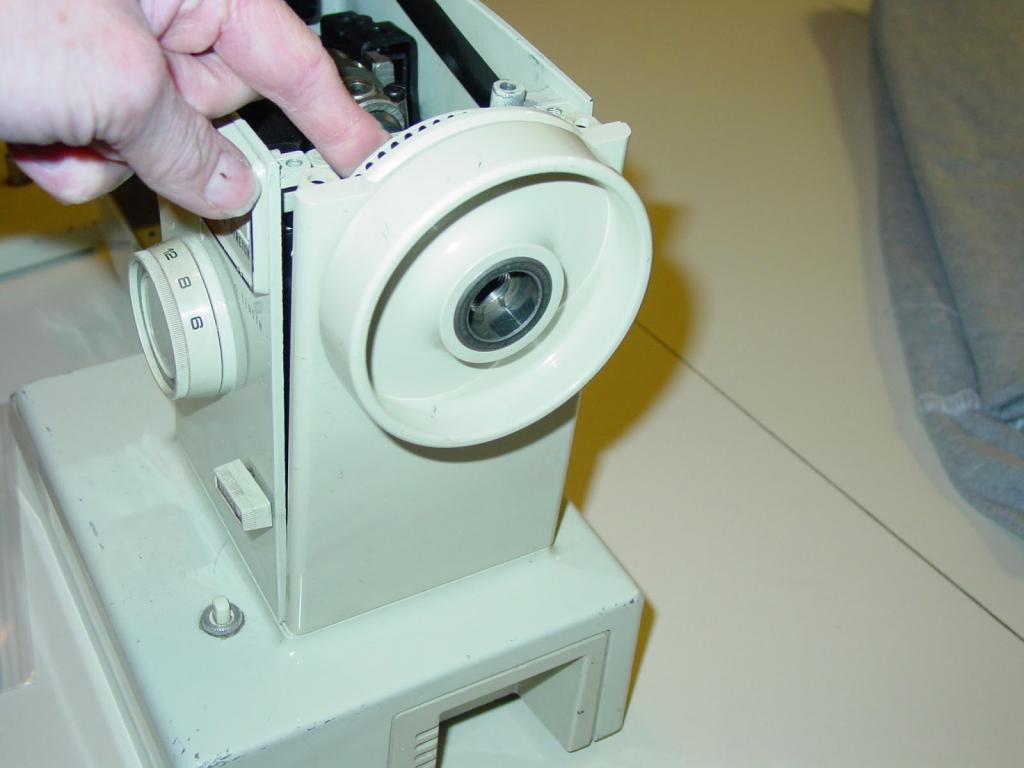
Step 4 – Adjust The Wheel
Xem thêm : What Size Needle For Sewing Jeans? Tips to Make Sewing Denim Hassle-Free
Adjust the wheel till you can feel your pin fully engaged, then move the wheel away from your direction until it is totally engaged. Once you’ve inserted the pin, you’re ready to start rotating the wheel in the desired direction. Please keep rotating until you hear an audible popping sound. It is a sign that your pin is safe.
Step 5 – Get Back To Normal
Gently release your clutch after making adjustments to your wheel, and then put your needle back in position. To begin, take your time stitching to ensure that everything is in working condition and that your wheel remains in the appropriate position for the whole sewing process.
You may use an automatic clutch to set your wheels straight if you carefully follow these steps.
What is a Clutch Knob on A Sewing Machine
The bobbin is able to function independently of the machine thanks to a central knob or clutch. When the bobbin is entirely wound, you must close the knob in the center to allow the needle to move again. Keeping the needle stationary during bobbin winding is essential to prevent damage to the sewing machine and the fabric being wound. As a result, when winding bobbins, it’s critical to exercise utmost caution when working with the center knob.
Where is The Clutch Situated on A Sewing Machine
Working with a machine requires the clutch to be a functional part of the machine. An adjustable handwheel is needed to ensure optimal machine operation. The plate under the arm has a clutch attached to the top. Silver is the most common material for a clutch button. You can use it as a safety-catch pin if your handwheel gets jammed and prevents your machine from working. These are the stages you can use a clutch to adjust or unwind the handwheel.
Difference Between Clutch Motor And Servo Motor
Xem thêm : How To Backstitch On A Brother Sewing Machine?
In industrial sewing machines, there are two main motor types: clutch and servo. A variety of options are available to meet your specific stitching needs. It’s impossible to compare one to another. A noteworthy distinction between the two machines is that the clutch motor is always working when the machine is started up. Sewing machines will be heard all around you. When you press the pedal, the Servo motor does not turn on. It won’t make any noise until you move it.
Industrial sewing machines have relied on this motor for decades now. The motor’s dependability and strength are unmatched. The clutch on the motor has a long service life and high strength. As a bonus, the clutch motor is specifically intended to stitch heavy fabrics such as quilts, leather, and other textiles. Due to its superior speed compared to other sewing machines used in industrial manufacturing, the clutch motor sewing machine is preferred over all others.
Related Questions
Where Is The Clutch On A Sewing Machine?
In most cases, the clutch, also known as a thumbscrew, is positioned in the flywheel’s midsection. Another option is to use the base plate’s under-arm button to free a jammed handwheel. Ultimately, always consult the sewing machine’s instruction manual to identify all of its parts.
How To Fix Sewing Machine Clutch
- Remove the clutch and the clutch release knobs.
- Before securing the knob, move the clutch around to make sure it is in the proper position.
- In the case that the screw comes into contact with something, reinstall it and remove the clutch and knob.
- As soon as you’ve found the ideal setting for the clutch, slide it into place behind the knob.
- The knob should be tested after the screw is installed.
How Does A Sewing Machine Clutch Work?
You may prevent your sewing machine from threading the bobbin by turning the clutch counterclockwise. A thumbscrew can also be used to halt the machine’s operation by removing the thumbscrew. When you turn the handwheel, you must keep it firmly in place.
Conclusion
It’s as simple as that! Press the button and look at the handwheel for a quick demonstration of how to open the machine’s clutch. Industrial sewing machines can also be powered by a clutch motor, it should be noted. When sewing heavy fabrics, this is the best option.
Nguồn: https://spasifikmag.com
Danh mục: Sewing Tips


