If you want to learn how to sew a quilt with a sewing machine, you’ll be pleased that it’s only four steps. First, we’ll talk about making the quilt sandwich and then how to use the device for quilting. We’ll also share helpful tricks when machine quilting.
Are you interested in learning other sewing techniques to do in the sewing machine as well? For example, teach yourself how to stitch in the ditch with a sewing machine. You can even browse our blog for more sewing tricks.
Bạn đang xem: How To Sew A Quilt With A Sewing Machine?
How To Quilt With A Regular Sewing Machine
Step 1. Prepare the squares
- Cut four fabric squares for a four patch block, with each square measuring 8 by 8 inches
- Use an acrylic quilter’s ruler and rotary cutter to make cutting easier
- Cut away from you and ensure that your fingers are far from the ruler’s edge
- Cut the fabric squares on the straight grain
- Replace the rotary cutter blade once you notice it skipping threads
Step 2. Sew the block
- Pin two squares right sides together and sew along the edge with a ¼-inch seam
- Press the seam to one side and repeat with the remaining squares to have two pairs
- Put the pairs you made right sides together and pin
- Press the seam and turn the quilt block right side up
- Check if the point where all the squares meet matches up
- Trim the edges to get a perfect quilt top
- Place the material on a cutting mat and align the selvage with the mat’s horizontal marking
- Check the right-hand side of the fabric and cut the edge if it does not follow the same horizontal line
- Do the same on the other side and check the quilt top if it’s right-angled
Step 3. Make the quilt sandwich
- Cut the batting, so that it’s a tad smaller than the backing layer and a tad larger than the quilt top you made
- Cut the backing, so that it’s larger than the quilt top
- Press both sides of the quilt top and construct the sandwich
- Press the backing fabric and lay it right side down with the batting on top
- Lay the pressed quilt top on top of the batting and secure the layers with masking tape on the surface
- Tack the layers together from the center out in a grid pattern with lines 4 inches apart
Step 4. Machine quilt
- Mark the quilt top with your desired pattern
- Set the sewing machine stitch length to zero and stitch on the spot to make a line
- Quilt near the center then work outward, stitching in a consistent direction
- Work in long lines according to your markings, and remember to start and finish the quilting at the sides
- For parallel lines, use the width of the machine’s foot to ensure that your lines have perfect spacing
- Stitch on the spot to finish quilting and trim the thread ends
- Remove the tacking and pins
- Tie the thread ends and hide them in the batting
- Press the quilt on both sides and trim the layers to perfect the size
Can I Quilt With A Regular Machine?
You can quilt with a regular sewing machine by using different feet. For example, you can do straight-line quilting with a walking foot or use a free motion quilting foot to quilt more intricate designs that are usually possible when hand quilting. Some sewing machine brands even include features like the stitch regulator in their sewing machines to suit quilting needs.
Is it better to quilt by hand or machine?
It will be easier for a beginner to machine quilt, especially if you want to make projects faster and do functional quilts that will be used and laundered regularly. Machine quilting makes a more durable finish, but those who want a more authentic-looking quilt can consider hand quilting. If you’re giving a gift and you want a more personalized touch, there’s no doubt that the labor in hand quilting makes the quilt more special.
As a beginner to machine quilting, learn what is baste in sewing. It can be an excellent alternative to pins and make quilting much more manageable.

Can I Make A Quilt With A Mini Sewing Machine?
It’s possible to quilt with a mini sewing machine, but expect limitations with the materials you can use.
How Do You Sew A Large Quilt On A Small Sewing Machine?
- Expand your sewing space with a table to support the quilt and, if possible, have the table against the wall to keep the quilt from falling
- Start in the center and scrunch the quilt into the sewing machine’s neck to maneuver it easily
- Turn the machine, so the body points away from you; this will make it easier to push the quilt into the machine’s neck
Can You Quilt With A Walking Foot?
You can quilt with a walking foot, specifically when doing straight-line quilting. You can also use it when sewing the binding to the quilt afterward.
Machine Quilting Options for Beginners
A growing number of quilters use machine quilting as their primary quilting method. Quilters can choose from many options, from intricate designs to straight machine quilting stitches. The good news is that you do not need a special sewing machine.
There are two basic types of machine quilting that can easily be accomplished on most sewing machines—straight line and free motion. Straight line quilting is the easier of the two techniques but both require a bit of practice.
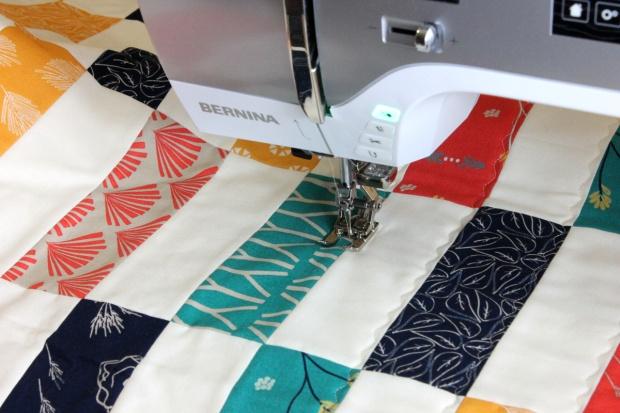
Straight Line Machine Quilting
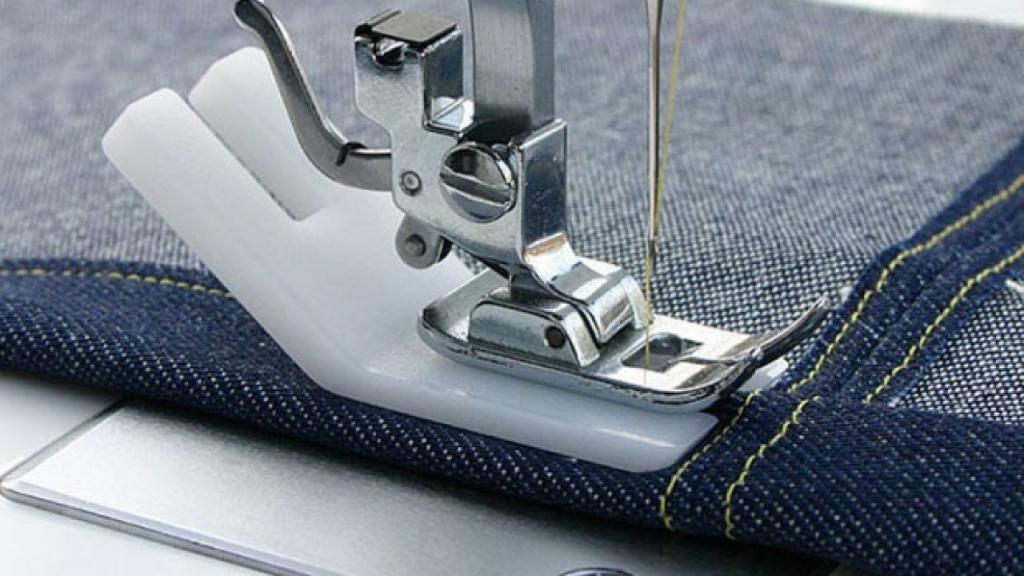
Straight line machine quilting is best accomplished by replacing a regular presser foot with a walking foot, often called an even-feed foot. A walking foot is a specialized pressure foot that grips the top of the quilt sandwich, advancing it through the machine at the same rate as the quilt’s back, which touches and is moved along by the sewing machine’s feed dogs.
Moving the quilt evenly through the machine keeps the layers of a quilt sandwich from shifting apart as the quilt is sewn, which reduces the distortion and the pleats that can occur if one layer of the quilt sandwich is out of sync with the other layers.
Xem thêm : How To Thread A Bernina Sewing Machine? Comprehensive Guide
Gentle curves are possible with a walking foot, but intricate patterns require free motion machine quilting techniques.
Free Motion Machine Quilting
Machine quilting designs can be every bit as intricate as the designs used for hand quilting, but it does take practice to create the stitches, even when using a sewing machine that includes specialized machine quilting equipment. These are the basics:
- The machine’s feed dogs are lowered when you use free motion machine quilting techniques, so nothing is in place under the quilt sandwich to guide it along. The quilter is in total control of the motion.
- The speed of your movements and how fast you run the sewing machine both work together to determine stitch length.
- The foot you use can be either a darning foot or a special foot made for machine quilting. Special feet resemble a darning foot but have much larger openings.
Watch for New Machine Quilting Options
The demand for sewing machines that make it easier to machine quilt has increased in recent years, so manufacturers have introduced new models to satisfy sewing wants and needs. Bernina’s Stitch Regulator is one feature that helps even beginning machine quilters sew evenly spaced free motion stitches. Other sewing machine manufacturers have developed special presser feet to help quilters use their machines more easily, too.
Do keep in mind that, while high-end machines are fantastic, you can machine quilt with just about any sewing machine. Generic walking feet and are available for most sewing machines, and so are their free motion counterparts.
Today’s quilters have more resources than quilters of past generations. Rotary cutting techniques, an endless selection of fabrics made with dyes that don’t bleed or change color, threads to suit every need, plus sewing machines loaded with time-saving and creativity-enhancing capabilities.
Stencils and other types of guides are available to help you sew machine quilted projects—even free motion quilting stitches needn’t be random.
Getting Started Machine Quilting
Start by machine quilting a small project, maybe a table runner, mug rug, or baby quilt, just to get a feel for the technique. If machine quilting turns out to be a technique you love, research machines to discover which one might be the best choice for your needs.
TOP 10 QUILTING TIPS
If you’re on a similar quest to be able to create your own quilts on your domestic sewing machine from start to finish, then these top 10 quilting tips are for you!
TIP #1 – SLOW DOWN
Slow down! I know this is not a fun one to hear, but I promise that slow and steady wins the race. There are so many layers going through your sewing machine and adding too much speed to the equation can result in uneven and skipped stitches. Not to mention, it’s way more challenging to keep a good hold on things when you’re going so fast. So, slow down. If you’re machine has a speed control like my *Juki does, then lower the speed so you’re not tempted to zooooom your way through. When I decided to slow things down, I immediately noticed an improvement in my control and stitch quality.
TIP #2 – LOOK AHEAD
Look where you want to go, not at your needle. Just like when you’re driving your car, you want to look ahead and see what traffic or hazards are heading your way. It’s the same thing with quilting. You want to look where you want to go and not at your needle. I know it’s tempting to look at your needle, but as soon as I started looking ahead my lines ended up being straighter. This is especially important if you’re doing any kind of dot-to-dot quilting or stitching in the ditch. But really, it’s just how I piece and quilt. It’s a good habit to get into. Try it and let me know how it works out 😊
TIP #3 – QUILTING RESOURCES
Invest in quilting resources. If trying to decide on quilting motifs stumps you, then I highly recommend getting the *Walk book by Jacquie Gering. I picked up my own copy last year and have loved the designs I’ve tackled to date (only 2, but they were so fun – you can see them here and here). It’s helped open my eyes to different ways of tackling quilting with my walking foot. If free motion quilting (FMQ) is more your jam, then you might want to check-out Karlee Porter’s Graffiti Quilting books or course (save $50 with code SFGQ50). As with most things with quilting, it really comes down to practice, but having helpful resources can go a long way is providing guidance and inspiration.
TIP #4 – FOCUS ON ONE AREA (SEE THE TREES NOT THE FOREST!)
Focus on the area you’re quilting. When I’m wrangling my quilt through my machine, I don’t worry about the entire quilt, I just focus on the immediate area I’m stitching. Here’s what I’m thinking about:
“Is my top and bottom fabric nice and flat?” I want to avoid puckering or bubbling as much as possible. Starting with a properly based quilt goes a long way in helping prevent these issues, but I find it important to still smooth out my fabric as I’m coming to each section. The key is to gently smooth the fabric out without pulling or tugging on it too much. It’s a delicate balance that you get better and better at the more you do it 😉
“are my stitches looking consistent?”
“have I run out of bobbin thread?” – ha! If you’ve gone and quilted a whole row only to discover you’ve run out of bobbin thread, then you know why I’m always checking in to make sure I’m seeing stitches!
Xem thêm : How To Thread A Dressmaker Sewing Machine For Beginners?
“do I need to remove any pins?” Since I pin baste (*these are my go-to), I need to keep an eye out if a pin will be obstructing my quilting path. You want to remove these as you come up to them, but don’t wait till the very last minute as it can get tricky to remove the pin if it’s too close to your presser foot (ask me how I know this!).
“is my quilt dragging?” By this I mean, is the weight of your quilt pulling/ weighing it down as your feeding it through the machine. You want to focus on alleviating that weight so your quilt is being fed through evenly. The best way I’ve found to do this is to have the quilt resting in my lap. I keep shifting the quilt so that there is no ‘drag’. You’ll feel this pulling/ dragging effect if you’re not properly holding the quilt and managing the weight.
Pictured above is the Winter Star quilt pattern | this was my first attempt at using a darker/ contrasting thread against a light background.
TIP #5 – TO ROLL OR TO BUNCH?
To roll or to bunch? I’ve tried both methods and have found the best success with bunching. Rolling tends to create a much heavier weight to manage and it can be tough to feed it through your harp space (especially with smaller throat spaces). This also creates more of a challenge with dragging. Bunching puts less pressure on my shoulders too. Try both methods and see which feels best to you.
TIP #6 – CHANGE YOUR NEEDLE
Change your needle often. As in, every 3 bobbin changes. Yup, that seems like a lot. But a sharp needle plays an important part in stitch quality and helps on the tension front too! Which is why I buy my *sewing needles in bulk.
TIP #7 – CLEAN REGULARLY
On that note, clean your sewing machine frequently. Also, every 3 bobbin changes. And don’t forget to give her a little drink of *oil too. This will ensure she’s working at peak performance. You can read more about my sewing room maintenance habits here.
TIP #8 – CHECK THAT TENSION
Check your tension early on. I will take several stitches and then stop and take a peek at the back. This ensures that if you do have a tension issue, you’re catching it nice and early (AKA way less stitches to rip 😉). A great tip is to have a test patch to check your tension after each bobbin change. Make sure to use fabrics from your project so that you’re testing like with like.
Pictured above is the Cloud Surfing quilt pattern | this was the first time I used curved templates to create curved quilting lines using Aurifil Thread in 50wt.
TIP #9 – DIVE IN BEFORE YOU’RE READY
Dive in before you’re ready. You can think about it as much as you want or practice on smaller projects, but until you actually dive into quilting a full quilt you won’t know how it feels. So, dive in and give it a go. If you really, really don’t like it you can always unpick your stitches. This leads me to my next point.
TIP #10 – LIMIT THE UNPICKING
Don’t feel like you need to unpick every quilting line that isn’t straight. Nothing in quilting is perfect. And I’d much rather you focus on learning, improving and completing than on perfection. I always think back to my first quilt and how awful the quilting is on it, but I learned so much by doing it. Plus, I’ve used that quilt multiple times for comfort and warmth and not once have I sat there and focused on the stitch work. Instead, I look at it and admire the prints and think about how thankful I am to have found this creative outlet.
BONUS | TIP #11 – HAVE FUUUUUUN!
Have fun with it! Remember, the reason you’re quilting is because you want to have fun. So, try not to stress about any wobbles in your quilting lines or small puckers in your backing. Honestly, you notice these mistakes more than anyone else (unless, of course, you’re my hubz who has eagle eyes for anything out of place – ugh). So, don’t stress. Learn from it and you’ll improve next time.
Conclusion
Was this article helpful? We just discussed how to sew a quilt with a sewing machine in four steps. Start with preparing the squares and pairing them up for your quilt sandwich.
The rest is self-explanatory, and you can do free motion or straight quilting on your sewing machine. You can even make big quilts on a small machine with the proper techniques. Leave us a question below if you have any.
Nguồn: https://spasifikmag.com
Danh mục: Sewing Tips