This step-by-step guide on how to sew a cylinder pillow, more commonly known as bolster pillow, will level things up as you mix decorations in your place.
- How To Use An Old Sewing Machine? Tips for Selling a Vintage Sewing Machine
- What Is The Best Sewing Machine For Leather?
- What Is A Walking Foot Industrial Sewing Machine? 5 Best Walking Foot Sewing Machine
- What Does Cut On The Bias Mean In Sewing?
- How Do You Control A Foot Pedal On A Sewing Machine?
You can conveniently apply a décor touch to the living room furniture or bedroom with a cylinder pillow for retaining. You can also comfortably hug your cylinder pillows while asleep.
Bạn đang xem: How To Sew A Cylinder Pillow? Easy Step-by-step Guide
What is a Cylinder Pillow?
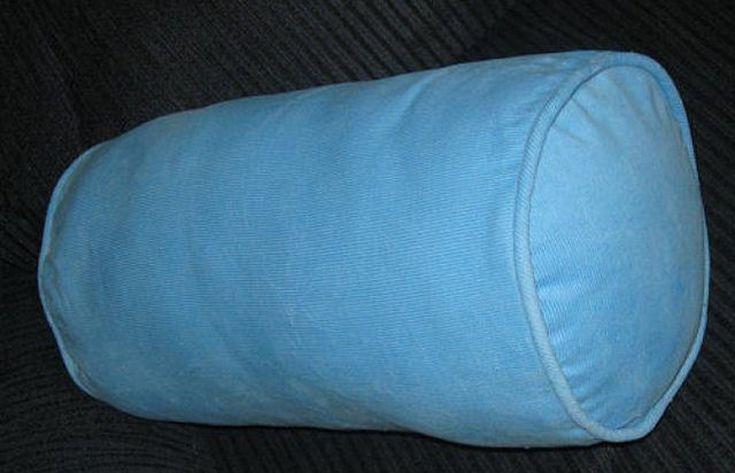
A cylinder pillow, also known as a bolster pillow, is a long, cylindrical pillow that’s typically made from cotton or polyester. These pillows are often filled with foam, such as memory foam, polyester fiberfill, fabric-backed sew foam and more.
Cylinder pillows are often used to provide added support for different parts of your body, like your legs, knees, or neck. The cylindrical shape is perfect for lumbar support. Cylindrical pillows are versatile. Aside from providing support, you can use them as throw pillows or even as a yoga bolster.
Who Can Use a Cylindrical Pillow?
Anyone can use a cylindrical pillow! But they’re also perfect for pregnant women and other people who have a hard time sleeping. New mothers can also use cylindrical pillows for support while nursing their babies. They’re also great for people with back and shoulder pains as it supports and relieves certain pressures.
Steps on Sewing Cylinder Pillows
Supplies:
-fabric (mine is vintage)
-trim (optional)
-loose batting or Poly-fil
-straight pins
-darning needle
-thread to match main color in your fabric
-sewing machine
Step One: Decide what you want the circumference of your pillow to be and add 1″ to this measurement. Cut your fabric to this measurement. The long side of your bolster pillow should run the width of your fabric. Be sure to add 1″ to this measurement for the hem allowance.
Xem thêm : How To Make A T-Shirt Blanket Without Sewing? Complete Step-by-Step Guide
Step Two: Pin the trim (I chose pom poms) to the ends of your fabric as shown above with the finished edge of your trim facing inward. Then stitch it into place, being sure not to get too close to the good edge of your trim or the thread may show on the final pillow.
Step Three: Fold the fabric in half, as shown above, with the right sides facing inward. Pin the folded fabric into place at the raw edge. Then stitch along the pinned edge, about 1/2″ from the edge.
Step Four: Flip the sleeve you just stitched right-side-out and get the measurement of its height. Multiply this measurement by two, and that’s the circumference the end caps of your pillow should be. I found a dish just slightly larger than this measurement to use as a template for cutting out the end pieces of fabric.
Step Five: Use a round object roughly the size of your circumference (make the circle larger or smaller as needed) as a stencil to cut out the end pieces of fabric.
Step Six: Pin the end pieces onto your pillow sleeve with the wrong sides facing out and the right sides facing each other, as shown above. Make sure to follow the shape of the circular pieces of fabric. You may need to remove the pins and adjust them once or twice if your circular fabric isn’t the exact size of your pillow circumference.
Once you’ve pinned the end caps perfectly, stitch it with the needle shifted close to the edge of your trim, or use a zipper foot to bring the needle close.

Leave one end cap of your pillow only halfway stitched. You will need to reach your hand in there to add the stuffing.
Xem thêm : Where To Donate Sewing Machines? Comprehensive Guide
Step Seven: Flip the pillow right-side-out and fill it with batting. Make sure you are keeping the filling even and condensed. Try to smooth out any lumps from the inside before closing up the pillow.
Step Eight: Use a darning needle and a slip-stitch technique to close up the open end of the pillow.
How do you use a cylinder pillow?
Bolster pillows are stiffer than the typical bed pillow. This means that it offers firm support to the body. Placing a bolster under your knees while sleeping on the back will help your hips curve your back, which relieves pressure and tight muscles. This sleeping posture helps soothe an aching back.
Are cylinder pillows good?
They are excellent for after surgeries or for general neck, back and arm support. They are also perfect for traveling. Each pillow measures 12 inches long, and its stretchy, soft cover is sewn up securely with double seams.

Final Thoughts on How to Sew a Cylinder Pillow
About every bedroom has a set of throw pillows somewhere in their sofas or beds as you browse at home decorating books or magazines. Everybody capable of stitching should acquire and manage with a small fraction of having a personalized pillow.
Instead of choosing from what’s available in stores, you can experiment with your desired colors and patterns. Since there are various tutorials online that are easy to follow, you can make your cylinder pillow from the comforts of your home.
This simple tutorial on how to sew a cylinder pillow will certainly guide you on creating your DIY project. Cylinder pillows are not only excellent decorations for your home but also a perfect hugging material. Make yourself one today!
Nguồn: https://spasifikmag.com
Danh mục: Sewing Tips