Ruching is the French word for ruffling, gathering, or pleating. In order to make ruffles, petals, or scallops, simply stitch ribbon or fabric together in a pattern.
- How To Thread A Dressmaker Sewing Machine For Beginners?
- How To Sew A Cylinder Pillow? Easy Step-by-step Guide
- How To Replace Tension Assembly On Sewing Machine? Step-by-Step Tutorial
- 13 Steps on How to Sew Curtains With Grommets? Things You Should Know
- How To Sew A Double-Sided Blanket? 7 Best Answers To FAQs!
Apparel, accessories, and fabrics were often embellished with ruffles in the past. In order to keep up with the latest fashion trends, precise and uniform ruching may now be manufactured.
Bạn đang xem: What Is Ruching In Sewing? 4 Fashion Items That Feature Ruching
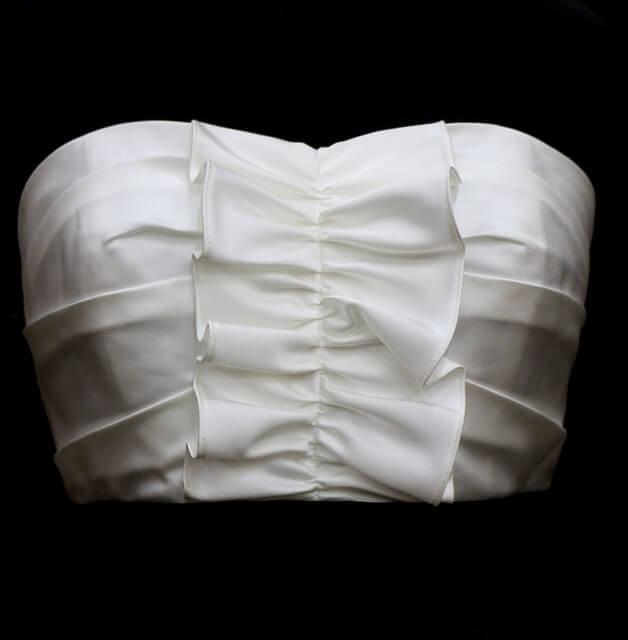
Wedding gowns, cushions, appliques, and even shutters can all benefit from ruched embellishments. Ruching is the process of stitching and pushing together fabric to achieve a particular shape or look.
What Is Ruching?
Ruching is a type of alteration used to give an object more body and substance. Bodices, sleeves, blouses, and skirts are all decorated with the gathered material. The pleated or ruffled design stands out in stark contrast to the smooth surface.
4 Fashion Items That Feature Ruching
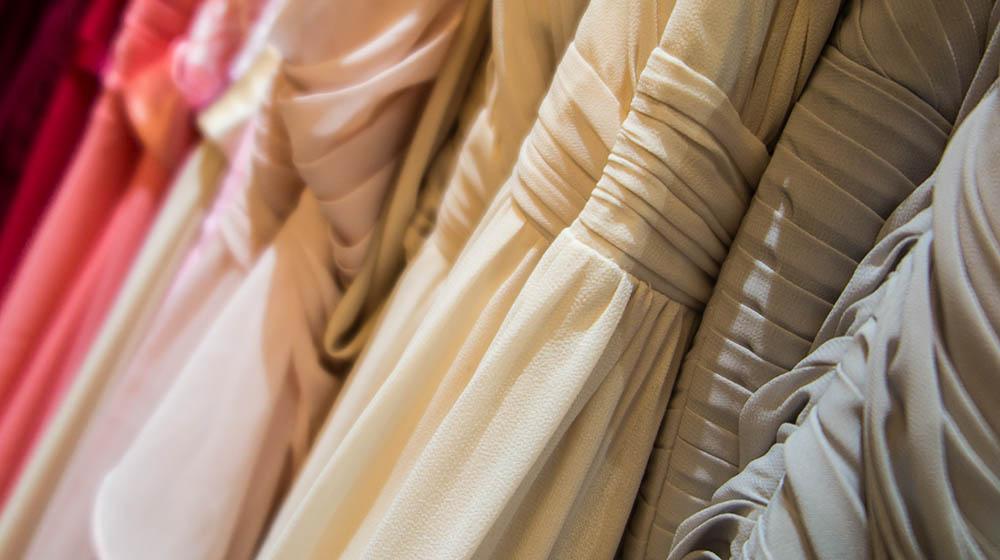
A variety of different apparel and accessories can benefit from the usage of ruching fabric.
- The swimsuits’ folded design is quite chic. A swimsuit with a ruche might help you look smaller in the waist, bust, and hips.
- Ruching, whether on the bodice or the skirt, can add the appearance of volume and dimension to a wedding dress. Maxi dresses and milkmaid gowns can both benefit from the ruche method’s slimming effects on the waistline and the shoulders. Find out more about the many clothing forms available.
How To Sew Ruching
Whether on the bodice or the skirt, ruching can give a wedding dress the appearance of depth and dimension. The ruche technique is used to cinch in the waist and lift the bust, making it ideal for both maxi and milkmaid dresses. Educate yourself on the many forms that dresses can take.
Pattern Alterations
If you need to make adjustments to your design, you’ll have to lengthen the ruched section. Having a ruched skirt on one side is a simple way to add ruching into your regular modern wardrobe. The ruching pattern works better if it’s made longer on that side. More gathering will occur along the edge of the pattern piece if the piece is symmetrical.
Ruching Methods
There are four distinct methods for gathering with the ruching.
- Stretchy ruches
- Tutorial on how to gather fabric to make ruching.
- Massage the cords with a tack.
- Ruching with pleats
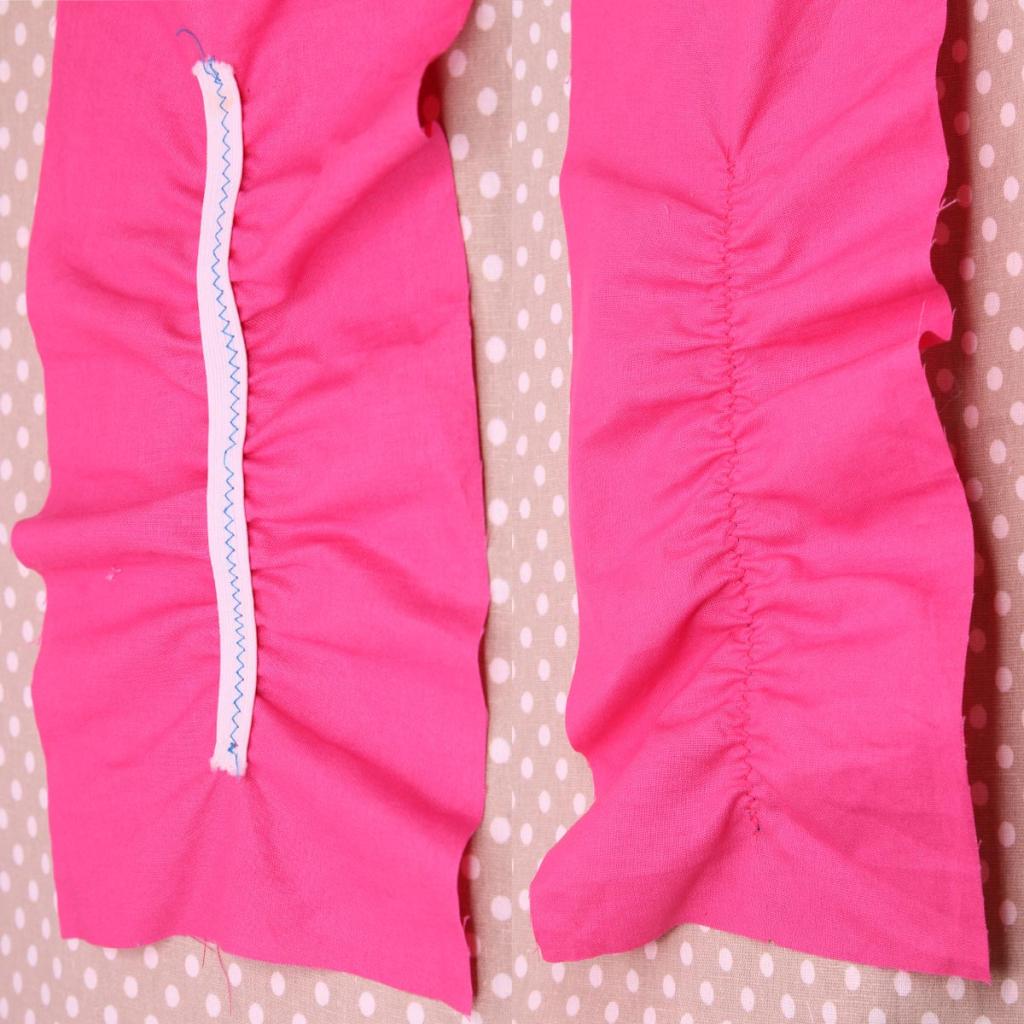
Method #1: Ruching With Elastic
As a common method of elasticized gathering and stretching, ruching is frequently employed around the neckline.
Why Use Elastic for Ruching?
The elastic is useful for achieving the desired level of fullness at the bust or neckline. You might want to give the garment a more sophisticated air because of your ample girth. It is also widely used in the design of costumes due to its decorative potential.
Sewing Elastic for Ruching
To begin, cut the elastic to the desired width of the ruched end result.
Finish by stitching both ends to the fabric that will span the entire length of the undertaking. In this case, clumping is more likely due to the fabric’s bigger diameter than the elastic. The ruches form because the elastic stretches the material, which is yet flexible enough to be tugged.
Finish by stitching both ends to the fabric that will span the entire length of the undertaking. In this case, clumping is more likely due to the fabric’s bigger diameter than the elastic. The ruches form because the elastic stretches the material, which is yet flexible enough to be tugged.
Following that, attach each end to the fabric that will be extended to cover the complete length of the undertaking. Since the fabric’s diameter is larger than the elastic’s, clumping is more likely to occur. The ruches form because the elastic stretches the material, which is yet flexible enough to be tugged.
Connect the two ends by sewing them to the fabric that will be stretched to cover the entire length of the undertaking. The larger diameter of the cloth, rather than the elastic, is the likely cause of clumping in this instance. Because of the elastic’s stretching effect, the material stretches, resulting in ruched fabric.
Xem thêm : How To Serge With A Sewing Machine? Everything To Know!
It’s easy to spot because my stitches went just over the elastic’s center. This may have been avoided with the help of the stretch needle. Find out more about the many kinds of needles used for sewing by reading this article. When sewing over elastic, take care not to pull the elastic too tightly, as this can result in unequal thread lengths.
It will be seen if you turn the fabric to the left. Fantastically cool, composed, and calm, Ruching!
Method #2: How To Sew Ruching With Gathering
Gather the strip together by stitching across the top or along the center with the longest needle on your sewing machine.
The number of guests at your gatherings is directly proportional to the amount of freedom you give to those attending. Up to three sets of lines can be stitched together.
Pull the cotton threads to gather the ruched strip. Make sure the ruching strip is positioned over the area you’ve chosen to have the gathers.
You can ruffle or add flair to any part of your garment by using ruched strips.
Method #3: How To Sew Ruching With Cord
You can also make ruchings by stitching a casing through which cables or a fabric pull tie can be threaded.
The casing can be attached to the garment on the outside for a splash of color and a decorative touch, or on the inside where it will be nearly invisible.
Trim a strip of fabric that is 1 1/2 inches wide (4cm). The finished hem of a garment can serve as a handy measuring stick. The seam allowances for the sides and the bottom require an extra inch of fabric (25mm).
When applying the strip, make sure to leave a 1/4-inch (6mm) border all the way around before adhering the rough edges to the opposite edge.
Invert the strip and lay it flat on top of the fabric. It can be sewed either on the inside or the outside of the fabric, depending on the desired effect.
In order to avoid having to backstitch as you go around the strip, leave one end open. Leave a space of around 2 centimeters (1 inch) at the closed end of the strip for sewing.
Secure the end of your cord with a pin. When you get to the top, turn around and head back down the other side. Gaining the top spot will necessitate sharp reflexes and quick reactions.
When the cord is at the right length, it can be trimmed. Tie the ends together or sew a few stitches around the top to prevent it from drooping.
The inside bodice is ruched with cords for added flair.
Method # 4: Ruching With Pleating
Fabric can be pleated to fit inside the bodice, on the sleeve, or wherever else you’d like to add ornamentation for a ruched effect. When applied to formal dresses like those used at weddings and formal balls, the pleated ruching effect creates a striking visual effect. Watch this video guide to understand the basics of pleating.
Xem thêm : 4 Step to Double Stitch Sewing by Hand. Complete Step-by-Step Guide
One inch of fabric is the simplest way to gauge the weight of the fabric and determine if it is acceptable for the Ruched look.
The History of Ruching
Ruching is a time-consuming art technique, but it’s gaining popularity because of its unique look and modern appeal. In the late 19th century, ruches were a popular way to decorate hats and petticoats for women. There is a widespread assumption that ruching has been practiced for centuries, perhaps even since the Middle Ages.
Modern Uses for Ruching
- As the name implies, ruching is a method of gathering fabric in strategic places on a garment, typically a dress, to create visual interest in the design.
- The use of ruffles is not limited to the neckline or waistline of a garment; they may also be found on the cuffs and the sleeves.
- A common design element in many modern bridal gowns is the use of gathered or ruffled fabric.
- As it was in the 18th century, ruches are now utilized to decorate everything from prom dresses and ball gowns to ties.
- You can also find ruching on the bottom of your Austrian blinds or on decorative cushions.
Fabrics like ribbons, metallics, and even lacing can be ruched. Remember that this procedure will cause the fabric to shrink, so you’ll need to buy it a little longer than necessary.
Today’s tailors and seamstresses often use plastic templates to create the zigzag pattern. You can also use a bag of chalk instead of a marker. Small, continuous stitches can be sewn by hand or using an automatic sewing machine. The thread needs to be durable enough to hold the weight of the fabric ribbon as you stitch it together.
Books and articles on the topic are also available, and there are many free videos and classes available on the internet that can help you learn the ropes.
How to Ruche a Flower
Using the procedures described here, a seamstress can make lovely appliqué flowers.
- Cut the cloth in half lengthwise, so the raw edges meet at the back.
- On the face of the paper, parallel lines are drawn at an angle of 90 degrees from one another.
- Lines will be stitched with the best thread possible in mind. When the stitcher is finished, the thread is brought back to the front.
- The stitcher will next proceed to tie the ribbon or fabric into petals after only a few inches of stitching, as depicted in the image.
- Using a second needle and thread, the petals are shaped into a circle.
- Affixed to the peak of the flower, the tail is tucked under.
What Is The Difference Between Ruching And Shirring?
Shirring creates wavy fabric that is distributed throughout the garment, whereas ruches use an elastic thread to hold rows of fabric together. It is not the same as smocking, in which the fabric is gathered and stitched back down by hand.
Another distinction between the two: To achieve a curvier silhouette, ruches are often used. On the other side, due to the elongated shape of the stretched cloth, shirring makes the wearer look trimmer.
Ruching vs Gathering
The process of ruching, in which cloth is gathered into a tighter bundle to provide volume, can actually cause the fabric to shrink. Ruches are typically done unilaterally, making the non-operated side appear fuller.
The method used to create the ruching or gathering is another distinction between the two. To gather fabric, raise the bobbin threads with basting stitches; to ruche, leave the thread ends open and pull to compress the fabric.
If you want to gather your cloth and give it some give, you should learn about smocking and sewing.
How to Ruche Fabric
If you want to gather your cloth and give it pliability, learn about smocking and sewing.
- If you want to gather your cloth and give it pliability, learn about smocking and sewing.
- Smocking and stitching are useful skills to acquire if you want your fabric to have more give and gathers.
- Tie your strands back in case they come loose. After you’re done stitching, gently tug on the loose thread ends to gather the fabric. Fabric should gather into a ball with each stitch.
- Make sure to secure both ends of your ruche with a pin. Once you’ve completed the ruching folds, you’ll need to secure the cloth with pins to keep it in place.
- Now you can stitch the ruffle in place. Sew a narrower thread over the ruffled cloth. It’s important to remember to backstitch at the start and finish of your project. The desired end result should have a wrinkled and unkempt appearance. You can also do this with any other articles of clothes that are in need of repair.
What Is the Difference Between Ruching and Shirring?
This is a summary of the key distinctions between shirring and ruching: Fabric can be distributed uniformly across a garment by ruching it to create a rippling or folded effect. Shirring is a method of sewing that involves pulling two or more rows of fabric tightly together using an elastic thread (not as smocking which employs a hand-embroidered stitch instead of elastic to create the same appearance). A shirred suit will be the most comfortable and snug, while ruching will make the garment look fuller.
How to Ruche a Flower
Beautiful applique flowers can be made using this method by skilled seamstresses.
- To ensure that a fabric’s edges meet up properly, it should be folded in the opposite direction from the fold you just made.
- Then, at a 90-degree angle, two parallel lines are drawn on the front of the page.
- All of the lines are sewn using the same thread. Once a stitcher has completed their work, they must weave the thread back through the fabric to the front.
- The stitcher will next proceed to tie the ribbon or fabric into petals after only a few inches of stitching, as depicted in the image.
- Using a second needle and thread, the petals are gathered into a complete circle.
- Affixed to the peak of the flower, the tail is tucked under.
Conclusion
Did you learn anything from this article? Ruching, it turns out, is simply another name for the sewing process. Fabric is gathered in order to provide fullness and a more attractive silhouette in the finished garment.
A ruffle does not look the same as one that has been shirred or smocked. Gathering the fabric and sewing on an elastic hem creates a smooth, contoured finish. We hope that you have learned more about Ruching thanks to our detailed guide. Do you need some clarification? If you have a question, please post it in the comments.
Nguồn: https://spasifikmag.com
Danh mục: Sewing Tips


