Beginners will appreciate the ease of use provided by the Brother machines. For those of you who’ve just made your first purchase, congratulations! For the projects you’ll be working on, you may have already visited your local sewing store and picked out an armful of gorgeous fabrics! Although it’s all very impressive, your current focus is on learning how to set up and use the Brother machine.
- How To Clean Sewing Machine? How Do You Deep Clean A Singer Sewing Machine?
- How Do You Control A Foot Pedal On A Sewing Machine?
- How Do I Fix The Timing On My Singer Sewing Machine At Home? Tips and Warnings
- How To Make A Puff Quilt With Sewing Machine? Step by Step Instructions
- How To Use Handheld Sewing Machine? 5 Easy To Follow Steps For You!
Because of their ease of use, Brother sewing machines are a good place for beginning sewers to start. In the sewing machine’s instruction booklet as well as on the machine itself, you’ll find clear instructions on how to utilize the various threads and how to start stitching. Each part of the machine serves a specific job, and understanding that purpose might help a novice get started.
Bạn đang xem: How To Set Up A Sewing Machine? Step-by-Step Tutorial
If you’re new to sewing, this guide will help you learn how to set up a Brother machine and care for your new purchase!
Why We Created This Guide
Does the thought of building your own sewing machine excite you enough to run for the hills?
If that’s the case, we’ve got it.
How does it work, exactly?
We understand that deciding to buy a sewing machine for the first time might be an exciting experience for some people. Others may be scared off by it.
This is why we’ve come up with an easy-to-follow tutorial. Here’s how to set up your sewing machine like a pro with the help of the instructions provided below.
Let’s get this show on the road.
What Can You Do With A Sewing Machine?
Sewing machines aren’t just for the house or office anymore; they can be used anywhere. If you have a sewing problem, a sewing machine can help you solve it.
For example, in this situation:
- Are you wearing pants that are too short? Rolled-hem foot? If so, you can find it in your sewing kit.
- Are you interested in bringing your old outfits up to date with some new accessories? This is all taken care of by the sewing machines.
- Is it time for a creative activity to lift your spirits, reduce your worries, and rid your thoughts of the things that never happen? Consider taking up sewing as a hobby. That’s correct! Restoring one’s mental well-being through sewing is a great idea.
You can use a sewing machine to update an outdated summer dress that no longer fits or to add embellishments to plain fabrics.
The best thing of all of this is…
The sewing machine has a wide range of features, some of which will surprise you!
These machines are fantastic for everything from clothes customization and sketching yarn to home décor. As soon as you become familiar with your sewing machine, you will discover a whole new world of possibilities.
Supplies Needed To Set Up a Sewing Machine
At this point, you’ve learned about all the fantastic things sewing machines can do.
However, before we get into the specifics of how to set up your sewing machine, we’ll take a look at the essentials. Sewing machines require the following goods and tools to be set up:
#1: Your Machine’s Manual
Everything you need to know about your sewing machine can be found in the “user’s manual” that came with your machine.
Most sewing manuals cover a wide range of topics, including how to use the machine and how to fix problems. Additionally, you may learn how to make the most of your machine’s most advanced features by consulting these guides.
Sewing can be made simple with the help of a guidebook. Your user manual can be downloaded from this page or searched for if you are unable to locate it.
#2: Thread
You’ll need a large thread spool for sewing your garments together.
Considering the following:
If you’re going to sew something, you’ll want to use a high-quality thread.
Make sure that the thread you’re using is compatible with the fabric you’re working with when you’re sewing!
As an example, while stitching denim, it is best to use a high-quality polyester thread.
Xem thêm : What Is A Mechanical Sewing Machine? 16 Best Mechanical Sewing Machine Reviews
A regular thread spool like this one can be used for simple sewing projects like a throw pillow cover.
If you buy polyester, cotton, or multi-purpose threads, be sure they’re of the best quality possible.
#3: Sewing Needle
A good sewing needle is a need for any sewist. It is true that selecting the right machine needle is just as important as selecting the right thread, fabric, and other components to utilize in your sewing.
Because of this, you should choose a sewing machine that has a needle that is suited to the type of fabric you’re working with.
The following is an example:
- In American machine sewing, needle diameters range from 8 to 19 inches in length. To manufacture lighter and finer fabrics, an 8-inch needle is used, whereas a 19-inch needle is used for thicker materials.
- Sewing needles in the European market range from 60 to 120. In this case, a 60 needle is used to create finer fabrics, while a 120 needle is used to create heavier ones.
Simply put, the lower the number, the higher the quality of the fabric. The heavier the fabric, the higher the number.
#4: Bobbin
Sewing machines would be incomplete without bobbins, which are an essential component. A sewing machine’s bobbins are typically located at the bottom of the machine. In other words, this is where the threads are bundled together.
The best part is yet to come:
By capturing threads in your higher system and the bottom system of the sewing machine, you have stitched on your sewing machine.
To get the most out of your sewing machine, try using bobbins with transparent sides, like the ones seen above. They are lot more user-friendly, especially for those who are just getting started.

Here Is a Step By Step Guide on How to Set Up a Sewing Machine
Step 1: Unbox your sewing machine
Make sure you remove all of the sewing machine parts from the box before opening it. The sewing machine you bought should come with a user’s manual, specifications, and information on the manufacturer’s warranty.
In the event that you need to retrieve the materials in the future, make sure they are kept in a secure location.
Step 2: Find a Suitable Surface to Place Your Sewing Machine
Do you have a place in your house where you can set up your sewing machine and sew? Possibly, you have a sewing area in your dining room or kitchen.
Both ways, you will need to make sure that your machine has a solid platform to stand on.
Now, If you have a spare space in your home that can be used for sewing, such as a table for a sewing machine, it would be ideal.
Step 3: Plug-In Your Machine
After deciding on a location for your sewing machine, the next step is connecting it to the electrical system. An automatic machine requires a power supply, thus the first step in operating one is to make sure it’s hooked up.
Following that, you’ll need to locate a power switch. The power switch for Singer and Brother sewing machines is often located on the right side. Just flick the switch on and you’re good to go.
The power socket/switch is located on the foot pedal of Janome sewing machines.
Step 4: Insert The Sewing Needle
Insert the needle correctly to ensure that the stitches come out evenly. Make sure you don’t get infected through the needle by using a tool for needle insertion at this point.
Step 5: Add a Spool of Thread to Your Machine
The use of a thread spool pin to add a spool of thread to your sewing machine. Your sewing machine’s spool pin is the huge lever dedicated to the thread spool you intend to use.
Sewing machine thread should be of the finest quality, as we’ve described in earlier posts.
Step 6: Thread Your Machine
You’ll need to thread your sewing machine correctly in order to ensure that your stitches come out correctly. In order to thread your machine, you must first thread the top of the machine and then the bobbin.
In order to thread your machine’s upper section, you must first attach a thread spool to the Spool Pin.
Finally, take the thread about an inch from the spool, and slip it over the machine’s feed dog. To find the needle, move the slider down and up a few times, then back down. In the event that you are unable to thread your sewing machine, reference the instructions in your sewing machine’s manual.
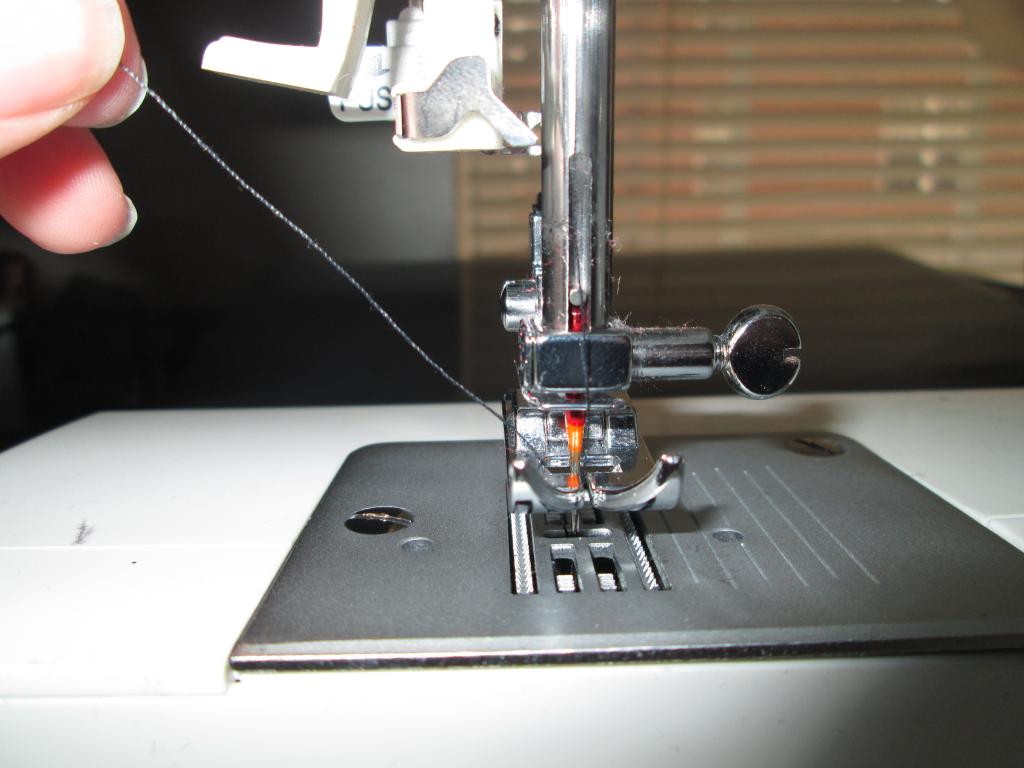
Step 7: Guide The Thread Towards The Needle
To do this, you’ll need to stretch out the thread by passing it through the needle’s eye and then tugging it tight.
Xem thêm : What Is Baste In Sewing? When To Use A Basting Stitch?
Now look for a wheel that is comparable to the knob on the back of your computer? Make three complete rotations of the wheel once you’ve located it. As it emerges from the machine’s side, the thread will climb to the machine’s top.
A piece of advice. To get the best results, use a needle that has been freshly sharpened.
Step 8: Thread your Bobbin
Determine where your machine’s bobbin is located first. There are clear ones with two holes in them that you can use if you don’t already have one; see the one below.
The bobbin must be compatible with your sewing machine model. Then, while still holding your bobbin, feed a spool of thread through the bobbin’s hole. As part of the next process, you’ll need to weave the thread onto the bobbin.
Step 9: Wind Your Bobbin
First, locate the Bobbin Winder Spindle so that you may begin winding your bobbin. In front of your computer, you’ll find this.
Place your bobbin on the Bobbin Winder spindle and it will wind itself up. Push the speed control on your sewing machine as you hold the thread in the bobbin. Your Bobbin will be full of thread once you do this. You can now move to step 10 when your bobbin is completely full of thread.
Step 10: Add Threaded Bobbin to your Machine
A professional sewing machine is only complete when the threaded bobbin that you’ve already pre-threaded is connected directly to the needle. Your manual will instruct you to put the bobbin in its case and then cover the case with a new bobbin in line with the instructions in your manual.
You’re on the correct track if you hear a clicking sound when installing.
Remember:
The front- and top-loading Bobbins are slightly different. You’ll find the loading compartment just beneath the needle if you have the earlier model. You’ll first need to remove the bobbin holder when you access the compartment for the second option.
Where to Go from Here
After you’ve finished the above steps, you’re ready to check to see if your sewing machine is working properly. Put a piece of test cloth on the sewing machine, attach the presser foot, and start sewing to see if everything is working properly.
It’s important that your machine is configured correctly before you use it. If you run into any issues, be sure to refer to your sewing machine’s manual for assistance.
How to Use a Brother Sewing Machine
It is time to begin sewing now that your machine has been installed. Let’s have a look at a list of things to keep in mind when sewing with your machine.
- To make a bobbin, twist it.
- Ensure that the needle is threaded (remember to keep track of the thread’s course) before proceeding!
- If necessary, lower or raise the tension.
- Once you’ve plugged in your machine, turn it on.
- After placing the cloth under the presser’s foot, use the lever to lower the foot onto the fabric.
- The pedal on your foot can be pressed down with a light, even pressure. While moving the fabric through the slit below the needle, this will activate the motor and make it move up and down, positioning the needle where you want it to be.
In the end, you may use the same equipment to create both simple and complex projects. You should start with a simple project if you’re just starting off with the procedure. You can get a better idea of how your sewing machine works by making a circle skirt, an upholstered pillowcase or a rectangle curtain, all of which include numerous straight seams.
Discovering sewing patterns to help make whatever you can dream from cloth will be easy after you become familiar with your brand-new Brother machine.
What Can You Do With A Sewing Machine?
Sewing machines can be used in a variety of settings, not just at home or in the business. Sewing machines can help you with just about any problem you might run across when sewing.
As an illustration:
- Are you wearing pants that are too short? A rolled hem foot is included in your sewing kit, should you choose to use it.
- With the right accessories, you can repurpose an old outfit into something fresh and fashionable. You’re covered, sewing machines!
- Do you need a creative activity to boost your mood, alleviate anxiety, and cleanse your mind of occurrences that may or may not happen? Make sewing something you enjoy. That’s correct! Sewing is an excellent form of treatment for regaining one’s mental health.
Using a sewing machine to add embellishments to plain fabrics or alter an old summer dress that no longer fits may suffice.
The most exciting part is here.
The sewing machine has a wide range of operations, and some of them will surprise you!
These devices are amazing for everything from clothes and yarn customization to embroidery and interior design. The sewing machine will open up a whole new world of creativity for you once you get the hang of it.
How Do You Set Up A Manual Sewing Machine?
How do you set up the Singer Sewing machine (manual)
- The hook should be inserted at the top of your machine, and then the tension assembly should be attached to it.
- To get to the needle, follow the thread and the lever for uptake and hooks.
- Place the bobbin in its container in the direction it should thread out to complete the installation.
- Examine the bobbin’s rotation once you’ve placed the thread in the designated space.
- To ensure that the bobbin case is securely in place, reinstall it into the sewing machine.
- Use the handwheel to help you pull the bobbin thread free while holding the thread at the top.
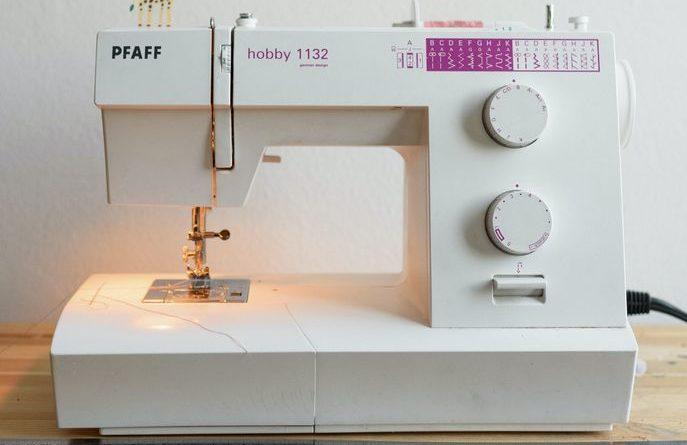
Do you have a Pfaff model? As a hand sewing machine, it’s also one of the most well-known in the world. So, if you’re having trouble using or setting up your Pfaff sewing machine, consider learning how to fix it.
How Do You Set Up An Electric Sewing Machine?
- What about a Pfaff? Among the most well-known hand sewing machines is the Singer 6601. Consequently, if you’re having trouble using or setting up your Pfaff sewing machine, consider learning how to repair it.
- Plug the connector into the sewing machine’s power socket after turning off the power source.
- Make sure your device is receiving electricity by unplugging it from the outlet and turning the switch back on.
- To safely insert or remove a needle, turn off your sewing machine and lower the presser foot.
- To lower the presser’s foot, turn the handwheel toward you.
- Loosen up the screw till you can remove needle from clamp without damaging it.
- According to the handbook, the needle should be put in the proper position for the procedure.
- Ensure that the needle is inserted into the clamp for needles by pushing it through the clamp’s opening.
- Attach the screw to the presser foot to tighten and secure it.
- Each sewing machine’s presser foot attachment will be unique. Make sure you set it to match your machine’s specifications.
What Setting Should My Sewing Machine Be On?
Your machine’s model determines the options you have to customize it. Electric or mechanical sewing machines are available, as are computerized types equipped with sensors that adapt to the user’s preferences. The best way to set up the sewing machine is to refer to the instruction manual, which is available online.
There are ten stitches per inch in a basic straight stitch, and a stitch tension of four is typical for a straight stitch. In light of the fact that most individuals sew with straight stitches, this is critical.
Conclusion
This is all you need to know! Setting up your sewing machine is as simple as threading it and then adjusting the settings. Our step-by-step instructions for both electric and manual models will help you get the most out of your machine.
We hope you found this information helpful and educational. If you’d want to learn how to free up a sewing machine in the event of a jam, you can do so here.
Nguồn: https://spasifikmag.com
Danh mục: Sewing Tips


