You don’t need a heavy-duty sewing machine if you’re just completing your everyday stitching tasks. Instead, a hand-sewing machine will be more cost-effective and easier to use.
- Which Janome Sewing Machine To Buy? Comprehensive Guide
- How To Polish A Vintage Singer Sewing Machine? A Step-by-Step Learning Guide
- How To Thread A Handheld Sewing Machine? 4 Easy To Follow Steps For You!
- How To Thread A Babylock Sewing Machine?
- How To Change A Sewing Machine Needle? Choose The Right Needle For Your Project
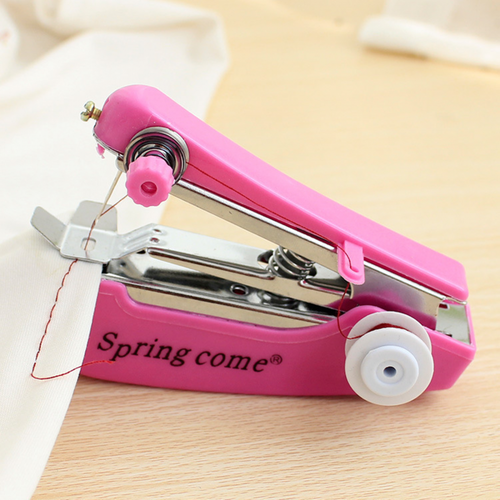
Is there a way to patch your shirt’s ripped seams with the least quantity of threads you have available?? This is a low-cost and lightweight machine. In addition, it is quite easy to use at any time and from any location.
Bạn đang xem: How To Use Handheld Sewing Machine? 5 Easy To Follow Steps For You!
In this case, your best bet is a mini-handheld sewing machine. This morning, we’ll dive deep into the world of handheld sewing machines, so keep that in mind as you make your decision.
What is Handheld Sewing Machine?
One of the advantages of a portable sewing machine is its portability. Using a hand-held sewing machine is great if you want to stitch whenever and wherever you desire.
For fragile materials, this machine can be a lifesaver, especially if you need to tear them out in specific regions. But if you’re doing a one-of-a-kind piece of art, it doesn’t matter.
The Utility Of A Handheld Sewing Machine
In the absence of a full-sized sewing machine, handheld sewing machines are not an adequate substitute. You may have seen advertising for e-stapler sewing machines that depict a lady sewing anything she desires. This is a commercial for a product. Hand sewing machines can be helpful in some situations, but they aren’t ideal for this type of work. The following are some positive and negative aspects of using a portable sewing machine:
Pros
- It’s small and light enough to carry around in your purse so you can stitch wherever you choose.
- The price difference between these machines and a conventional sewing machine is between five and ten times more!
- Cordless No need to plug it into the power source. Because of this, it is easy to use.
Cons
- It’s a pain in the neck to use. will be required to learn how to sew on a hand-held sewing machine in order to do so. Not as simple as a conventional sewing machine
- Handheld sewing machines lack the stability of a regular sewing machine. As a result, zigzag stitches may be produced.
- The handheld sewing machine, like a more expensive machine, will not be able to produce a higher level of tension. As a result, the stitches are not evenly distributed.
- The stitches don’t have the same polish as a typical sewing machine. To avoid a sloppy finish, be sure to tie the thread by hand when you’re done.
People prefer to use hand sewing machines since they are easy to take with them, as shown in the above comparison table Because of this, even if the stitch quality is poor and stitching is impractical, many people continue to sew on these machines. Sewing beginners will be disappointed with this machine because it isn’t the best machine to learn on. For novice sewers, we recommend a tiny sewing machine or a sewing equipment that costs less than $100.
Supplies You’ll Need to Get Started
- A portable sewing machine Every craft or speciality sewing store has an electric sewing machine on hand. There are a lot of different brands out there to choose from, so it’s important to familiarize yourself with them before you go shopping.
- The thread and the bobbin are included. Make sure to check the packing before heading out to get the materials because some devices already have these components. Despite the fact that Bobbins are critical to the device’s operation, just a few manufacturers offer them.
How Do You Use A Handheld Sewing Machine?
What is it about a hand-held sewing machine that appeals to people? mobility is the obvious answer. The hand-sewing machine is too large and heavy for most individuals to operate. Even the most experienced of large-scale sewing machine users find it difficult to operate a portable machine. We’ll show you how to use a hand-held sewing machine step by step so that you can sew with confidence.
Step 1- Setting up the batteries
The hand sewing machine must be set up before you can begin sewing. However, unlike a typical sewing machine that uses electricity, a stapling machine uses batteries. So, put the batteries first.
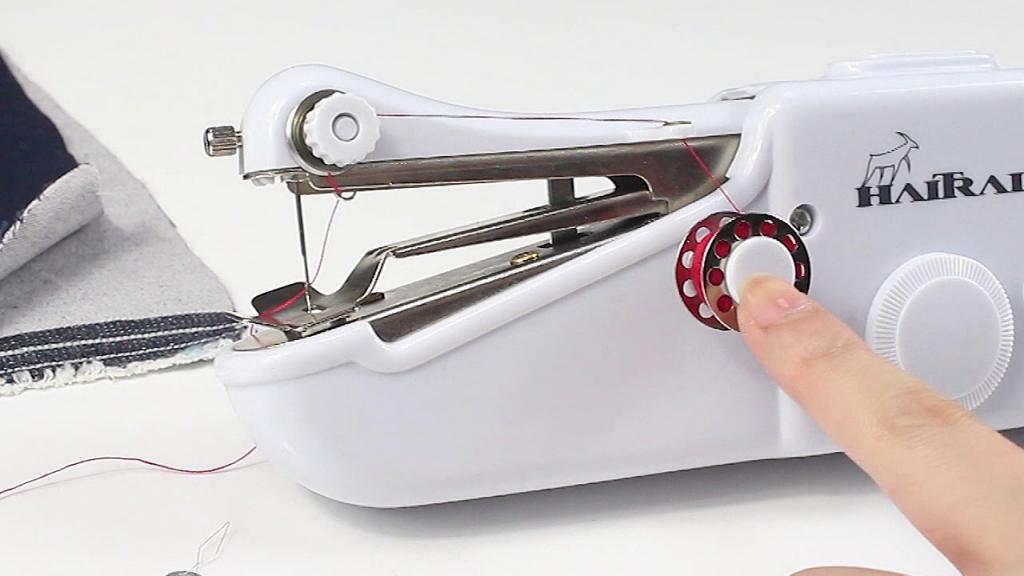
Step-2- Bobbin set up
The bobbin is the only supply of thread for a hand-held sewing machine. The bobbin is located in the back of the machine. Pull the spring on the bobbin holder to secure the bobbin to the machine.
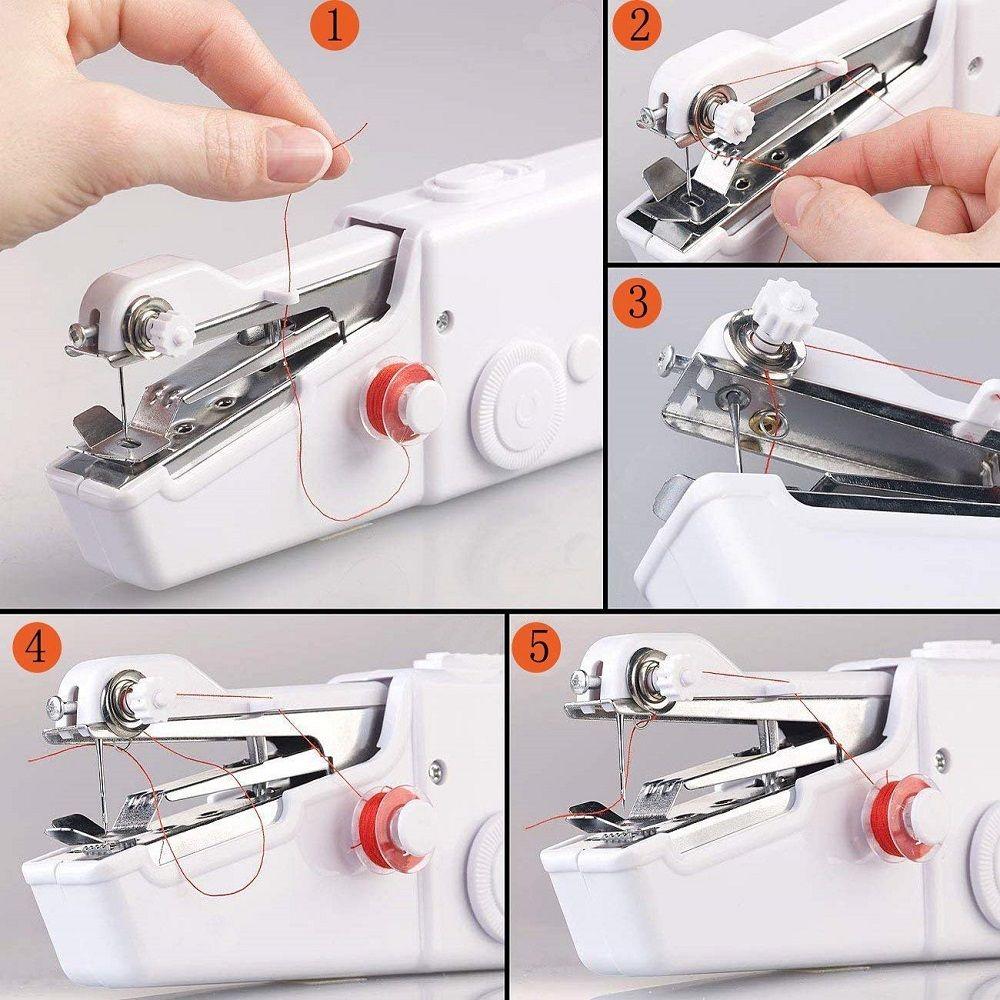
Step 3-Threading
It’s time to begin feeding it with thread. The threads are fed from the bobbin in the following manner.
Step-4-Sewing
Threading a hand-held sewing machine is the most challenging part, while stitching itself is the most exciting. After threading is complete, the sewing plate must be raised so that the fabric may be inserted. The cloth must be held in the left hand while the sewing machine is held in the right. Aim the fabric in the direction of where you want to stitch. The cloth will be fed through the machine as soon as you turn it on.
Step 5-Securing the stitch
After the sewing is complete, the seamstress must finish the thread. Because the handheld sewing machine does not offer reverse sewing, this procedure of securing is different from that of regular sewing machines. As a result, you must raise the plate that is fastening you, draw the thread in, and then cut it. After that, spin the rotary wheel until the cloth ends have loops. This is where the threading has to be fixed. This is a tedious process, but it’s the only way to ensure that a hand-held sewing machine may be used.
Best Time to Use Handheld Sewing Machine:
Xem thêm : How To Thread A Brother Sewing Machine? Best Guide
On top of that, you must know when to utilize a handheld needle and thread sewing machine.
Traveling without your favorite shirt can be a frustrating experience if you can’t even sew a stitch on your outfits. Having a portable sewing machine when on vacation or vacation is a good idea. It’s easy to transport because it can fit in a suitcase.
Using it when the power is out for hours and you need to stitch your cloth in order to meet with friends is also a great application for it. It is able to stitch a few stitches without a care in the world because it does not require any electricity.
Are Handheld Sewing Machines Easy To Use?
The majority of the time, hand-held sewing machines are really easy to use, even for those who have never sewn before. Hand-held sewing machines are ideal for people who don’t spend a lot of time stitching, as they require less space and energy to operate than traditional sewing machines. As an alternative to hand sewing, this method is far faster and more reliable.
Are hand-held sewing machines worthwhile?
If you just plan to sew once or twice a year, a hand-held sewing machine is a good investment. Because it is battery-powered, you don’t need an outlet when you’re on the go. The basic hand-held sewing machine can help those who don’t have the time to learn how to operate a standard sewing machine.
How Do You Thread A Hand Sewing Machine?
- Learn the layout of your tiny sewing machine by studying the instruction booklet.
- The bobbin should be attached to the spindle before the spring is attached.
- Anchor the spindle after it’s been placed in the designated hole.
- Make sure the thread is attached to the bobbin, and then guide it into the hole above the spindle and into the tension control knob, as shown in the illustration.
- Use a needle threader to thread the needle after threading it through the knob’s hole.
- A needle can be threaded through a needle. That’s all there is to it.
Do Handheld Sewing Machines Work On Jeans?
There are a wide variety of handheld sewing machines, some of which are capable of working with denim. Determine whether or not the device is capable of fixing your cloth. Some even use more durable materials, such as wool.
Can You Backstitch With A Handheld Sewing Machine?
It is impossible to sew forward with a hand-held sewing machine. As a result, you shouldn’t anticipate the machine to stitch in a straight line from right to left, but all you need to do is hold the cloth in place as it passes through the machine on its own.
How To Use Singer Handheld Sewing Machine
- Check your Singer hand-held sewing machine’s instruction booklet for information on how to use it.
- Check to see if the switch has been turned off.
- The needle’s arm should be lifted to its highest point by using the wheel.
- A cloth should be placed on top of the plate before it is released.
- Take two inches of thread from the needle’s rear to the front.
- Switch on the device with your dominant hand, while the other hand is using the cloth to regulate its movement, to keep it steady.
- To keep the plate in place, sew straight along the dotted lines on the plate.
- If the machine’s tension is too loose, turn the controls left; if it’s too tight, turn the controls left.
- Pull the thread about 3 inches from the needle before cutting it off.
- Turn the wheel to raise the needle arm after inserting it into the substance.
- Take the material to the left after raising the plate.
- Using a screwdriver, you can unscrew the screw on the Singer hand-held sewing machine and then remove the needle you’re now using.
- Make sure that the flat side of the new needle is facing the device when it is installed.
Conclusion
Using a sewing machine is not a simple operation. I feel you’ll benefit from reading this post. Portable sewing machines and in-built sewing machines are often confused by many individuals. The portable sewing machine, as we have already stated, is ideal for routine repairs and maintenance. Having the ability to carry it about is a big plus. If you ever manage to rip your cloth, you won’t have to deal with the embarrassment that would follow. Don’t expect to be able to sew major items on this machine. Even so, you’ll need either a conventional sewing machine or a larger-sized mini to do this task.
Nguồn: https://spasifikmag.com
Danh mục: Sewing Tips


