When working on sewing projects, keeping the seam or trim in place can be a problem. If you’re just beginning in sewing, the job becomes more difficult. To conquer this difficult job, you use temporary stitches to make sure that the fabric doesn’t move from its position. After the permanent stitching has been completed the temporary stitch can be taken off. A temporary stitch used to keep the fabrics is known as basting stitch.
What is Basting in Sewing?
Taking or basting is a unidirectional stitch that is used to stitch fabric to keep them together. The stitches are long and unfinished. They will be removed when the permanent stitching is completed. Basting can be performed using a machine or hand. The stitches created are known as basting stitches or tacking stitches. In some cases, X-shaped basting stitches can also be sewn to secure pleats.
Alongside basting, stitching can also be held in place by glue and pins.
When to use a basting stitch
When you’re looking to keep layers in place for a short period the basting stitch can be the best choice. You’ll sew the basting stitch to the exact seam allowance, or even inside. Never backstitch while beginning or stopping your basting stitch because this can make it very difficult to take it off. If you’re planning to get rid of it following sewing your permanent stitch, you might want to consider using an uncontrasting thread to find it.
Fitting a garment
If you’re not sure if an item will fit you It’s recommended to start by making a muslin. A muslin is a model of the final item. It’s typically sewn with inexpensive fabric to not waste your expensive fabric and is made with a basting stitch. Basting lets you quickly stitch the garment as baste stitches aren’t longer to stitch. Additionally, you will be able to quickly adjust your seams to get the ideal size.
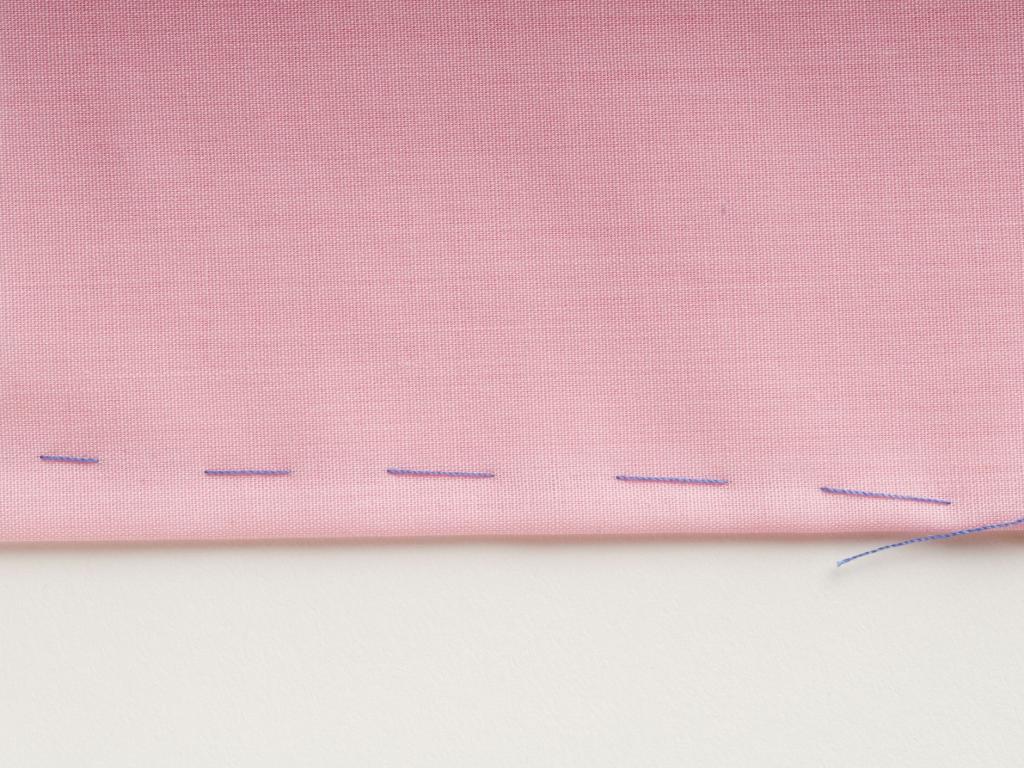
Here’s a straight stitch that is regular in contrast to the basting stitch, so you can tell the differences.
Easing a sleeve
When sewing a set-in sleeve sleeve, you’ll have to start by making basting of the curve. Sleeves made from woven fabrics need extra flexibility or fabric so that they can move along with your arm. Otherwise, the sleeve is restrictive and tight. This added convenience makes the sleeve larger than the armhole. The act of squeezing the cap of your sleeve will gather it enough to fit perfectly into the hole in your arm.
See in the photo that basting this sleeve creates the cap around appearance instead of flat. It’s now ready to accommodate the shape of your shoulder.
Zippers
Installation of zippers can be challenging and basting can make it easy. Baste stitches stop your zipper from moving around, which makes your final stitch more precise. It’s also much more comfortable sewing a zipper, without the hassle of pins. Basting will ensure that your zipper will end up as professional-looking installed. Basting tape is an additional excellent option to master the zipper’s installation. (Pssst! We have a fantastic video tutorial on how to use it here.)
Making ruffles
What would you like to see in existence without the ruffles? Without our amiable baste stitch, we’d be able to create cute and attractive ruffles! Make at least two to three rows of basting stitches in close proximity. Separate your top and bottom threads. As you hold only your top threads, just pull your fabric to bring it together. The baste stitching will keep the gathers while you stitch your seam. (Pssst! Are you looking for a comprehensive guide on how to collect fabric? Look it up here.)
When to Use Basting Stitch?
Basting stitch can be utilized in the following situations.
-
Garment fitting
When you make custom-made clothing it is possible that the clothing doesn’t fit the individual right. It is necessary to take out all stitches and re-do them over to achieve the perfect fitting. Once a basting stitch has been finished, it is easy to remove and modify it as required.
-
Sewing sleeves
Sewing sleeves is not an easy job. You must create an even, flat seam out of an open hole that is rounded. By basting, you will make sure that the stitch is done correctly without making any mistakes.
-
Sewing zippers
Zippers should be fixed at the right place so that it functions properly. If it’s off-center the zipper might not be able to zip correctly or even the fabric may pucker. With basting, you are able to make sure that the zipper is in the precise location.
-
Gathering fabric
Certain sewing projects such as skirts and dresses need to gather fabrics. Basting is the best method to gather the fabric needed to make a project. It is possible to put two rows of stitching within the seam allowance on the fabric, and then draw the thread through them. This will result in a perfect gathering of fabric.
-
Quilting
Quilting is the process of holding together various fabrics. The top layer batting and bottom layer should be aligned correctly to ensure that the quilted fabric is finished with high quality. With batting, layers are able to be stitched and aligned correctly to achieve an ideal finish.
-
Sewing slippery fabric
Silk and satin aren’t easy to sew since they can be slippery. While sewing, the fabric could move and create many frustrations. Basting can help avoid errors. It ensures that seams are placed correctly and allows you to stitch without any mistakes.
-
Sewing trims to drapes and pillows
Basting is a great technique for adding trims and laces to pillows and drapes. The basting stitch will ensure it is certain that the trim stays in place and will not move. Once you’ve put the permanent stitch in place, you are able to take off your basting stitches.
Is Basting A Permanent Stitch?
Taking or basting is not permanent stitches. It’s designed to be removed in the future and this is the reason that makes basting stitches flexible and are longer than permanent stitches. However, there are times when you may leave basting stitches in the project you are sewing.
For instance, it could be used on quilts or on garments in which the stitches are left in place for aesthetic reasons. On clothes with basting, it is also possible for the stitches to be hidden within the seam or around the edges.
What Are Three Types Of Basting?
Uneven, even as well as diagonal basting comprise three kinds of basting. Particularly they are the three types which hand-basting. Machine basting on the other hand is another way to create basting stitches.
Uneven basting
Basting that is uneven can be the most simple and most popular basting stitch. However, the lengths and spacing of these stitches aren’t uniform. The smaller ones are beneath the fabric, while the larger ones are on the top.
Even basting
Xem thêm : How To Sew A Patch On A Hat With A Sewing Machine?
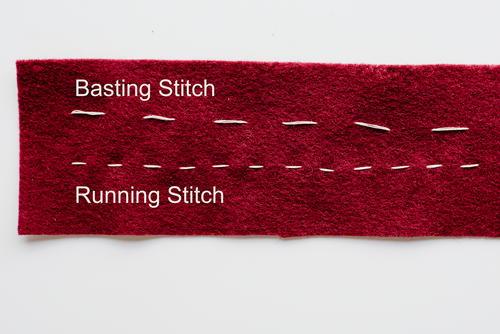
Even basting stitches appear like a uniform pattern and are reminiscent of real running stitches. They are smaller than the uneven basting stitches and their lengths and spaces are the same across both sides of the fabric. This kind of basting could be the ideal option for projects that require stability.
Diagonal basting
There are diagonal basting stitches in the sense that they have an angle that is diagonal in comparison to straight, even, and uneven basting stitches. But the stitches are distributed uniformly and diagonally at the top, and horizontal at the bottom. The diagonal basting stitches while making large-scale projects.
How to Remove a Basting Stitch?
When the function of the basting stitch has been completed and you’ve inserted the permanent stitch in place it is now time to go ahead and pull it out. Removal of the basting stitch needs to be done in a careful manner so that you don’t accidentally cut through the permanent stitch or fabric. Also, it is recommended to take off the basting stitch prior to ironing since the process is difficult after the fabric has been ironed.
A seam-ripper tool is a great tool to remove an abutting stitch. It’s a fork-like tool that has two points – one of them being long and the other shorter. The two points are joined with a sharp central point that is used to cut the thread.
To get rid of the thread, insert the long edge of the tearper between the thread to the fabric. When inserting the thread, ensure that the thread on the fabric is not pulled in a way that isn’t intended to be. The ripper should be moved forward until the sharp point cuts the thread.
To get rid of the entire basting, cut the thread through each third stitch. This will allow you to remove the thread with ease and take out all stitches.
If you’re new to sewing, you may consider basting as a taking task. However, it’s not in actuality. Basting can save you a considerable amount of your time by avoiding errors in sewing. It eliminates frustration and discontent and leaves you feeling satisfied when the project is finished.
How Do You Baste On A Sewing Machine?
- Choose the straight stitch setting, or basting stitch if the sewing machine supports it.
- Choose the longest length stitch and reduce the tension of the thread for loose stitches that will be simpler to remove later
- Sew the way you would normally but do not backstitch at the start and at the end.
- After that, press then pull and cut the thread to have a thread tail you can pull
If you’re unfamiliar with using machines, learn the way a sewing machine functions to better understand its functions.
Conclusion
That’s all there is to it! We’ve discussed what’s baste sewing and it is a reference to temporary stitches for basting. They are both loose and long and are usually used to secure the fabric in order to sew more efficiently.
It is possible to sew by hand or using machines. If you’re looking to bast faster and more precisely, it’s easier to create the basting stitches on a sewing machine. Basting larger projects will be more easily accessible on your sewing equipment, particularly when making commercial sewing projects.
Nguồn: https://spasifikmag.com
Danh mục: Sewing Tips


