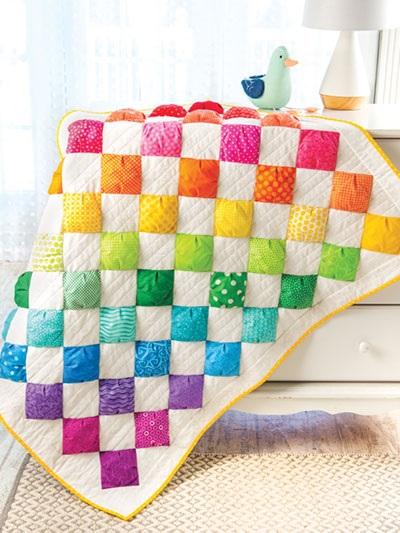
We’ve put together a step-by-step tutorial on how to make this lovely chevron puff quilt. You can have fun combining modern prints with cool white triangles, and then select a plush and inviting backing fabric. Create an eye-catching modern pattern for any nursery by sewing together the chevrons with a fluffy, light effect. You’ll stitch the individual “puff” squares together after they’ve been made. Despite the fact that this puff quilt may take a few days to put together, the process is wonderfully calming. The material on Flying Geese Quilts may be of interest if you liked this topic.
What is a puff quilt?
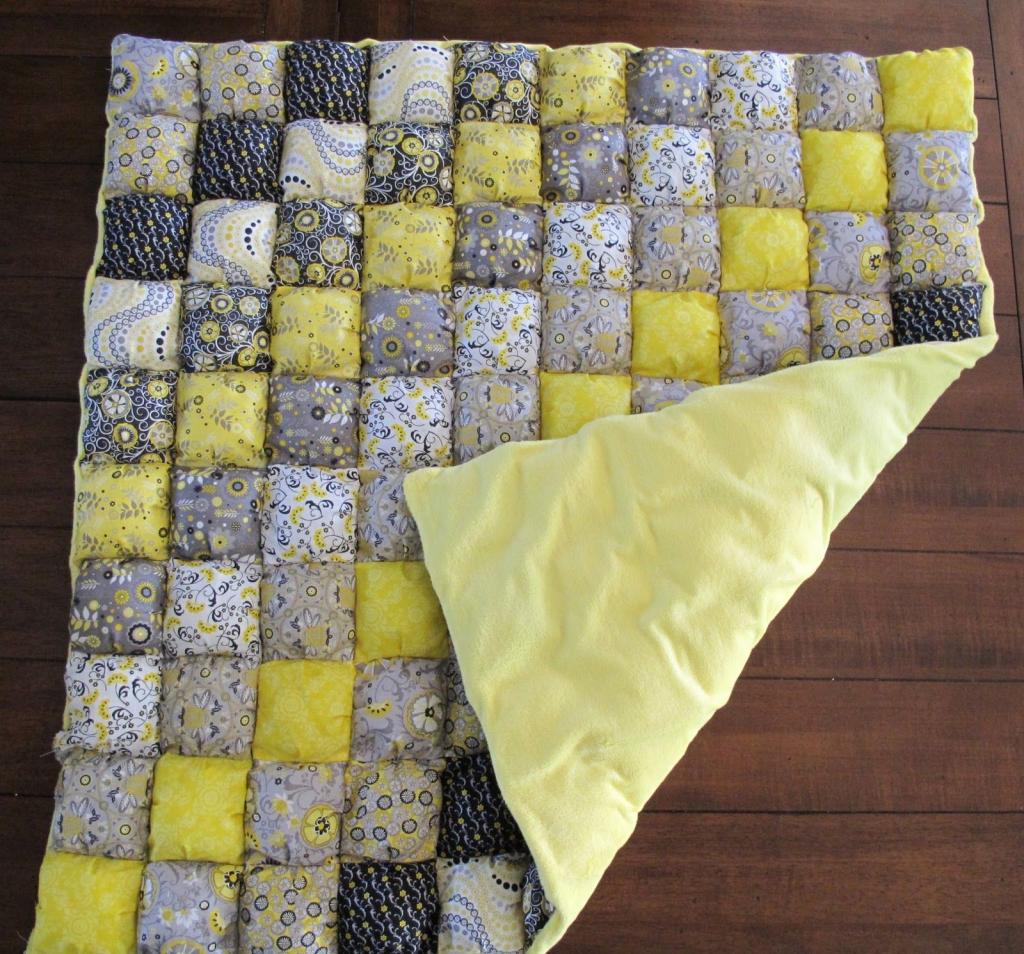
If you’re trying to figure out “what is a puff quilt,” then read on. Before the quilt is finished, every piece is stuffed with toystuffing to give the illusion that it is puffing up. The terms “bubble quilt” and “biscuits” are also used to describe puff quilts. It’s made in a different way from traditional quilts. A larger quilt can be made by filling and sewing individual blocks instead of using three layers (the top fabric, backing fabric, and middle wadding). The finished blanket will be even larger than the original.
Step 1: Buy Your Fabric and Polyester Filling
Making a bubble quilt calls for three layers of fabric: one for the top layer puffs, another for covering what you can’t see at the bottom of those puffs, and a third for flipping the quilt over. Filling and thread will also be required for this project.
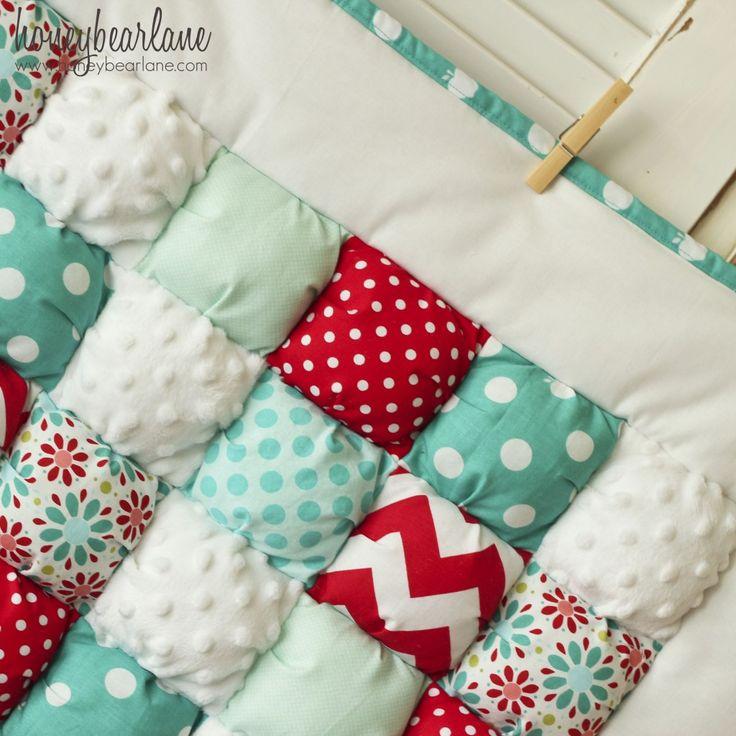
One yard of linen and 1.5 yards of minty fabric were used to produce my puffs, which were then covered in another 1.5 yards of minty fabric to make the quilt’s back. I also used a quarter of a bag of 32 oz poly-fil for this project. Making larger bubble quilts necessitates the use of Poly-Fil and more fabric.
- (153 917-inch squares) Crib size: 27×52 inches
- Size: 39″ x 75″ (or 325 squares, or 1325 squares each).
- A whole 54×75 inch (450 squares, 18×25) is needed for this project.
- 540 pieces (2027) of Queen 6080 in
- King: 76 x 80 inches (702 squares 26 x 27 inches) King
Xem thêm : 5 Step by Step to Put the Bobbin Driver Back Together
Puffs are made by slicing the dough into 5-inch and 4-inch pieces. What you’re going to see are 5-inch squares (the puffs). It doesn’t matter what the squares of 4 inches look like because they will be entirely covered in your quilt. Puff squares sewn together with a half-inch seam will have a finished width of 3 inches.
Step 2: Design Your Bubble Quilt
Once you know how many puff squares you’ll need to make, you can begin planning the layout of your finished quilt. Color pencils and graph paper can be used to plan out your design. You can print graph paper for free here if you don’t have it.
There’s no reason not to appreciate checkerboard designs, yet the possibilities are practically endless. The bubble quilt I made for my son features a diamond pattern, which I think is wonderful.
Step 3: Cut Out Your Pieces
The first step is to cut all of the 5-inch squares needed for the puffs on top. Make your cuts as exact as possible to help your quilt look more appealing when it’s finished. You’ll also need a stack of your pieces arranged in such a way that they can be sewn together with their nap facing the same direction. Fabrics like Minky, or any other material with a directional pattern or a lot of flexibility, require this step to be taken seriously.
It’s best to use a rotary cutting mat when slicing a square of fabric. For my sewing area, I recently got a brand new Sew Ready cutting table and a cutting mat that completely covers the top. – I’m in love with it! If you’d want to learn more about the cutting table, check out my review. To me, this Sew Ready cutting table is preferable to the one I purchased from Sullivans in the past.
Puffs’ sides can be covered with 4-inch squares cut from scrap fabric. These squares will be entirely encased in the quilt, so no one else will ever see them. To keep the bubble quilt’s shape, I recommend using muslin or linen for the 4-inch squares.
Step 4: Sew Your Squares Together
Make little pleats between the 5-inch squares you cut to attach to your 4-inch squares. If I’m going to stitch, I’d rather sew an inch, then fold my square in half and sew to the finish. In order to ensure that your pleats are placed precisely in the middle of each puff, don’t bother about doing so until the fiber-fill has been added to each one. I also enjoy sewing two pleats in one way and two pleats in the other, although it’s not necessary.
Step 5: Stuff and Close Your Bubbles
Xem thêm : How To Use A White Sewing Machine? Step by Step Instructions
Fill the Poly-Fil squares with your bubble puff panel before flipping it over. All of the 4 inch backing squares must be threaded through the 2-inch space you left behind. There is no reason why it should take more than ten minutes. The amount of Fiber-Fil I used left me speechless. In order to make a crib-sized bubble quilt, I only used a quarter of a 32 oz container of Poly-Fil. One bag should do for a queen or twin-sized bubble quilt.
Step 6: Bind Your Quilt
It is the simplest method of binding a quilt if you cut your binding cloth 2 inches larger than your puff panel. The binding is as simple as folding it twice and stitching the back cloth to the front fabric. This method isn’t recommended for those who want to use Minky for both the back and the front of their quilt, because it’s tough to stitch Minky to minty, especially when you add three layers of minty.
Are Puff Quilts Comfortable?
When it comes to quilts, nothing beats a puff or biscuit quilt. Soft and sumptuous, it’s also an ideal baby shower present. Each quilt block will be filled with a puff before being stitched together, unlike traditional quilts that use wadding between the top and backing fabric.
It’s a cozy, silky quilt that’s perfect for snuggling up under on a chilly night or at the end of a long day. In addition, the fabric used to cover the bottom and top of your quilt can improve its overall attractiveness. Of course, the quilter has the option of stuffing each square to their desired level of loft.
Conclusion
It’s as easy as that! You can make puff quilts with your sewing machine, and we’ve found a simple tip that makes it even easier. First, the panel is constructed, and then each square is filled with filler to prevent it from interfering with the stitching process.
Nguồn: https://spasifikmag.com
Danh mục: Sewing Tips


