The Singer sewing machine’s timing adjustment isn’t as complicated as you would think. Due to the fact that the machine was utilized, the machine’s timing may need to be modified. If you’ve cleaned, re-threaded, and adjusted the tension on your machine but still notice that your stitches aren’t quite right, it’s probable that the timing was the root of the problem.
How Do I Fix The Timing On My Singer Sewing Machine At Home?
Step 1
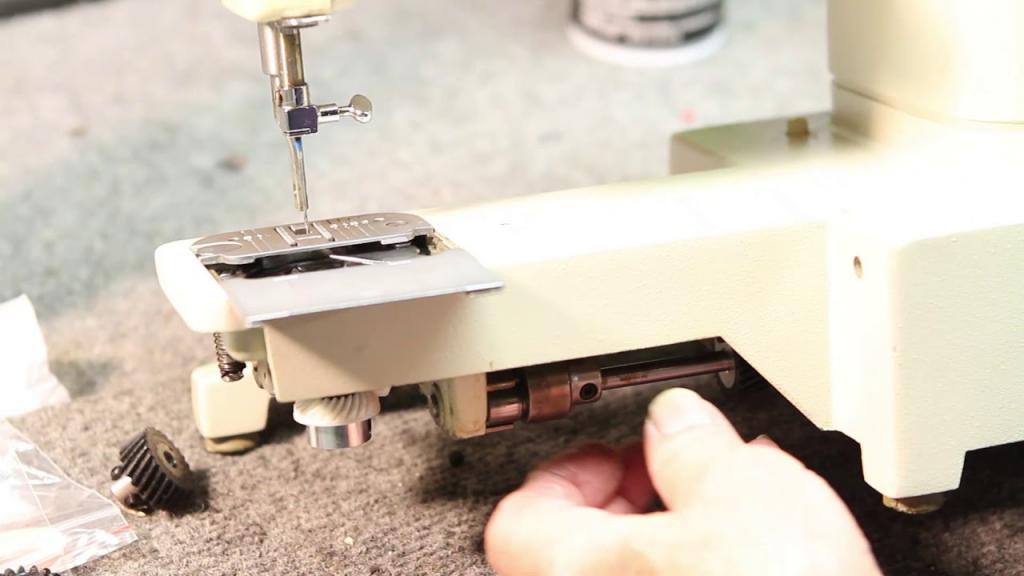
Remove the plate that shields the Bobbin from view. To make things a little easier, use the screwdriver that came with your Singer sewing machine.
Step 2
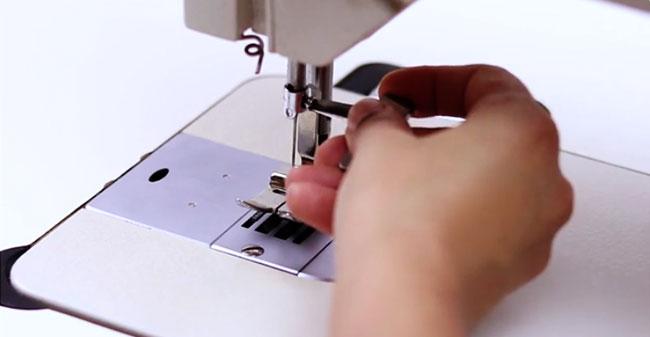
Inspect the point at which the needle’s tip and the bobbin’s casing touch. Observe whether the bobbin casing moves before or after the needle is dropped by slowly turning the hand wheel with your hands.
Step 3
Removing obstructions from the path. The length of the stitch should be adjusted to four, and the needle should be elevated to the highest position so that you may work under it. Lift the presser foot or remove it from the machine so that you can see the feeding dogs clearly.
Step 4
Make sure you have a flat-head screwdriver to remove the sole screw on the Singer sewing machine. The screw at the very top is usually the culprit.
Step 5
Xem thêm : How To Hem Curtains Without A Sewing Machine? Step by Step Instructions
With the use of an Allen wrench, turn the eccentric pin to the left. The eccentric pin can be found beneath the screw you removed with a flat-head screwdriver. Turning the eccentric pin adjusts the feeding level for dogs. Adjust the eccentric pin in the opposite way if the dog’s height decreases.
Step 6
Measure the height of your feed dogs. If you turn the wheel with your hands, the feed dogs of the Kenmore sewing machine will rise by 0.04 inches or 1.016mm. Using this method, the feed dogs are able to push the fabric ahead while stitching. To ensure that the feed dogs are not at the correct height and to correct the timing, the eccentric pin should be turned slightly further.
Step 7
Bring your sewing machine back to its former glory. Replace the plate that covers the Bobbin after all screws have been tightened.
Step 8
Make sure the sewing machine is working properly. At “2” stitches per inch, adjust the stitch length. Slowly turn the wheel to make sure that the needle is not struck by the casing of the bobbin, and then remove the fabric. The sewing machine may be made to run quicker, and the feed dogs can push the cloth accurately, allowing you to verify the time by pressing the pedal.
Tips and Warnings:
Make certain that your sewing machine’s timing has to be adjusted before you begin. Use the right thread and needle for the job at hand to ensure it gets done. If the machine is connected, disconnect it. Before starting, it’s a good idea to check the warranty and contact the manufacturer. Certain brands’ warranties may be void if you attempt to repair the timing.
To avoid having to have your sewing machine repaired or to pay a sewing repairman’s fees, follow these simple steps to fix the timing on your machine. There are many advantages to taking the time to repair your sewing machine, but you should check its owner’s manual and warranty first. This simple guide and the sewing machine owner’s manual make it possible for anyone to adjust their sewing machine’s timing quickly and effortlessly.
How To Adjust The Timing On A Singer Sewing Machine
- If you can’t find your sewing machine’s manual, you can use Singer’s manual finder tool to locate one.
- When the needle bar is in its lowest position, remove the screw from the lever and adjust the lever’s height so that the top indicator mark is in line with the bushing’s bottom.
- Disassemble the Singer sewing machine by removing the needle bar, stitch plates, and bobbin cap covers.
- Ensure that the needle is positioned correctly.
- After you remove the screws from the pulley for the bobbin mechanism, put the machine on its back.
- Ensure that the hook is pointing towards the side of the machine by holding and rotating the pulley.
- When the needle is at its lowest point, or the lower timing indication mark is aligned with the very top needle bar, turn the wheel until the wheel is at its lowest setting.
- The timing indication should be aligned with the bottom indicator mark. The hook and needle are at the same level.
- To ensure that the screws are securely fastened, use a wheel with the hook facing the opposite direction of the needle and positioned in the same location as the bushing.
- Everything should be put back where it was.
- When using your Singer sewing machine, make sure the time is right before you start stitching.
How Do I Know If My Timing Is Off On My Sewing Machine?
- Remove the base cover, switchplate, and bobbin cover from the device.
- If the hook does not hold the thread at a slower rate, use the wheel to adjust the sewing machine’s timer.
- In no case should the hook be placed above or below the eye. As a result, keep an eye on the hook’s tip as it rotates.
What Causes Sewing Machine Timing Problems?
Time can be messed up by both needle and hook. The needle must be moved to the correct side while the hook is rotated in the correct direction. In other words, if the axis is rotating counter-clockwise, the needle should be placed on the right. When the hook is turning counterclockwise, the needle must be moved to the left.
How Much Does It Cost To Fix The Timing On A Sewing Machine?
If you know what’s wrong with your sewing machine’s timing, you can fix it for free. However, finding a repair shop that can fix your computer is a matter of choice. For as little as $50 or as much as $100 or more, depending on your machine’s model.
Why Isn’t My Singer Sewing Machine Working?
Your needle may be to blame if you find that your Singer sewing machine is malfunctioning or that your stitches aren’t keeping up with the fabric. Ensure that you know how to replace a sewing machine needle correctly to avoid any issues. The needle should be as high as possible in relation to the clamp, with the flat side facing the back of your machine and the back of the needle facing the clamp.
What is sewing problem?
Introduction Included in sewing difficulties are the following: Stitch formation issues are an ongoing concern. Puffing along stitch seams of the fabric. * A product may be rejected if the fabric or yarns are damaged at the seams. This could be due to a needle-damage issue or a faulty needle choice.
Why is my needle hitting the bobbin?
What is the reason for this? If the needle hits the bobbin casing, the tip of the needle can be broken. If the bobbin casing has not been properly installed, this is likely to be the result. It’s possible that the bobbin casing won’t fit back into its original spot after you clean your sewing machine. Your sewing machine’s bobbin system is also something to be mindful of.
Conclusion
Have you found this article to be helpful? Finally, to fix Singer sewing machine timing issues, correct the needle bar height and hook timing before doing a machine check. If you have a certain model of Singer sewing machine, you need consult the instruction manual.
Please don’t hesitate to contact us if you have any further inquiries. Comments from us.
Nguồn: https://spasifikmag.com
Danh mục: Sewing Tips


