The New Home sewing machine’s manual has detailed instructions on how to thread the machine. If you don’t have your machine’s manual, don’t worry; this page will walk you through the steps necessary to properly set up and operate the New Home model.
This video lesson teaches you how to thread, wind a bobbin, and use a new sewing machine at home. If you own a specific brand of sewing machine, you may also look at our blog for tips and tricks.
Bạn đang xem: How To Thread New Home Sewing Machine?
For example, you can find information on how to thread an Elna sewing machine among our many other resources. It is necessary to know the proper threading technique for each sewing machine in order to avoid any issues with the stitch.
How To Thread New Home Sewing Machine Step By Step
- Allow yourself to be as high as possible with the lever for take-up by bringing the balance wheel closer you.
- Take your New Home sewing machine and insert the thread spool.
- The upper arm should be used as a guide for the thread.
- From left to right, tighten the thread by leading it around the discs.
- Take care not to get the thread caught in the tension guard at the back of the machine.
- Using the take-up lever, thread the spring through and then move the thread higher toward the lever for take-up
- Once you’ve threaded the lever for the take-up, pull the thread toward the other thread guides until it reaches the needle bar.
- When threading a needle, begin by threading the needle eye from left to right, and then pull the thread for about two inches.
- It’s important to keep your fingers on the bobbin thread and turn the balance wheel slowly to elevate it.
- Pulling thread from bobbins via needle holes is accomplished by moving lever that takes up upwards and downwards.
- Once the threads are under the presser foot, they should be tucked behind the machine.
What is the reason my thread is broken with my New Home sewing machine?
- Please double-check your New Home Sewing Machine’s threading before using it!
- Use a needle that is razor-sharp and pinpoint-accurate for the job.
- Take a look at the thread take-up spring and replace it.
- Adjust or loosen the thread’s top tension, if necessary.
- If the bobbin thread is broken, thoroughly clean and check the bobbin case and the area under the tension spring.
- If the bobbin thread is broken, you’ll need to adjust the tension on the bobbin.
- Make sure the machine is free of lint buildup.
How do I make a bobbin wind on the latest Home sewing machine
- Use the balance wheel to raise the lever as high as you can while lifting the needle bar.
- To reach the bobbin case, slide the plate off the machine’s bed.
- Removing the Bobbin case by unlocking the clasp.
- To disengage the sewing machine and activate the bobbin winding mechanism, turn the screw that stops motion toward you while using the balance wheel.
- Before starting to wind, make sure that your bobbin is properly fastened in the bobbin winder’s spring-loaded spindle by placing it there and rotating it until it is.
- Ensure that the spindle and bobbin are pushed all the way down to the bobbin before closing the lock.
- Thread the space between the tension discs by attaching the thread spool to its pin.
- Thread the bobbin through the bobbin hole.
- Rotate the balance wheel several times while holding the thread lightly.
- It’s time to wind up that thread by cutting its end off.
- The thread on the bobbin should be cut before it is removed from the spindle.
- Tighten the stop motion screw to release the winding mechanism.
How do you thread the bobbin onto a new home sewing machine
- With one hand, hold the bobbin case and turn it so that the forward-facing side is facing you.
- The bobbin should be placed in the case and the slot should be threaded along its outside border.
- Attach the thread to the tension spring and sew it in place.
- Threading the delivery eye
- To release the slide plate, the needle bar should be elevated and the lift lever pushed all the way up.
- The finger of the bobbin case should be situated at the highest point of the shuttle when the case is held with the latch and inserted into the machine.
- Lock the casing to the shuttle by releasing the latch.
- Latching should be able to latch on to the machine’s central post. There should be a clicking sound when you engage the latch.
- Only a few inches of thread should be pulled.
How Do I Use A New Home Sewing Machine?
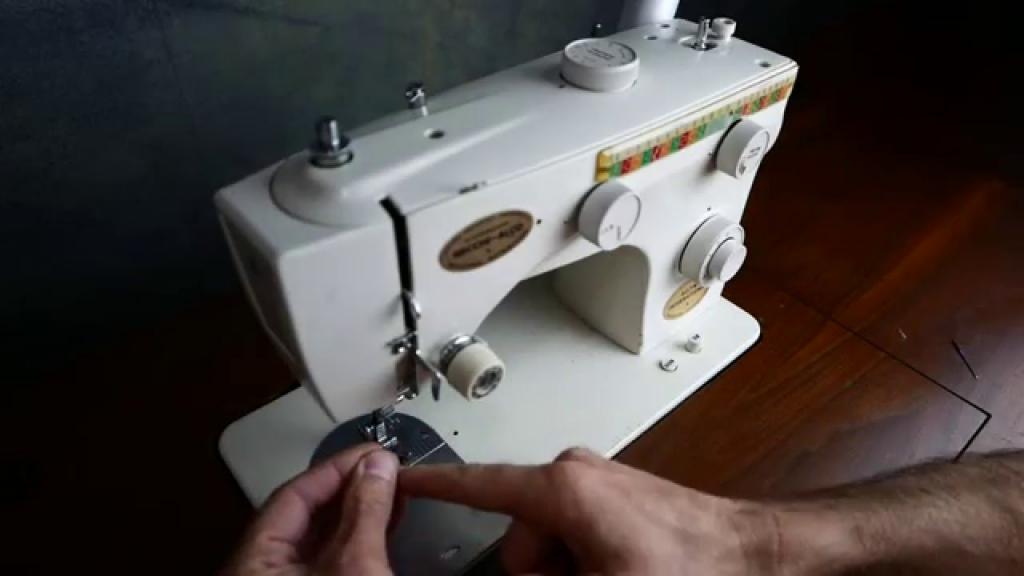
- The foot presser of your New Home sewing machine can be used to sew the fabric.
- When you’re ready to stitch, remove the threads and adjust the balance wheel so that the needle can reach the desired spot in the fabric.
- Ensure that the fabric is in place by lowering the presser foot, then sew.
- To remove the fabric, press your foot down while moving your needle as far as feasible.
- Maintain the textiles
- After cutting the threads at the ends, leave about 4 inches of thread on each end and continue sewing
How do I put the needle in the new Home sewing machine
- To remove the needle that is now attached, unscrew the screw holding it in place.
- The needle should be under the clamp while using this technique.
- Push the needle as far as it will go.
- Ensure that the needle is in contact with the pin that is inserted into the slot above the needle clamp.
- Close the needle clamp screw to keep the freshly attached needle in place.
Get familiar with sewing machines by learning how to insert a needle.
How to Thread a Sewing Machine
During the process of threading your sewing machine, you insert an upper and lower thread into the machine. To generate stitches in your material, the machine will use these two threads to weave them together. When it comes to threading, every sewing machine is a little bit different, although most machines follow a few common stages. When threading your sewing machine for the first time, consult your instructions.
- A bobbin is wound. The lower spool of thread on your sewing machine is known as the bobbin. Using an existing spool of thread, you can wind your own bobbins if you don’t already have any (from a prior project or pre-wound bobbins purchased from a store). Place a spool of sewing thread on the thread pin of your sewing machine to do this (at the top of your machine). To wind the thread around the pre-tension disc, pull the thread to the left of your machine and wind it counter-clockwise (attached to the thread guide). Next, insert a piece of thread through each of the two little holes in your bobbin’s pillar and wound it many times around. Put the bobbin on the bobbin winder pin of your machine (usually on the top right side, near the thread pin). Simply push the foot pedal on your sewing machine and the bobbin will begin winding itself, as shown. Trim the thread to separate it from the larger spool once it’s full.
- Wound bobbins should be loaded. The bottom thread for your sewing machine is wound onto a bobbin and placed in a little compartment beneath your needle (known as the bobbin case). If your machine has a hand wheel or a button, use it to raise your needle and presser foot to the highest position before removing the bobbin cover. Make sure your bobbin is positioned correctly in the circular slot; your machine will have an indicator to indicate which direction it should be placed. Replace the bobbin cover and tighten the machine’s tension spring using the bobbin thread.
- Spool it up. Place a spool of thread on your machine’s thread pin to begin setting up the upper thread (also called a spool pin or spool holder).
- Take a step by step approach to threading the needles. In order to properly thread your machine, begin by pulling the thread toward you.
- Make a U-shaped guide for the thread and feed the thread through. After lowering the thread from the thread guide and inserting it into a deep groove on the machine’s front, the user should then raise the thread and insert it into a second deep groove to its left.
- You can do this by wrapping the thread around the take-up lever. There is a metal hook called the “take-up lever” on top of the second groove of the machine. Using the take-up lever as a guide, sew the thread together.
- Prepare the needle for use. Thread the needle’s eye from the front to the back by lowering your thread toward the needle. Continue to draw the end of the thread until the needle is full of thread. (Automatic needle threaders are available on some machines; consult your sewing machine manual for additional information.)
- The thread is there for the taking. In order to stitch, you must join the two threads you’ve already set up on your bobbin and top thread. The bobbin thread will be caught by the needle and pulled out in a loop when you lower it all the way down and then raise it again using your needle position knob or button. When you’re ready to sew, grab both ends of the thread with anything flat, like a ruler, and move them away from the area where you plan to stitch.
Your Sewing Machine Is Not Threaded Correctly
Threading your sewing machine wrongly is something even experienced sewers are prone to. If your bobbin thread is looping or your stitches don’t appear right, this is the first thing you should examine.
Start over with a fresh thread on your sewing machine. Thread take-up lever should be in the highest position, thread spool attached. Thread should be pulled through tension discs and guides according to directions in handbook. Leave a four-inch tail of thread once you’ve pulled your thread through the needle’s eye.
Your Thread Tails Are Too Short
If your bobbin thread tails are less than two inches, they may get pulled into your sewing machine when you begin stitching. Underneath your cloth, you may notice threads clumping up. Begin by leaving at least three to four inches of thread tails, or hold on to the thread tails until you have sewed a few stitches. Sewing with knits requires extra attention to these instructions.
Your Thread Tension Is Too Tight
Depending on the weight of your cloth and thread, you will need to change the tension of your threads. Use the same weight of thread in the bobbin and the top thread. Make sure you keep your fabric taut, otherwise you’ll end up with thread that’s dangling from the underside of it.
Xem thêm : What Are The Types Of Sewing Machines? How To Buy A Sewing Machine?
You should not meddle with your bobbin tension too often, but if you keep obtaining clumps of thread under your cloth, you should alter the top thread tension. It’s possible to break your thread if your tension is too high. Loosen the pressure on your tension dial by turning it counterclockwise Sewing machine repair technicians can reset bobbin tension, but you can also make minor adjustments on your own if you’re having trouble.
Your Feed Dogs Are Not Up
Feed dogs are the part of your sewing machine that pulls your fabric through the machine. These are the little teeth that protrude from your neck plate and protrude beneath your presser foot, respectively. If you’re stitching freehand or on delicate cloth, you may usually lower the feed dogs on most sewing machines. It’s possible to acquire bobbin thread looping under your fabric if you forget to raise your feed dogs back to their regular position after a sewing project. It is impossible to work with a moving cloth without feed dogs, so your stitches will continue to form in the same place.
Your Presser Foot Is Not Down
To feed your fabric through your sewing machine, you must raise your feed dogs and lower your presser foot. Thread looping or bunching might occur beneath your cloth if your presser foot is not lowered prior to sewing. Computerized sewing machines may not begin stitching unless the presser foot is first lowered. What a lovely perk to have when purchasing a sewing machine!
Your Spool Cap Is Missing or Not Secure
Keep your thread from vibrating and bobbing out of control while sewing by covering your spool with a spool cap. If you don’t use a spool cap, your thread may not feed smoothly through your sewing machine, resulting in thread bunching under your cloth. It’s important to always keep your threads covered with a spool cap, but don’t tighten it up too much that they can’t be pulled off easily.
Your Bobbin Case Is Full of Lint
As you stitch, lint accumulates in your bobbin case. Your needle may get in the way and the hook in your bobbin case may not be able to make the stitches it is meant to. Keep your sewing machine clean so that you don’t end up with clumps of thread below your cloth when you finish sewing.
Your Bobbin Is Not Inserted Correctly
If you insert your bobbin the wrong way, your sewing machine will still be able to stitch, but your stitches will seem sloppy. It’s possible your bobbin is inserted backward if you’re seeing bobbin thread bunching under your cloth. In some sewing machines, the thread in your bobbin case must be wound clockwise, while in others, it must be wound counterclockwise. Check your sewing machine’s user manual to discover what direction it needs to go in. Near the sewing machine’s bobbin casing, there may be a schematic showing which way the thread should travel.
Did you find this post helpful?
I can also help you with any other sewing machine issues you may be experiencing! To learn more about sewing machine problems and how to fix them, you can order a copy of my book on Amazon.
You should expect more issues with your sewing machine in the near future.
It’s a given…
My book on sewing machine troubleshooting explains how to handle the 20 most frequent issues that can arise with your machine. You’ll be ready for anything your sewing machine throws at you. More time to sew and less time to grieve.
FAQs
Why does my sewing machine keep jamming underneath?
It’s possible that lint, dust, and other particles are clogging their mechanism, which would explain the issue. It’s time to take a break from your sewing and properly clean the fee dogs. Lift them up in an elevated position to ensure a secure grasp on your material.
Why does my thread keep bunching up when I sew?
Xem thêm : 2 Steps to Sew a Blind Hem Stitch Using a Sewing Machine? Step-by-Step Tutorial
Keep your thread from vibrating and bobbing out of control while sewing by covering your spool with a spool cap. If you don’t use a spool cap, your thread may not feed smoothly through your sewing machine, resulting in thread bunching under your cloth.
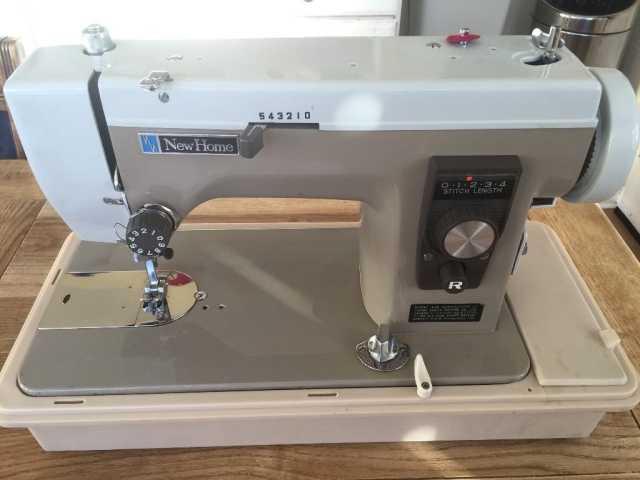
Where is the model number on a new home sewing machine?
The model number can be found on the bottom or the base of the sewing machine. If you look in the area, you should see a plate with five digits on it. A letter is placed in front of certain of them.
Why does my sewing machine run noisily?
If your machine makes noises, it’s likely that the hook or needle bar has lint or oil built up on it. Simply follow the instructions in your machine’s handbook to clean the hook and feed dog. Oiling the machine might also help it run more smoothly.
What thread tension should I use?
When stitching straight lines, the dial can be set anywhere from 0 to 9, and 4.5 is the most commonly used setting. This should work on a wide range of materials. It is possible that the bobbin thread is dragged through to the top if you are using a zig-zag pattern or another wide stitch.
How do I know if my bobbin tension is correct?
Bobbin cases should fall an inch or two when the thread unwinds. The bobbin tension is too loose if the thread unwinds easily and the casing falls to the floor. Your bobbin tension is too tight if the bobbin case won’t budge.
Why is the tension wrong on my sewing machine?
Different bobbin and top thread sizes and kinds can throw off the basic tension settings, which include needles, threads, and materials. Because the size of the hole affects the total top tension, using a needle that is either too large or too little for the thread can throw your stitches out of whack.
Is New Home sewing machine made by Janome?
A few modern machines are still marketed under the New Home brand, which was purchased by the Japanese firm Janome at that time. New Home’s older versions are well-made, with metal components that will last.
Conclusion
This is all you need to know! Using a New Home sewing machine is as simple as following these 11 basic steps, which we’ve just discussed.
This guide is based on the New Home manual and includes instructions on how to wind and set the Bobbin. We hope this was clear, but if not, please don’t hesitate to ask any questions you may have.
If you’re new to sewing, we recommend checking out our sewist’s blog for helpful hints.
Nguồn: https://spasifikmag.com
Danh mục: Sewing Tips


