The benefit of backstitching is that it doesn’t have to repeat it regularly or perform it in order to win races. It’s a simple method of sewing to ensure that your clothes are in place. It’s a great method to master.
How do you backstitch your sewing machine: The process of backstitching varies from one brand to another or model. For the Brother model, there are models that of them require you to sew between 4 and 5 stitches before you go back, while Singer models require only two or three forward stitches before you reverse direction.
- How To Hem Stretch Fabric With A Sewing Machine?
- How To Sew A Baby Blanket With Satin Binding? A Few Tips to Remember When Sewing With Satin
- How To Smock Fabric On A Sewing Machine? Step-by-Step Tutorial
- How To Clean Sewing Machine? How Do You Deep Clean A Singer Sewing Machine?
- How To Make Burlap Curtains Without Sewing? What You Need To Know
To find out more about backstitching and how you can do it on various models that use sewing equipment, keep reading our article. This article contains the details you need to learn about. It is worth a moment to learn more about this subject.

Why do You Backstitch?
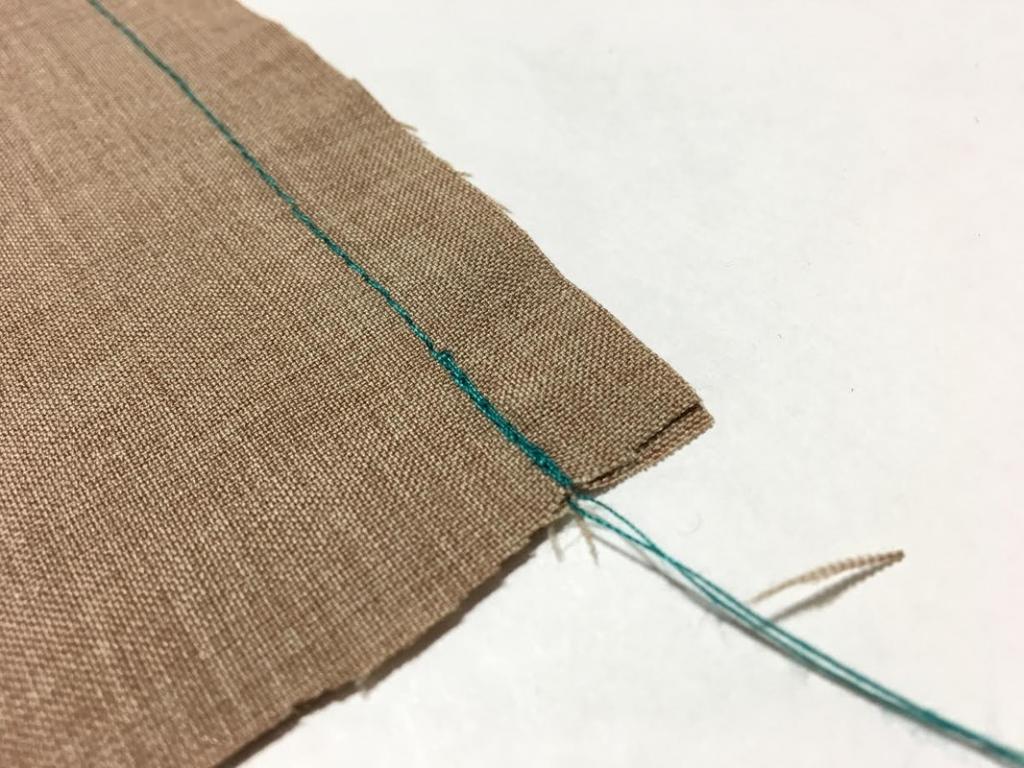
The edges of seams are where you will receive the most stress. They are constantly pulled depending on the kind of motion that you make. In the event of this, the stitches could fall out on you if did not secure the stitches in some way.
Sometimes, a knot that is simply won’t suffice and the thread snaps and the stitches are ripped out and so on. The reason to backstitch is to strengthen the original stitches and to ensure they’re sturdy enough to withstand the rigors of tasks.
Another reason to backstitch is to stop seams from stretching to the point of being stretched out. In the event that this happens, you will need to perform repairs to the sewing or replace the fabric or buy new clothes products.
Backstitching and even the lock stitch can ensure that the seams remain in their original shape for as long as is possible. It’s not a fix-all-forever solution but backstitching will help preserve the quality of the seam and ensure these seams last for many years.
It will take only a second or two to master this method, so it is not something to leave out when you’re in a hurry and have only a few minutes to finish the job.
When Should I Backstitch My Sewing Machine?
The word”when” does not refer to an exact time frame. It is not the case that you place a clock on your timer and as soon as the minute’s hand gets to the number 6, you begin backstitching.
The word “when” refers to the point at which the sewing process you backstitch. The first time you start using this method is after you’ve sewn some stitches towards the beginning of the sewing seam, and then for several stitches after you’ve completed sewn the seam.
Also, you backstitch on both sides of the seam. This will ensure that the first stitches are firmly held into place, and your seam is strengthened so that it will not stretch out of shape. This is the only step when backstitching really is necessary.
It is possible and even acceptable to add an extra backstitch or two at the center of your seam when you believe that the area requires reinforcement. This has been done by skilled sewers, and as you progress in your experience, you’ll be able to identify the areas clearly.
Your experience will guide you and you shouldn’t feel disappointed even if you are required to complete the Backstitch more than one time. Make sure you learn from your mistakes to create a beautiful seam.

How do You Backstitch?
When sewing seams using a machine this is among the easiest stitching techniques you can accomplish. All you need to accomplish is to stop your machine between 3 and 4 stitches, then press the reverse and then return to 3 to 4 stitches.
Each machine differs in how you use the lever that reverses or buttons. Furthermore, every machine requires an individual number of stitches forward to be stitched before going backward. The machine does all the work for you. All you have to do is press the button and make sure you keep the lever in reverse.
Backstitching with a hand sewing machine is as easy, but you’ll have to do the entire work. Once you’ve identified your seam, you move forward and stitch, then around one stitch. Repeat this until you’ve sewn 3 to 4 stitches. Then you continue sewing until you have reached the end in the seam.
Then you’ll repeat the process by moving forward a stitch, afterward, back a stitch and the process continues. You should employ shorter lengths of stitch when backstitching by hand because the smaller stitch will have more of hold to the cloth than the longer-length stitch.
How to Backstitch On a Sewing Machine
The procedure is easy if you are using the machine. Of course, each manufacturer might have different techniques to reverse stitch on various models. This means that the information provided here is focused on a specific kind of sewing machine and not all.
Xem thêm : Easy Window Curtains How To Make Your Own Without Sewing?
One brand of the sewing machine has you holding and pushing the button to reverse all the time that you reverse the direction of the stitch. This can tie up your hand however it only lasts for about 4 or 5 stitches before you let go of the button to continue forward.
Another brand requires you to push the U-shaped symbol with an arrowhead, and then you go forward about 2 or 3 stitches, then back to 2 or 3 stitches. Then, you press the button to start and continue forward.
Some models also have small levers that you can push down to sew reverse. After you’ve finished pushing the lever again to begin sewing forward. Because there are different ways of sewing by the same manufacturer it is recommended to read the manual of your machine’s owner to find out how your reverse or backstitch functions work. You should then practice it several times to ensure you’re well-prepared for when you will need to reverse the machine.
For your practice, you can use a scrap of fabric. It should take only about 20 minutes and after you’ve done it, you will be prepared for when you are able to do the real thing.
How to Backstitch Without Reverse
There are many methods for accomplishing this. One method is to turn your material around, making sure that the holes are aligned, and then stitch forward. This method only reverses the material and not the stitching orientation of the machine.
Another option is what’s known as the ghetto backstitch. This is when you pull the foot back until you reach the point where the seam is finished and then pull the fabric back by 3 to 5 stitches, and then sew it over the original stitches.
This isn’t a very attractive method, but it is most effective when the seam is to be concealed from public view. Some sewers sew to the end, leaving around two inches at both ends. Then, they backstitch with their hands. Depending on the skill you have it will take only one to 10 minutes to the time you sew using this method.
A tip to do the ghetto backstitches to when you’re finished sewing, grab some of the thread. Tie a knot around it to make sure that the stitches will not disappear in the near future.
Use glue or a surgical knot in the middle. The way you finish the stitch is entirely up to you.
Back Stitch On a Sewing Machine is Loose
If you notice that you are beginning to loosen back stitches, you should think of the most basic solutions first. The reason is that simple solutions will not cost much money if they do not cost you anything at the least. Furthermore, they are very easy to fix and you will not waste the time you spend sewing.
The first place to search for is the dials that control your tension. Check that you have set the tension correctly and if it is not, adjust back to the point where the dial is supposed to be. Another difficult problem is that of timing. If your timing is not correct, then your stitches may be out of alignment. The timing is responsible for many more stitches that are worse than the loose ones.
Another possible source to solve this issue in the thread inside the bobbin. If it’s not identical to the thread on top and you are experiencing problems with reverse stitches. Double-check that the thread on the bobbin is identical to the top thread.
Another source of this kind of issue is one of the primary sources you’ll discover for the majority of sewing problems. Examine your cleaning schedule to find out when your last time that you washed your machine
If it’s been a long time, you’ll be required to tidy it up and determine if this will solve your issue. It’s not too bad to take care of it, since dirty machines can create more issues for you too.
The above issues with the exception of timing, are able to solve yourself. The timing must be taken care of by a trained and certified repairman.
How to Backstitch On a Singer Sewing Machine
The singer is one of the brands which has an arrow with a U shape on the button. They love using symbols on their equipment therefore you’ll need an owner’s manual first place, in order to understand what these symbols mean.
The arrow that has a U shape is the reverse button. It is necessary to press it, and the model with this feature will sew at the reverse position until you stop it. By stopping it manually, means taking your foot off of the pedal after the machine has sewn sufficiently in reverse.
For sewing machine forward just push the U-shaped button then it will be a while before the Singer model will shift directions again. Since Singer employs a variety of symbols, you might accidentally press one that is not the correct button.
Xem thêm : How To Sew A Quilt With A Sewing Machine?
To correct the error To fix it, simply turn the machine off and then back on. This will restart the machine and will cancel the mistaken command. For all other Singer models, check the owner’s manual for the specifics for your model.
Sometimes, the table of contents does not contain exact terms such as sewing in reverse’. They may utilize a different term to describe the characteristic.
Backstitch On a Kenmore Sewing Machine
Kenmore was not manufactured through Sears and was produced by various companies throughout the company’s lengthy history. This implies that the reverse function could differ on different sewing machines, even though they belong to identical model ranges.
A particular model or even a few models will feature a press button feature. It’s not the most user-friendly according to the manual of the owner. that you must look for the correct button, and then press it as you sew in the reverse direction.
To move forward, push the button to make the machine run normally. The great thing about this particular model is that it has a reverse button that is prominent and easily accessible.
It’s on the rear of the appliance and, according to the owner’s manual, there aren’t any other buttons or dials close to the button. Pressing the wrong button appears to be a concern that you don’t have to worry about when using this Kenmore.
We aren’t able to speak for other Kenmore models but the owner’s manual will explain where reverse functions are and how you can use them. In some instances, the manual might mention reverse function is in the tables of contents.
How to Backstitch On a Brother Sewing Machine
If you own a Brother sewing machine that is fully automatic or features an automated reverse feature then the process is easy. Make sure that your fabric is in the starting position for the backstitch, and then choose your stitch pattern. Once you have completed those two steps, press the U-shaped icon that is located on the reverse button.
When you press the button it will do the rest. To stop the reverse stitch, you just need to press the U-shaped button once more. If you have a different model the process is a bit more specific.
Make sure that your needle is within the fabric, not being in it. Then, you begin sewing forward for 4 to five stitches. Once you have reached that point, push and then hold down the button to reverse. Once you’ve reached the point where you have reached the end of your backstitching Release the button.
To continue, just press the start button, and the machine will start moving forward. At the other end of the seam, repeat the process and stitch for an additional 4 to five stitches.
How Do You Do a Backstitch in Knitting?
There are a few simple steps you can follow to make sure you’ve got this process correctly.
- First step: pin both sides to each other.
- Step 2. With a tapestry needle and some yarn, pull 1 stitch to the edge, then move the needle upwards and down through both layers. It is going from the bottom.
- Third step: Next, turn around and exit in the same location. Bring the edges of the bottom together.
- Step 4: Now step is to go around the edges again and then move one stitch up. This means you’re ahead of the stitch you started by one spot.
- Step 5: Repeat the stitch you made in the beginning and make sure you push the needle’s edge of the needle into both layers.
- Step 6: Repeat the procedure until you’re finished with the work. It is important to ensure that you have the correct tension when you are working every stitch.
You should be able to observe the backstitch’s forming and how it holds the two pieces securely. If not, check your work to ensure you’re following the correct procedure.
There Will Be Problems
Sometimes you might find that your reverse function whether it’s a button or a lever, could create a problem. This is the reality of the world of sewing machines. We’ve already published an article that addressed the concerns.
All you need just click Sewing Machine Reverse Stich Problems to access the web page. There, you can look at what you can do to resolve the issues before contacting the repairman. You may not be able to solve every issue, but you will be able to save time and money by fixing the problems by yourself.
Conclusion
It’s that simple! We’ve just talked about how to reverse stitch on a machine, that’s as easy simply as pressing the reverse switch.
Each sewing machine will differ on the method you use to press the backstitch button only once or hold it while pushing the button to stitch. In some instances, there is a need for another method to backstitch to ensure the stitch is secure.
We hope this has been helpful. Let us know If you have any questions.
Nguồn: https://spasifikmag.com
Danh mục: Sewing Tips


