I’ve honed my slipcover-making skills over the years by tweaking and polishing my methods over and over again. These skills are now mine, and I can’t wait to share them with you!
My ability to measure and cut the fabric to the correct size, then pin it to a piece of furniture is now at an all-time high! After that, use the pin to secure the sewing machine cover to the machine. It’s time to put the slipcover on the furniture and make sure it fits perfectly every time.
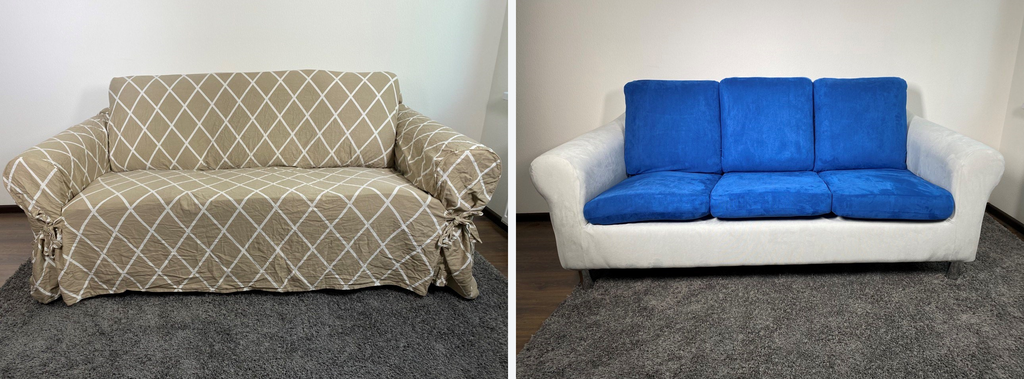
SAVE YOUR SOFA FROM THE CURB
Your sofa will always be a necessary part of your living space.
Bạn đang xem: How To Sew A Loveseat Slipcover? A Must Read!
I’ll show you how to make an appealing covering instead of throwing it away and spending thousands of dollars to replace it.
In the end, I was able to complete the slipcover for my couch. It took me about a week to complete everything and was not nearly as difficult as I had anticipated.
Are you interested in learning how to make a slipcover for your sofa so that it does not end up in the trash? Allow me to walk you through the steps I take.
Adding a few extra yards to your slipcover is an excellent habit to get into.
Xem thêm : How To Sew Grommet Curtains? Things You Should Know
Always use leftovers to make cushions.
Make sure to indicate the sizes and heights when you measure in a customer’s home so that you know how to cut the parts correctly. The height cut should be selvage to selvage and not higher than the roll if you are railroading your cloth.
If you’re not careful, you could end up with the wrong measurements on your cloth.
DETERMINE THE SIZE OF THE SLIPCOVER
However, we won’t go over the processes because you’re more likely to be thinking about how to compute the size of a piece than how to do it. Reupholstering the chair, rather than purchasing new cushions, can be done by tracing the existing fabric onto a new piece of material (pattern). Making a custom slipcover means you’ll need to know the exact dimensions of your sofa before you begin cutting fabric.
- Ascertain the approximate size of the area in question by measuring with a tape measure. The larger the dimension, the easier it will be to cut the surplus fabric. Keeping this in mind will help you get the best fit.
- Lay the fabric out over the sofa and use a fabric marker to make an outline. Then, cut the shape about 2 inches larger than its outline.
When the fabric (panels) are sewed together, the garment is finished.
PUT IT ALL TOGETHER
Xem thêm : How To Fix A Singer Sewing Machine Bobbin Case?
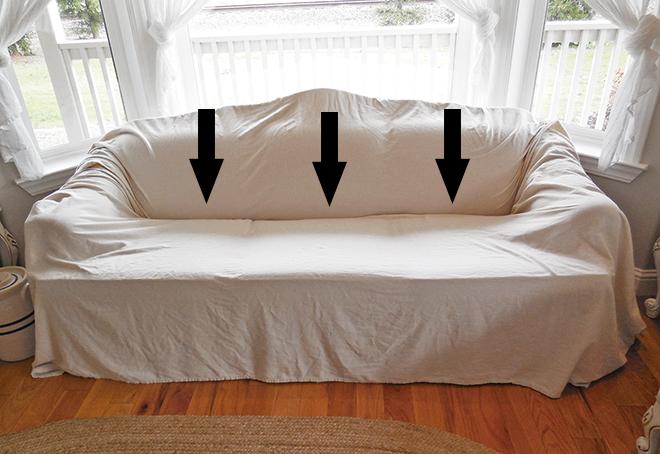
Pin the fabric to each other and use the fabric marker to designate the place where you’ll need to stitch the pieces together to join them. As an example, take a look at the image below.
As the adage goes, “Cut twice, measure twice, and cut once!”
It is also critical that you collect accurate dimensions of your furniture. As a result, you’ll spend less time and money on materials purchases and customer visits. It’s important to pay attention to the furniture’s dimensions and note where the room’s largest opening is.
For an outdoor back or outside arms, the largest point of the cutting’s top is normally where the cut ends. When it comes to outer arms, the lower portion is longer than the top on some pieces, but this is not always the case. As a result, when you take measurements, be sure to pay great attention to the fine print.
Take your time and make sure you get these steps right the first time around.
Get your slipcovers in place so they fit perfectly!
With your measurements in, you’re ready to stitch the pieces of your cloth into a slipcover with your creative design in mind. To begin, I use chair anchors to secure the slipcover pieces in place. The term “anchoring” refers to the practice of using pins to secure my cloth pieces to the chair so that I can begin sewing. Prioritize your most important elements, such as the outer back, interior of your deck, and back. Now it’s time for the outer and inner arms. You’re ready to begin making relief cuts once all the pieces are attached and joined.
Conclusion
Slipcovers for a loveseat can be sewn in a variety of ways. Many inexpensive slipcovers are available, but if you can’t afford them, you won’t be able to use them. Make your own by following these instructions!
Nguồn: https://spasifikmag.com
Danh mục: Sewing Tips


