To better grasp how to set tension on a Singer sewing machine, it is necessary to understand how to modify the tension of your thread. Additionally, we’ll go through how to alter the bobbin tension on a Singer sewing machine, if that becomes a concern for you.
If you’d want to learn more about how to solve the Singer sewing machine’s timing issues, check out these instructions. If you’re having issues with your sewing machine, it’s important to know the most common ways to fix it.
Bạn đang xem: How To Set Tension On Singer Sewing Machine?
Also, we have a sewing blog where you may get instructions for sewing machines from different manufacturers, including Singer.
How To Set Tension On Singer Sewing Machine Correctly
- Sewing machine with a variety of thread colors, both for the top and the bottom of your garment
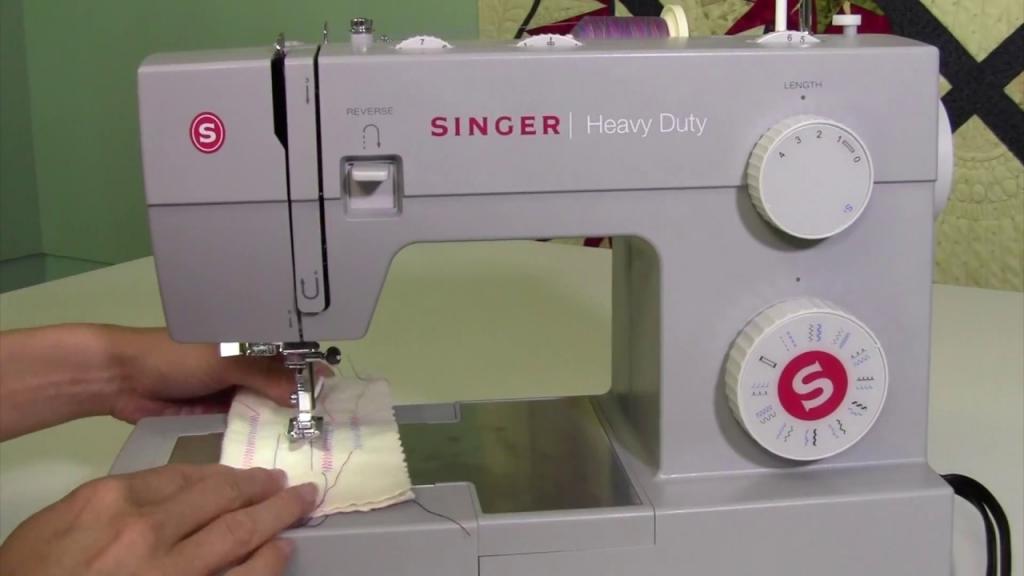
- Use straight stitches to sew a seam on a piece of fabric.
- Check the bottom and top of the fabric to make sure there is no looping between stitches.
When is it time to release the tension on the thread?
This indicates that you should lower your top tension, as the bottom thread pulls through the fabric’s top by looping threads on one side of the cloth. On your Singer sewing machine, locate the tension adjuster knob towards the top and turn it counterclockwise, adjusting it by the lower number.
When is the right time to increase the tension of the thread
Stitch looping at the lower section of material that is attached by top thread signals that you need to tighten the top tension, as bottom thread is squeezing it. One number higher is all that is needed to tighten top-stitching tension on the needle.
Create three-inch straight stitches on a scrap of fabric after adjusting the tension of the top thread on the Singer sewing machine. The upper thread must be above the fabric’s surface, while the lower thread must be below it. This must be done in the centre of the fabric.
The tension knob can be adjusted by one number at a time if the stitches are uneven. But Singer recommends checking the thread quality or restarting the machine if tension adjustment doesn’t fix uneven stitches.
How Do You Adjust The Bobbin Tension On A Singer Sewing Machine?
- To see if you can change the bobbin tension on your Singer machine, check the manual for the model you are using.
- Break threads by making a seam on the folded fabric and then pulling across it.
- If one of the threads is broken, the rest of the threads will not Change the bobbin tension to see if that helps.
- To access the bobbin compartment, the sewing machine’s faceplate must be removed.
- Using the hinged latch, remove the bobbin from the case. Keep the bobbin in the casing, however.
- Locate and use the proper size screwdriver on the bobbin case’s side screw to tighten the screw.
- Make small movements instead of huge ones. Rather, adjust the screw just a tad
- To increase or reduce bobbin tension, turn the bobbin counterclockwise or clockwise.
- Pull the bobbin’s thread to check for proper tension.
- Tightening the thread will make it easier to draw the thread free.
- There is a problem with the tension if the thread does not come out.
- Replace the bobbin on the sewing machine with the Singer brand.
- Make that the faceplate is securely fastened again.
- Step 2: Sew the seam along the edge of the fabric to verify that it is straight.
- The stitches should be evenly spaced on both the top and bottom of the garment, and the centre should be securely fastened.
- When pulling the cloth, make any necessary adjustments until no threads are broken.
Are you having trouble with your Singer sewing machine’s bobbin winding? Learn how to fill a bobbin on a Singer sewing machine by following this article.
The time to adjust the tension of the bobbin on an embroidery machine
Changing the bobbin tension is only necessary if you’ve been unable to improve stitch quality by adjusting the tension of the top thread. Instead of adjusting the bobbin tension, some sewers choose to change the bobbin casing entirely.
Nonetheless, there are a number of variables that could cause the sewing machine’s tension to change. Using high-quality threads and keeping the machine clean and well-maintained can help prevent difficulties with tension.
When adjusting the bobbin tension, be sure to move the case screw on the bobbin in very small increments. After each step, try a few stitches and adjust if required.
Only in the following circumstances should the bobbin tension be adjusted:
- If you’re sewing with silk or fine thread, be careful to tighten the bobbin tension to prevent the bobbin from continuing to unwind after the machine has stopped stitching.
- Reduce the bobbin’s tension if you’re using a large or bulky thread to prevent the thread from spinning out of control due to too much pressure.
The bobbin tension has already been established by the makers for all projects. Before testing the bobbin tension, make adjustments to the top thread tension.
How to Adjust Tension on Old Singer Sewing Machines
Bottom Tension Adjustment
As long as the bottom tension is set appropriately, it shouldn’t need to be rechecked during typical operation. As a general rule, you don’t need to adjust the bottom tension unless you’re using a second-hand machine or if the bobbin holder has been altered for any reason.
When it comes to bottom tension, all Singer machines employ the same adjustment method regardless of whether they use the vibrating shuttle boat type bobbin case (VS, 28, 128 etc.), the horizontally mounted removable bobbin case (15, 221 222, 301) or the oscillating shuttle carrier with drop-in bobbins (66, 99, 201 etc). A little bent metal spring holds the thread taut between the bobbin case/body carrier’s and the spring in all circumstances. Adjusting the spring’s pressure on the body is done using a little screw, which affects how much force is needed to slip the thread between them.
With a spring balance, all you have to do is remove the bobbin holder, insert and thread a bobbin, and then pull on the thread’s end normally in the spring balance’s direction of pull. The ideal weight range is between 30 and 40 grams (1-1/4 to 1-1/2 ounces), but it doesn’t need to be exact. If you don’t have access to a spring balance, one alternative is to attach a weight to the thread and gently tug it upwards. The thread should be able to slide through, but it should not be able to unravel freely.
Using digital scales to weigh sugar, sand, etc. into a small ziplock bag can be used instead of small weights if you don’t have any.
Changing the spring’s tension is as simple as tightening or loosening the screw near the spring’s center. Before retesting, 1/16 to 1/8 of a turn should be sufficient for most movements.
Top Tension Adjustment
A wide range of materials and threads can be accommodated by increasing the top tension after the bottom tension has been correctly established. Even if the lower tension is incorrectly set, a machine can still sew but the higher tension will have to compensate and this can produce tight or loose stitching as well as thread breaking in some cases.
Xem thêm : Where Do I Oil My Baby Lock Sewing Machine? How Do I Fix My Baby Lock Sewing Machine?
The upper thread of the early Singer models was threaded through two tension discs, which were held in place by a knurled nut. A simple trial and error procedure of tweaking this nut is all that is required to achieve the perfect lockstitch. The knurled nut only needs to be turned a quarter of a turn in either direction to accommodate varying conditions.
Later models included an updated upper tension control that included a numbered dial in the adjustment nut for the adjustment. Two layers of medium-weight cotton fabric should be used to test the machine’s accuracy, and the dial should be set between positions 4 and 5. A re-calibration is required if this is not the case.
As it turns out, removing the assembly isn’t necessary for this procedure.
The first thing to do is run a test stitch using 2 medium thicknesses of fabric to determine the correct position of the upper tension knob so that the machine makes a correct stitch having the right balance of top and bottom tension.
The first thing to do is run a test stitch using 2 medium thicknesses of fabric to determine the correct position of the upper tension knob so that the machine makes a correct stitch having the right balance of top and bottom tension.
In order to identify the correct location of the upper tension knob, run a test stitch using two medium-thickness fabrics to get the right balance of top and bottom tension.
It is possible to change the relationship between the knob that controls the tension and the dial that shows it by turning the dial plate while it is pressed back and then releasing it again. The basic default condition should be between 4 and 5 because we’re aiming for a circumstance where a full turn of the knob and dial gives a tension range from maximum to minimum. As a result, before releasing the dial plate, make sure to rotate it to this position.
Recheck the machine one last time. Repeat the procedure of adjustment if necessary until it is correct. If you don’t like the default value of 4-5 you may always adjust it to suit your needs. As a practical matter, however, it is doubtful that the knob will ever be turned all the way up to its maximum upper tension range of 9.

Bobbin Tension Guide
When To Adjust The Bobbin Tension
Tension settings and machine tension adjustments are frequently discussed. We get the correct stitch 90% of the time by adjusting the top tension. The bobbin tension is the other 10% that we’ll cover today. It’s possible that you were trained not to adjust the bobbin tension at all. Our message to you is that it’s fine. It’s not nearly as difficult as people make it out to be. If you’ve been warned not to touch your bobbin case and are one of those people, hopefully the information on this page can convince you otherwise. Maintaining a constant bobbin tension using a second bobbin case is an easy failsafe. Instead of spending $30-40 on a new bobbin case, why not learn how to make basic modifications and save money? Tensions might shift over time as a result of repeated use. However, even though you haven’t made any physical adjustments, they might nonetheless tighten or loosen on their own. They can be affected by thread, lint, and even temperature.
The big screw on the bobbin casing should be turned slowly while adjusting the bobbin tension. It’s best to adjust the huge screw in 15-minute intervals, test, then adjust again if necessary. Changing the bobbin tension on three separate occasions will be the subject of today’s discussion. However, there is a “I never thought of that before” option to the first two.
- It’s possible that the preset tension isn’t tight enough while using a fine, smooth bobbin thread. The term “backlash” may be familiar to you. The bobbin thread continues to unwind even after the machine has stopped sewing. This is known as backlash. This can be fixed by tightening the bobbin tension.
- It is possible that the pre-set tension is too tight while using a heavy or thick thread in the bobbin. In order to prevent the bobbin’s thread from unwinding easily, this may place too much pressure on the thread. This can be resolved by lowering the bobbin tension.
TOWA Bobbin Gauge Template
For all longarm and midarm quilters who are tired of fiddling with bobbin tension, TOWA’s Bobbin Gauge is a godsend. Who wouldn’t want to put an end to this misery? All longarm machines can use the same template that contains our recommended bobbin tension values. In contrast to longarm machines, home machines often require fewer bobbin tension adjustments.
The TOWA bobbin gauge uses a system of pulleys to measure the resistance of the bobbin thread as it comes out of the case. The little screw on the bobbin casing can be turned to increase or reduce the bobbin tension. A quarter-turn adjustment in either direction can have a substantial impact on bobbin tension, unlike the top tension on sewing machines or longarm machines, which requires significant rotational movement. The bobbin tension may be easily dialed in with each fresh bobbin or when replacing top threads by assigning a numerical value to it. The TOWA bobbin gauge will help you start each quilt with optimum bobbin tension and save time on your longarm quilting routine.
FAQs
What thread tension should I use?
In conventional straight-stitch sewing, the dial is set to 4.5, which is the “default” setting. This should work with a wide variety of materials. It’s possible that the bobbin thread will be dragged to the top while stitching with a zig-zag or similar wide stitch.
How do I know if my bobbin tension is correct?
Bobbin cases should fall an inch or two when the thread unwinds. The bobbin tension is too loose if the thread unwinds easily and the casing falls to the floor. Your bobbin tension is too high if the bobbin case does not move.
Why is the tension wrong on my sewing machine?
Using the wrong needles, threads, and materials can cause basic tension settings to be out of whack. Your stitches can be unbalanced if you use a needle that’s too big or small for the thread you’re working with.
Why is my sewing machine making loops underneath?
Improper tension is frequently to blame for looped stitches. Correcting an upper-side loop is as simple as adjusting the upper- or lower-tension screw to make it tighter. The best way to fix a loop on the underside is to increase the upper tension.
How do you adjust thread tension?
You should be able to see a little screw on the bobbin case’s flat side. The bobbin tension can be loosened or tightened by rotating the screw a small amount counterclockwise or clockwise.
The Different Types of Knit Fabrics?
Knits
Rows of loops called ribs or wales make up a knit. Stability and rigidity go hand in hand; elasticity and flexibility go hand in hand.
Always use a ballpoint needle and pins when sewing with knits. Avoid pulling the fabric when stitching because this can stretch it, but do your best to support the weight of the cloth while you work. If you want the best results, you should use a walking foot or an even feed foot. To get the greatest results, always start with a scrap piece and experiment with different tensions until you discover the one that works best.
Jersey
When looking at the front of the cloth, you’ll see flat vertical lines, but the back has prominent horizontal ribs. Useful for T-shirts.
Ribbing
Xem thêm : What Is The Best Heavy Duty Sewing Machine?
It is possible to get knits with good stretch properties thanks to the use of rib stitching. For cuffs and necklines.
Interlock
Both the front and back of interlock knits feature the same design. There are no runs or curling at the edges thanks to interlocking. The best fabric for clothing and dresses.
Double knit
Made with an interlock stitch, but the finished product has a ribbed look. Generally, they’re a little less pliable and sturdier.
What is Integrated Even Feed?
In order to keep the fabric layers fed at the same rate, Integrated Even Feed (IEF) “walks” over them. IEF’s dual feed teeth grasp and feed fabric, preventing it from moving or puckering during sewing. It goes well with plaids, knits, vinyl, and leather, among other fabrics. Also used in quilting when stitching two layers of cloth and batting together.
The New Featherweight C240 has this unique characteristic.
What is meant by Free-arm?
It is common for portable sewing machines to feature a free arm. Sewing pant legs, cuffs, and sleeves with the free arm is very common. Sewing machines have a free arm that protrudes out of the machine’s frame at the bottom of the machine, just before the needle and feed dogs. The free-arm can be accessed by sliding open the accessory compartment.
I can’t see the take-up lever?
In order to access the take-up lever, you must remove the front panel of your machine.
In order to begin, make sure that the needle is in its highest position, insert a piece of thread through the opening between the front cover and the machine’s top cover, and then pull the thread back toward you. Take-up lever features an aperture in its rear that permits thread to be slid into it.
What types of thread should I use?
Regular all-purpose sewing thread is designed for use in household sewing machines. You can get this thread from your local fabric or sewing supply store. Polyester is the most used thread for most general-purpose applications. Cotton thread can be used for quilting.
A heavy-duty thread or buttonhole twist can occasionally be used. However, if you use this thread on a regular basis, your machine’s tension will eventually be damaged. Make use of a larger needle (size 16 or 18) and longer stitches while working with thicker thread.
How often should I oil my machine?
Only Singer® oil is suitable for use in our machines.
Exactly what I was looking for! There is no need to lubricate your machine further if the owner’s handbook contains no advice on how to do so. The needle bar and the bobbin case can be lubricated with 2 to 3 drops of sewing machine oil, which will not affect the machine. Put a few drops on the handwheel where the machine touches the wall.
We recommend that you lube your machine once a week if your handbook calls for it and you use it every day. Lubricate your machine once a month if you use it once a week. Lubricate your sewing machine once every three months if you only use it once a month.
A Singer® expert can perform a tune-up on your machine every three to four years if you follow our advice.
Pro tip: If you haven’t used the machine in several years, we recommend a tune-up like you would for your automobile if it hadn’t been driven in that time. The oil will dry out if the machine is not used, and operating it at that point could result in parts breaking.
Why doesn’t my stitch pattern match what is on my machine?
To sew correctly, different stitch patterns need using different stitch lengths. As a general rule, the Stitch Length dial should be set at a lower number for decorative stitches like crescents or beads (between 0.5 and 1.5). Repeat this process until you achieve your desired effect. Set the Stitch Length dial to the “S” or Stretch setting if your machine offers stretch stitches and you want a stretchy finish to your project. Your stitch’s appearance can also be influenced by the width option. The best results are obtained by turning the Stitch Width dial all the way up.
Why is the thread looping/bunching on top of my fabric?
This indicates that your bobbin has not been threaded correctly if you see thread looping over the fabric.
Conclusion
Was this post helpful to you in any way? You may easily loosen or tighten the tension on a Singer sewing machine by using this method.
Adjust the top thread tension by turning the dial in either a counterclockwise or a clockwise direction, as indicated by the higher or lower number. To adjust the bobbin’s tension, you may need to spin the bobbin’s case screw in small increments.
Make careful to read the instructions for your model thoroughly and inspect the stitch quality as you complete various chores.
Nguồn: https://spasifikmag.com
Danh mục: Sewing Tips


