It’s difficult to make curtains because there’s so much cloth to work with. With just a few straight seams to work with, creating curtains is as simple as can be. Incorporating bespoke curtains into your design is an easy way to inject some personality into the space you’re working with. A good curtain set isn’t always simple to come by in the marketplace. Here, I’ll walk you through the basics of sewing curtains so you may decorate your home as often as I do.
- How To Take Apart A Husqvarna Sewing Machine? Step by Step Instructions
- How Does The Sew Cool Sewing Machine Work?
- What Is A Free Arm Sewing Machine? Top Free-Arm Sewing Machine Models
- How To Sew A Flanged Pillow Sham With Mitered Corners? Complete Step-by-Step Guide
- Smartek Mini Sewing Machine How To Thread
What Are Grommets?
With the help of grommets, curtains can be steered in the desired direction. In addition, they aid in the curtain’s maintenance. “eyelet” curtains are a popular choice for window treatments. These drapes are referred to as “curtains.” With grommets, your curtains have a point of reference to which they can be anchored. This is by far the most effective technique to ensure that your curtains are in good condition and that they will remain that way. In order to hang your curtains, you’ll need to use circular hoops installed above your window treatments.
Bạn đang xem: How To Sew Grommet Curtains? Things You Should Know
Steps To Sew Grommet Curtains?
Step 1
Getting the Ball Rolling
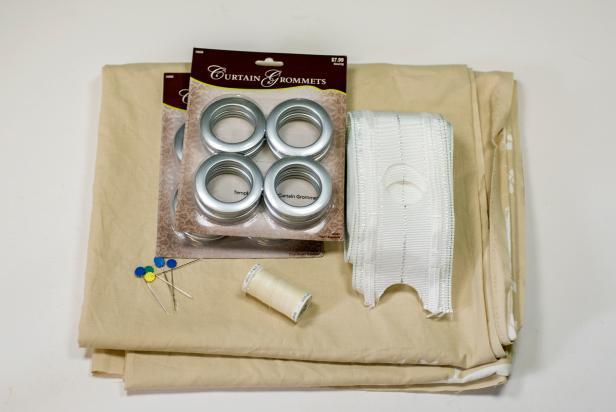
To make a simple curtain, follow these instructions.. Make sure you have enough fabric for double folding at the back of the top section. Depending on the size of the grommets, you may need more or less fabric. For a heading, you should leave at least 1.25 inches (2.5 cm) between the grommets and the edge of the fabric. An 8-inch (10.2 cm) double-fold heading was used in this instance.
To allow the curtain to move freely, choose a pole with a smaller diameter than the grommets. Choose grommets that have an interior diameter of 30-40 percent bigger than the diameter of the curtain rod, if it is operable.
The rod should be placed on the window, and then the length and width of the finished product should be measured. Make sure that the rod’s top is not the ultimate length before you start. The length is measured from the top of the rod to the bottom.
Grommets are attached to a rod at this location. There’s a gap between the curtain’s top and the rod’s. If you’re installing near the ceiling, this is something to keep in mind. You’ll want to leave enough area for the curtain’s hem above your rod.
Always arrange an even number of grommets to ensure that the grommets face the same direction from both the inside and the exterior as well as the wall.
The distance you’re interested in is the one between the rod’s two ends and the center. The “return” is the term used to describe this process. You should measure the return at both ends of the rod, as window trim may extend outward, making the center returns less than those on each side.
Step 2
What You’ll Be Able to Accomplish
length after adding the bottom hem of 6 inches (15.2 cm) Equals cut length
The needed number of yards (meters) is equal to the length of the cut less the number of widths of 36 inches (91.4 cm).
Step 3
Xem thêm : Who Makes Baby Lock Sewing Machines? Is Baby Lock A Good Sewing Machine?
To make a simple curtain, measure the length and then fold the excess cloth over the top. For a 4-inch (10.2 millimeter) double-fold head, add an extra eight inches (20.3 cm). To mark the final length, press a crease in the fabric with an iron. Trim the lining to the finished length by removing the excess.
Step 4
You should face the curtain panel’s leading, with the lining facing away from you. The buckram piece should be 6 inches (15.2 centimeters) larger than the finished panel’s dimensions. Create a double fold at the top of the header. Fold the excess buckram over the opposite end before inserting it (this will give an additional body at each of the ends).
Step 5
Fusible hem tape or fabric adhesive can be applied to the folded edge of the heading to keep it in place.
Step 6
The grommets need to be marked. Make a mark on both the return on the outside and the return on the inside to begin. Then, using an odd number, divide the two numbers by the mark you find between them. There must be grommets with a diameter of around 6 inches.
More than 15 centimeters in length. Do not place your grommets too far apart, as this will result in your folded-back sections being blocked from the walls.) (A)
Step 7
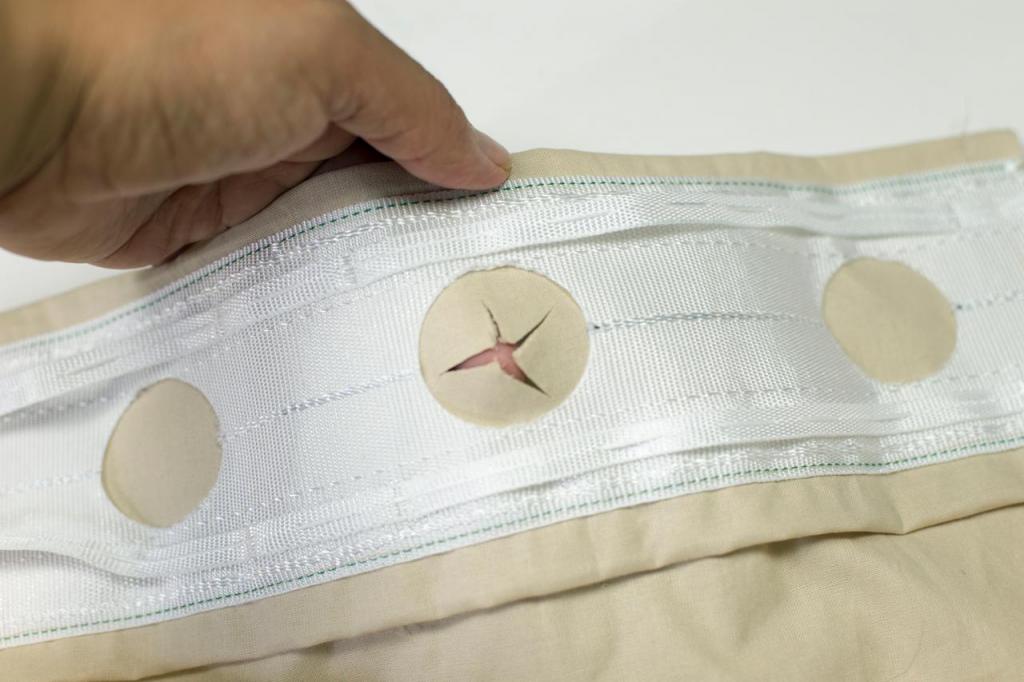
Using a grommet, trace around the grommet’s inner circle on each spot. (B)
Step 8
Separate the grommets into two halves so that you have a front and a back. (C)
Step 9
Staple each circle in the middle. One hole at a time, that’s what you do. The grommet will not be too loose if you cut slightly larger than the mark. (D)
Step 10
Join the parts of the grommet after inserting the front half of the grommet into the hole. (Metal grommets require the use of a setting tool.) Make more holes and attach grommets to the top of the head. (E)
Step 11
The curtain is ready for installation if all of the grommets have been fixed. Inside and outside edges facing backward should be used to thread the rod through grommet holes. (F)
Step 12
Remember to place the seams in the areas directly in front of the rod when working with multiple-width panels. In order to do this, draw out where you want the grommets to go on the fabric before cutting and sewing it together. Arrange your fabrics after you’ve marked your seams using the template. It’s possible that trimming the leading edge of the fabric or adjusting the grommet spacing is in order. To draw around the inside diameter of a grommet, place one on each mark.
Use a screwdriver to separate plastic grommets. Every circle has a staple in the middle. Cleanup is a breeze thanks to this feature!
Xem thêm : How To Make Curtains Longer Without Sewing? Step-by-Step Tutorial
Now that the grommet panel is complete, it’s time to hang it on the windows.
How do I make grommet curtains?
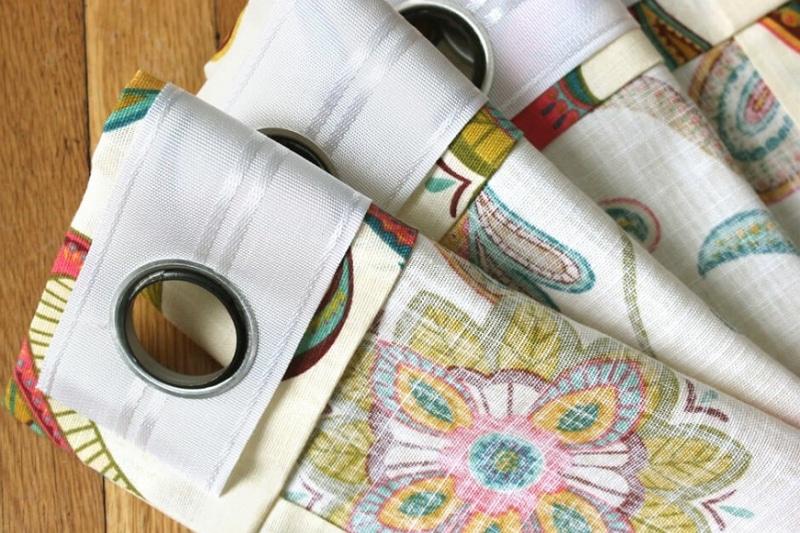
Incorporate Grommets into the design Add Grommets to the garment. Debby Wolfe To install the grommet, insert the raised side of the grommet into the curtain’s hole. The prong of the grommet should be placed on top of the elevated center of the curtain and pressed down to assure. preceded by Hang. You can attach the rings to a curtain rod and revel in your new look.
Is it hard to make grommet curtains?
Simple to make, they don’t take a lot of material and can be easily installed and used in any setting. Grommet curtains also go well with a wide variety of fabrics and decors.
How far apart should grommets be placed on curtains?
A typical spacing for grommets is around six inches apart. It’s important to put the first and last grommets where they need to be, so make sure you do it both in front of the window and on the top border of the wall.
What can I use instead of grommets?
An alternative to the grommet is a webbing loop, which can be used for everything from sails to tie-downs to the fabric covers. Grommets have a place, but webbing loops have a few advantages over them.
What is the difference between a grommet and an eyelet?
To strengthen holes in the fabric, eyelets are inserted into them. Brass is commonly used in their construction. They can be used in the same way as eyelets, however grommets are typically employed to reinforce far more durable materials than eyelets.
Where do you put curtain grommets?
On the curtain’s rear, use a ruler to locate the center of each grommet. The top of the grommet should be at least 21/4″ away from the center of the grommet when using large sizes. The middle grommet on a medium-sized curtain should be 2 inches away from the curtain’s top.
Can sheets be used as curtains?
Window treatments can be matched with your bedroom’s design without having to spend a fortune on custom-made drapes. Sheets are one of the most affordable ways to acquire broad materials. The nicest part about making curtains is that you don’t need to be a seamstress.
Why are grommet curtains so popular?
Drapery panels with grommets have long been a popular choice, thanks to their modern, sleek design. Grommets come in a variety of colors and sizes, making it simple to incorporate them into any design scheme.
It’s A Wrap!
See? Grommets for curtains are easy to make.
Do you have to be an expert in sewing to apply for this position?
It’s a fun thing to do when you’re bored, for sure!
Nguồn: https://spasifikmag.com
Danh mục: Sewing Tips


