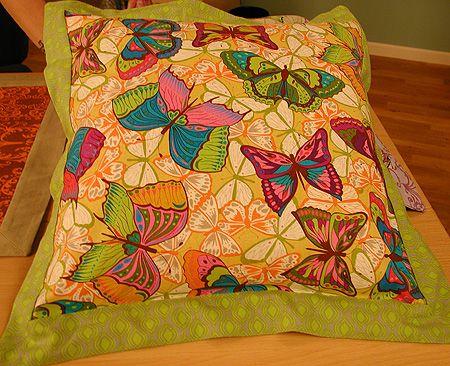
In the past, have you questioned how to sew mitered corners on an edged pillow case? There are just nine basic steps to making one on your own.
Keep your space looking put together and elevated by protecting your pillows and pillowcases in style with pillow shams.
Bạn đang xem: How To Sew A Flanged Pillow Sham With Mitered Corners? Complete Step-by-Step Guide
There are some pre-made bedspreads that don’t match the style of the room they’re going to be used in.
Make one with mitered corners by following this tutorial. That’s so cool!
You can learn to sew while also bringing a piece of yourself to the community.
How to Sew a Flanged Pillow Sham with Mitered Corners?
The flange and cushion fabrics must first be cut. Mitered corners can now be made after connecting the flange. The next step is to fold the back seams.
Once you’ve finished sewing the seams, trim the excess thread. The next step is to put everything together and stitch the pillow sham’s front and back together. Inserting the cushion foam completes the project.
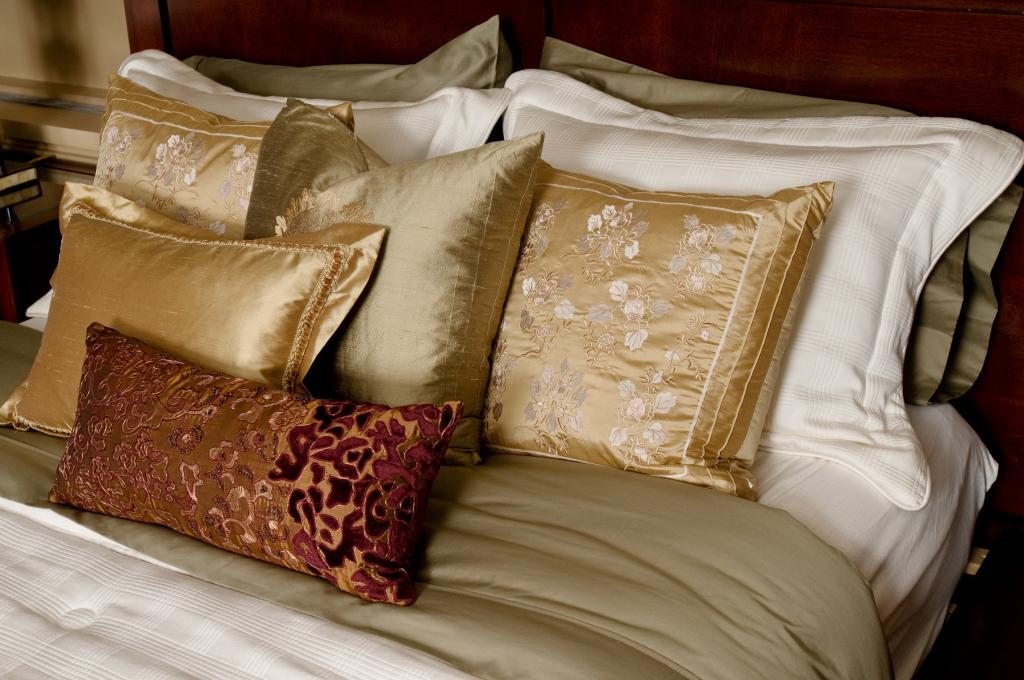
It’s time to decorate your bedroom, kids’ room, or living room with your new pillow.
Procedure for Sewing a Flanged Pillow Sham with Mitered Corners
Begin by acquiring all of the necessary tools and materials. Here are a few examples:
- Fabric for Flanges
- Fabric for pillows
- An 18-by-18-inch pillow form
- Machine for Sewing
- Iron
- Thread
- Pencil
- Pins
- Ruler
- Scissors
Tips:
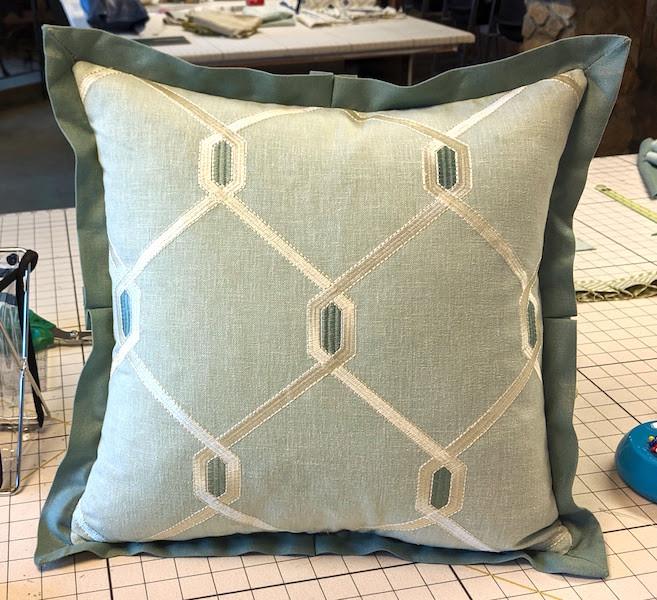
Before beginning the job, you should always measure your pillow to ensure a proper fit. An expertly mitered edge should have the appearance of a picture frame.
The pillow sham will not appear as good as you want it to if the pillow is discovered to be too tiny or large.
In addition, the dimensions provided here are the ones that we have used in our work. To meet your needs, you may need to increase or decrease the numbers.
In addition, it is usually best to use a sewing machine for this kind of delicate work.
Steps To Sew a Flanged Pillow Sham with Mitered Corners
Step 1: Cutting the Flange and Pillow Fabric
Xem thêm : How To Shorten Curtains Without Sewing? Complete Step-by-Step Guide
Lay out your cushion fabric on top of your workstation and begin sewing. Measure and mark a 19 x 19″ square on the cloth with a pencil and ruler, then remove the fabric and discard it. Make sure to measure out two 12 x 19″ rectangles for the back of the pillow as well.
After that, lay out the flange fabric on your work surface. Eight 3 x 24″ rectangles should be marked with a pencil and ruler.
Finally, using your scissors, cut out the shapes you’ve drawn on the two pieces of paper.
Step 2: Marking the Front Piece
Using the 19 x 19″ square front piece of the pillow, mark every corner one-half inch from the fabric’s edge on its wrong side.
Attaching the flange is made easier by the four dots you established before.
Step 3: Attaching Your Flange
Get the flange fabric and the pillow sham front that you cut before. The next step is to fold the flange in half and finger push to make a line on it. For each of the eight pieces, and for the pillow fabric, keep repeating this procedure.
Place the right-side-up front of the sham over your desk. Flange pieces with their incorrect sides facing up are then placed along the edge. As a result, the correct sides of the two pieces of fabric are now facing each other.
There are wrinkles in the center of the fabric that you made before. Pin the pieces of cloth together until they are perfectly aligned.
As you sew, make sure that the flange is positioned at the bottom. Using the dots you made in step two as a reference, begin and end your stitches at those points. Also, remember to preserve a half-inch seam allowance and to align your materials while stitching.
Continue this process until the flanges are fastened to all four sides.
Step 4: Making the Mitered Corners
The sham’s flange fabric will flutter and droop around the corners. The mitered corners are next on our list of things to do.
You can use the extra flange on one corner of the pillow front to make a triangle shape. Once you’ve done that, press hard enough to make a distinct line. Take care of the other flange in the same way.
Pin the two folds together so that their right sides are facing each other. Pins should be removed as you stitch, so don’t forget to remove them as you go along. If you’re not sure where the crease is, make a note of it using a pencil.
Keep a?” allowance while trimming the excess fabric.
Step 5: Folding the Seams on Your Back Pieces
Remove the pillow’s back pieces. Then, fold a 19-inch-long section of the cloth in half and iron it flat to finish the look.
Xem thêm : How To Sew A Lapped Zipper In A Pillow? A Step-by-Step Learning Guide
Make things easier on yourself by folding the paper a second time and ironing out the creases. When withdrawing or inserting the pillow form from the sham, it leaves a neat finish.
Before continuing, complete this step on both of the back pieces.
Step 6: Sewing the Seams and Assembling the Pieces
In step five, you made a fold by putting a straight stitch along the edges of the fold. They’ll go through the same process for the other 12 x 19 pieces of fabric Cut any excess threads after that.
Lay out the two back pieces with their right sides facing up on the work surface. Create a 19-inch square by overlapping the hemmed edges of the hemmed fabric. Sew the edges once they have been pinched.
It’s time to attach the rest of the flanges and do the same mitered corner thing you did on the front half. Steps three and four should be repeated.
Step 7: Sewing the Pillow Back and Front Together
Lay the back and front pieces together with their right sides facing each other. The edges should be firmly fastened. Get the excess fabric and thread clipped and begin sewing. Press the outer borders with an iron next.
Step 8: Inserting the Pillow Form
You’ve finished making your pillow sham. Insert the 18 x 18″ pillow form at this point. Finished with the adorning!
Tips for Sewing a Flanged Pillow Sham with Mitered Corners
Take your time while choosing your fabric. To make sewing and upkeep easier, go for a fabric like cotton that isn’t too heavy.
iron out the four flange pieces lengthwise in half, with the cut edges meeting, to make stitching easier for you
Before cutting through the fabric, you need to be aware of the dimensions. Before you begin cutting the fabric, take careful to double-check your measurements on each side of the pillow. Cutting and wasting a perfectly good material at random serves no use.
Despite the fact that we haven’t used pencils or chalks to mark the lines, you are more than welcome to do so if you prefer.
What is The Right Pillow Size for Making Mitered Corners?
Using miter joints, two pieces are beveled at a 45° angle to generate a 90° angle when they connect together. Mitered corners can be made on any cushion size. You can add it to any pillow or cushion in your bedroom or living area as a decorative feature.
How much fabric do you need for a sham?
It is essential that you plan ahead to ensure that you have adequate material for your hoax. A knife-edge sham requires one and a half yards of fabric, whereas a Euro sham requires two yards of fabric. If your pillowcase is embellished with ruffles or cords, you’ll need an extra two yards of fabric in addition to the knife-edge sham’s standard one-and-a-half yards of fabric.
Conclusion
A flanged pillow sham can be made in only nine steps, and you’ve just learned how!
Your hard work paid off in a beautiful home piece that you can give as a present or keep for yourself.
Nguồn: https://spasifikmag.com
Danh mục: Sewing Tips


