Creating custom-made curtains has never been easier than it is today. You’ve come to the right place! There’s nothing more gorgeous than a custom-made curtain with the correct fabric, the right size, and even the appropriate quantity of black! Make your own unique liner curtains in no time at all!
- How To Thread A Necchi Sewing Machine?
- How To Make A Sofa Slipcover Without Sewing? Things You’ll Need
- How Much Polyfill Do I Need For A Pillow? Perfect Information For You!
- How To Thread A Bernina Sewing Machine? Comprehensive Guide
- How Do I Fix The Timing On My Singer Sewing Machine At Home? Tips and Warnings
How To Line Curtains Without Sewing
Materials
The optimal type of fabric for a curtain is (I discovered my own from Tonic Living)
Your choice of blackout fabric or liner (again I discovered the one I needed in Tonic Living)
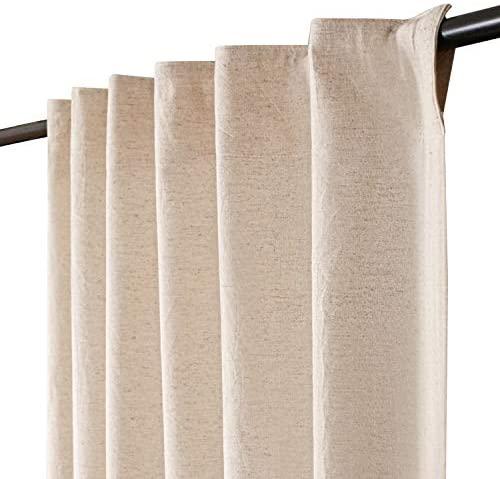
Curtain rings are the easiest and most practical way to attach tabs to rear grommets.
Step one: Cut the curtain fabric.
Determine how long you want each curtain to be before you begin sewing. Then, add another 10 inches. When you sew a hem to link it to the fabric lining, you’ll have a little extra fabric to work with. Measure out how long you want your curtain fabric to be, then cut it to that length. To keep things simple, I decided to use the curtain fabric’s width because it was large enough to cover my window.
Step two: Cut the lining.
A nice blackout lining is necessary since who doesn’t need it while they’re snoozing until noon? Are you dreaming? Ha!
In addition to blocking out light, this blackout liner from Tonic Living has the softest drape I’ve ever seen.
Add 2.5 inches to the finished panel length to account for the lining fabric.
After that, cut your fabric to a length that is six inches less than the actual length of the curtain material.
You’ll be left with the following:
Step three: Hem the bottom of the curtain fabric.
Xem thêm : How To Fix A Singer Sewing Machine Bobbin Case?
The bottom edge of your curtain fabric should be folded upwards by four inches, then ironed and folded again for another four inches before pressing again to achieve a neat finish.
To avoid pinning, I used an iron to run it all the way around the hem, but depending on the sort of cloth you’re working with, it may be essential to put the entire thing on top first.
Step four: Hem the bottom of your lining.
Next, fold the bottom border of your lining fabric up by 2 inches with the fabric left side up, iron, and fold it in another 2 inches before ironing it to secure it in place. Just like I did in my first attempt, I winged it and used the ironed edge of the fabric to sew it in place.
Step five: Attach the lining to the curtain fabric.
Put the fabric you’ll be using for your curtains face down. To do this, lay the lining fabric over the top of it, with the left side facing up, and raise the bottom of the curtain by 1.5 inches. The two sides must be aligned at all times. Here you are, my buddies.
If you look closely, you’ll notice that the curtain’s edges and lining aren’t precisely the same on both sides. It’s exactly what you want to happen. Then, using a 1/4″ seam, sew straight along the length of the fabric, being careful to match one side to the other.
Step six: Turn it right-side out and admire!
Once you have it laid out, pull on each side to get the same measurements on both sides of the curtain. Once you’ve finished, iron the cloth on both sides to create an exquisite, crisp edge.
Step seven: Miter the bottom corners.
This appears to be a much more difficult task than it actually is. Really. Once the curtain fabric is tucked in, all that is required is a simple stitch across the fabric to secure it. When tying the curtain, you can use a blind-stitch (sewing it through only one layer so that the threads don’t show up in front of the curtain), but I used my sewing machine to construct the ordinary stitch through all the layers and it was so simple that you wouldn’t even know it was there.
Step eight: Sew the top edge.
This top layer of fabric needs to be addressed. Once you’ve ironed the first inch of the top edge, fold it in another inch and iron it again. Make a 1/4-inch stitch along the entire edge of all of it (if desired).
Step nine: Prepare to hang.
In order to hang the whole thing, you’ll have to add a setting. You can add grommets like these, or even back-tabs like this, to your garments. Alternatively, you can go for the simplest solution by attaching them to basic rings, as I did. Not only is this the most practical and straightforward option, but it also makes closing and opening our heavy-lined curtains considerably simpler. As a matter of fact, these rings slide right along the rod!
Step ten: Hang your beautiful custom curtains!
In the event that your curtains have been completed and you are ready to hang them, now is the time to do so. It’s finally done!
Keep In Mind
So, you’ve learned how to make drapes without sewing, right?
Xem thêm : How to Hem Your Curtains Without Sewing? Step by Step Instructions
A common misconception is that all curtains must be lined.
Not at all.
Light and airy drapes are possible.
Prior to deciding whether or not to line your curtains, consider various things, such as the color of your curtains and the size of the windows, the time of year, and the general mood you want to create.
Does this only work with blackout fabric, or can I use something else?
Drop cloths are a fantastic alternative if you don’t want drapes that block off light. Because the cloth is strong enough to hold itself in place, this approach works well with blackout textiles.
Do I actually need to line my curtains?
No. It’s all about what you want your room to appear like and how the light penetrates it.
It’s A Wrap!
Remember that sewing a curtain liner using a sewing machine is time-consuming and tedious.
There is a lot of work involved here, and you’ll need to be patient.
However, I have full confidence in your abilities.
You might want to have a look at this post to get some inspiration going.
Please accept my best wishes.
Nguồn: https://spasifikmag.com
Danh mục: Sewing Tips


