Sewing with a sewing machine, whether for clothing or quilts, can be a time saver around the house. If you’re looking for a long-lasting and reasonably priced machine, a Kenmore is a good option. When it comes to sewing, you need to know how to load the bobbin with thread and insert it into your machine before you can use it. Filling and replacing bobbins on the Kenmore sewing machine is an easy task that can be completed in a matter of minutes.
How To Fill A Bobbin On A Kenmore Sewing Machine
Things You’ll Need
- Sewing machine model number
- Free online schematics or a manual for your specific model are both options.
As long as I can remember, Sears has been selling Kenmore sewing machines. The threading of the needle and the threading of the bobbin, two previously time-consuming operations, are now made easier by the inclusion of high-tech elements in today’s traditional machines. A lot of information on the Internet may show you how to use an older Kenmore sewing machine’s drop-in bobbin if you don’t have one of the more modern models.
Bạn đang xem: How To Fill and Thread An Old Sears Kenmore Sewing Machine? Step by Step Instructions
Step 1
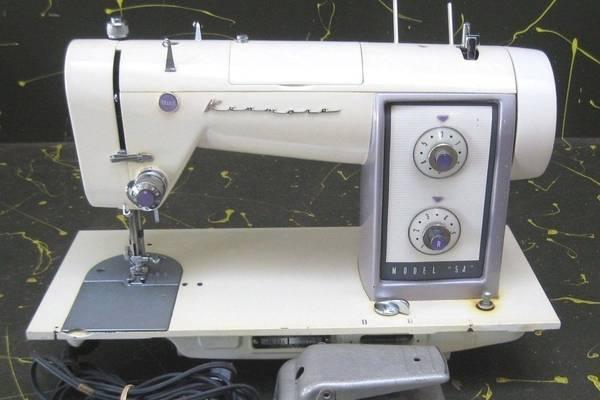
Find out the model number of your device. Bobbin threading might differ from sewing machine to sewing machine. The Kenmore model number typically is on the back of the machine, to the left of the stitch-width selector (in the area where the light is) or below the detachable machine bed. Typically, it has three digits and a dot, followed by four or more digits, as 385.1254180. These places are depicted in the Sewing Educational Warehouse, which may be found in the Resources section of this page. An online handbook can be purchased with the product model number or free diagrams such as how to properly thread a bobbin can be found at a site like Sew USA. The basic instructions for winding and threading the bobbin are the same for both the Kenmore 158.1340 and the Kenmore 158.1355 machines in the three-digit series.
Step 2
Xem thêm : How To Use A Double Needle On A Sewing Machine?
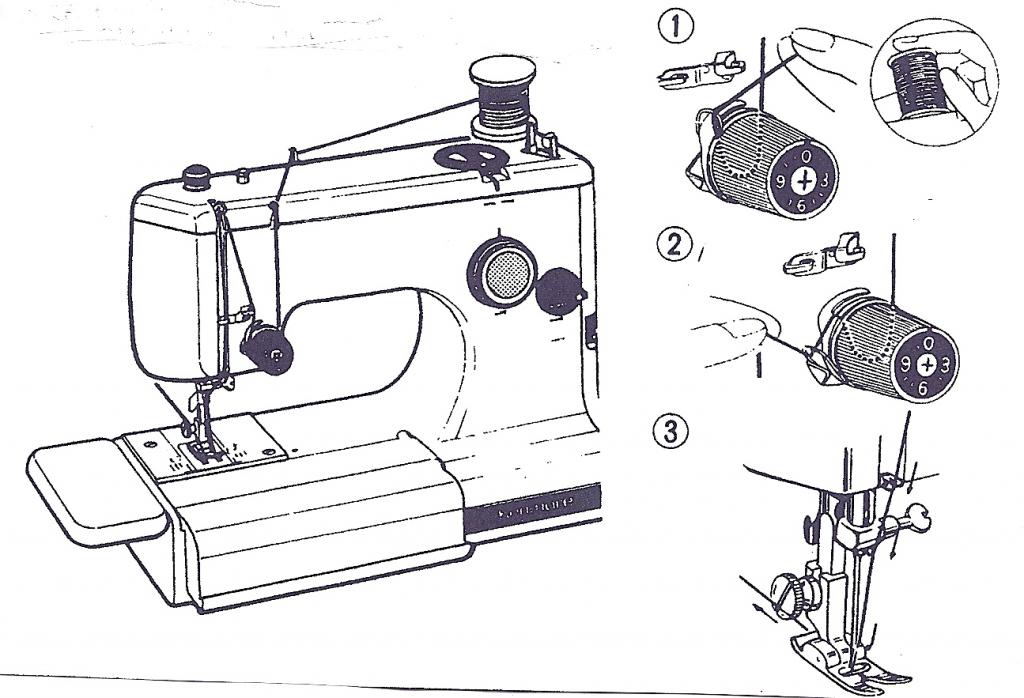
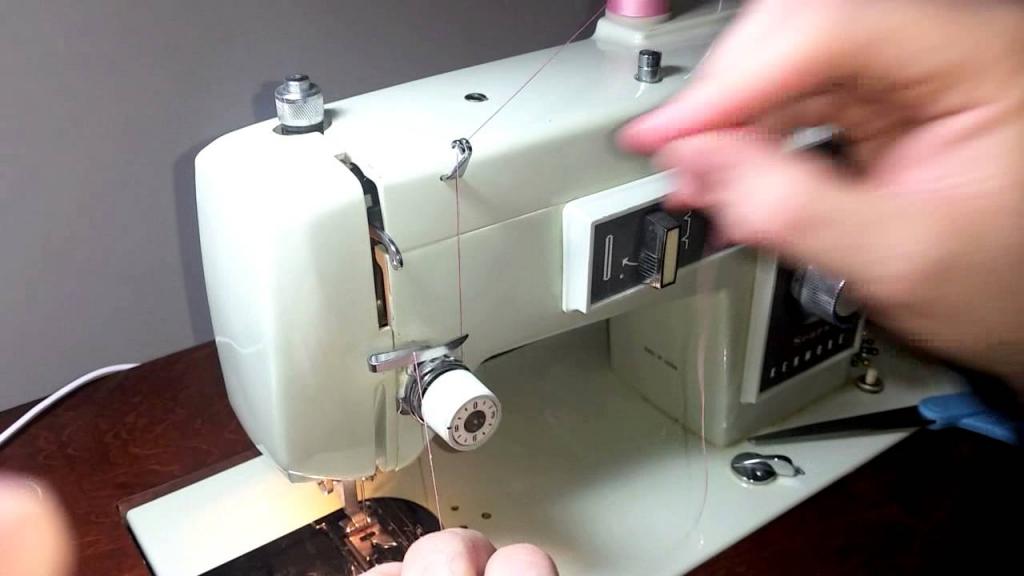
This is a general guide on how to thread the bobbin, if you can’t find the model number The bobbin and bobbin case are not accessible from the top, near the presser foot, on older Kenmore models, as mentioned in Step 1. To remove the extension table, slide it to the left and then turn the shuttle cover downwards toward yourself.. Afterwards, you can turn toward you to lift your needle out of your way by reversing the hand wheel.
Step 3
Lift the bobbin case out of the shuttle by squeezing the latch, then release the lock. The bobbin should be able to come out of the frame on its own. By sliding it in clockwise, wind a fresh threaded bobbin into a bobbin casing. Draw out roughly three to four inches of slack by feeding the thread through the case’s slot and pulling it beneath the tension spring.
Step 4
As you position the bobbin case into the shuttle, release the clasp to secure it in place. Depending on your model, you might have to slide the bobbin case along a spindle and align it with a groove before releasing the latch.
Step 5
As you position the bobbin case into the shuttle, release the clasp to secure it in place. Depending on your model, you might have to slide the bobbin case along a spindle and align it with a groove before releasing the latch.
Tip
Xem thêm : What Is The Best Industrial Sewing Machine? Which Is Best For You?
As you position the bobbin case into the shuttle, release the clasp to secure it in place. Depending on your model, you might have to slide the bobbin case down a spindle and align it with a groove before releasing the lock.
How Do You Thread An Old Sears Kenmore Sewing Machine?
When the bobbin case latch is open, insert the case into the shuttle and release it to secure it in place. A spindle and a groove could be required to align your bobbin case, depending on your model, before you release the lock.
- Take-up lever and presser foot lever should be raised.
- The thread spool should be placed on its pin, and the thread should be drew into the guide as illustrated in the manual
- Tension and check spring holder are surrounded by thread.
- Using the take-up lever, guide the thread up and through the spool.
- Thread the needle bar’s thread guide with the thread.
- Thread the needle eye from the front to rear.
- The bobbin thread can be picked up by lowering the presser foot lever.
- Hold the top thread lightly and turn the handwheel toward you.
- Bring the bobbin thread up by pulling the top thread.
- For at least four inches, pull both threads beneath and to the back of the presser foot.
Why Isn’t My Sewing Machine Catching The Bobbin Thread?
- If the bobbin winding spindle isn’t on the left, the needle won’t move, therefore check to see if the bobbin thread is placed on the left, and pick it up.
- Inspect to see if the needle and bobbin are in the correct position
- Use the correct tension and make sure the machine is threaded correctly.
Conclusion
To begin using your Kenmore sewing machine, make certain that it is threaded correctly from the top and bottom. Threading is a very simple technique, but it must be done with great care and attention to detail. As a side note, all Kenmore models follow the same basic directions, however there are a few minor changes between the models.
In addition to the several items listed above, there are numerous items that aren’t listed here since they aren’t relevant to the information on the website that Em is copying, which is why they won’t be able to replicate it at this time.
Nguồn: https://spasifikmag.com
Danh mục: Sewing Tips


