There are three stages you can take to learn how to change the foot on a Singer sewing machine. We’ll begin by properly prepping the machine and then removing and reinstalling the foot. You’ll also learn how to fix typical sewing machine presser foot problems.
Speaking of Singer sewing machine presser foot changes, you can also check out our blog for all things Singer. For example, we’ve talked about how to put thread on a Singer sewing machine’s bobbin. To make things even easier for you, all of our courses are based on actual Singer manuals, so you know they’ll work.
Bạn đang xem: How To Change Presser Foot On Singer Sewing Machine?
How To Change Presser Foot On Singer Sewing Machine?
The Singer sewing machine’s presser foot may be easily replaced. If you’ve never done it before or are just getting started, the steps outlined here are a great place to start. Go ahead and take a look!
Step 1
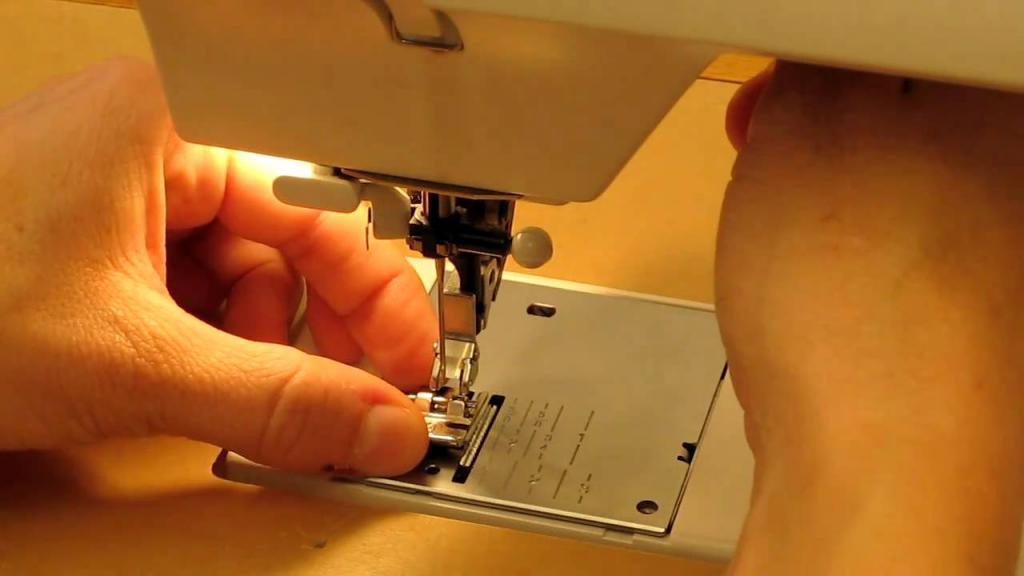
Position the sewing machine needle so that it is straight out of the machine. To accomplish so, you must turn the balance wheel in your direction.
Then, by sliding it up, see if you can free up the presser foot lever. Make careful you catch hold of the presser foot as soon as you release it.
Step 2
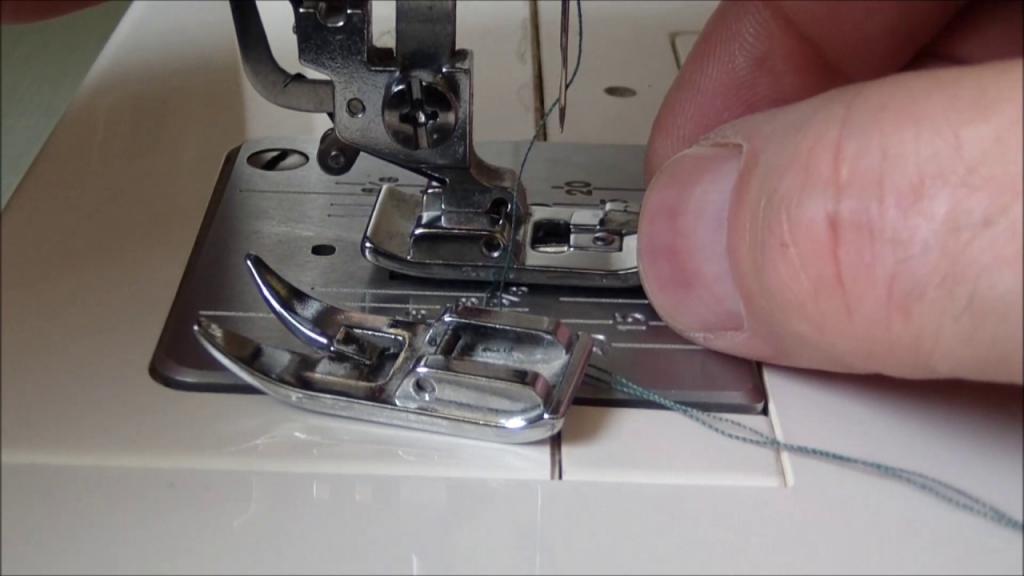
Slide the presser foot off of the sewing machine’s peg by lowering it. When removing the presser foot, take care not to damage the needle in the process.
Step 3
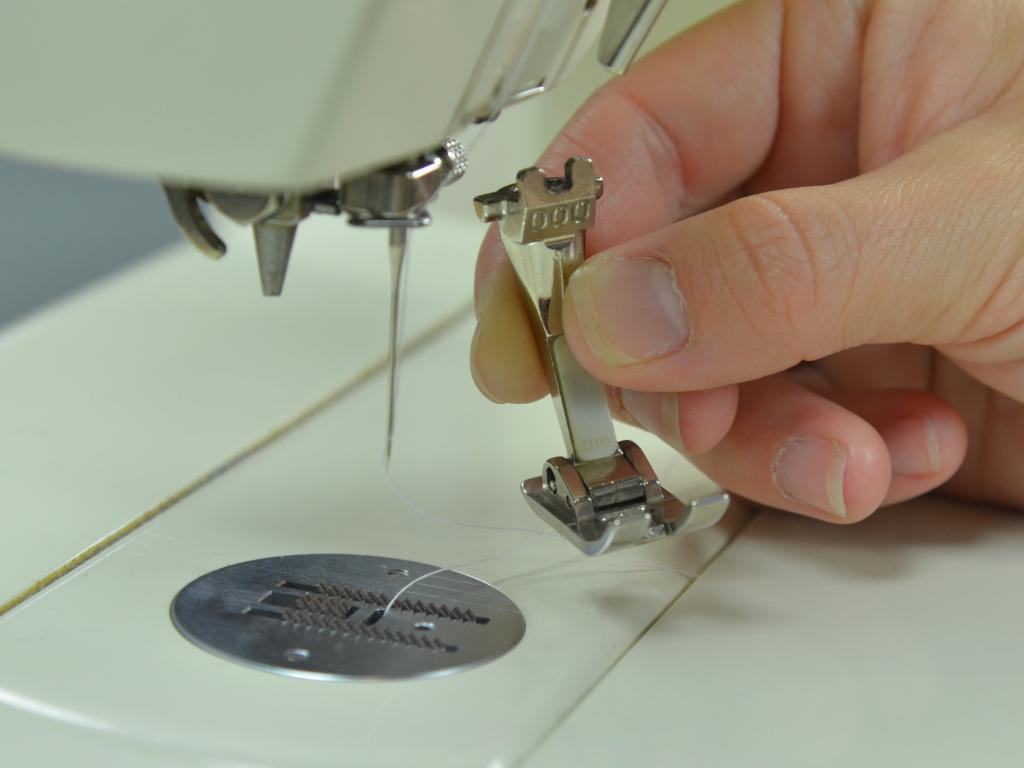
You take hold of the presser foot of your choice and place it foot-down on the floor. You must angle your foot in a specific way.
This will allow you to slide the peg on the sewing machine’s presser foot into the hole on the presser foot.
Step 4
Presser foot lever must be slid down so that the new foot may be locked in place. If you need to change the needle’s location, check the instructions first.
If the needle is not properly adjusted, it will strike the presser foot and snap during the sewing process.
Adjust The Height Of Presser Foot on Singer Sewing Machine
After learning how to change the presser foot, you also need to learn how to raise or lower the presser foot’s height. For the best and most precise stitches, this is one of the most important stages.
Let’s have a look at the instructions below to discover how to raise or lower the presser foot.
Step 1: Take the Singer sewing machine’s faceplate off.
It is important to remove the knob on the pressure foot to relieve the pressure on your foot.
Step 3: Lubricate the presser bar to which the foot is attached with a small amount of oil. You’ll be able to make quick and easy adjustments as a result of this.
Lift has the needle and the foot, as seen in this step. You should always lift the needle above the pressure foot when doing so. As a result of this, the feed dogs will be lowered and the presser foot will rest flat on the throat plate.
Xem thêm : How To Sew Cushions For Wicker Loveseat? A Few Tips to Remember
Adjust the height of the presser foot by loosening the clamp screw. Instead of 3/16 inch, you should use 5/16 inch because it is compatible with all of the fabric types.
You’ll need a piece of material to constantly verify that your measurements are right in order to reach the correct height in Step 6. Check to see that the presser bar lifter’s presser bar clamp is firmly in place.
Once the presser foot height is adjusted, align the foot and allow the needle enough room to pass through the presser foot’s toe. Step 7.
When the presser foot is at the correct height, you can tighten the clamp screw to secure it in place.
Step 9: Return the presser knob to its original location. Screw the dial until you see only three threads on the screw. This will substantially aid you.
Step 10: Replace the faceplate in its original location. Once you’ve made the necessary modifications, you’re ready to begin sewing or stitching.
Types Of Presser Feet For A Singer Sewing Machine
There are a wide variety of presser feet for the Singer sewing machine on the market. Each of these presser foot can be used for a variety of different tasks, and they all perform well. Here are a few examples of presser foot.
The all-purpose foot
Almost any type of sewing project can benefit from the all-purpose foot. A singer sewing machine’s most often used presser foot is this one.
There aren’t any work aids included, making it the most basic of sewing feet.
Sew-easy foot
The sew-easy foot makes it simple to stitch straight lines, regardless of the type of seam allowance required. A ruler and an adjustable guide are included in this foot’s package.
For topstitching, position the guide on a seam that has already been stitched. Place it against an edge if necessary.
Blind hem foot
Blind hems can be sewn onto clothing if you have the right foot by your side.
The only thing they all have in common is that they are all blind hem foot. Located on the front of the foot, this extension serves as a guide for the fold.
Overedge foot
Using the overedge foot, you may help complete a seam exactly at the edge of the seam allowance with ease. A little bridge on the foot aids in increasing the amount of thread used in each stitch.
Even feed foot
Dual-feed foot or walking foot is another term for the even feed foot. Like feed dogs, it aids in feeding the fabric to the stitching region for sewing.
This foot works perfectly with a singer sewing machine. It will keep corduroy and satin’s seams and layers in place, preventing them from shifting.
Pintuck foot
Xem thêm : How To Sew A Double-Sided Blanket? 7 Best Answers To FAQs!
Multiple grooves can be found on the pintuck foot. In order to stitch parallel rows, the tracks are located at the bottom of the foot.
Pintucking the fabric using twin needles and a pintuck foot results in a lovely surface texture.
Gathering foot
It’s easy to add fullness to soft and lightweight materials using the gathering foot on the Singer sewing machine.
How To Fix Presser Foot On Singer
If your machine is skipping stitches or the fabric is not stable, you may be using the wrong presser foot height. The good thing is that adjusting the foot is as simple as adjusting the clam screw. When the presser foot is lifted, a height of 5/16 inch is ideal for most textiles.
- Remove the Singer sewing machine’s faceplate and presser foot pressure knob.
- To see if the foot presser bar may be lubricated, consult your manual.
- In order for the needle and foot to be above the foot and the feed dogs to be lower, raise them.
- The throat plate should sit flat on the foot, so make sure of that!
- Adjust the presser foot height by loosening the clamp screw.
- Using fabric, measure the height and make any required adjustments.
- The clamp on the presser bar must be placed in opposition to the presser bar raiser.
- Ensure that the presser foot is properly aligned so that the needle can travel through it
- The pressure knob and faceplate should be returned when the clamp screw has been re-tightened.
When to adjust presser foot height
- When sewing, if the cloth is slipping, you may have set your presser foot too high.
- This could be a sign that your presser foot is too low.
- In this case, the machine skips stitches because the foot is set too high.
- When the presser foot is positioned too low, the fabric puckers and puckers.
- When working with heavier fabrics, raise your foot.
- When sewing with thin fabrics, lessen the foot pressure.
If this is a recurring problem, take a look at why is my sewing machine skipping stitches. Fabric puckering was also brought up as a possible cause.
Common Singer Sewing Machine Presser Foot Problems
- If the presser foot is too low, the cloth will not feed.
- Using the improper presser foot or applying incorrect pressure to the presser foot might cause the material to pucker.
- If the presser foot does not press down on the cloth, the machine will not sew in a straight line.
- To avoid problems with the stitches or the cloth, the presser foot must be firmly fastened.
Types Of Presser Foot
If your sewing machine comes with an all-purpose foot, you’ll also have rolled hem foot, blind hem foot, and zipper foot options to choose from. In addition to these, you can purchase other foot options including the overlock foot, buttonhole foot, Teflon foot, and gathering foot, all of which are handy for various types of sewing projects.
To avoid problems while sewing, make sure to always replace your machine’s presser foot in accordance with the job.
Can You Lessen The Pressure Within The Singer Sewing Machine?
The procedure for reducing the pressure is straightforward and hassle-free. Lowering the lever just behind the presser bar may be of assistance.
The presser foot will be lowered as a result. To lower the overall height of the presser, you must remove the presser foot’s pressure from the clamp screw.
The presser foot can then be raised or lowered in accordance with the material and requirements. Use scrap fabric or stuff to ensure that you’ve got what you’re looking for.
Why Do You Need To Change The Presser Foot Of The Singer Sewing Machine?
Change the presser foot to create a variety of stitches for different sewing projects. Changing your sewing machine’s presser foot opens up a world of possibilities for customizing your work.
All of your sewing-related tasks will become much more exact as a result of learning how to sew on zippers. Sewing problems can be resolved by changing the presser foot in the proper manner.
The presser foot may fail to work as expected on occasion. When this happens, the only thing you can do is switch the presser foot. Replace it with a fresh one after that.
In order to stitch buttons, ruffles, and zippers, your singer sewing machine may need a special foot. As a result, a new foot will be required.
Conclusion
The article was helpful, right? Changing a presser foot on a Singer sewing machine is as simple as releasing the lever, placing the new foot on the machine, and lowering the lever back to its original position. However, be sure to check the height of your presser foot at all times when sewing to avoid problems.
We sincerely hope everything was clear. We’d love to hear from you if you have any questions.
Nguồn: https://spasifikmag.com
Danh mục: Sewing Tips


