To be able to see, you need light. When sewing machine models are used, the light bulbs are shattered and the lights are damaged. Depending on the model, you may need to follow particular instructions for replacing the bulb. Lighting fixtures may not be installed in an ideal location.
On how to replace the sewing machine’s light bulb Some tools may be required to change the light bulb on a Singer sewing machine. The plastic tube you need to hold the bulb in the bulb securely is the primary instrument of choice for the featherweight. As a result, it’s a matter of twist and pull.
Bạn đang xem: How To Change Light Bulb In Singer Sewing Machine?
Continue reading this post to find out everything you need to know about replacing the light bulb in a Singer sewing machine. In just a few minutes, you’ll be able to replace the light bulb in your Singer sewing machine after reading this short guide.
Singer Sewing Machine Bulb Change Tips
To begin, keep in mind that the great majority of Singer light fixtures do not use screw-in type bulbs. Changing a sewing machine’s bulb is a regular blunder for individuals who have never done it before.
It’s important to realize that Singer lamps come in a variety of shapes and sizes. In this case, a single size will not fit all of them. When replacing the bulbs, do not use your fingers to do so. bulbs. Because of the oil on your fingers, the replacement bulb may be more prone to breaking than normal.
And lastly, an LED sewing machine light bulb can be used to replace an incandescent incandescent. To use an LED replacement bulb, all you have to do is consult a chart to find the right one.
Lastly, if the region is small, avoid touching it with your hands. You can push and turn the light bulb using a plastic tube or a hard but gentle longhandle tool. It’s important to remember to unplug your sewing machine from the power supply, as well. If you’re not paying attention, you run the risk of getting a shock.
To make your task easier and more secure, loosening up the light assembly is a great way to provide the user more room. If the light bulb has been hidden inside the machine for a long time and you’re working on an older machine, be cautious when removing the light bulb. Take care. The light bulb is prone to breakage due to its brittleness and brittleness. Be aware of your surroundings and adhere to the safety measures in place.
Singer Sewing Machine Light Bulb Type
Several Singer sewing machine models are thought to have been produced over the years by the Singer sewing machine manufacturer. There are a variety of designs to choose from, allowing the user to make their own clothes.
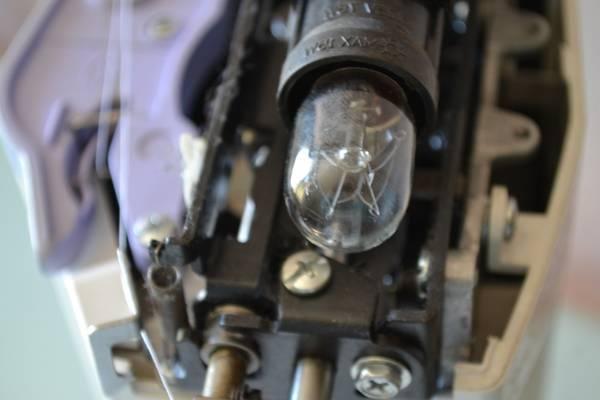
There does not appear to be much of a shift in one thing, however. A single screw-in bulb is offered from Singer, but the bulk of their bulbs require only a simple push and turn. It has two knobs on the base of the bulb to keep it in place.
A metal guide must be cleared by pushing these bulbs down and then rotating them leftwards so that they are in the correct position. Allow the light bulb to expand into its proper position after releasing your pressure.
One thing to keep in mind is that the sewing machine bulb you purchase is made specifically for a specific Singer model. This design does not guarantee that the bulb will be compatible with all sewing machines of the same series.. Specifically for this paradigm, there is one such case that comes to mind. A set of 14SH654
Using this light bulb on other sewing machines from the SH series will not work. Each bulb must be checked to see if it is suitable.
Singer Featherweight Sewing Machine Bulb
Light bulbs used in Singer featherweight sewing machines have a basic push-and-turn mechanism that makes them energy efficient. Because of this, it can be difficult to access the bulb assembly and subsequently remove the bulb that was previously in place.
A fantastic box cutter (or equivalent) and an aluminum tube can be used to implement this technique. Rotate the sewing machine toward the handwheel for the best access. When you’re sitting in this position, it becomes easier to see exactly what you’re doing.
Use a 3- to 4-inch-long plastic tube with an inner diameter of 3/4 inch to keep your fingertips safe. Slit the tubing 1/4-1/2 inch wide at both ends after it has been cut to length using a knife.
The slots make it easier for the tube to expand and slide across the glass of the bulb. The tube should be pressed down into the light bulb after it is positioned over it. The knobs can now be removed by turning them counterclockwise.
When you remove the bulb from the top of the tube, keep the tube on top of the bulb. Afterwards, re-install the tube on top of the newly installed bulb and carry out the previous step in reverse. You’re done when you turn the machine up all the way.
Singer Futura Sewing Machine Bulb
The Singer Sewing Machine model has gotten a lot of good press. The first option is to use the bulb’s twist-and-push mechanism. This makes replacing bulbs a cinch to do.
LED-compatible bulbs are also available, ensuring that you won’t have to make the switch again in the near future. The downside is that there are lots of various Futura sewing machines that are part of this line.
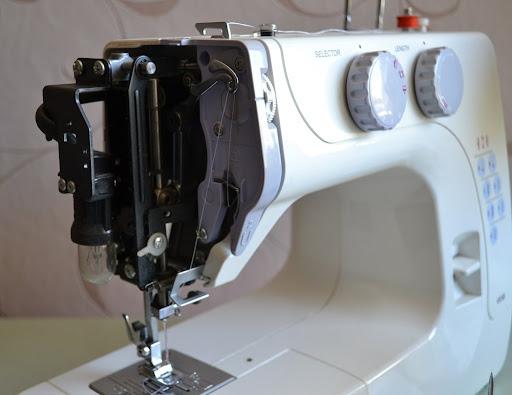
In this part, we’ll walk you through the process of changing the lights’ bulbs, as described in the XL 400’s user manual. The lamp bracket must be lowered in order to remove the old light bulb. With your forefinger and thumb, just pull the tab.
It’s as simple as turning the light bulb till it pops out once it’s been lowered into place. Remove it at your own risk. The technique can be reversed if you choose to use a fresh bulb. The light bracket can then be moved up until it clicks into place. You can resume stitching as soon as you hear the click.
To view all of the Futura’s owner’s manuals, go to this page and click on the link. Enter your serial number into the search box and then press the button for additional models. To get to the relevant page, simply click this link.
Old Singer Sewing Machine Light Bulb
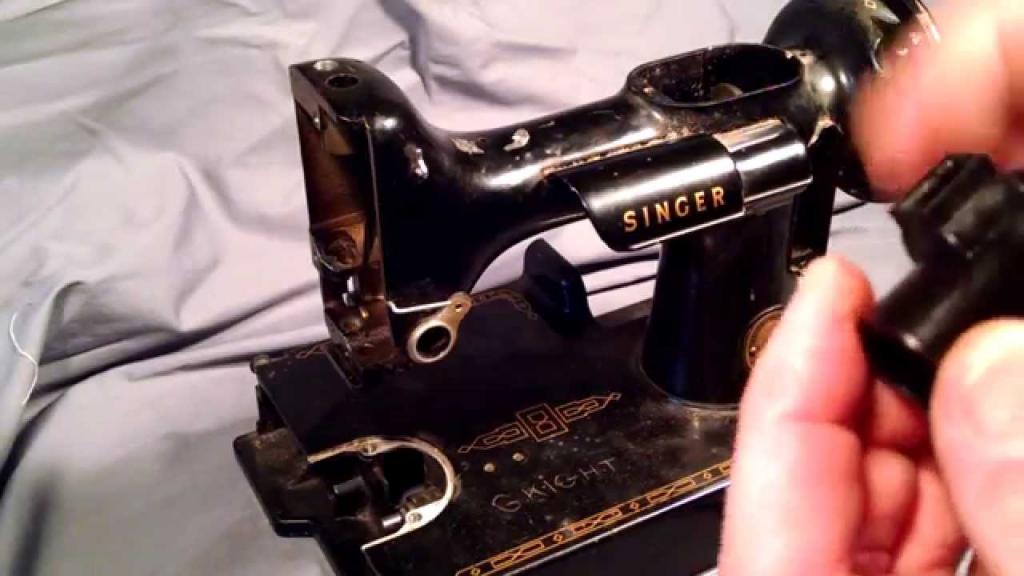
Lighting bulbs put on ancient Singer sewing machines can date back to when Thomas Edison was still alive. In order to remove the bulb, you will need to be particularly careful.
Breaking the glass is really easy because it is so pliable. As a result of the lack of safety gear, a few people have had their fingers cut. To begin, make sure your device is turned off. When people don’t follow this procedure, they’re more likely to get a mild electric shock.
A loosening of the light fixture could be necessary in order for you to access the bulb more easily. If the light bulb isn’t stuck in the fixture after a long period, you can gently turn it out of the way to take it out.
Some, if not all, of the older Singers use screw-in types (series 99 and 185, and earlier models). You must push and simultaneously if it isn’t rotating. Afterwards, fix the cloth or plastic instrument to the glass using whatever method works best for you. Remove the lightbulb from the socket.
Sewing Machine Bulb Keeps Blowing
Sewing machine light bulbs frequently fail because sewing machine manufacturers outsource their production to countries with lower quality requirements.
Sewing machine light bulbs are made of low-quality materials and will not last long. Because the bulb is not properly positioned inside the socket, an arc develops, blowing it out into the socket and shortening its lifespan.
To address the problem, make sure the connection is safe by checking it twice.
Do All Sewing Machines Use The Same Light Bulb?
Light bulbs on sewing machines vary, as you might anticipate given the wide variety of models. Remember to check your unit’s handbook to find out what type of bulb it uses so you can replace it with one that works.
Even if you try to use an incompatible light bulb, the machine will reject it. Make careful to take your machine to the dealer if you have any problems after changing the bulb.
When shopping for a sewing machine, it’s a good idea to go for a model that has LED lighting. As a result, you’ll be able to use your sewing light for a long time before it needs to be replaced.
What Size Is A Sewing Machine Light Bulb?
There is no standard size for sewing machine light bulbs. However, certain Singer sewing machines employ a 15-watt bayonet base light bulb that merely requires you to press and twist to affix it.
How do I fix the light on my sewing machine?
The light bulb in your sewing machine can be readily replaced if it no longer turns on and illuminates your stitching area. A new bulb may not have fixed the problem, so you may need to check the sewing machine’s on/off switch or the bulb may have been wrongly inserted.
The 11 Best Sewing Machine Lights 2022
The Tohoer Magnetic Mult-Task LED Light
You won’t have to worry about your concentration slipping away since the Tohoer Magnetic Mult-Task LED Light features 33 high-quality LEDs that reduce eye fatigue while you work and don’t pulsate or flash.
The light can be moved about with ease because to the goose neck’s adaptability.
The bulb lasts for 50000 hours on a single charge and uses only 6 watts of power.
Xem thêm : How To Thread A Bernina Sewing Machine? Comprehensive Guide
Additionally, it includes a magnetic base, a 12-month money-back guarantee, and a reasonable price point.
Visit Amazon.com to See the Current Price.
Xem thêm : What Are The Types Of Sewing Machines? How To Buy A Sewing Machine?
On Amazon Canada, you can see the current price.
The Gold Star Hi-Performance Sewing Light
Working on your sewing tasks will be easier with this lamp’s natural light, which is provided by its 50 LED bulbs.
Unlike other bulbs, this one is 99 percent efficient and can last up to 60000 hours.
A two-level brightness control and a 30-inch gooseneck with a spinning head make it simple to direct the light in the desired location.
For sewing and crafting, this is a great light that can be attached to your sewing platform.
Visit Amazon.com to See the Current Price.
Xem thêm : What Are The Types Of Sewing Machines? How To Buy A Sewing Machine?
On Amazon Canada, you can see the current price.
Bonlux Sewing Machine Light 2W30LED Lamp
With a strong magnet and an easy-to-use on/off button, this light will stay where you placed it.
It’s simple to position the light where you want it thanks to its flexible arm.
You won’t get tired eyes from staring at the bright light, which is focused on your workspace and features 30 LED lights.
If your sewing machine doesn’t have a metal foundation, you can glue a flat washer to the machine and then attach the lamp’s base to it.
I’d recommend this to anyone looking for a powerful 30 LED light.
Visit Amazon.com to See the Current Price.
Xem thêm : What Are The Types Of Sewing Machines? How To Buy A Sewing Machine?
On Amazon Canada, you can see the current price.
Mighty Bright 64602 Sewng Machine LED Light
You may connect this light to any surface of your sewing machine using a unique adhesive base.
The LED light may be shifted between the two bases, which are included with the set.
Cordless, the Mighty Bright can run for 8 hours on a single charge, and its LED bulbs will last 100,000 hours, so you won’t have to replace them for a while.
For the price, it’s a great deal, with an adjustable 5.5-inch bending neck that allows you to shine light on your threads and materials.
Visit Amazon.com to See the Current Price.
Xem thêm : What Are The Types Of Sewing Machines? How To Buy A Sewing Machine?
On Amazon Canada, you can see the current price.
The Stalwart 75-WL2019 Lamp
This lamp is lightweight and may be taken anywhere, however the batteries must be purchased separately.
It comes with two bases, both of which have a magnetic button and sides that are 5 1/4 inches in length, as well as two magnets.
The LED lamp at the end of the adjustable gooseneck measures 2 1/4 inches in length.
You may want to have a look at this LED light because it will last longer than any other type of light.
Visit Amazon.com to See the Current Price.
Xem thêm : What Are The Types Of Sewing Machines? How To Buy A Sewing Machine?
On Amazon Canada, you can see the current price.
LudoPam LED Sewing Machine Light
This LED light is so bright that stitching will be a lot easier for your eyes because to its brightness.
It has a magnetic base, a 7-inch-long adjustable arm with a 3.24-inch-long light fixture at the end, and a 6-foot chord for powering it up.
When you use the LED on your power bill, you will save 90% of your energy costs.
For those seeking for an LED sewing light, this might be worth a shot. It can be used in any situation where you require a bright sewing light.
Visit Amazon.com to See the Current Price.
Xem thêm : What Are The Types Of Sewing Machines? How To Buy A Sewing Machine?
On Amazon Canada, you can see the current price.
EVISWIY Sewing Machine Light
The 30 LEDs in this extremely bright light ensure that it won’t cause any harm to your eyes as you sew.
It will need to be replaced after 50,000 hours if it is still functioning properly.
It has a strong magnetic base, and the on/off switch is positioned on the base of it.
In addition to the 8-inch goose-neck, the plug-in cord is 4 feet 6 inches long, and it comes with a 12-month warranty.
This lamp isn’t terribly expensive, and it may be used for reading, as well as for any shop operation that requires more light.
Visit Amazon.com to See the Current Price.
Xem thêm : What Are The Types Of Sewing Machines? How To Buy A Sewing Machine?
On Amazon Canada, you can see the current price.
Fancii Daylight LED Clamp Magnifying Lamp Rechargeable
This magnifying light has an LED ring around it, which emits a cool white light that is easy on the eyes.
To support the light, the goose neck is 13.5 inches long and has a hefty base.
This lamp is ideal for threading needles and doing other dot and craft projects.
For simplicity, the on/off button is positioned on top of the goose neck near the lens, and the plug-in cord is 5 feet long, so you won’t have to replace the bulb.
You might want to check out the light, which is highly recommended by craftsmen.
Visit Amazon.com to See the Current Price.
Xem thêm : What Are The Types Of Sewing Machines? How To Buy A Sewing Machine?
On Amazon Canada, you can see the current price.
HengBo Sewing Machine Light
An 11.8-inch LED strip with 18 LEDs is included in this sewing machine light; it’s flexible and can be attached to your sewing machine.
With a touch dimmer that always comes on at the last setting you had it at and can be adjusted in brightness by pressing for 2 or 3 seconds, it generates a strong white light.
The 6.6-foot power cord features sticky clips to keep it out of the way, and a USB plug adaptor is included on the power cord.
To utilize these light strips under cupboards, all you have to do is pull the tape off and stick them there.
You can’t go wrong with LED strips in your sewing projects.
Visit Amazon.com to See the Current Price.
Xem thêm : What Are The Types Of Sewing Machines? How To Buy A Sewing Machine?
On Amazon Canada, you can see the current price.
LED Sewing Machine Light by Daylight Company Naturalight
The lamp may be mounted to your sewing machine with the included self-adhesive stickers, making it easy to direct the light where you need it.
Daylight LEDs provide strong contrast and exact color matching, allowing you to work on your sewing tasks for long periods of time without tiring, and allowing you to notice more fine details in your work.
There will never be a need to replace the LEDs in this lamp, and it consumes extremely little energy.
Visit Amazon.com to See the Current Price.
Xem thêm : What Are The Types Of Sewing Machines? How To Buy A Sewing Machine?
On Amazon Canada, you can see the current price.
Bendable Bright Light Kit
It is bright enough to allow you to work for lengthy periods of time on your sewing projects, even if you enjoy doing so.
With a brightness of 90 lumens, this sewing light is ideal for lighting up your workspace. It is simple to install thanks to the included chord clips and glue, and the cord itself measures 8 feet in length.
When it comes to lighting your sewing space, the Bendable Bright Light Kit is a great option.
This lamp has received a lot of positive feedback, so it should be easy to find some.
Razon Sewing Machine LED Light
An LED light strip is used to create this illumination, and it is attached to the machine via double-sided tape. Even though installing it can be challenging since you want to ensure that the strip is placed precisely where it should be, you will have no problems and enjoy using it after you do.
In spite of its high color temperature of 6500K, the Razon Sewing Machine LED light provides enough brightness to keep you going for long periods of time.
With the dimmer switch, you may control the intensity of light in your room to meet your specific requirements.
FAQ
What size is a sewing machine light bulb?
Screw-In, 7/16′′ Base, 120 Volts, 15 Watts.
What Lamp Should I Buy For My Sewing Machine?
You won’t have any trouble finding the proper lamp for your sewing machine because most lamps for sewing machines are compatible with the majority of sewing machines.
Make sure that the lamp features are compatible with your sewing machine and that you know if you want to illuminate simply the sewing machine region or the entire sewing area.
Where to attach the Sewing Machine Lamp?
Some lamps will be attached to the side of the sewing machine and some others need to be attached on the sewing machine, the importance here is to get the lamp that will give you the proper light on the area you need it.
The most important thing here is to acquire the right light for the area you’re working in.
When stitching, additional lamps must be used that have goosenecks that point directly at the needle.
How often do you need to get a new Sewing Machine Lamp?
The majority of lamps (lights) on the market are manufactured of high-quality materials, which indicates that they will survive for a long time.
For this topic, you need to know how frequently you use your sewing machine. If you only sew a few times a year, any lamp will last for years, but if you sew frequently and for extended periods of time, you may need to buy a new lamp or simply swap the bulbs on your current lamp.
Conclusion
That’s it! You’ve just learned how to replace the light bulb on Singer sewing machines by removing the faceplate.
You’ll then remove the old bulb and replace it with the new one. When it comes to bulb type, you should examine your specific model’s instruction booklet.
If you have any questions or comments, please feel free to express them in the comments box below.
Nguồn: https://spasifikmag.com
Danh mục: Sewing Tips


