You need to get your needle in the right spot during stitching. It will protect your sewing machine and your project from damage by ensuring that the stitches are placed correctly on your fabric and on your sewing machine.
A sewing machine’s needle-changing procedure is straightforward. However, the needle must be inserted into a machine. You must ensure that the needle is not damaged during the procedure. You’ll be able to sew safely and effectively with this set-up.
Bạn đang xem: How To Change A Sewing Machine Needle? Choose The Right Needle For Your Project
Choose the right needle for your project
Different needles are needed for various textiles. Choosing the right needle for your sewing machine and the cloth you’re working with is critical to the finished product. For those in doubt, use a universal needle, which is designed to work with a wide range of materials and is widely available.
Ball point needle
In addition to knits and polyester/cotton blends, this can be done.
Sharps needle
Quilting and heavier materials necessitate the use of needles that are specifically designed to increase strength and puncture force.
Quilting needle
It’s used in quilting, where there are numerous wadding layers, but it’s shorter than the sharps needle. When sewing at high rates, this ensures a more consistent stitch.
Leather needle
Suede and leather are no match for this shoe.
Stretch needle
Using a stretch needle is recommended when working with materials that tend to gather and gather. your most trusted companion.
Jeans needle
Because of its super-sharp and reinforced shank, it is able to handle denim that is extremely thick without breaking. sewn point of view
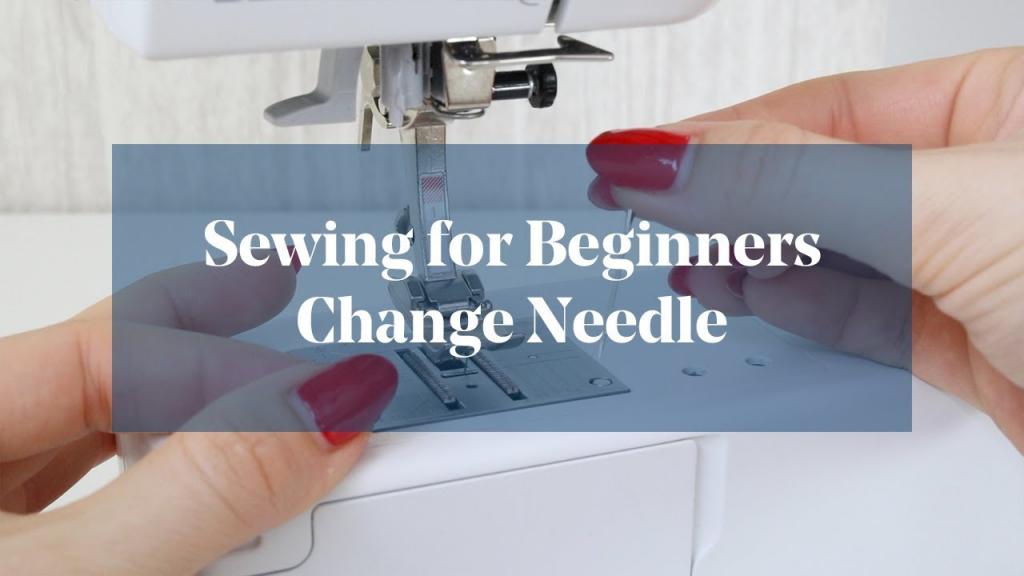
How to Change A Sewing Machine Needle
1. Removing the Old Sewing Machine Needle
Shut off your computer or other device before continuing (for your security). I use my sewing machines to improve the brightness and quality of the images in the photos.
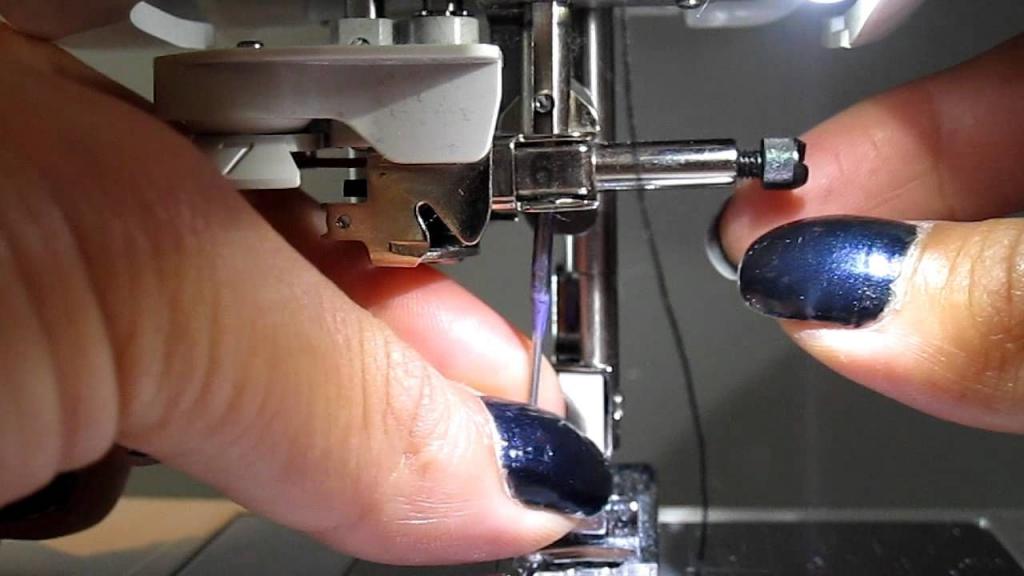
A sewing machine’s needle can be removed by unscrewing it. The needle clamp’s screw must be loosened first. The needle clamp secures the needle in its insertion point. Right next to the needle clamp, there should be a little screw.
Xem thêm : How To Pre-wash Fabric For Sewing?
The screw loosens in different ways depending on the model of your sewing machine. The needle-clamping screw on my Singer heavy-duty sewing machine is readily twisted with a hand. To loosen the screw, either clockwise or counterclockwise turn it. In case the needle comes off, use your other hand to keep it in place.
When the needle-clamping screw on my Brother sewing machine is tightened, it cannot be released by hand. To loosen the needle, I turn this screw counterclockwise toward me with my flat-head screwdriver.
The needle clamp screw does not need to be overly tightened. The needle should be able to move freely with just a small amount of pressure.
Remove the needle by holding it at an angle between your pointer finger and thumb. To make more room for your fingers to pivot the needle, it can be easier to remove the presser foot at the same time as the needle.
Pay attention to the needle’s shank and whether or not the flat side of the needle is facing forward or backward. In most sewing machines I’ve dealt with, the flat side of the needle is pointing towards me from behind to the back of the sewing machine. Flat and round sides are seen in this fast sketch.
2. How to Put the Needle in a Sewing Machine
Three ways to insert a needle into a sewing machine exist. Then I’ll show you the way.
Inserting The Needle Using Your Fingers
To begin, slide the needle higher with your fingertips before inserting it into the screw clamp for needle replacement. Make sure that you’ve pulled the needle all the way up and that the flat portion of the needle is facing backwards.
 Then, turn the screw clockwise to tighten it. Make sure the screw is as secure as you can make it. A stray needle can lead to a host of problems!
Inserting Using a Clearance Plate
Clearance plates are another alternative for inserting the needle. The Singer 4452 sewing machine came with this helpful accessory.
To get clearance, you need to put your needle on the transparent plate. By looking at the plate, you will be able to tell which side is the flat side and which is the round side. Fits perfectly in the dish with ease.
While making sure the needle (and therefore the clearance plate) are facing the correct way, insert plate into sewing area and move the needle’s top into the clamp for the needle. Insert plate. This can be seen in the image to the right.
Pull the needle all the way to the top of the clamp when you’ve got it in there. There will be very little of the needle’s top sticking out once it’s been inserted into the fabric.
Once the needle is fully placed into the clamp, tighten the needle screws by turning them in a counterclockwise direction.
Xem thêm : How Much Polyfill Do I Need For A Pillow? Perfect Information For You!
To use them, you first insert the needle into a special inserter, then insert the needle into its clamp.
3. Setting Up to Sew After a Needle Change
Replace the foot of your presser if you accidentally removed it.
In the event that your machine has an auto-needle threader, be certain that your needle is positioned correctly so that it can be threaded through the eye of the machine. If not, refer to your sewing machine’s handbook for instructions on how to thread the needle.
It’s done! Singer and Brother sewing machines can now be operated with a needle switch. Eventually, you’ll have muscle memory of the technique!
Steps on How to Change Sewing Machine Needle:
Dislodging a Needle
- To use this instrument, place the needle’s tip into the needle-insertion hole.
- Pull it back across the needle and stitch it again.
- To begin, loosen the screw on the needle using your screwdriver.
- Then use your hands to loosen it the rest of the way until the screw comes out.
Replacing the Needle
- In order to replace the Needle,
- It’s up to you to see how far you can go.
- With your fingertips, close the space.
- Turn the screwdriver a quarter turn.
- Remove the needle from the tool.
How Do You Change A Needle On A Singer Sewing Machine?
- Learn how to use your Singer Sewing machine by reading the instruction manual.
- Make sure your Singer sewing machine is off for your own safety.
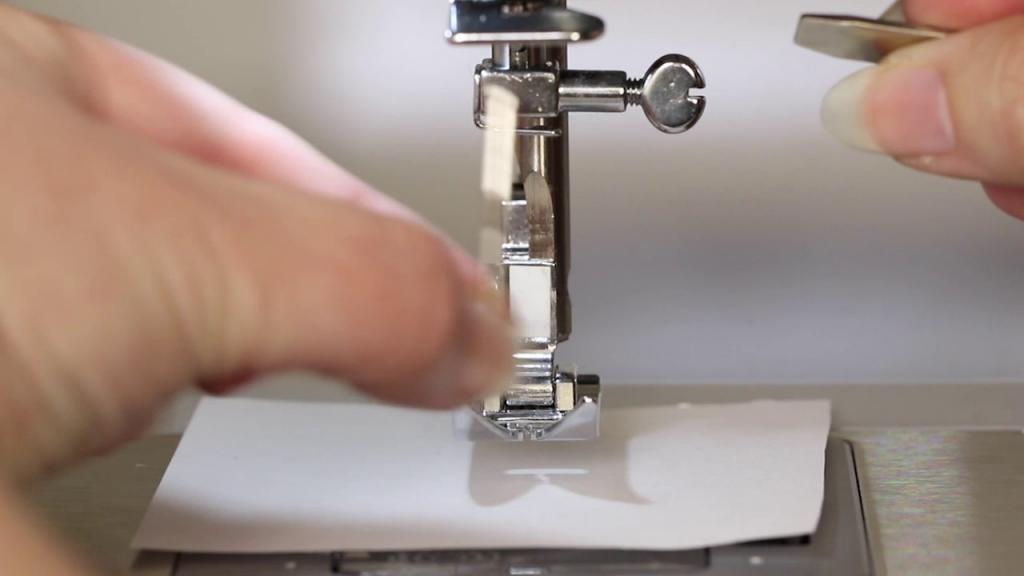
- A sheet of paper should be placed on top of a lever on the presser foot to lift the presser foot and cover the needle plate’s gap.
- To prevent your needle from falling into the machine as you remove it, place a piece of paper over the hole for the needle plate.
- The handwheel should be spun toward you until the needle reaches its highest point, which is normally marked on the machine.
- Because the needle is high, it will be easier to remove and reinstall it.
- Your left hand should be used first, then your right hand.
- If you’re having trouble rotating the screw on the needle, another option is to use a screwdriver.
- Make a new needle by removing the old one.
- Make certain that the needle’s tip faces the side of the sewing machine while inserting it.
- To secure a needle, insert it into the clamp for them.
- It will be obvious that your needle has been smashed against the stopper, which signifies that the needle is in place.
- Tighten the screw counter-clockwise with your other hand while holding the needle in your left hand.
- A screwdriver can be used to tighten the screw so that it remains in position, but be careful not to overtighten it, should it harm the sewing machine.
How Should A Sewing Machine Needle Be Placed In A Machine?
Needle placement on sewing machine should be done with its flat side facing outward. You’ll get a needle that’s slightly to the right if you don’t put it in your sewing machine correctly. This indicates that the machine won’t be able to stitch since the hook can’t get to the thread loop.
A sewing machine’s inner workings are described in detail here. You’ll benefit from this because you’ll understand how the machine stitches. Additionally, you’ll learn how to use the needle and how to set it up.
How Do You Loosen A Set Screw Needle?
While releasing the screw on your sewing machine to position the needle is a straightforward task, it can become challenging if it becomes stuck. Using the correct needle, placing it correctly, and, of course, reading your sewing machine’s manual can all help you avoid issues like this. Set screw needles can get caught, therefore we’ll teach you how to loosen them:
- You should grip the needle with your left hand and then use the screwdriver that came with your sewing machine.
- For example, Brother sewing machines include an oval screwdriver that twists the screw that holds the needle in place.
- Pull the needle out after releasing the screw in a counterclockwise direction.
- A straight screwdriver can also be used if a Phillips head screwdriver would not loosen the screw.
- Make sure to turn the needle clamp screw counterclockwise to loosen and clockwise to tighten.
How Often Should I Change My Sewing Machine Needle?
Changing your sewing machine’s needle after each completed job is possible, especially if you’ve worked with materials that wear out needles, such as leather and fleece. The needle of your sewing machine can be changed after you have used two pre-wound bobbins, or you have tallied three bobbins on your machine. Replace the needle in your sewing machine every eight hours if you’re quilting.
Conclusion
That concludes our discussion. You simply need to be able to secure the sewing machine to guarantee that the needle does not fall for an overview of how to change a sewing machine needle. To secure the needle, use an insertion tool and turn the screws counterclockwise. Every time you finish three bobbins full, repeat this simple practice.
Is there anything more you’d like to know about sewing machines? Visit our blog to learn more about the many machine brands that we carry. Where can I buy an Eversewn Sewing machine? for example
Nguồn: https://spasifikmag.com
Danh mục: Sewing Tips


