Here are the two methods to threading a Simplicity sewing machine. Begin with the top thread and work your way down to the bobbin.
Winding and inserting bobbins will also be covered. If you’re not following the instructions in the Simplicity manual, we can help.
Bạn đang xem: How To Thread A Simplicity Sewing Machine?
Is this something you’d like to do? If you’d like to learn how to thread a Smartek Mini sewing machine, check out our blog for lessons.
How To Thread A Simplicity Sewing Machine Correctly
What You Need
Materials
- Thread
Tools
- The sewing machine.
- Needle
- A bobbin that has not been used.
- Scissors
Winding the Bobbin
1. Place the spool cap on the spool pin and secure the thread. A spool cap is a plastic wheel that is attached to the machine’s spool. The spool pin on my machine is vertical, thus you won’t need to worry about a spool cap.
Remove around 18 inches of thread from the bobbin winder and wrap it once around the tension disc on the backside of the winder.
The thread guide that comes with your machine might be there already; if so, don’t miss it! Make sure you use all of the thread guides on your machine to secure your thread.
3. Choose a bobbin that is compatible with your particular sewing machine.
Put it on the bobbin winder and wind it up.
When you’re done winding the bobbin, bring the tail of the thread up through the bobbin’s center, leaving a short tail.
Before continuing on to the next step, simply loop the thread around your bobbin a few times to make it easier to force the thread through.
You’ll hear a “click” when you slide the bobbin pin toward the little, round plastic component of the bobbin winder.
As shown in the illustration, the bobbin pin should now be firmly in contact with the bobbin winder.
Take it slow and steady until you find a speed you’re happy with.
In order to get the thread you need, fill your bobbin to the brim with it. To avoid having to repeat the process all over again, I like to totally fill my bobbin, even if I don’t think I’ll use it all.
Xem thêm : How To Sew On Blanket Binding? Step-by-Step Tutorial
9. Return the bobbin pin to the left and listen for it to “click” out of position once more.
Remove the bobbin from the bobbin pin at this point..
Remove the bobbin housing by opening the shuttle cover and revealing it.
Place the bobbin in such a way that the thread hangs down the right side of the needle (clockwise).
Once you have the bobbin in place, thread the bobbin case with your thread and pull it tight, as shown above.
It’s time to finish securing the thread in the case.
Rotate it around, and place it right side up on the horn of your sewing machine.
Make sure you line up the bobbin’s tip with the notch in the shuttle hook cover when you insert it into the housing. When you hear the bobbin click into place, stop pushing.
The shuttle cover casing must be shut down.
Threading Your Machine
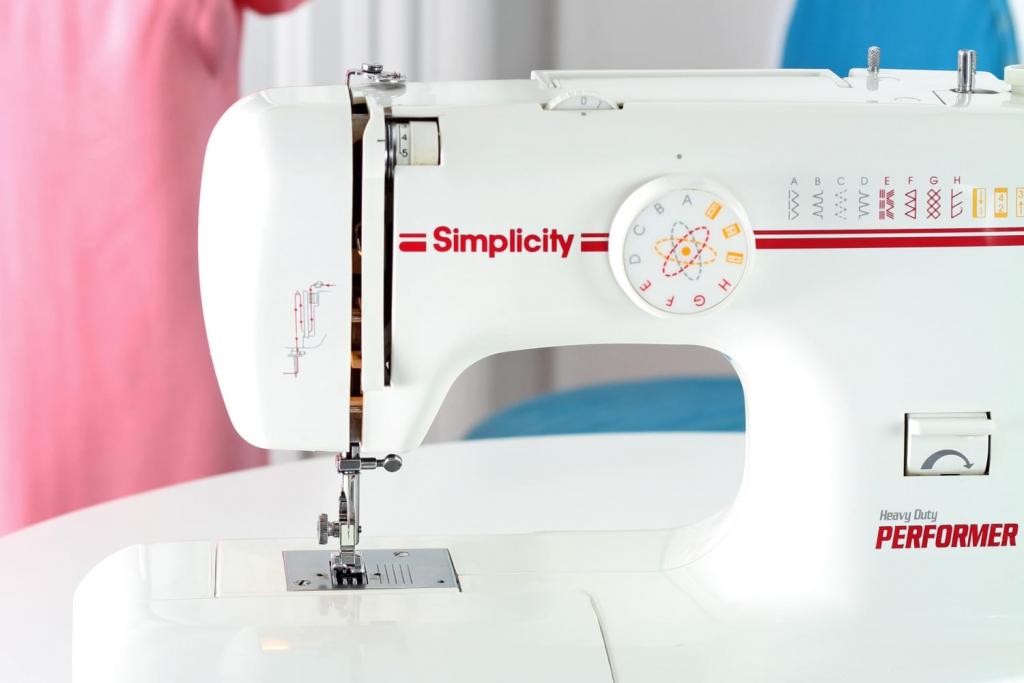
Most sewing machines feature a printed diagram on the front of the machine that explains how to thread the machine.
Before you begin, turn the hand wheel so that your machine’s take-up lever protrudes from the top.
Spool pins with thread on the bottom are called “under” spools, and this is how they should be used when working with horizontal spool pins. Attach the spool top by screwing it on.
To begin, unwind a length of thread of about 18 inches.
Slide the thread into the first thread guide as shown in the diagram. I use the tension disc on my bobbin winder for this, which is a small “A” shaped plastic piece that snaps into place.
Xem thêm : What Is The Best Sewing Machine For Denim? Everything To Know!
Follow the instructions on your schematic to thread your needle through the channel and around the check spring holder.
As you coil your thread near the take-up lever, there is likely to be another thread guide.
The thread should be tucked behind the take-up lever.
Make sure that the thread that comes from behind the take-up lever is slipped into the hole. When weaving thread, the take-up lever component looks a much like a folded “s,” making it easy to do so while maintaining everything in place.
Observation: Although I took a shot displaying the inside of my machine, you won’t need to do so. Turn the hand wheel until the thread guide protrudes from the machine’s top.
Follow the diagram’s arrows and pull the thread back toward the needle by following the arrows on the diagram.
Thread the needle bar thread guide with the thread you just cut.
Using a needle and thread, insert the thread from one end of the needle to the other.
A bobbin thread is picked up by a bobbin thread needle when a bobbin thread tail is gripped.
A small, thin tool, such as a pair of scissors, can be used to grab both pieces of thread under the presser foot.
Finally, bring the two pieces of thread out of the machine and you’re good to go!
How to thread a Simplicity sewing machine with a needle threader
- Let go of both the presser foot and the needle-threading lever.
- It’s time to get your hook in on some left-handed threading!
- Pull the thread to the right as far as you can with the needle threader lever lowered as far as possible.
- An eye inside the needle’s eye can now capture the thread.
- Tightly grasp the thread with both hands as you pull up the needle threader lever.
- To do this, thread a needle and then pull the thread through the eye.
How To Thread The Bobbin On A Simplicity Sewing Machine
Winding the bobbin
- The bobbin winding clutch can be released by turning the handwheel.
- A tension disc on the bobbin winding spool is a good place to start.
- Thread the bobbin with the thread end inside out.
- Make sure that the bobbin is securely attached to the bobbin winder spindle and that the bobbin’s groove is receiving the spring.
- To begin, move the spindle to the right.
- Holding the thread end, press the foot control.
- Clip the thread near to the bobbin after a few rotations.
- Take a step back and let the machine finish winding the bobbin using the foot control until it’s completely full.
- The bobbin winder spindle should be pushed to the left, and the thread should be clipped.
- Reengage the clutch by removing the bobbin and pushing the handwheel.
- Remove the free arm cover and raise the needle as high as you can.
- Open the bobbin case’s clasp and bobbin cover.
- Remove the bobbin by releasing the lock on the machine’s frame.
Inserting the bobbin
- With one hand, hold the bobbin case and the other, the bobbin.
- Remove around six inches of thread from the bobbin and return it to its container.
- Thread the bobbin case’s slot with the thread and pass it beneath the tension spring.
- Allow around six inches of thread to trail from the case once it is inserted into the outlet.
- Make sure that when you pull the thread, the bobbin spins clockwise. If it doesn’t, you may need to start the process over.
- Before placing the bobbin case lock over the shuttle pin, make sure its long finger is pointing upward.
- Before releasing the latch, align the long finger with the shuttle’s notch.
- Close the cover and insert the bobbin case into the machine.
If you don’t understand what a bobbin is on a sewing machine, please check out this article to learn more about it.
How Do You Thread A Simplicity Celebrity?
- For examples, see the Simplicity Celebrity manual.
- The takeup lever should be pushed all the way to the top.
- Before inserting the thread spool on the spool pin, raise the presser foot and place a felt cushion on it.
- Before beginning threading, check to see if the thread is coming from the back of the spool.
- Place the thread in the thread guide at the very top and then lower it into the discs of tension.
- Right-to-left through the right-to-left threading path and the right-to-left takeup lever
- Thread should be in the takeup lever slot and above the needle while it is under the takeup lever slot.
- Thread the needle from the tip to the base, using the thread guide that is located above the needle.
Conclusion
There you have it! With the help of the sewing machine manual, you can learn to thread a Simplicity machine again.
To get to the needle eye, you’ll need to work your way through both the tension discs and the take-up lever. If you have any questions, please don’t hesitate to contact us and we’ll get back to you as soon as possible.
Nguồn: https://spasifikmag.com
Danh mục: Sewing Tips


