The five steps to learning how to properly care for your sewing machine. Once you’ve taken it apart, perform the basic maintenance steps. Although the material in this page is broad, it’s still a good idea to examine your owner’s handbook before making any significant changes.
- How To Change Singer Sewing Machine Motor Belt? The Easy Way
- How To Make A No Sew Fleece Pillow? Step-By-Step Guide
- What Is The Best Sewing Machine For Leather? Helpful Information
- What Is Understitching In Sewing? Preparing a Seam for Understitching
- How To Thread A Singer Sewing Machine? 7 Easy To Follow Steps
We also recommend that you learn how to use a sewing machine correctly. Improper use of the machine is the root cause of many problems that need to be fixed. To keep yourself and your sewing machine safe, go over the safety instructions one more time.
Bạn đang xem: How To Service A Sewing Machine? 8 Easy To Follow Steps For You!
What You’ll Need:
Various sizes of screwdrivers. Most fabric stores and sewing machine repair businesses sell a small set of screwdrivers. With the Eyeglass Repair Kit, you can also utilize the screwdrivers. In addition, a standard-sized screwdriver is a need for everyday use.
A towel or rag with the potential to become (very) soiled.
Machine to sew Sewing machine lubricant. Most fabric stores and sewing repair shops carry it. I recommend Singer, which comes in tubes. No, I don’t advocate the squirt bottle of liquid. It’s up to each individual to decide.
*Tweezers
* A variety of brushes are available. I utilize both antique cosmetic brushes and paintbrushes in my work. In addition to a cleaning tool, the above-mentioned shops sell them. A toothbrush can also be used to clean the teeth..
To Begin:
You’ll need to remove all of these items before you can begin sewing. Put them in a safe place.
Remove the screws from the sewing machine’s base. There are three screws in my model, but there may be fewer or more in yours. Open hinged lids with hinged covers are commonplace on machines that don’t have screws on the top.
Look for washers and see whether they’re of different sizes on the screws. Get an idea of which screw goes in which hole. I recommend creating a picture like this one:
Then you’ll be able to see clearly! An explanation of how your device works from the inside. For all it does for you, you should take a moment to appreciate it
Take a peek around you by moving your hand towards you.
Cleaning the Top of the Machine:
You’ll need to use an abrasive to remove the old, soiled dirt from the surface. You can get into the tiniest of spaces with the help of a knitting needle concealed within the fabric. This is where a toothbrush comes in handy. It’s a bad idea to use a brush to get rid of grease. In the future, they’re the best way to remove lint.
Gentleness is required: When it comes to cleaning your equipment, make sure you do so with gloves on. It doesn’t take a lot of effort to make your computer look clean and fresh. Sharp jabs are out of the question! Spring damage and critical component damage are more likely if you’re rough around the edges.
Step 1: Removing Fluff and Dust
Remove any fluff or dust from the area as soon as you discover it. When it comes to gathering, the space between the feeder and the area where dogs eat tends to be the most popular choice. It’s best to remove the needle, as well as the foot and the needle plate, so that cleaning is easier. Typically, it is a piece of metal under the foot that includes cutouts that allow the feed dogs to expand. If the fluff and dust are matted, you can use a vacuum cleaner’s brush or crevice tool to remove them. Compressed air can be used, or you can blow it out, but you should be careful that you will blow more fluff into the machinery. Inspect this area for any needle fragments that might be obstructing the mechanism.
Remove any dust, fluff, or broken thread that may have gathered along the thread’s path, including between the tension adjuster’s upper discs and other points along the thread’s path. The best thread will shed less fluff than lower-quality thread, therefore it’s a good idea to use it.
In this case, the needle needs to be replaced. Check the needle well before reinstalling it. From the shank to the end, you can run it through your fingers. Fine emery can be used to remove any blemishes, but it’s best to replace it after six to eight hours of use. Make sure to repair bent needles because they can cause problems for no good reason at all.
Step 2: Checking the Bobbin
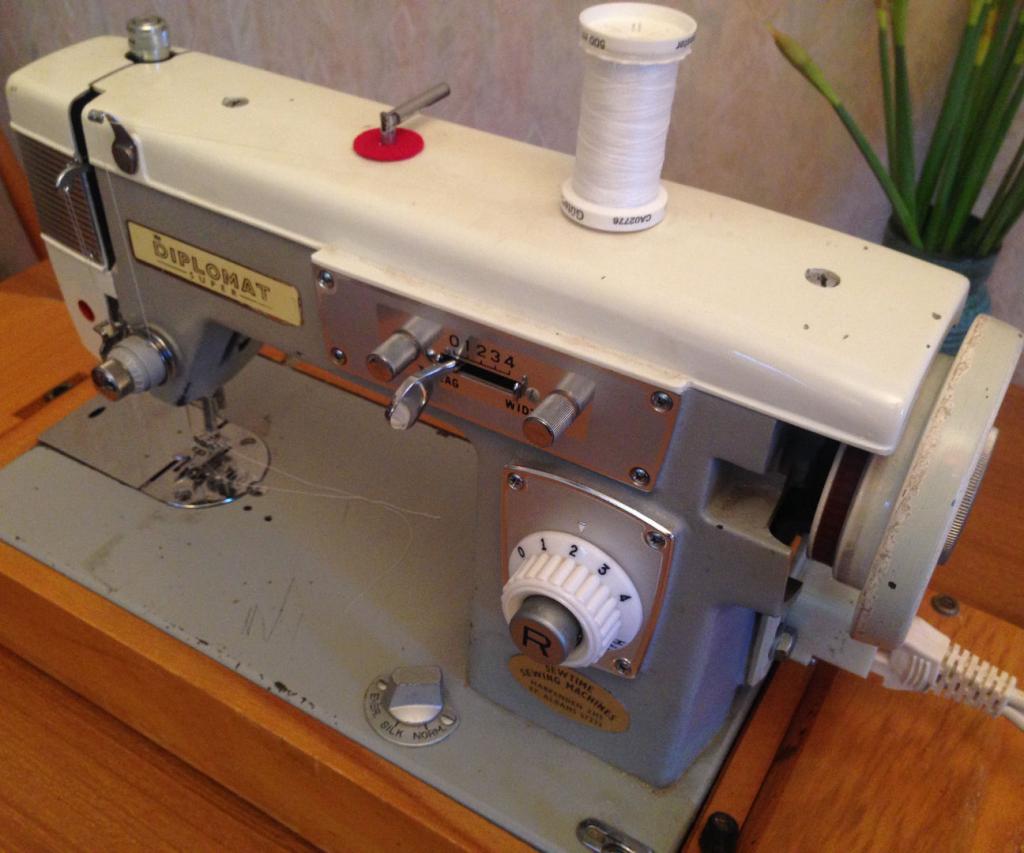
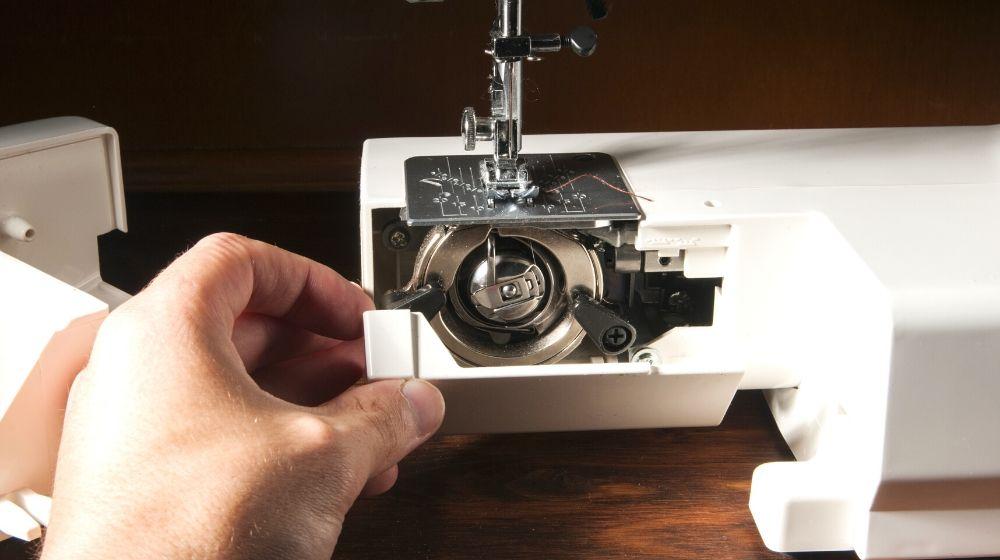
To access the bobbin in an older machine, the needle must be moved away from a piece of metal close to the needle, as shown in the top picture. The similar mechanism can be seen in the front of modern front-loading washing machines. The bobbin falls horizontally to the machinery between the needle plate and the plate for the bobbin in newer top-loading machines.
To make each stitch, a shuttle is thrown into a loop in the thread that goes through the bobbin of many older machines (such those made before World War II).
Xem thêm : Which Janome Sewing Machine To Buy? Comprehensive Guide
If you look at an old machine, it has a hinge that can be rotated horizontally and rests on a thick stack of books that makes it easier to reach the bottom. Almost all of the photos were taken in this setup.
Once you’ve removed the bobbin from its case, you can then take out the bobbin case itself. Remove any dust by blowing it away.
The bobbin case is placed in a rotating holder for the bobbin case while the machine is running. The clips on a retaining ring can be released to remove it in a manner that is simple to perform.
For making an edging, the “hook” on the bobbin case holder is used to capture the thread from above, so that it can be connected to the thread from below by means of the thread on the lower side of the holder. Using fine emery, smooth off any burrs on the hook. Reassembling it correctly is critical.
If you’re buying an old machine, double-check that the bobbins that came with it (and any extras you buy) are the right kind. It’s possible to utilize the wrong type even if it’s just a little, and that can lead to major issues down the road.
Step 3: Lubrication
On an ancient machine, this is an easy task. In the same way as the top mechanism, the bottom mechanism can be accessed by tiling it to the side. To open the top mechanism, simply remove a few screws holding the top cover in place.
You’ll normally need to remove a few screws from a modern plastic machine. Clips connecting the two parts of the plastic casing together may need to be removed. Use an elongated spatula, a blunt scalpel, or a knife to probe through the chasm between them in search of the clip locations. Make careful you don’t damage the plastic by pushing the knife too far into the material. While depressing one side of the spatula, you should be able to lift up one of the case sides while keeping the other one pressed down. While you search for the next clip, insert an old credit card or other plastic instrument, guitar plectrum, or something similar into the opening created by the clip. It’s possible that a stubborn refusal of the cases to separate indicates the presence of a hidden screw or even a rubber foot.
Rotate the wheel with your hand after you’ve obtained access to both mechanisms to see which sections are moving. Except for wheels, nylon gears, and cams, all moving parts require lubrication at the joints, bearings, and sliding surfaces. They’re usually coated in a thick layer of grease to keep them going for a long period.
Use only sewing machine oil. Don’t use Vaseline or olive oil, bicycle oil, or any other type of oil. There is no sewing machine compatibility with any of these items.
Oil all connections and bearings with a single drop. Before it gets a chance to run off, remove any surplus.
A machine that has been in use for a long period of time may have a stiff or entirely seized mechanism. Allow it to sit for a few minutes to allow the oil to penetrate before wiping it clean with a paper towel. If necessary, repeat the process until it is working properly.
Step 4: Checking the Tension
It’s critical to check the bobbin tension before you begin sewing, as incorrect tension might result in broken or snagged threads. Tighten it up with an elastic spring before you begin winding your thread. The thread serves as a lifeline. When the bobbin and the casing are able to hold it in place, the tension is correct. Using a gentle shake will only loosen a small amount. The spring tension can be adjusted with a screw. If you’re experiencing trouble, look under the spring tension for any slack or broken thread pieces.
Step 5: Checking the Bobbin Winder
A good place to start is the bobbin winder. In most cases, it is attached to the handwheel using a wheel with a rubber tire. Replace the tire if it has been damaged. In most cases, it’s easy to find.
Use a Bobbin to wind your bobbin. The thread’s tension is just right for a clean, even pile (without being too tight). A bobbin that isn’t properly wound can cause problems.
(Since my machine does not have a bobbin winder, I have no images of one.) Dowels attached to the drill’s chuck are used to wind my bobbins.)
Step 6: Checking the Electrics
Make sure your device is not plugged in before handling any electrical components.
It’s impossible to sew well without a fluid movement of the pedal on your foot. Lubrication may be all that is needed. A rheostat, which has a variable resistance and is connected in series with the motor on earlier machines, may be used. Electronic speed controls, similar to those found on dimmer switches, are likely to be included in the newest models.
In order to dismantle the foot pedal, you must first examine it. Don’t use the sewing machine’s own oil for lubrication or grease on moving parts; instead, use any light oil. All electrical connections should be kept clear of grease and oil.
Make sure the motor belt tension is checked as well. You should be able to loosen any nuts or screws on the bracket to make modifications. Electric motors are discussed in detail on the Restart Project wiki’s Electric Motors page if the motor is acting up. The commutator or brushes may need to be cleaned or replaced. If the bearings of the motor appear to be in need of lubrication, you should use an electric motor grease, at the very least in accordance with the manufacturer’s recommendations.
Xem thêm : How Much Polyfill Do I Need For A Pillow? Perfect Information For You!
When it comes to newer versions, an alternative bulb must be wired in and cannot be added as easily as it can on older ones. Replace a filament light bulb with a modern LED replacement that is more efficient. If the LEDs of an LED bulb appear to glow to the side, it may not be ideal if the bulb must shine mostly downwards. Make sure you buy a replacement bulb with the same base as your previous one.
Step 7: Checking the Timing
Unanswered fractured threads may be a sign that the timing has to be tweaked. In the absence of an instructional, it’s better to leave this to a qualified technician who can consult the appropriate service handbook. However, figuring out if it’s the culprit isn’t difficult.
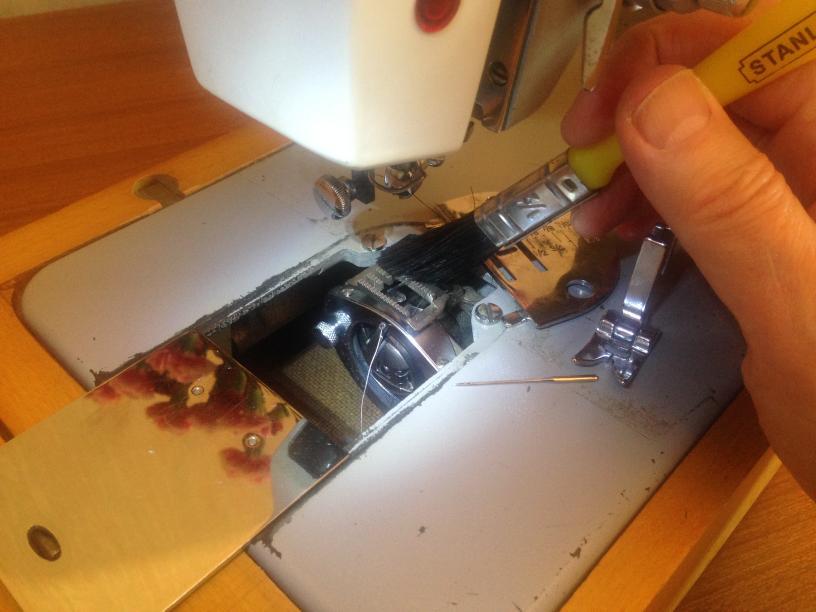
A good view of both the needle and the hook is required in order to properly attach a thread to a hook. As shown in the image, I’ve turned my machine over and removed the bobbin as well as the bobbin carrier plate that secures the bobbin. In order to keep it from falling out when I turned the handwheel, I had to fasten it.
When the needle is threaded, turn the handwheel so that the hook is in contact with the needle while maintaining the thread’s free end taught, but not tugging it. Once the handwheel was turned a little more, the thread was safely captured.
When the needle is at its lowest point, the hook’s tip should be able to pass over it. If the needle has increased by 3/16 of an inch (2.5 millimeters), this is normal. At this point, the thread becomes slack and forms a loop that is drawn to the hook by the rising needle.
You may see the thread dangling through the bobbin if you are able to place it there by turning the handwheel even farther.
There are plenty of resources online to help if you need to remove the machine, so do some research and look for “timing adjustment” in addition to your manufacturer and model so you know what to expect when it comes to altering the machine’s timing. Ensure that the needle’s lowest point is at the correct height below the hook. It’s important to make sure that the hook can pass through the needle once you’ve increased the size enough. If you can find it, the machine’s maintenance handbook will detail these options and how to change them.
Step 8: And Finally …
I hope you’ve learned a lot about your machine and have overcome your fear of staring at such a complex and ingenious device. Your machine is purring like a cat with the nicest cream if it’s of high quality.
How Much Does It Cost To Service A Sewing Machine?
In order to repair your sewing machine, you may be charged anywhere from $75 to more by certified or expert centers. There are a number of variables that will determine the cost of the equipment, including the amount of maintenance and repair it takes, the availability of particular parts, and even the cost of labor. If you’re familiar with your machine’s model, you can probably fix it yourself.
Do you think it is worth it to repair the sewing machine?
No matter how many times you’ve tried to fix your sewing machine, you’ll never be able to get it right the first time. It’s not a good idea to accidentally exacerbate the problem and add to your stress level. Sewing machine repairs are preferable to basic maintenance like cleaning and oiling or adjusting if the problem persists.
If you own a Pfaff sewing machine, this is the best method for performing more extensive repairs.
What Maintenance Does A Sewing Machine Need?
Cleaning
Sewing machines can be cleaned on a weekly or monthly basis, depending on how often they are used. Also keep an eye on the needle bar, handle, and presser foot, as well as the hook and bobbin. Keep an eye out for any loose connections when you’re cleaning or wiping the machine, and label everything you remove.
Oiling
Oiling a machine should be done after a night’s rest, and you should consult the instruction manual to discover which oil is best and how to apply it. While lubricating moving parts is sometimes necessary to keep them in good working order, there are also holes through which grease must be inserted. To learn more about the exact processes and advice for lubricating sewing machines, review the detailed instructions.
Adjustments
If you know how to fix and troubleshoot different systems, most sewing machine problems aren’t urgent. Keep an eye on the presser foot, needle plate, needle feeder dog, and thread tension. To figure out what alterations you’ll need, try a practice sew on a scrap of fabric.
How Much Does It Cost To Service A Pfaff Sewing Machine?
Pfaff Sewing machine repair rates are determined by the nature of the issue and other expenses incurred by the service center. Checking your equipment might cost you at least $50, while services like oiling and cleaning could cost you up to $110. Depending on the Pfaff model, you may have to pay repairmen $50 an hour.
How Do You Take Apart A Pfaff Sewing Machine?
Make a note of the model number of your Pfaff sewing machine before continuing. To get the most out of your new equipment, it’s a good idea to spend some time reading the instructions. It’s best not to disassemble the Pfaff sewing machine if you’re unsure you can put it back together.
- Remove the machine’s top cover by hand.
- Remove the screws that hold the front cover to the needle.
- Removing the screws on the bottom of the center lid is simple enough.
- After that, remove the handwheel by pushing the back cover toward you.
- Following the removal of the bottom and rear covers, you can now remove the top cover.
- To finish disassembling the Pfaff sewing machine, remove the final set of screws.
How Do You Oil A Pfaff Sewing Machine?
- Verify that your Pfaff sewing machine’s plug has been properly detached before using it again.
- Go through the Pfaff model’s manual to figure out which sections to oil, what oils to use, and which specific oil to use.
- Read this article about sewing machine lubrication to discover more about what to do and what not to do while lubricating your machine.
- To remove the oil, sew a few stitches together.
- Using scraps of fabric, test the sewing machine’s functionality every 15 minutes to ensure that there are no leftovers that could interfere with your job.
- Prevent oil drips from your fabric by cleaning the machine with an unclean cloth and then cleaning the area.
Why Is The Handwheel On My Pfaff Sewing Machine Won’t Turn?
If you don’t clean and lubricate your Pfaff sewing machine on a regular basis, the handwheel may get stuck. In addition to inspecting the threads in the bobbin or hook, it is also feasible to remove them from the Pfaff sewing machine to free the handwheel.
Are Old Pfaff Sewing Machines Worth Anything?
People are willing to pay top dollar for vintage and antique Pfaff sewing machines, indicating that there is a market for them. Because of the company’s reputation for producing high-quality sewing machines, these items are also highly sought after. There is a wide range of prices for fully refurbished and restored Pfaff sewing machines.
Conclusion
I hope this essay was helpful to you. Keeping your sewing machine in good working order is a simple five-step process that doesn’t require you to fork out a lot of money. Do not try to fix the problem yourself; instead, contact a professional.
Let us know if you have any further queries in the comments section below. We’ve also put together a list of frequently asked questions on our blog.
Nguồn: https://spasifikmag.com
Danh mục: Sewing Tips


