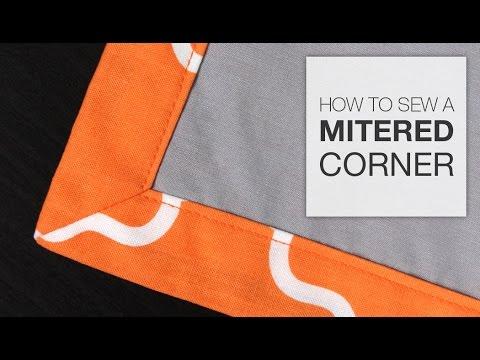
There are two ways to learn how to miter a corner in sewing. Topstitching and sewing before topstitching are the two methods. As a bonus, we’ll go over how to sew flawless corners.
If you’d like to see more sewing tutorials, you can check out our blog. You’ll learn how to sew two pieces of fabric together, as well as a variety of other skills. The best part is that all of them can be done on a sewing machine.
Bạn đang xem: How To Miter A Corner In Sewing?
How Do You Miter A Corner In Sewing?
Sewing Mitered Corners – Steps
Mitered corners are often made by folding each side twice, pressing, and then refolding and pressing again. A bit much? Let’s simplify and expedite this process!
Step 1 – Cut Fabric For Your Project
Cut out the square or rectangle needed for your sewing project. I decided to make a linen napkin by cutting an 18-inch square. If you require a specific shape, a rectangle will do.
Step 2 – Mark The Corners
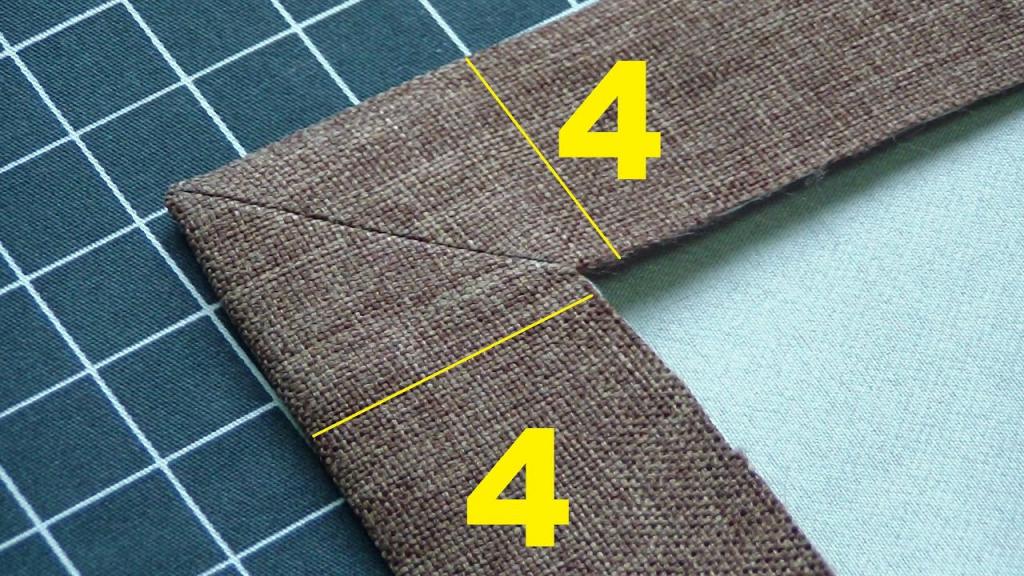
As a first step, mark 1 12″ on the reverse of each of your fabric’s four corners before folding them inward. For smaller folds, such as a 14-inch (6-millimeter) fold, you should mark your triangle at 1 inch (2,5 cm).
Step 3 – Fold Back The Corners
Fold the corners toward the rear and push firmly.
The raw edge of your cloth should be marked and folded 1 12″ from the corner if you wish to fold it twice by 38″. Look at the image above. Alternatively, if your fold will be 14” (6 mm), then you should use a 1′′ fold for your triangle (2,5 cm).
Make sure the triangles are flat by pressing them firmly.
Step 4 – Cut Off A Portion Of The Triangle
Xem thêm : How To Thread A Handheld Sewing Machine? 4 Easy To Follow Steps For You!
Next, trim the triangle to provide a tiny seam allowance of between 14” and 38” in height. Our 3/8″ fold means that only a 1-inch triangle will have to be trimmed off. This:
You’ll receive a small fold (about 14 inch) this way; no measuring is required; just fold a small amount of fabric.
Then do the same thing on the other three corners:
Step 5 – Double-fold Edges
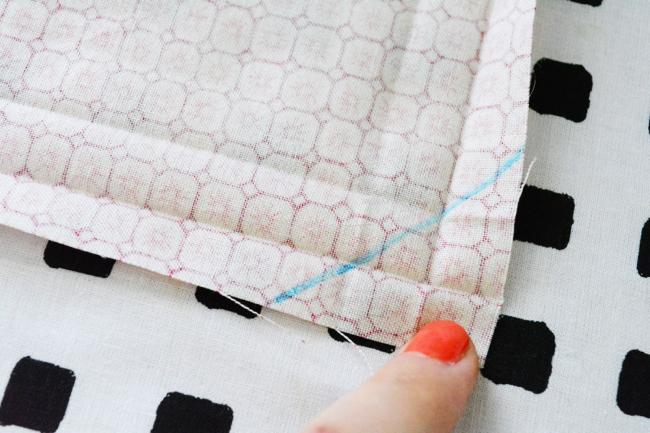
Fold back and press 3/8″ (1cm) of the fabric’s edge once and then 3/8″ again. To demonstrate, I used a fabric marker to mark the folds, but you are under no obligation to do so. Repeat on all four edges.
Pin or cut the corners if desired after pressing the folds. Not if you’ve done your pressing correctly.
Step 6 – Topstitch Around The Folded Mitred Corners
To finish the backside of your product, topstitch it all the way around. As a result, the bobbin thread will be visible from the top, so choose a complementary color.
Stitch along the fold, just catching the fold, from one corner to the next. Use an awl or another sharp instrument to assist guide the fabric while you sew slowly:
When you reach the corner, stop with the needle down and pivot, making sure to catch the folded edge. Here’s a closeup, taken with the sewing foot raised to make it easier to see:
Just a picture to show that you need to stitch the entire piece of fabric together.
Xem thêm : Why Does My Sewing Machine Keep Jamming?
In the end, you’ll have this stunning product, complete with slim mitered corners. congrats!
Thanks for taking the time to read this tutorial; please consider forwarding it to a friend if you found it useful. You can save the guide to Pinterest and use it whenever you want:
How To Miter Corners In A Sewing Machine
- Fold each corner in half, right sides together, to align the seams.
- Sewing the cloth begins at the fold and moves toward the fabric’s edge.
- Turn them out after trimming the extra material from the corners.
- If the corners do not come out exactly, you can use a pen or a chopstick to help you out.
What Is Mitered Corner?
A mitered corner is a method of completing a cloth edge’s corner. You can avoid a bulky hem by using this method. While it is possible to simply turn the edges under to complete a corner, the seam will appear bulkier and the edges will not meet at an exact angle.
Where may a mitered corner be put to good use? Napkins, pillows and quilts all benefit from mitering the corners. When mitering the corners of a rectangular object, whether by hand or with a sewing machine, the finished result will be more visually pleasing.
The unseen seam is something that interests me as well. You can learn how to make a hidden seam by following our step-by-step instructions.
How Do You Make A Perfect Mitered Corner?
-
- Dry your fabric before using it.
- Adjust the hem by pressing the seam allowance in the desired direction.
- All edges should be pressed an inch to the wrong side of the seam.
- Make sure the corners are folded uniformly and press an additional inch.
- On each side, undo the second fold and measure one inch down from the corner.
- Connect the two marks with a diagonal line, then fold the corner diagonally wrong side out.
- Stitch along the pinned line using little stitches.
- Make sure you backstitch at the start and end of the seams.
- Leave a 1/8-inch seam allowance after trimming the corner.
- Press the seam open after you’ve clipped the corner’s tip.
- Push the chopstick out of the corner after it has been turned right side out.
- All corners should be pressed and repeated.
How Do You Sew Trim Around Corners?
- Clean and dry the material.
- Unfold the bias tape or trim.
- Right sides together, attach the tape’s raw edge to the straight edge of the sewing project.
- Sew the trim to the fabric and backstitch once you’re at seam allowance distance away from the corner
- Backstitch once you’ve sewn the trim to the cloth and you’re at the seam allowance distance from the corner.
- Using a pin, pin each corner of the trim in place.
- Upon reaching your starting position, overlap the two tails of the trim for an inch and join them.
- Press the seam towards the trim and fold the tape over the stitching to cover it
Conclusion
The best way to conceal exposed stitching is to press the seam toward the trim and fold the tape over it.
Overall, folding and pinning during mitering is the most important technique. At first, it may seem daunting, but with time and effort, you will become an expert.
If you’ve read this far, thank you for your patience. If you have any questions, you can ask them in the comments section below, and you can also check out our blog to learn more about how to stitch projects’ edges.
Nguồn: https://spasifikmag.com
Danh mục: Sewing Tips


