In just two easy steps, discover how to make a buttonhole on a Singer sewing machine. Using the buttonhole presser foot on a Singer is the first step. To make your job easier, we’ll show you how to sew buttonholes on sewing machines. To begin, do you have a working knowledge of how to properly set up a sewing machine made by Singer? For example, how do you put thread on a Singer sewing machine’s bobbin? After that, check out our blogs for more information on how to get your Singer ready to sew.
- How Does A Sewing Machine Work? All You Need To Know
- What Is The Best Sewing Machine For Leather? Helpful Information
- 2 Steps to Sew a Blind Hem Stitch Using a Sewing Machine? Step-by-Step Tutorial
- How To Serge With A Sewing Machine? Everything To Know!
- What Does With Nap Mean In Sewing? What You Need To Know
How To Make A Buttonhole With A Singer Sewing Machine Correctly
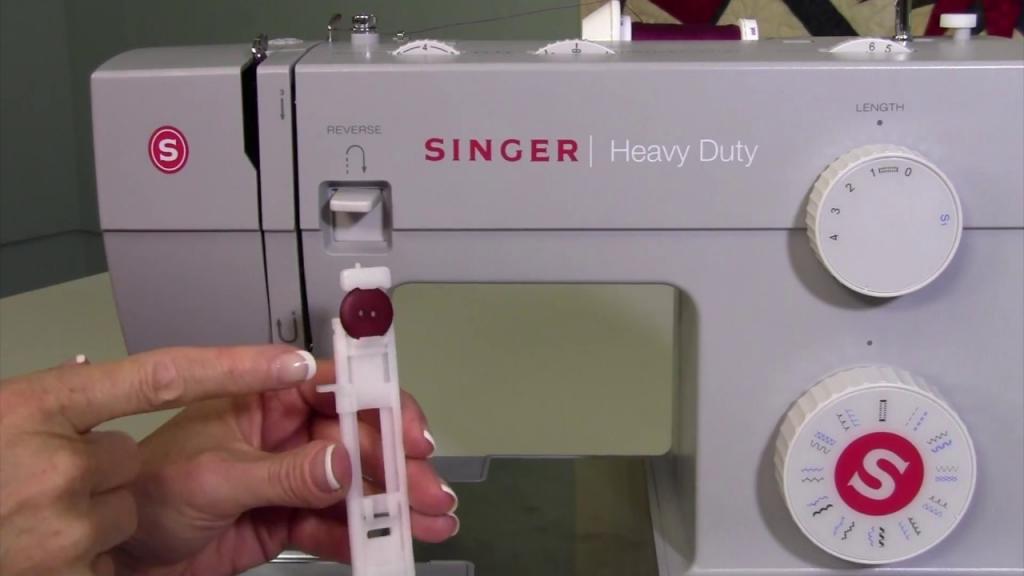
Step 1. Install the foot presser
- Depending on the specific type of Singer you’re using, you may need to take a closer look at the handbook to see how many steps it takes to make a buttonhole.
- Make sure your sewing machine is equipped with a buttonhole presser foot before you begin stitching.
- Let go of the shank’s current foot.
- The presser foot should be positioned under the shank.
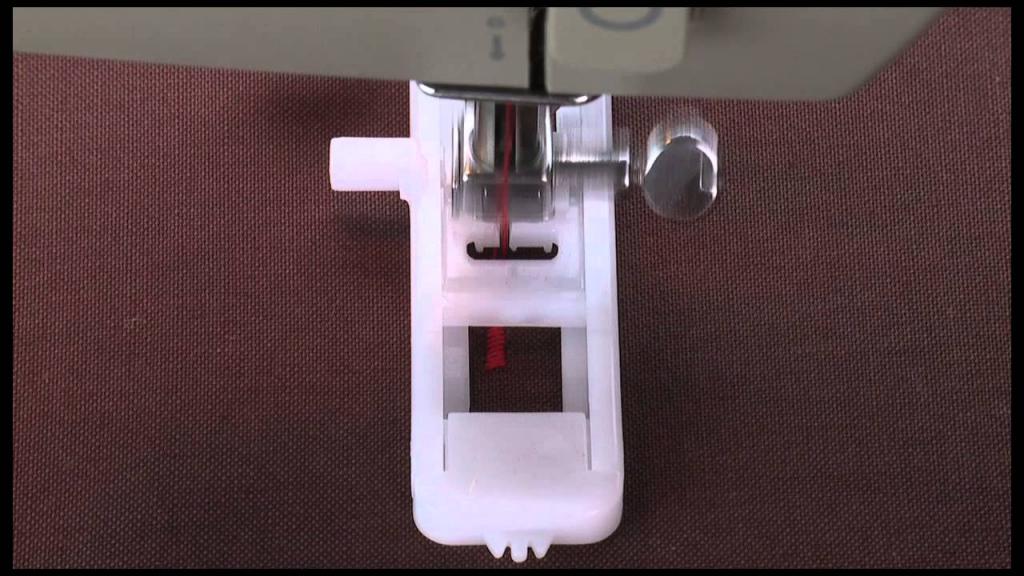
- The foot of the buttonhole presser should be screwed and pressed down to ensure that the shank snaps into place and provides security.
- Measure the buttonhole’s diameter and length.
- The lever can be pushed toward you.
- A simple lever and clamp combination is all that is needed to create a buttonhole.
- Before stitching, the buttonhole foot’s guidelines should be centered on the starting line.
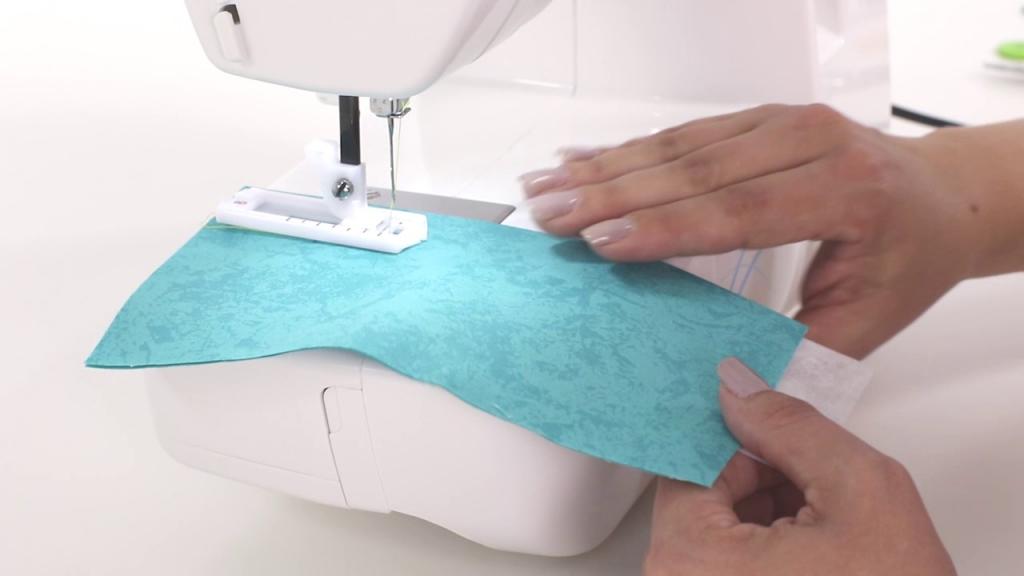
Step 2. Begin sewing
- Sewing will commence as soon as the machine is turned on.
- So, keep an eye out for when your leg crosses over the bartack so that the machine can complete the full buttonhole in one operation. Stop right away.
- Remove the material by raising the presser foot.
- Loosely sew the threads into the buttonhole after opening it.
- The buttonhole lever can be removed from the machine. Decide if the move stitch lever balance needs to be adjusted to align the buttonhole on both sides.
One-step buttonhole vs . four-step buttonhole
A one-step buttonhole and a four-step buttonhole option are possible on Singer sewing machines. The distinctive buttonhole presser foot that comes with models with the one-step buttonhole feature can calculate your button’s size to make the perfect buttonhole consistently. You can, however, make a buttonhole in just four steps with the help of a Singer if your model doesn’t have this capability.
The Singer sewing machine’s four-step buttonhole feature will necessitate greater user intervention. Mark where the hole will be on the fabric and how long it will be in advance. Then, using the dial for stitch selection, you can sew on all four corners of the buttonhole.
Tips for Better Buttonholes
Sewing lovely buttonholes is easy if you follow these two tips. The buttonhole was sewed and interfaced multiple times. Buttonholes can become puckered if interfacing is not used. A small bit of cloth under the buttonhole is really necessary. The next step is to sew the buttonhole twice. These two buttons are worth a closer look. The same thread and settings were used to stitch them onto the same fabric. Because I sew twice, the picture on the left is more visually pleasing.
How To Make A Buttonhole On Stretch Fabric With A Singer Sewing Machine
- You can do this by sewing a cord to the bottom of the buttonhole after you’ve finished sewing the buttonhole.
- Place the fabric where the buttonhole will be on it.
- The Singer sewing machine’s foot buttonhole must be present.
- If you’re using the pattern selector dial, you’ll want to adjust it to 2 for thread length and 1 for width based on your thread size.
- When you’re done, you’ll have an ankle bracelet.
- Both of the heavily used threads are geared toward
- Begin stitching after securing the threads in the grooves.
- Pull off the weighted thread and clip it off when you’re done
Threading your Singer stitching machine correctly is essential if you want to avoid any stitching troubles.
How To Adjust The Stitch Density On The Sides Of The Buttonhole With A Singer Sewing Machine
- The buttonhole balance adjustment dial on the Singer sewing machine can be used to provide a consistent density at both ends of the buttonhole.
- Before adjusting the dial, make sure it’s in the “+” or “-” range.
- Turn the setting to “+” if the stitching on the left buttonhole side isn’t near enough.
- The dial should be turned toward “-” if the stitching on the left buttonhole side of the garment is too close together.
Let me share my experience and show you how to solve the #1 problem when the buttonhole foot gets stuck and not moving anymore.
Xem thêm : How To Thread A Free Westinghouse Sewing Machine?
There are a few things to keep in mind when inspecting a vehicle. moving the foot in an unnatural way.
When sewing with a buttonhole foot, you may be pressing the cloth under the foot and rubbing your toe on the foot. Creating buttonholes from small bits of fabric is impossible. As I explain in the video below, the entire operation takes place behind your buttonhole foot.
The buttonhole should be level.
To allow dogs to move the fabric from start to finish.
Stabilizers and interfacing should be used to keep the garment in place.
When sewing buttonholes, Feed Dogs must offer an equivalent amount of cloth. It is not uncommon for the top layer of cloth to behave differently from the lower layers. Layers of fabric are being shifted as a result of this. As an example, when working with stretchable materials.
Set the sewing machine’s controls.
Xem thêm : What Is The Best Industrial Sewing Machine? Which Is Best For You?
The area under the needle plate and the bobbin holder should also be examined. Possibly clogged with something? Is it better to have threads or dust? To see if this fixes the problem, give it a thorough cleaning.
Keep the buttonhole foot in place by without pulling it. stitch with excessive power and apply or remove the feet with excessive pressure. If you bend the foot just a little, it could not work properly. When sewing buttons, be aware of the temptation to pull your fabric back.
It’s important to keep testing and testing and testing until you have it right.
When I bought my first Brother sewing machine fifteen years ago, I ran across this serious problem with the buttonhole foot. As soon as it stopped making buttons, I was overjoyed at the prospect of being able to do them in just one step. I’m not sure what triggered the problem, but I wasn’t aware of sewing blogs at the time. It didn’t work for me, despite my best efforts. I opted to upgrade to a more complex sewing machine from Brother. I was shocked to see that I was experiencing the same problem.
Other interesting new gadgets that I came across are Janome and other brands’ Buttonhole Stabilizer Plates. Buttonholes are usually excellent on my machines, and hence I don’t own or use this tool.
How Do You Make A Buttonhole On A Singer Heavy Duty Sewing Machine?
Singer 5532 users should refer to this instructions. Because of this, if you possess any other heavy-duty machinery, you should thoroughly read the instruction manuals.
- The location of the buttonhole is shown on the cloth.
- Buttonhole foot must be attached to sewing machine.
- A stitch pattern should be created in accordance with the design’s dimensions.
- Set a piece of fabric under the foot to see if it is comfortable.
- The lines on the foot of the presser should be reduced and aligned with the fabric markings.
- Place the button you’ll be using into the button plate after unlocking it.
- Pull back on the buttonhole lever after it has been lowered to the desired size.
- Once you’ve finished sewing, cut the thread.
Why Is My Buttonhole Foot Not Moving?
- Make sure the foot is exerting the correct amount of pressure on the fabric.
- Check the thread and needle to see if they’ll work with the material you’re using.
- The stitch length should be adjusted to match the diameter of the buttonhole you’re using to sew through.
- Take care to remove any accumulation of thread, lint or dust that may have built up on your sewing bobbins and plates.
- If the buttonhole foot isn’t properly fitted, it could be damaged.
Conclusion
It’s as simple as that! You only need to attach the buttonhole foot and let Singer gauge the required buttonhole for a fast overview of how to create an opening for the Singer sewing machine to sew a button. You can choose between a single step or a four step buttonhole with this model. We hope you’re well-versed in the subject matter. If you have a question, please post it in the comments box below.
Nguồn: https://spasifikmag.com
Danh mục: Sewing Tips


