You are not alone in feeling overwhelmed by the variety of sewing and embroidery patterns, methods, and stitches available. Trying to make sense of everything may feel like a monumental task. Despite the fact that it is why we came here.
Then, smocking is defined as… By gathering the fabric into small, tight pleats, smocking creates a piece of cloth with exceptional elasticity. Smocking techniques have evolved over many decades and even centuries to allow for a wide range of appearances and designs.
Bạn đang xem: What Is Smocking In Sewing? Which Fabric Is Best For Smocking?
Although similar in that both involve working with thread, smocking is more labor intensive. Smocking is a technique that uses thread and elastics to produce a wide range of cloth textures.
This tutorial will teach you the basics of smocking so you can add it to your sewing repertoire.
The History Of Smocking
While the practice of smocking itself dates back centuries, the term itself was first used in England around the 1700s. This method is used to create pleats in a cloth item. Next, the thread is weaved into the cloth to produce the desired effects and designs. Cloth is gathered into a smock at the cuffs or the bodice.
The original intention of smocking was to allow agricultural and tradesmen more freedom of movement by adding bulk to their clothing. It was worn by artists, nobility, and even infants, and eventually incorporated into many different types of clothing.
Women’s magazines and sewing manuals from the early 20th century featured instructions for smocking, a technique that remains popular today. New patterns and creative uses for the honeycomb stitch emerged in the 1940s and 1930s, paving the way for smocking to become an integral part of the 1970s fashion scene.
Smocking’s current popularity may be traced back to the 1970s, when it became popular in both high-end fashion and streetwear.
Smocking’s current popularity may be traced back to the 1970s, when it became popular in both high-end fashion and streetwear.
Smocking Techniques
The 1970s saw the rise of smocking in both high fashion and streetwear, which may explain its present popularity.
An even and consistent row of gathers is then stitched onto the front of the item. The smock is open to customization through the use of a wide range of decorative stitches.
Smocking gives fabric depth and dimension by stitching it together in a variety of ways.
Some forms of smocking use the use of visible stitches to create elaborate embroidery-like designs and patterns throughout an entire article of clothing.
These days, if you see smocking (or shirring) on a fashionable garment, it is almost always an imitation. Since achieving the traditional smocked effect of pleated fabric takes a lot of time, shirring is often employed instead.
Sewing elastic rows across a piece of fabric allows for the creation and maintenance of pleats. The irregular pleats in a shirred material tend to cover up the stitches.
Spreadsheets could be used to catalog all of the many smocking techniques.
There are probably no such hats out there, given there are so many regional and national variations of the technique (or in different areas of the same country). Smocking, however, can be broadly divided into three distinct styles: English smocking, American smocking, and Canadian smocking.
1. English Smocking
Although hats do exist, it’s quite doubtful that we’ll ever be able to track them all down due to the myriad variations in production methods between nations (or in different areas of the same country). English smocking, American smocking, and Canadian smocking are the broadest classifications we can use to describe this type of embroidery, although there are many more.
Two common stitches used in geometric smocking are the cable stitch and the trellis pattern. Hundreds of unique patterns and iterations can be made using just two stitches.
The ability to embroider piled cable threads on top of the tight pleats to create decorative features is what gives “picture smocking” its name (images). This method is often used to print a wide range of designs and scenes onto fabric made entirely of cotton.
2. American Smocking
Fabrics with patterns, such as stripes, checks, or grids, are often used in American smocking to create the illusion of a single color. Instead of using pleats to create squares, a vandyke or honeycomb stitch is utilized. Some American variations on the classic smocking method include contrast, faux, and direct smocking.
Xem thêm : How To Service A Pfaff Sewing Machine? Troubleshooting and Repair Guide
The pattern of the gingham is more affected by the use of counterchange stitches than by any change in the fabric’s drape or hand. Fabric pleats are made with stitches. Similar to smocking, but without the stretch.
Fabric folds are used to produce a mimic smocked effect. Popular because it can create honeycomb patterns and does not make the fabric stretchy.
The outcome is similar to that of traditional English smocking, but the method is distinct in that it calls for the employment of gridded dot patterns on top of the pleats. This method is simpler to understand and implement in the long run because there are no pleats involved.
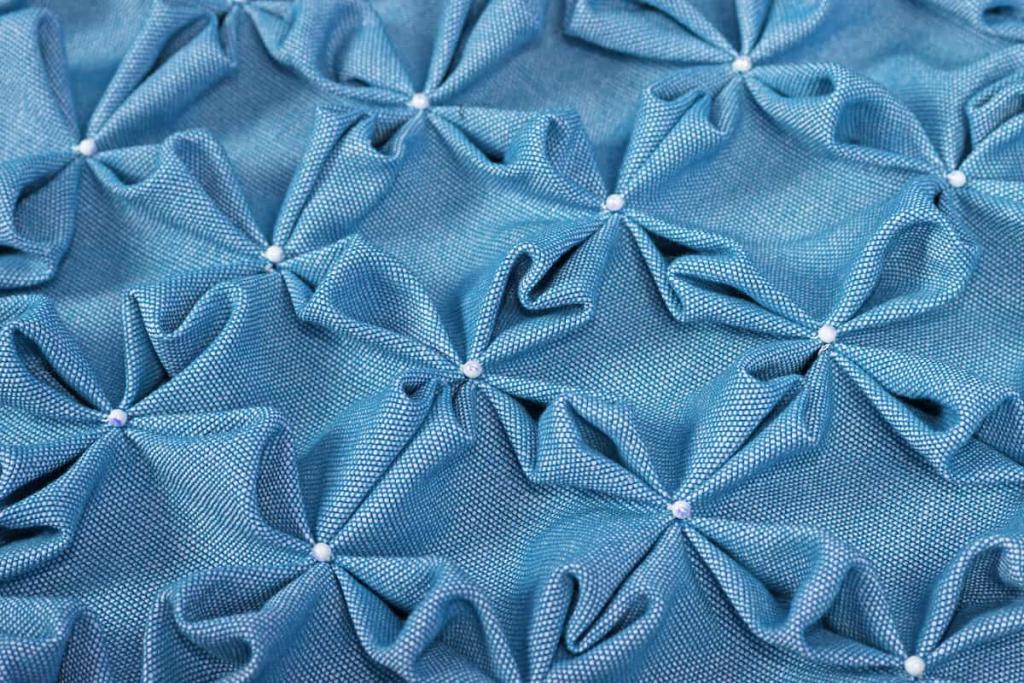
3. Canadian Smocking
In Canada, numerous different smocking techniques are used, and only some of them require pre-pleating. If you draw a grid on the reverse of the fabric, you can use it to make a three-dimensional impression on the front. The three-dimensional look achieved by smocking would be destroyed by an iron.
Canada has given the world such smocking techniques as the lattice smock, the fabric smock, and the reverse smock.
Lattice smocking creates a beautiful crossing pattern on one side of the fabric. This is done by stitching the three-dimensional pattern into place after tracing diagonal lines onto the back of the fabric.
The “flowers” on the front of the fabric are made with stitches that are worked in patterns to create 3D effects, giving the appearance of lattice smocking.
The cloth’s front is smocked in a grid pattern, giving it the sense of depth. The fabric will always look “crunched up” while using this technique, thus you’ll need more than you think to construct a small piece of smock.
Reverse smocking, often known as “smocking backwards,” creates patterns on both the front and back of the fabric. There is a sense in which it can be called “reversible.”
Which Fabric Is Best For Smocking?
For smocking, you’ll want to choose a light to medium weight fabric that has no elasticity. Smocking is a challenge for seamstresses because elastic fabric won’t hold the textured design well.
Fabrics with a smooth surface and an even weave are ideal for smocking because they are easy to manipulate and maintain pleats. Medium-weight fabrics like cotton, linen, cotton blends, and lightweight denim are great for newbies.
Expert seamstresses should look to lightweight fabrics such as silk, satin, or poplin. Lightweight fabrics need interfacing’s rigidity to retain pleats and stand out more clearly when sewed in order to emphasize their patterns.
Since heavier materials make smocking more difficult, especially when done by hand, and require much thicker stitches to keep the pleats in place, they are not recommended for use in smocking.
Since smocking causes the fabric to be “scrunched up,” you’ll need three times as much as you think you’ll need. This criterion should be given extra consideration for smocking techniques that result in stretchy fabrics.
If you want to sew a smock that’s 10 inches square, you’ll need a square of fabric that’s 30 inches by 30 inches. If you want to make sure you have enough fabric for your clothing project, add seam allowance to your design.
Which Thread Is Best For Smocking?
Embroidery thread is the ideal weight for smocking since it holds the pleats securely without being too difficult to manipulate.
When selecting a thread for smocking, it’s a good idea to try to match the thread’s material to the fabric’s. Using silk threads with a silk cloth, for example, is a good illustration.
When selecting a thread for smocking, it’s a good idea to try to match the thread’s material to the fabric’s. Using silk threads with a silk cloth, for example, is a good illustration.
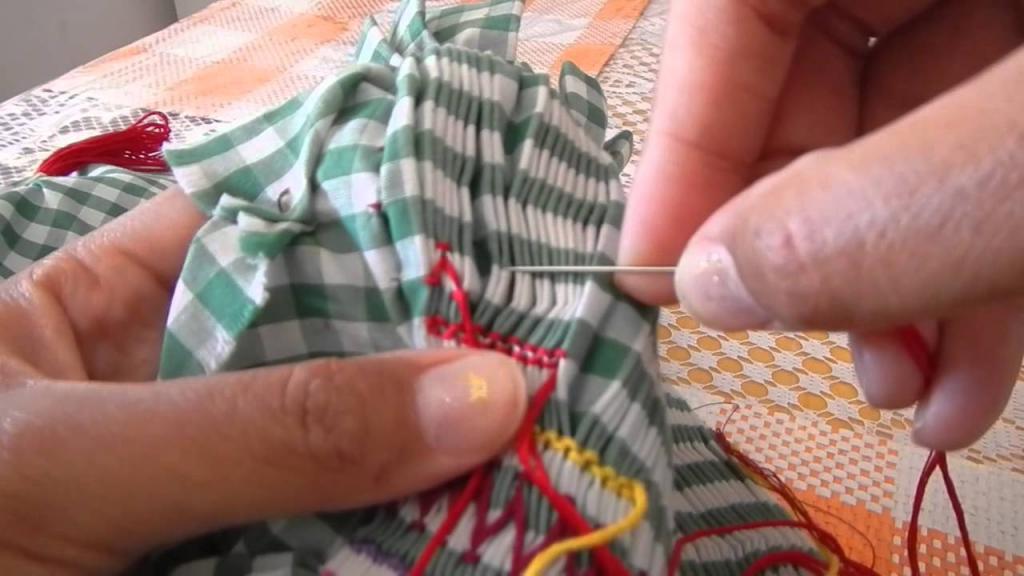
How Do You Do Smocking By Hand?
- Smocking thread should ideally be chosen to complement the cloth it will be used on. Using silk threads with a silk cloth, for example, is a good demonstration.
- Selecting a thread for smocking that is similar in composition to the fabric being used is recommended. To illustrate, consider the use of silk threads with a silk cloth.
- Ascertain that each stitch is immediately under the one above it and that the rows are uniformly spaced but the columns are slightly longer.
- Join the points with a running stitch.
- Close the loops at the beginning and end of each row.
- Pull the pleats taut again by retying the threads.
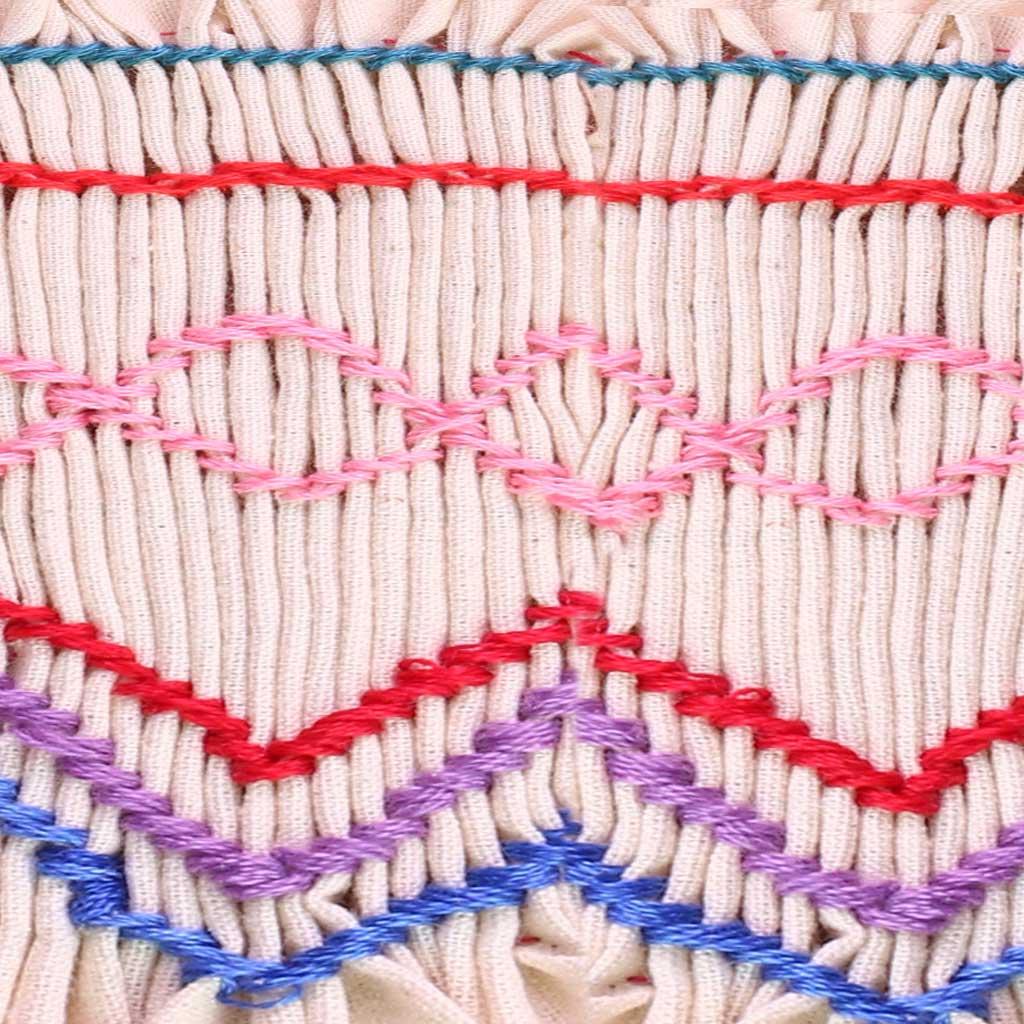
What Are The Different Types Of Smocking?
Many different techniques exist for smocking, including:
- Smocking relies on the diamond-shaped Trellis stitch.
- Smocking makes use of the cable stitch, which is utilized as an embellishment and looks like chain links.
- In smocking, an outline stitch is used to keep the pleats from coming undone.
- In terms of stretch, the honeycomb stitch is the best option for smocking.
- Although the trellis stitch and the diamond stitch share visual similarities, they are actually completely separate stitches.
- The smocking chevron stitch is among the most eye-catching stitches.
This guide will teach you how to use the decorative stitches on your sewing machine.
What is backsmocking?
Working from the back of the fabric, rather than the front, is standard practice in traditional smocking. Once again, the objective is to add a subtle new texture to the main motif.
What is applique smocking?
Applique smocking is the term for the decorative sewing done on pleated fabric. A common stitch used in this fashion is the herringbone.
How To Gather Fabric For Smocking?
Xem thêm : What Is A Walking Foot Industrial Sewing Machine? 5 Best Walking Foot Sewing Machine
Be sure your fabric has been pre-shrunk before you start crafting with it. Warm water washing is recommended if it has not been pre-shrunk. If you want to start smocking, check to see if your cloth has shrunk before you start. Cotton in particular is notorious for its tendency to shrink.
If you don’t pre-shrink the material, the finished product can be too small because some smocking techniques further “shrink” the fabric. If you’re making a dress or blouse with a smock, make sure it fits you instead of a youngster.
After the fabric has been pre-shrunk, the smocking process can begin. Some of the most frequent techniques are hand pleating, machine gathering, and pleating with a pleater.
1. Hand Pleating
Hand pleats are the most time-consuming and labor-intensive option. This is how smocking was done in the 1700s, so you can bet that it will take a long time and a lot of careful preparation.
This step is all about tracing your pattern onto one side of the fabric so that you can use it as a guide when you begin stitching.
2. Machine Gathering
In this stage, you will be tracing your pattern onto the wrong side of the fabric for future reference.
To collect fabric with your sewing machine, use the longest stitch length allowed on your machine (about 5 millimeters) when using basting stitches as described above. The width of your pleats can be determined by the distance between the two parallel lines you sew. Each time, be sure to leave enough of thread tails so that we may pick it up afterwards.
To collect fabric with your sewing machine, use the longest stitch length allowed on your machine (about 5 millimeters) when using basting stitches as described above. The width of your pleats can be determined by the distance between the two parallel lines you sew. Each time, be sure to leave enough of thread tails so that we may pick it up afterwards.
When utilizing basting stitches in the manner outlined above to gather fabric, it is recommended that the longest stitch length possible be used (about 5 millimeters). Start by sewing two parallel lines on your cloth to determine the length of your pleats. Always leave sufficient thread ends for us to pick up.
Faux smocking, often called shirring, can be done with a sewing machine and a number of separate pieces of elastic. Using a stretchy stitch, sew parallel strips of elastic across the cloth, making that the elastic is the right length for the finished smock (such as a zig-zag stitch).
The parallel elastics will give the final result the appearance of a smock, but the pleats will be completely random.
3. Using A Pleater
A wide range of pleaters exist, each of which is capable of making perfectly uniform smocking pleats.
Even pleats can be made on a sewing machine with a ruffler presser foot, eliminating the need for manual collecting and pleating (this one is our fave). If you already have a sewing machine, this is a fantastic choice.
A pleater can be operated manually, too. You can easily achieve flawless pleats with the help of these pleaters, which come in three different sizes. You must order the pleater size that corresponds to the desired pleat width in order to get the desired pleat size.
This is only a cheap plastic tool for making neat “folds” in your cloth, so you’ll need to use pins to help keep the pleats in place. Using this straightforward technique, anyone can create beautiful smocking pleats.
How Do You Do Smocking With A Sewing Machine?
- Long, straight stitches are used to sew parallel lines, and the threads are tucked under the fabric as you go.
- The raw edges of tucked or gathered fabric should be finished with a seam.
- Use your preferred decorative stitch or the smocking instructions provided in the user handbook to complete the project.
- Rows of parallel stitches can be sown either across or between the gathering stitches.
- Take off the gathering stitches on the panels.
What Is The Purpose Of Smocking?
Elasticity
It is not necessary to use elastic to achieve the desired amount of stretch in a smocked garment.
Fullness
According to the Textile Research Centre, smocking can be used to add or subtract volume to a variety of garment features, including sleeves, necklines, and shoulders.
Decoration
Smocking is a form of ornamental embroidery used to provide depth and texture to clothing. It’s up to you to decide what color thread you want to use.
How Hard Is It To Smock?
Having to do everything by hand makes smocking a challenging skill to master. You can use a smocking transfer to speed up the process, but a sewing machine will do the same job.
When utilizing a smocking transfer, you won’t need to mark and measure the fabric for the dots. After you’ve trimmed the transfer to the right size for your cloth, all you need is an iron to permanently attach the markings.
Conclusion
And it sums up the whole thing! Smocking is a gathering method used in sewing and embroidery called “smocking.”
This can do more than just make the garment seem better; it can also give it extra volume or stretch where it’s needed. Instead of learning how to smock by hand, beginners can get a smocking transfer and set up their sewing machine to do the job.
Nguồn: https://spasifikmag.com
Danh mục: Sewing Tips


