Do you know when it’s time to change the needle on a sewing machine? Simply owning a sewing machine isn’t enough; you also need to understand the basics, such as when to replace the needle and how to do it.
- How Do I Fix The Timing On My Singer Sewing Machine At Home? Tips and Warnings
- How To Make A Sofa Slipcover Without Sewing? Things You’ll Need
- How To Remove Sewing Stitches? Complete Step-by-Step Guide
- What Are The Types Of Sewing Machines? How To Buy A Sewing Machine?
- How To Make Curtains Without A Sewing Machine? Step by Step Instructions
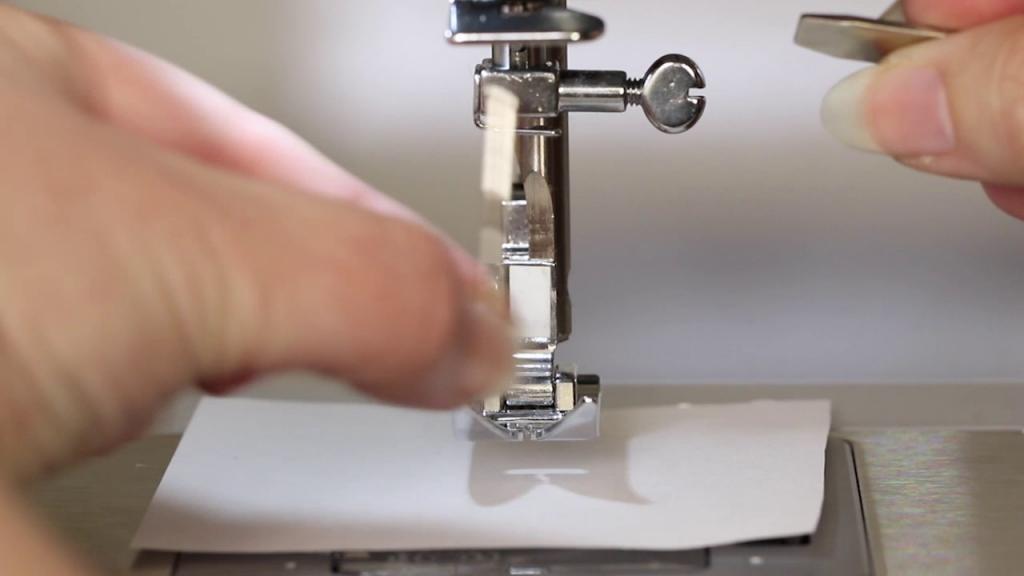
What is the proper procedure for changing a sewing machine’s needle? Start by shutting down and unplugging the machine. Set the presser foot on a piece of fabric. Once you’ve got the needle in the “up” position, you’re ready to remove it and replace it with a fresh one. A fresh needle should be tested on a small piece of fabric after being secured with the tightening screw.
Bạn đang xem: How To Put A Needle In A Sewing Machine? Step-by-Step Tutorial
If you plan to use the same needle for all of your garments, you may end up spending more money over time. If the needle breaks, you’ll need to buy a new one because it’s more expensive to replace the entire piece of cloth than to repair the needle on the sewing machine.
It is also advisable to change the needle if you want to avoid skipping stitches or thread that breaks.
Everything you need to know about changing the needle on your sewing machine is covered in this article. Here are some quick hints and answers to frequently asked questions about threading sewing machine needles to make the procedure easier for you.
How To Put A Needle In A Sewing Machine Yourself
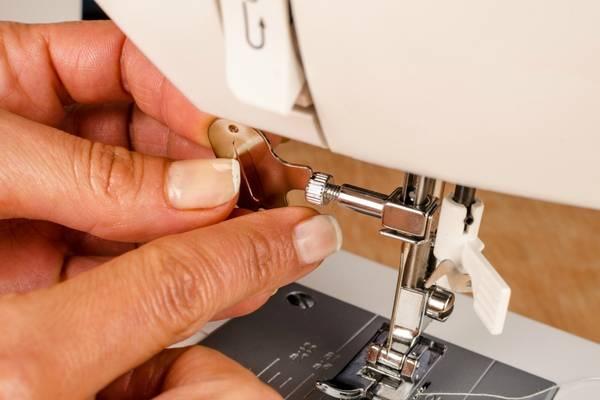
Step 1. Keep the needle in place and pull it down. needle.
- Grab the needle with your non-dominant hand and release the screw on the needle’s upper end with your dominant hand. The needle will not fall into the sewing machine if you use both hands to hold it.
- To loosen the screw manually, if you’re having trouble. A screwdriver should be included in your sewing machine.
- If the needle screw is loose, freeing your needle clamp should be a breeze. clamp.
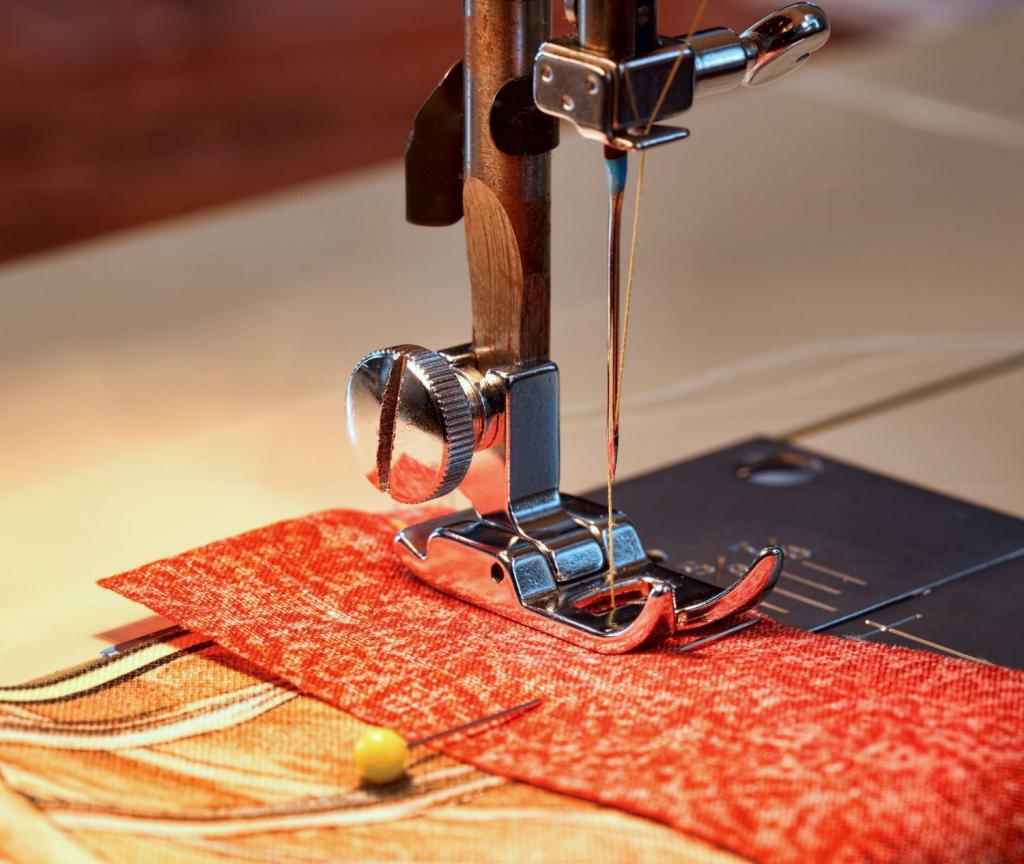
Step 2. Rethread the needle
- After locking the needle into the clamp, it can be rethreaded.
- Ensure that the threads are placed in the correct order in relation to them.
- In order to attach the thread, you must press the lever.
- To get to the needle, route the thread in the direction of the thread guides located within the needle’s zone of the work area..
- Take care to align the bobbin with the thread.
- Thread the needle to the required notches.
- Pick up the bobbin thread after taking the thread from the beginning to the end. Use the handwheel to fine-tune the needle.
- The needle of a Brother sewing machine can be threaded using this tutorial. To learn more about the specific processes involved in threading a Singer sewing machine, go to the owner’s manual.
Step 3. Inject the needle with the new needle
- Find the needle’s flattened edge by inspecting it with your new sewing machine.
- The needle should be put toward the clamp with the flattened edge facing the back of the machine. During installation, make sure your needle is oriented in such a way that the machine can make a stitch.
- When the new needle is securely clamped, you’ll know because you’ll hear or see it.
- Tighten the clamp screw with your hands first, and then with an instrument if necessary.
How to tell if your sewing machine needle is dull?
As soon as the needle begins to thump or make an unpleasant sound whenever the needle has difficulty stitching through the fabric, it is time to replace it. To check if the needle is sharp or dull, switch the machine off and stick your finger in the needle.
Use a magnifying to examine the needle’s point to see whether it’s dull on your sewing machine needle as another way to check.
Always use the correct needle for the type of stitching you are doing and the type of material you are stitching. The right needle can speed up and smooth out the process of sewing.
Xem thêm : What Is Understitching In Sewing? Preparing a Seam for Understitching
It is also the most cost-effective approach to extend the life of a product without having to spend money on costly repairs. In part, this is because the needle glides effortlessly across the fabric, requiring the machine to use less effort to stitch.
How to change the needle on a sewing machine?
It’s a simple task that will improve your stitching quality. To change the sewing machine needles, follow the directions that come with the machine.
The following are basic step-by-step instructions for changing the sewing machine needle if you’ve misplaced your owner’s manual or need help with your sewing machine:
- Remove the device from its socket and turn off the power.
- Put a piece of cloth or paper under the foot that is under strain. “
- Remove the screw that holds the needle in place.
- It is imperative that you continue to drag the needle down until the needle’s bar is found.
- Bring in a fresh one.
- Pull the needle upwards until the back of the needle touches the stop, then release.
- Tighten the screw on the needle.
The flat edge on the shank of home sewing machine needles means that there is just one correct method to position the needle. However, the shanks on industrial sewing machines are spherical.
Sewing machine needles are one of the most cost-effective solutions to ensure that your machine lasts longer and help you achieve straight stitching easily. Maintaining the optimal performance of your sewing machine couldn’t be easier than this.
The quality of your sewing and stitching can also be guaranteed this way. You now know what happens when needles need to be changed, how to insert the needle correctly, and how to make modifications in a safe and secure manner with confidence.
Do All Singer Sewing Machines Use The Same Needles?
According to the instruction manual, most sewing machine needles can be used on any type of machine. Singer sewing machine needles can be purchased from the same manufacturer. Singer Style 2020 and Singer Style 2045 are the most often used sewing machine needles from Singer.
Choose the kind of fabric that you’ll be sewing
Sewing knits or non-stretchy textiles is a breeze with the Singer Style 2020. Both as a standard Sharp needle and as a pointed needle, it serves multiple purposes. When it comes to sewing non-woven and flexible fabrics, the Singer Style 2045 needle has a ballpoint needle that presses between the fibers.
Find the right needle size needed for the fabric’s thickness
Medium-weight materials are best suited for Singer sizes 14/90, whereas light-weight textiles can use size 11/80. Sizes 16/100 and 18/120 can be used for medium- to heavy-weight textiles, respectively, and for heavier materials like upholstery. Lacework in sizes 9/70 and other light materials are also options.
What Causes A Needle To Break On A Sewing Machine?
Xem thêm : Who Makes Elna Sewing Machines? Everything To Know!
If you use a needle that is too little for the weight of the fabric you’re stitching, you could end up with a broken needle. Feed dogs will perform the heavy lifting for you if you don’t tug or push on the fabric while sewing. If you try to move the fabric by yourself, the needle may deflect and break.
What can I tell when my machine’s needle is broken?
When using a sewing machine, keep an ear out for noises. In order to make the popping sound, even if the needle is crooked, it must break. Right away you should delete it and replace it with the suitable type and size.
Can You Use Any Needle For Sewing Machine?
Sewing machines should not be used with any sort of needle, as the wrong type or size could cause:
- Pull the fabric tighter.
- Stitching the non-woven cloth will damage it.
- Sewing causes thread to rip and fray.
- The seam has rips in it.
- woven materials that weave their way through it
- It is impossible for the machine to move smoothly and quickly.
What Is The Sharpest Sewing Machine Needle?
It’s best to use the needle that’s best suited to the fabric you’re working with when using a sewing machine. Silk, for example, is a very light fabric, so a thin needle, such as a 70/10, is recommended. It is advisable to use a 100/16-sized sewing machine needle for denim, which is heavier. There are three thicknesses available: 110/18, 110/14, and 110/12. A needle size of 80/11 would be appropriate for a medium-sized fabric such as cotton.
Why Sewing Machine Needles Break
The needle on my sewing machine keeps breaking. The needle of your sewing machine is vulnerable to the following 14 problems:
- Sewing pins instead of pins
- Threading the sewing machine was done correctly.
- The spool’s capsule is either missing or not present.
- There is a problem with the bobbin.
- There is an issue with the Bobbin.
- It’s possible that any part or component of the gadget has lint, loose thread, or fluff on it ( particularly the bobbin)
- The machine’s tension has been incorrectly set.
- the fabric or the project you’re working on need a different type of needle.
- The needle has not been correctly placed into the machine, or it is not securely fastened into the machine.
- Incorrect placement of the needle.
- Damaged or dull needles are possible.
- While sewing, you pull the fabric.
- The wrong thread type was used.
- Foot attachments are being used incorrectly
To find out what caused the needle to break and how to fix the problem, keep reading.
The Needle Is Not Correctly Put Into The Machine Or Secure
When it comes to threading your sewing machine, each one is a little different. Make sure you read your unique model’s manual to ensure that the needle is secured in the correct position. When sewing, even the tiniest misalignment can cause a host of problems.
Generally speaking, the needle’s flattened portion should face the machine’s side. On the other end of the needle, you’ll find small screws (sometimes referred to as clamps). It’s critical that you do everything you can to keep this thing safe. If you don’t keep an eye on it before you begin sewing, it’s easy for it to get loose over time.
Conclusion
That’s it! We’ve already covered the basics of threading a sewing machine with a needle. To replace the needle, first loosen the screws and then pull the old one out and insert the new one. To avoid any stitching issues, it is critical that you use the correct needle size and type.
Nguồn: https://spasifikmag.com
Danh mục: Sewing Tips


