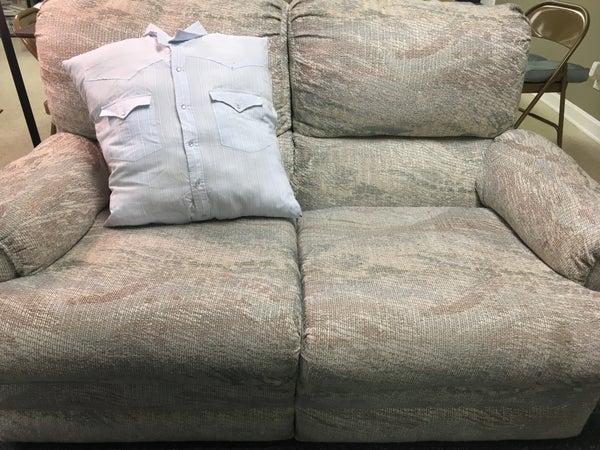
Did you know it simply takes two steps to learn how to build a shirt pillow? You can use a shirt to build a pillow, or you can buy a pillow protector. Even better, there is no need for sewing at all!
- What Is The Best Sewing Machine For Leather? Helpful Information
- How To Fix Sewing Machine Handwheel?
- How To Stitch In The Ditch With A Sewing Machine? A Few Tips to Remember
- How Do I Fix The Timing On My Singer Sewing Machine At Home? Tips and Warnings
- How To Hem Curtains With A Sewing Machine? Step by Step Instructions
To commemorate your favorite shirts or to give as unique gifts, these shirt pillows can be made into mementos. You don’t even need to know how to sew to apply these techniques, as they don’t require a needle or thread. Shirt pillows can be made right now if you keep reading.
Diy No-sew Shirt Pillow
Supplies Needed:
- x-large button-down shirts are a good fit -wise
- filling for pillows
- I used Dritz heavy-duty Stitch Witchery iron-on fusible bonding tape.
- Is it really necessary to state the obvious in regards to scissors? OK, so I’ll go ahead and do it.
- a piece of iron
- a piece of ironing equipment
- Is this too much information?
- Too much information? Use a cup to pour water into the iron?
Step 1: Purchase t-shirts
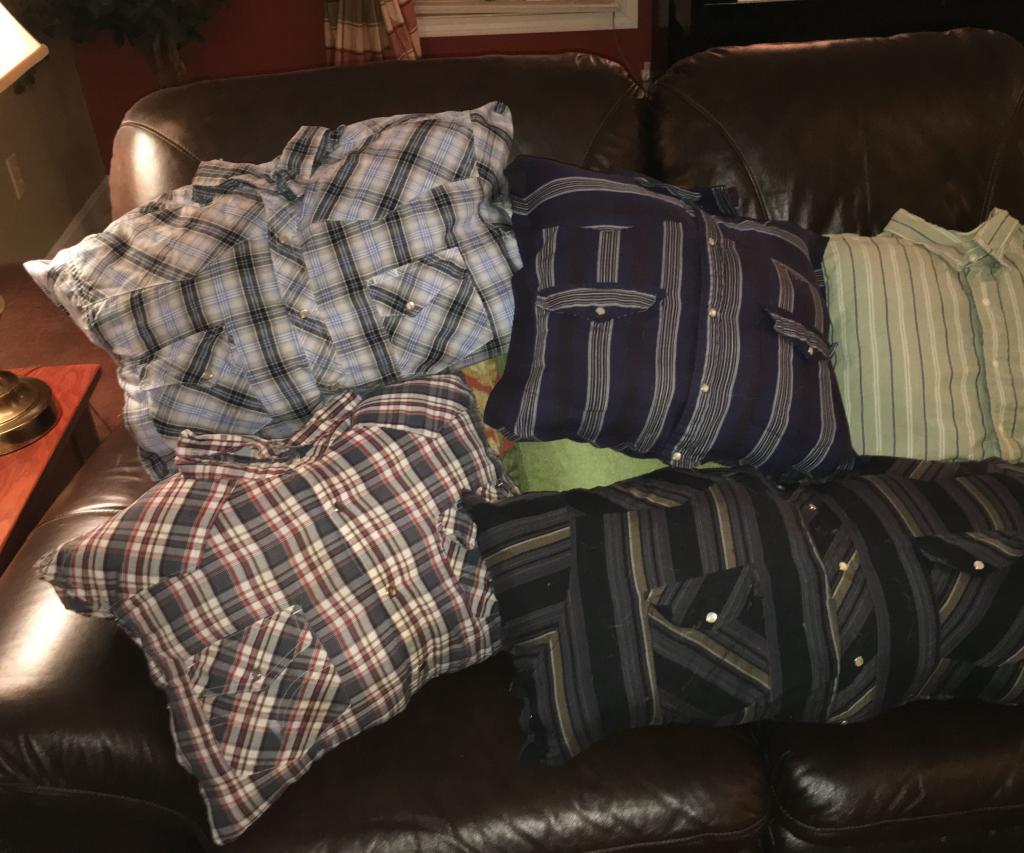
Buy several plaid shirts at a discount from your local secondhand shop. Denim shirts are another option. Whatever style you’re going for, you’ll look great. Another alternative is to rummage through your husband’s closet.
If you want to build a memory shirt cushion, you can even use one of your father’s or grandfather’s shirts.
Step 2: Makeover time for shirts
Lay out your clothing flat on a table after they’ve been ironed if they’re particularly wrinkled (like mine were).
Decide on the size of the fabric in Step 3.
I made use of a few cushions. Taking the pillow covers off of my shirt pillows allowed me to utilize the pattern as a guide for making the rest of the pillows. Use chalk to mark off an inch larger than the old pillow form for seam allowances (I completely forgot to include chalk in my list of supplies! ). (or in this case, iron-on tape allowance).
I have a single pair of pillows for the porch, which I just reupholster each season.
Determine how big your pillow is and add an inch around it if you’re using fresh pillows. To accommodate for the seam allowance, cut your fabric to a size of 20×20 inches if your pillow form is 18×18 inches.
This project benefits from using checkered fabric because the cloth’s lines make cutting straight cuts a cinch.
4. Cut it out (In my best Joey Gladstone from Full House impression)
Also, I wanted the pocket to be visible, so I made sure it was perfectly positioned within the space I planned to cut away.
Step 5 – Flip!
Place the tape between the right and wrong sides of the shirt and flip it over.
Step 6: Remove the iron
Using an ironing board instead of an antique oak table may be a better option.
The cushion must be ironed all the way shut. I’m confident in my abilities. Tape the four corners together with the iron.
Is it possible that I sound crazy? No, not at all, because.
Step 7: Put it away
The shirt should be unbuttoned, flipped inside out, then stuffed with a cushion before being buttoned back up.
Take a moment to congratulate yourself.
Take a seat and take in the beauty of this amazing pillow!
Can You Make A No-Sew Pillow Cover?
Xem thêm : What Size Sewing Machine Needle For Quilting? Picking the Right Size
Pillows may become a breeding ground for bacteria and allergens, so using a cover that fits properly is a good idea. There is another option: You don’t need to sew to construct a pillowcase. Making an envelope or overlapping back cover is similar to this idea.
To make a pillow cover, all you have to do is measure a piece of cloth and fold the seam allowance. Place your cushion in the centre of the cloth, then use a fusible bonding web to connect the two ends. The open ends should be bonded again once the fabric has been allowed to overlap and the pillow has been removed.
Should I use a pillow form or stuffing?
Whatever you choose to do is up to you, but I’ve found that it makes a difference in the end result. Stuffing can be variable, lumpy, and worsen over time when I’ve used it to make pillows and other filled goods. On the other hand, it’s an excellent choice for making something of an unusual scale.
For a cushion, pre-made forms are appropriate. When it comes to pillow forms, they’re not much more expensive and come in a wide selection of materials, so you can pick and choose what works best for you.
What size pillow form should I choose?
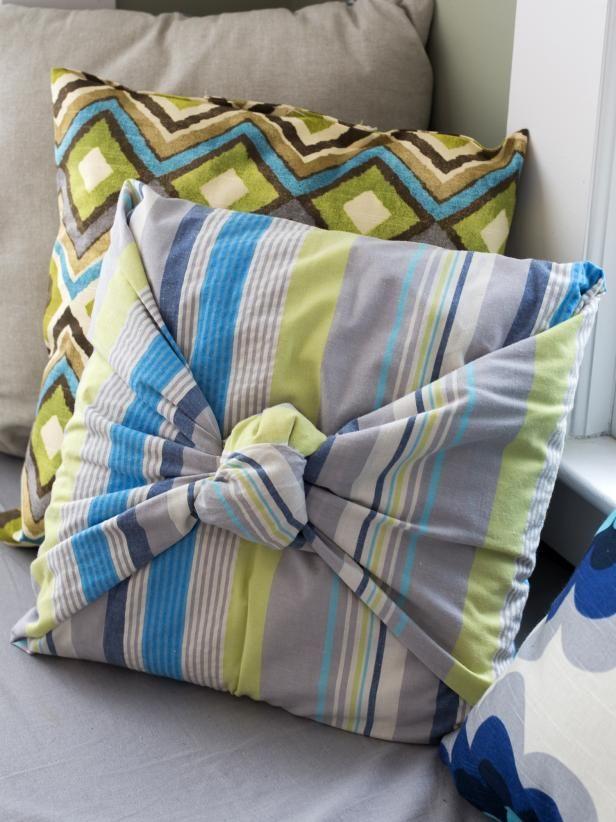
Is there a design you want to incorporate into the shirt’s design? The ties need to be at least 2 inches away from the pillow form’s edge (however you can go as long as 3 inches all around if you want it to be easier to tie). On each side, I trimmed the shirt to a little less than 24′′ by 24′′, which works out to around 3′′.
Additional shirt size tips
The collar and seams of the ties will affect their appearance, so avoid them whenever possible. Although I couldn’t get rid of the collar and sleeve seams completely, I did my best to minimize them. If your shirt’s design allows it, size down to avoid the collar, shoulder, and sleeve seams.
Should I use a rotary cutter or scissors?
A combination of the two is recommended. To make the cushion base, I used a rotary cutter, and then scissors to cut the tie strips. No worries if you don’t own a rotary cutter. Sharp fabric scissors are essential, however.
What is ruler tape?
The iCraft PeelnStick Removable Ruler Tape was an optional item on the materials list, but it came in handy during this project (shown below). There are a variety of ruler tapes on the market. I found this in my craft drawer and it made the shirt pillow creation process a lot more efficient.
It’s not just for measuring and positioning my primary image but also for cutting the tie strips. Make your own with a ruler and releasable tape.
Conclusion
Use an old t-shirt to sew a pillowcase. You have no reason to say no now that you can construct a shirt pillow quickly and easily without sewing. Even those who dislike needle and thread can construct their own shirt pillow if they have the time and patience.
Cut through your t-shirt simply once to acquire two pieces of fabric. Keep in mind the graphic design and the fabric allowances surrounding it when sewing. Once you’ve folded the cloth into four, snip the top corner, then unfold it and cut the fringes around the entire piece of material.
Stuff the pillow after you’ve tied on a pair of fringe around it. Voila! A old shirt and some pins and scissors were all you needed to make a shirt pillow.
Nguồn: https://spasifikmag.com
Danh mục: Sewing Tips


