Using a sewing machine, it’s possible to learn how to sew a hem in two simple stages. Setup is the first stage, and then we’ll teach you how to sew. A sewing machine isn’t necessary; you’ll learn how to make a skirt hem by hand utilizing this guide.
Is it possible to sew the hems of my pants? We’ve put up a how-to for sewing machine hems for pants. After reading this, check out our blog for sewing machine-related content.
Bạn đang xem: How To Hem A Skirt With A Sewing Machine?
How To Hem A Skirt With A Sewing Machine Step By Step
Step 1. Create the skirt
- Sketch out the hemline of the skirt where you want it, and then take measurements.
- Ensure the skirt is the correct length by measuring 1/4 inch of cloth, then pressing the seam on the wrong side before folding it again.
- Keep a record of how far you folded the material. Apply it to the hem of the skirt to get the perfect fit.
- Make sure that the hem is folded inward toward the outer edge of the dress before you begin sewing the hem.
Step 2. Begin sewing
- Begin by making sure the machine is set to stitch the blind hem and then attaching it to the bottom of the blind and beginning to sew.
- If you have a sewing machine with a hemming foot, you can learn how to use it to make hems.
- Test your settings with scrap fabric first to determine whether the thread width needs to be adjusted before stitching the skirt.
- To sew a skirt, follow these instructions for setting up the sewing machine:
- A small stitch will be left behind if you place all of your stitches on the right-hand side of your folded region before shifting the needle.
- You’re done hemming your skirt when you press it.
What Stitch Do You Use To Hem A Skirt?
Blind stitch
The blind stitch is the best way to hem an entire skirt, especially if the cloth is quite heavy. Professional-looking clothing can now be made at home using this method. It’s also a snap to do, requiring simply the usage of a blind-specific sewing machine foot and a selection of the blind hemstitch stitch type.
What if I told you that there are machines specifically specialized to make this type of hem? A blind stitch machine can be found in this page on how to use it properly.
Edgestitch
Hand sewing an expanded skirt with largely invisible threads is the most efficient method. Using an edge stitching foot on a sewing machine, on the other hand, is the most efficient way to hem a skirt with curving edges. There is no puckering, and the finished product is also tidy.
How Do You Hem A Skirt Evenly?
- Before hemming the skirt the next day, hang it up overnight to let the fabric relax.
- Dress up or let someone else wear it and you’ll be able to figure out the best hemline.
- Using pins, mark the appropriate length on the side seam.
- Take note of the distance from the ground to where the pin is, and mark this distance on the hem of the garment to indicate where the pin is located.
- With a pair of scissors, follow the pin lines to cut off the skirt’s fabric.
How Do You Hem A Skirt Without Cutting It?
- Trimming a skirt isn’t necessary, especially if you’re only going to be reducing it by a small amount.
- The hemline of the skirt you’re constructing can be determined by using a pattern from another skirt.
- Make sure you can hem the skirt evenly by inspecting the marks you’ve created.
- Iron the skirt if necessary and check to see that it is folded neatly.
- The tape should be applied on the garment. Finish the hemline with an iron.
What Is The Hem Of A Skirt?
This is the fold that runs from the bottom of the skirt. You can also use this technique to draw attention to your thighs and ankles by framing the skirt’s hem. Straight skirts have a conventional hemline of 2 and a half inches. According to experts at the Texas A&M College System’s Extension Clothing Program, 2-inch hemlines are optimum for circular or gored skirts.
How Do You Hem A Skirt Without A Sewing Machine?
- For an undetectable hem, thread the needle with the same shade of thread as the skirt.
- When inserting the needle, make sure that the knot is hidden in the hem’s folds.
- Close enough to the needle’s point of entry to catch the fabric, but not so close as to fully perforate it.
- Continue sewing and then go back to where you started.
- Hold the stitches in place with a knot
- To complete, flat iron the garment’s hem.
How do you sew a hem without cutting or sewing?
- Remove the top edge stitches and the hemline stitching from the skirt by turning it over.
- When the hemline reaches the waist, tuck it in.
- Tape a piece to the hem on each side.
- Press the fabric with an iron.
- When ironing, be sure that the skirt is facing the correct way up.
Five Ways To Machine Stitch Hems
Machine stitched hem techniques have been explored in earlier articles, therefore it’s time to go into the details. Machine stitching isn’t always better than hand stitching, but there are times and places for both. For particular types of cloth and hem, it’s not only faster (in most situations), but it’s also easier to get professional results. For example, stitching a thin hem on a sewing machine makes it much easier to get a flat hem than doing it by hand. If you don’t have an overlocker or cover stitch machine, a machine stitched hem with a twin needle is an excellent alternative for a professional finish if you’re working with stretch fabrics by hand. We provide a whole assortment of sewing machine feet that make precise, clean machine sewn hems easier to produce than ever before.
The Blind Hem
A blind hemming foot on your sewing machine can be used instead of a standard hemming foot and stitch in order to achieve the best results for any hem deeper than a thin hem. If you’re looking for an alternative that hides the stitching in plain-woven textiles like linen and wool, this is a great option for you to consider. As long as the design of the fabric isn’t too busy, the stitches won’t be noticeable.
In order to produce a blind hem, finish the raw edge of the fabric and press the appropriate hem allowance up. A portion of the raw edge and some of the hem allowance will be revealed when the hem allowance is folded back onto the right side of the garment. The folded edge of the fabric should lie on the inside edge of the right side of the foot when using a machine with a blind hem foot. In order to ensure that you are sewing along the inside edge of the foot, select a blind hem stitch on your machine and begin stitching. Using the blind hem stitch, you can catch the edge of the folded fabric of the garment, then switch to stitch numerous stitches in the hem allowance so that the stitching line is hardly visible from the right side of the garment. The width of the stitches on many machines can be adjusted using an adjustable blind hem foot*, allowing you to catch more or less of the main garment fabric as you sew.
Check our compatibility charts before purchasing sewing machine feet, or contact us for help if you’re not sure if they’ll work with your machine.
The Turned Hem
For most hem allowances and materials, this technique is a good choice, but it should be avoided for bulky or sheer fabrics since it turns up the raw edge of the cloth inside the seam allowance.
You may produce a turned hem by simply pressing the raw edge of the fabric up by about 1/8′′ (or slightly more if necessary owing to the fabric) and then pressing it up again to the needed hem allowance.
Secure the stitches by sewing near to one of the raw edge of the hem allowance from the wrong side and back tacking. Using a seam guide foot or an edge foot, like the one pictured below, can make it easier to stitch precisely.
A Curved Turned Hem
If you want a nice hem, sew a basting line 1/4′′ from the raw edge of the hem. Pressing up the hem is made easier with this handy tool that doubles as a measuring reference.
The raw edge of the fabric should be pressed up against the stitching line.
Make sure the raw edge of the fabric meets the pressed fold once more, and press up the fabric once more. Gently pulling one of the threads to gather it slightly before pressing is an excellent suggestion for easing the fabric in to minimize any creases.
In order to keep it from unraveling, you’ll need to backstitch it in place at one of the side seams after pressing. Using an edge foot or seam guide foot can be helpful in ensuring that your stitching is consistent. Once you’ve pressed the final button, you’re done!
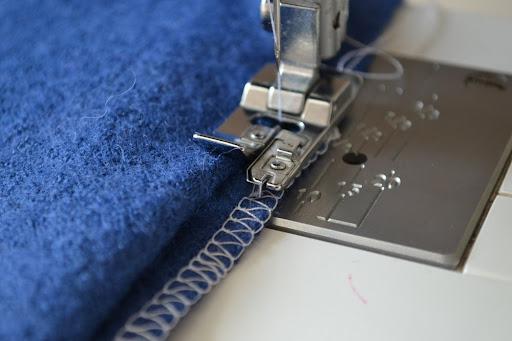
An Overlocked And Turned Hem
Flared hems and heavy materials benefit from this choice because the cloth is only turned up once, resulting in reduced bulk. Because the overlocked edge of the fabric would be seen from the right side, sheer textiles should be avoided.
Use an overlocker or the overcasting stitch on your sewing machine to overlock the raw edge of the hem.
Stitch the hem allowance in place from the wrong side, near to the edge of the hem allowance and within the overlocking stitches, as seen in the image below. An edge or seam guide foot can help with stitching accuracy. Make a backtack at a side seam and sew in place.
From the right side, you’ll get a clean stitching line.
Remember to keep the hem allowance small when working with a curved hem. It’s possible to modify the differential feed on an overlocker to gather the cloth slightly, which will assist reduce the hem’s flare.
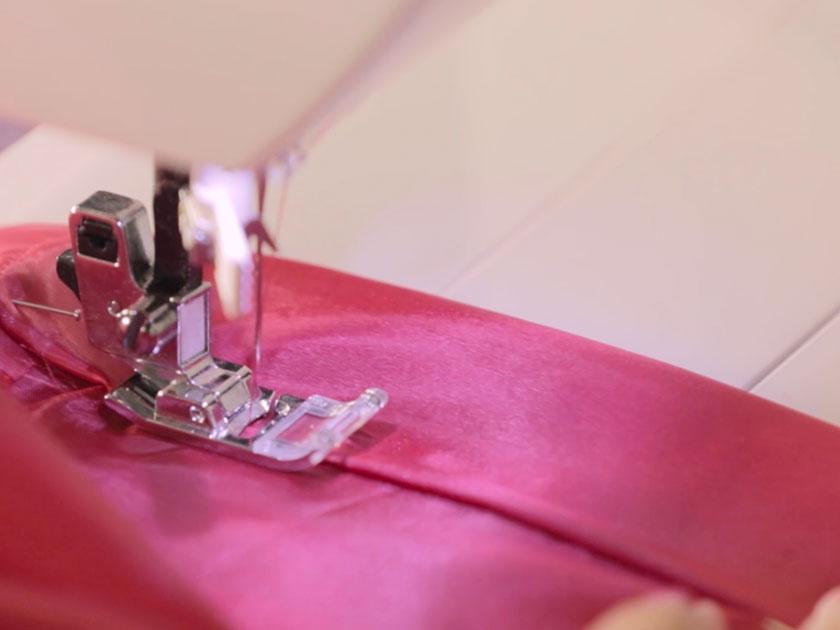
A Narrow Hem/Rolled Hem Foot
A hemmer foot or rolled hem foot can also be used to make thin hems, in addition to the methods listed above. Even though it’s a difficult technique to perfect, thin hems are particularly handy when working with sheer or fragile fabrics because they are quick and easy to sew. Water-soluble stabiliser can help you get started while working with a slippery fabric like silk, satin, or chiffon by sandwiching it between the needle plate and the fabric.
In order to get the hem you want, first press up a 1′′ length of the fabric by the width of the gap between the foot and the cloth, which can range from 2mm to roughly 6mm. Repeat the same procedure.
To sew a few stitches in the ironed fabric, place it beneath the narrow hem foot and lower your needle.
Lift the cloth up and over the scrolling edge of the foot while keeping the needle down.
You should keep stitching while holding the cloth vertically to ensure that the fabric feeds smoothly into your foot.
Afterward, you’ll be left with a clean, slim fit…
For delicate textiles like this chiffon, it is ideal. If you want a hand-rolled hem, this foot should be used with chiffon and silk, and it should not be pressed once the hem is finished.
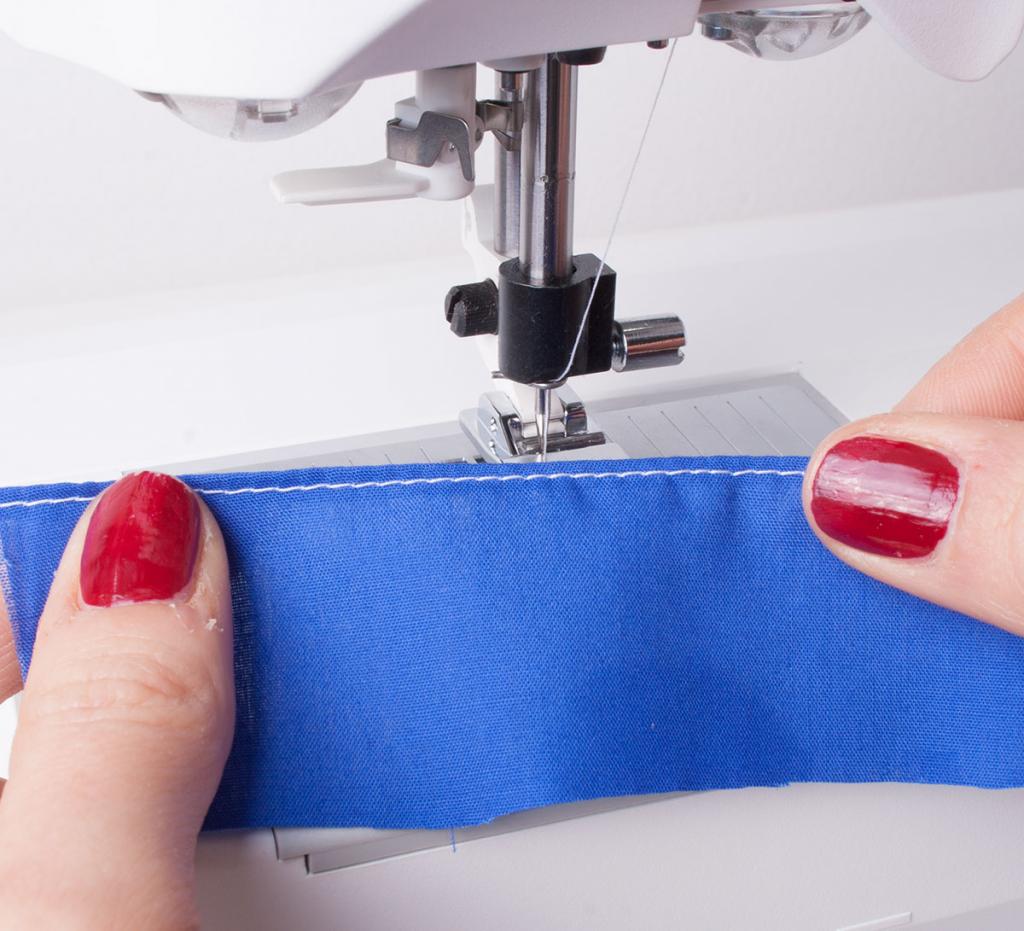
A Twin Needle
Two needles are used to create two parallel lines of stitching, as seen on many store-bought clothing, as the name implies. If you don’t have access to a coverstitch machine, a twin needle finish is an excellent alternative for garments made from stretch fabrics like jersey, knit, and scuba. It has give and won’t break as your clothing expands and moves with you because it is a form of zig zag stitch on the wrong side of the garment.
Sizes range from 1.6mm to 6mm for twin needles. A 4mm twin needle creates two rows of stitches 4mm apart because the measurement refers to the distance between the needles. To get the greatest results, use the proper needle for your fabric type (such as stretch or denim) when sewing with twin needles.
Xem thêm : How To Hem Stretch Fabric With A Sewing Machine?
Insert the twin needle into your machine as usual, then place a spool of thread on the additional thread stand on the top of your machine, as shown in the illustration (usually used for winding the bobbin). Thread the right-hand needle with the thread that you took through the normal route. Using your machine’s main thread stand, thread the left-hand needle as usual.
Identifying which needle plate markings you intend to follow is a smart idea. Lay your fabric wrong-side up on the needle plate with the folded edge on the right-hand side after pressing the hem into place. Set your stitching lines/needles where you want them to go, and mark which marking on the stitch plate your folded edge is aligned with, before pinning your fabric in place. The folded edge should be lined up with the required marking and stitched when the fabric is turned right side out.
Reduce the tension on your sewing machine if you see that the fabric between the lines of stitching is elevated and protrudes from the fabric on either side. Try a stabilizer between the cloth and the needle plate if you have to lessen the tension so much that the stitches loosen.
When working with twin needles, another alternative is to try putting the left needle’s thread spool away from the machine while sewing. To see if it works, first try it with a homemade thread stand. If it does, you can purchase a more permanent stand like this Hemline double cone holder.
Making Perfect Garment Hems
Marking the Hemline
Hemming a garment can be done in a variety of ways. Ask yourself: Will the hem let the garment hang as gracefully as designed? before making a hem choice. Will it hang in a straight line from the ceiling to the floor? Unless the stitching is meant to be decorative, will the hem be unnoticeable? Do you have an even, smooth hem that doesn’t have any bumps or over-fullness? These questions should be answered “yes” if you want to use hemming.
Before marking the hemline on a new garment, it must be fitted and finished. It’s best to let the garment hang on a cushioned rack for 24 hours before marking the hem, since this will help prevent fraying. Remove the old hem and press out the crease if it is not a new garment. There shouldn’t be any issues if the garment is being shortened. However, if the garment is to be lengthened, be sure that the original hem crease is not permanently pushed in or stained. Use a tiny brush or cotton swab to apply undiluted white vinegar to remove an old crease from permanent press fabrics.
Wearing the outfit, someone else can help you determine how far up from the floor the hemline should be. Wear the same undergarments and shoes with the garment as you would normally. Make sure to wear a belt while marking the hem if you intend to wear the garment with a belt. Place equal weight on both feet and keep your back straight. To make it easier for the assistant, try standing on a table with the hem at or near eye level.
Preparing the Hem
Put the clothing on the ironing board with the wrong side facing you.
It’s possible that you’ll need to trim the seam allowances in the hem slightly smaller if the garment will be reduced. Make sure the hem can be pulled down if necessary before you trim it too narrow. Pin the hem at a right angle to the edge every 2 to 3 inches, folding it up along the designated line (5 to 7.5 cm). A close-fitting stab at the fold.
Check the length and levelness of the hem on the garment by wearing it. Repin and adjust the basting as needed.
Determining the Depth of the Hem
Based on the type of garment, the flare of the hem edge, and the weight of the fabric, determine the correct hem depth. The hems of skirts, dresses, and coats are often wider than those of jackets, slacks, and blouses (2 to 3 inches or 5 to 7.5 cm) (1 to 2 inches or 2.5 to 5 cm). Flare- or circular-edged items tend to have shallower hems (about half an inch, 1.3 to 2.5 cm) than do items with straight edges. It is best to roll the hems of sheer fabrics very broad or very narrow, depending on how straight or flared the edge is. In some cases, a less bulky fabric can be used on the back of a larger one.
Use a seam gauge or ruler to measure the hem’s depth and mark it with chalk, a soap sliver, or pins so that it’s the same depth all the way around. This will ensure that the hem’s thickness is consistent from end to end. To avoid accidentally slicing the clothing, open the hem before sewing.
In order to reduce any excess bulk, especially in curved hems, use a machine stitch slightly longer than customary for that cloth to stitch 1/4 inch (6 mm) from the cut edge. Pull the bobbin thread with a pin as needed to bring up the fullness. The hem should not be pulled tighter than the rest of the garment if you draw up the fullness too much. Using thick paper between the hem and the garment fabric prevents an imprint, then press to shrink out the ease in wool and other flexible textiles. Press the ease as flat as can on non-flexible textiles. If the fullness causes ripples, it is to be expected; nevertheless, tucks or lap-overs should be avoided. Pressing the fold will result in a pressed hem.
Finishing the Hem Edge
How you finish the hem edge of your garment is dependent on a variety of factors, including the type of fabric used, the type of garment made, the expected amount of wear and maintenance, and your personal preferences and skills. To avoid altering the garment’s appearance, choose a hem finish that does not alter its appearance. Imprinting from the right side might be caused by excessive weight or bulk from the finish. A good hem finish will keep the garment’s stretch and prevent the hem from raveling or buckling up. In unlined coats and wrap skirts, a finish can create a more polished appearance.
Pinked and stitched. This finish is ideal for non-ravelling knits and textiles, as well as clothes that aren’t meant to last. With regular-sized or ease-sized stitches, sew 1/4 inch (6 mm) from the edge. To finish, use pinking shears and take care not to cut the stitching.
Stitched and turned (also called clean finished). Lightweight and durable, washable medium-weight fabrics can use this method. A shirt tail may need to be stay-stitched before the rest of the garment can be sewn. Turn the raw edge under 1/4 inch (6 mm) and press. Stitch 1/8″ (3 mm) from the fold on the topstitching.
Overcast. Lightweight and ravel-like textiles, medium- and heavyweight ones, all benefit from this treatment. It’s best to use a regular stitch or an easy stitch to secure the edge. Using the machine stitching as a reference, evenly space the stitches by hand.
Zigzagged. Fabrics which ravel can be treated with this method. Knits, such as sweater knits, require stretch, hence the many stitch zigzag is the pattern of choice. In other words, you’ll want to place your zigzag stitching 6 mm away from the edge. Using medium-width and medium-length stitches, adjust the zigzag as necessary for your cloth, taking care not to stretch or add bulk. The zigzag may necessitate the addition of ease stitching below. You can cut the surplus fabric to the zigzag stitching.
Stretch lace and seam binding. This binding is used for straight edge hems that are likely to unravel, whereas the stretch lace is used for curves and textiles that require stretch. The right side of the hem should have a 1/4-inch (6 mm) layer of seam binding or lace placed over the edge, including the ease stitching if applicable. Use zigzag or straight stitch seam binding or lacing on the lower edge. When applying the lace to the hem, be cautious not to stretch it. Afterwards, it should be able to flex.
Tape with a skewed bias. Flared and circular skirts benefit from this finish’s ability to “give” and adjust to curves. Make your own 1/2 inch (1.3 cm) bias tape from underlining-type fabric or buy pre-made bias tape in a variety of colors. Right below the ease stitching, open one of the tape’s folds and place the fold line. The bias tape ends should be folded and overlapping. The fold line is stitched using a machine stitch. Put a piece of masking tape on your work surface and press it up, making sure that the stitching is hidden.
To conclude, Hong Kong. Use a bias strip for seam and hem edges on thick or heavy fabrics with the Hong Kong finish. Velvet and satin can be bound with a thin net or tulle if desired.
An underpinning cloth bias strip or another thin woven fabric is cut to match the hem’s width. Stitch 1/8 inch (3 mm) from the edge of the garment’s hem. Press the raw edge of the hem with the bias folded to the inside. Machine stitch along the fold created by the first row of stitching from the right side. Using a needle and thread, seal the edge by hand stitching it shut.
Faced Hems
There are several reasons why facings are required for hems: hem allowances that are not wide enough to turn up, thick fabrics that can’t be turned up, circular skirts that are round, or unusually-shaped edges. A pattern or a tracing of the hemline is used to cut the contoured facing. Hemming can be done with bias strips of lining fabric, or 2 to 3 inches (5 to 7 centimeters) wide, or purchased bias hem facing. Full skirts in sheer fabrics are adorned with horsehair braid as a finishing touch.
By marking the hemline and reducing the hem allowance to 5/8 inch, the hem edge can be prepared (1.5 cm). A steam press can be used to mold the bias strip or bias hem facing into a slightly curved form that matches the hem’s curve. You should press 1/4 inch (6 mm) of the bias strip beneath the inner curved edge when using bias strips of underlining or lining to give the required length.
Right-side facing is placed on garment’s right-side, with raw edges even, starting at seam. Put a pin in it. Open the fold on a pre-made facing before using it. Make a tidy finish at the beginning and end of the facing by turning the end back. Do not sew directly on the fold, but rather around 6 mm (1/4 inch) from the edge. The ends should be overlapping. On the designated hemline, turn the facing to the inside. Apply pressure to the hemline, making sure the facing is facing up.
Securing the Hem
In the final phase, other than pressing, the hem is stitched, machine stitched, or fused to the garment. For many hems, hand-stitching is still the best option, as it is the most traditional method. If the hem will not be visible, such as the inside of a shirt or lining, you can use machine-stitched hems for household items, children’s apparel, or as an aesthetic flourish on select garments. The fastest technique to secure a hem is with fusible web instead of hand or machine sewing. Some soft knits can be sewn together using fusible webs.
Stitching with a needle and thread. Both inside and flat hemming, commonly known as plain stitching, need hand hemming, which can be accomplished in one of two ways: catch stitching or plain stitching. If you’re doing an inside hem, you’ll fold it back and sew only along the hem, leaving a gaping hole at the very top. Rather than folding the hem under itself, it is stitched down flat on the fabric. Because there is less risk of the hem leaving an unsightly imprint on the fabric, inside hemming is increasingly popular. How easily your fabric unravels and what kind of edge hem finish you’ve applied will determine whether you use inside hems or flat hems. Inside hemming can be used if your cloth can be stitched and pinked, overcast, or zigzagged. Flat hemming is preferable if your hem is finished with seam binding or lace.
Stitches used to finish seams by hand include slanted, vertical, and blind/catch hemming stitches, as well as catch hemming stitches. While the blind stitch, the slanted and vertical stitches, and the catch stitch can all be used for inside hemming, the blind stitch is the most commonly employed for flat hemming.
You should always begin at a seam and hide the thread knot in the finished hem. Using only one or a portion of a heavy thread, sew small stitches into the clothing. There should be a 1/4 inch (6 mm) space between each stitch. Never tighten the thread. You should make two stitches on top of each other and at right angles to one another every 12 inches (30 cm) or so while hemming a garment. It’s time to wrap things up the same way. The thread should not be cut too close to the fabric when sewing.
The correct side and the hem side of a garment are both undetectable when a garment is hemmed with blind stitching. Finish the hem or facing without folding the raw edge first. If your hem isn’t too wide, you can leave around 1/4-1/2 inches between your threads and work in little, horizontal stitches 1/8-1/4″ (3-4″ or 6-mm) from the edge of the garment. Do not over-tighten the stitches. The right side should not be able to see any stitches or indentations. The hem edge may be pressed without causing an obvious ridge on the right side because of this stitch. A nonstretchy, non-raveling cloth is best suited for the blind stitch. A tailor’s hem is another name for this hem.
When the hem is finished with stretch lace or seam binding, the slanted-hemming stitch is utilized. Bring the needle through the edge of the seam binding with a one- or two-yarn stitch. At an angle, the seam binding edge is passed over by the stitches. The stitch should not be dragged or pulled too tightly from the right side. Hemming can be done quickly, but it’s not as long-lasting.
Xem thêm : How To Sew A Double Sided Fleece Blanket? Things You’ll Need
With seam binding or stretch lace, the vertical-hemming stitch can be used to finish the hem. Slanted-hemming stitch, except the stitches pass vertically across seam binding instead of slanting. This stitch outperforms the slanted-hemming stitch in terms of durability and stability.
The catch stitch can be used as an inside hemming stitch for non-raveling stretch fabrics, or it can be used as a flat hemming stitch over the edge of the cloth. Rather than following the needle’s path, stitches are taken in the other direction. Take a little stitch in the hem, 1/8 to 1/4 inch (3 to 6 mm) from the edge of the hem and the garment, as you work from left to right. Take the following stitch in the garment by moving diagonally right. Alternate stitching in a zigzag pattern like this one. To keep the hem edge flexible, keep the stitches loose.
Stitching by machine. Hand-sewn hems were long regarded the only appropriate hems, however in some cases, a machine-sewn hem is preferable.. Sewing machines vary widely, so consult your owner’s handbook if you’re unsure how to sew a particular hem on a particular style of garment.
Machine blind hemming is a long-lasting, low-profile procedure best suited for children’s apparel, athletics made of tough materials, and interior design. The blind hemming stitch can be either a straight stitch or a stretch stitch depending on your machine. Make sure your sewing machine is set up correctly. Make a sample to see where the straight threads go and where the “bite” is taken before you start stitching on your own. Use the smallest feasible bite so that the thread on the right side is hardly visible.
A narrow, rolled, machine-stitched hem is appropriate for linings, tuck-in blouses, and shirts where the hem will not be visible. When you have marked the hem, cut the hem allowance to half an inch long (1.3 cm). In order to keep the edges of your garment in place, use a stay-stitch. Fold a quarter inch (6 mm) in half, and then fold it in half again and press. The hem is finished with a machine stitch. The narrow rolled hem can be made on some machines using an accessory. Practice stitching the hem by following the instructions in your sewing machine’s manual.
Soft knits and textiles that don’t ravel benefit from a topstitched hem. Measure and mark the hem allowance, then cut it down to 5/8 inch (1.5 cm). It is recommended to topstitch at a distance of 3/8 inch (1 cm) from the edge.
An elastic web. A hem can be quickly and discretely secured with fusible web. Two layers of fabric are held together by a heat-sensitive glue known as fusible web. Heat, moisture, and pressure are used for a set period of time. Precut strips on rolls or bigger sheets from which to cut strips are available for fusible webs.
Pressing the Hem
Because the heat sensitivity of fabrics differs, you need to follow the fusible web instructions and test the web on your fabric, making sure to set your iron according to the fusible web instructions. Check the strength of the binding and the look of the sample.. Before applying the fusible web, make any necessary modifications to the hem. It’s best to use another way of fastening the hem if the hem is extremely curvy or loose. The hem will not be able to fuse flat and smooth because to the fullness or excess ease. After using the internet, it is possible to make changes, but they are tough. Avoid sliding the iron throughout the fusing process to prevent extending the hem. To prevent imprinting and to prevent the fusible web from sticking to the iron, keep the fusible web back from the cut edge of the hem at least 1/4 inch (6 mm).
Make sure your iron is set to the fusible web instructions before using the web because different fabrics have different heat sensitivities. Make sure the sample has a strong connection and looks good. Before you apply the fusible web, make sure the hem is properly prepared and adjusted if necessary. Select an alternative way of fastening the hem for garments that are particularly curvy or have considerable ease. This will prevent the hem from sewing flat and smoothly because of the extra ease or fullness. Changes can be made after using the internet, although it is tough. When fusing the hem, don’t slide the iron. This will keep the hem from stretching. At least 1/4 inch away from the cut edge of the hem, keep the fusible web away from the iron to avoid imprinting and to keep it from clinging to the iron (6 mm).
Apply fusible web between the garment and hem and pin if necessary to keep it from moving around. Steam heat baste by steaming lightly between pins. Remove pins before fusing. Complete the fusing process, working on a small section at a time. Before handling, allow it to cool and dry completely.
Apply fusible web between the garment and hem and pin if necessary to keep it from moving around. Steam heat baste by steaming lightly between pins. Remove pins before fusing. Complete the fusing process, working on a small section at a time. Before handling, allow it to cool and dry completely.
FAQs
What stitch do you use to hem a skirt?
If required, use a pin to secure the fusible web to the garment’s hem, keeping it in place. Steam heat basting by steaming softly between pins. Ensure that the pins are removed before you fuse. Complete the fusing process, working on a little portion at a time. Before handling, allow for drying and cooling.
How do you hem a skirt without cutting it?
For further security, pin the hem in place using fusible web about 1/4 inch (6mm) from the edge of the garment. Steam between the pins to heat-baste the garment. Remove the pins from the fusing chamber before starting. Complete the fusing procedure in small sections. Prior to handling, allow the product to air-dry and cool completely.
What is the best stitch for hemming?
Most textiles benefit from a zig-zag or overlocked hem, but this is especially true with bulky or difficult-to-press fabrics. In addition, it can be used to sew curves. Once you’ve zig-zagged or serged the raw edge, then pressed up the hem allowance, you’re ready to begin stitching. In the second step, sew across the final edge.
What are the three types of seams?
Seams come in a variety of forms, each with its own set of advantages and disadvantages. The seam is straight. The most common sort of seam, a plain seam, can be utilized on practically any object. Seam is double-stitched. The French seam. Sewn together. a seam with a flat fall The stitching on the sleeve. Lapped seam
Where is the hem of a skirt?
The bottom, folded edge of a garment is known as the hem. Your sleeve ends, your skirt hem, and the hem of your t-shirt are all examples of hems on your clothing.
How do you hem a pleated skirt by hand?
Is It Possible To Make Pleated Dresses Shorter? The first step is to determine where the hem will be. Next, use your iron to press the hem flat and free of creases once you’ve pinned it. Step 3: Sewing with a smaller needle will result in better results. Step four is to fold and iron your paper.
Is hem tape permanent?
Two pieces of cloth can be permanently attached with fusible hem tape, a double-sided fusible adhesive tape. A quick and easy alternative to sewing is to use fusible tape, but it’s permanent and can’t be undone.
How do you fix a skirt that is too big in your waist?
You can make a reversible stitch to help you repair a sagging skirt with just a few minutes of work. The rear center of the skirt can be found by folding the skirt in half and aligning the side seams. Slip the skirt on by turning it inside out. Sit down and tighten your skirt. After the safety pin is in place, sew a straight stitch around the waist.
How do you alter a skirt that is too small in the waist?
If the waistline on your skirt isn’t quite snug enough, you have three options: Cinch in the waist with a belt by adding some belt loops. Incorporate an elastic band inside the waistband. This will prevent the skirt from slipping down, but it may not provide the ideal fit depending on the style of the skirt. Make a new stitch.
How can I make my waist bigger?
Stretching or sewing procedures can be used to increase the waist size of your pants. The simplest approach to extend your pants’ waistband is to stretch the cloth. With scissors and a sewing machine, you may also make more permanent adjustments.
What is hemming stitch used for?
An openwork or drawn-thread hemstitch is a decorative hand-sewing technique used to adorn the hems of clothes or household textiles. Hemistitching can use embroidery thread in a different color than a typical hem to make it stand out.
What is the difference between a hem and a seam?
While a seam connects the edges of two materials, hemming is the technique by which the edge is rolled flush with itself. It is usual practice to employ hems to strengthen an edge, cover burrs and rough edges, and enhance the overall appearance.
What are the two types of seams?
Seams are divided into four categories in clothing construction: plain, lapped, bound, and flat (centre back seam, inseam, side seam). Many procedures are used to finish seams and keep the raw edges of the cloth from fraying.
What is the strongest seam?
Flat-felled seams are the strongest and will not fray because the raw edges are concealed. In spite of the fact that they are commonly used on thick fabrics, they may also be used on lighter ones because they give a very clean end.
What are the 5 basic stitches?
Stitches for Beginners It’s Important That You Recognize This Using the Running Stitch. The Stitch for Basting. The Stitching of a Cross (Catch Stitch) Backstitching. Use the Slip Stitch. Stitching a Blanket (Buttonhole Stitch) Stitching Forward and Backwards in a Straight Line. The Zigzag Stitch.
What is a basic hem?
Double Fold Hem 3/8 Inch The fundamental hem is the double folded hem. Any garment that needs the raw edge encased without fraying or finishing will benefit from the use of this technique. Double-fold Hem 1-3/4 Inch Dresses and jackets benefit greatly from this heavier folded hem, which is ideal for adding hem weight to.
How do I make my hem look professional?
Cut away any extra material in a straight, equal line. Before hemming, finish the raw edge of the hems for the best appearance. If you don’t have a serger, here’s how to use the Rolled Edge foot (#30 in the set) to achieve the professional effect. Make sure that the sewing machine foot is attached.
What is high low hem?
A dress or skirt with a “High Low” hem has a shorter front hem and a longer rear hem.
Conclusion
That’s how simple it is! Simply mark the folds on the skirt and fold it accordingly, then select the blind stitch setting using the foot for blind stitching on your embroidery machine to get a short overview of how to sew a skirt. If you don’t want to sew blind hems, you can also use an adhesive to accomplish it.
We hope this article was helpful. If you have any questions, please don’t hesitate to contact us.
Nguồn: https://spasifikmag.com
Danh mục: Sewing Tips


