In order to alter the look of your home without spending too much money, all it takes is to add a little texture and color to your pillows.
- What Is Best Sewing Machine For Quilting? What You Need to Know
- How To Thread A Babylock Sewing Machine?
- How To Thread A Janome Sewing Machine? What You Need To Know
- What Is The Strongest Sewing Thread? Interesting Must Read Facts!
- 4 Tips for Buying Fabric for your No-Sew Pillow Covers. How To Make A No-Sew Pillow?
Because it’s essentially a rectangle with an opening for your pillow insert, a pillowcase is perhaps one of the simplest things to make. Even if you’ve never sewn before, this project is simple enough that even a total novice could do it.
Bạn đang xem: Steps To Sewing Your Pillow By Hand. Best Answers To FAQs!
Depending on the time of year, different textures in your home are more important than others. Because of this, your bedding must be changed according to the season. There are lighter and brighter sheets appropriate for the summer and more textured and warm sheets appropriate for winter. Let us know if this trend changes your mind, and we won’t judge you!
When making a pillowcase with your hands, how do you do it? Take the measurements for the pillowcase and then sew a long rectangular piece of material together. It’s best to divide the fabric into two sections, one for each side of the pillow. In order to create an opening, you can either leave the edges open or extend one of them (the sides are stitched to the rest of the length of the case while the top is left unattached).
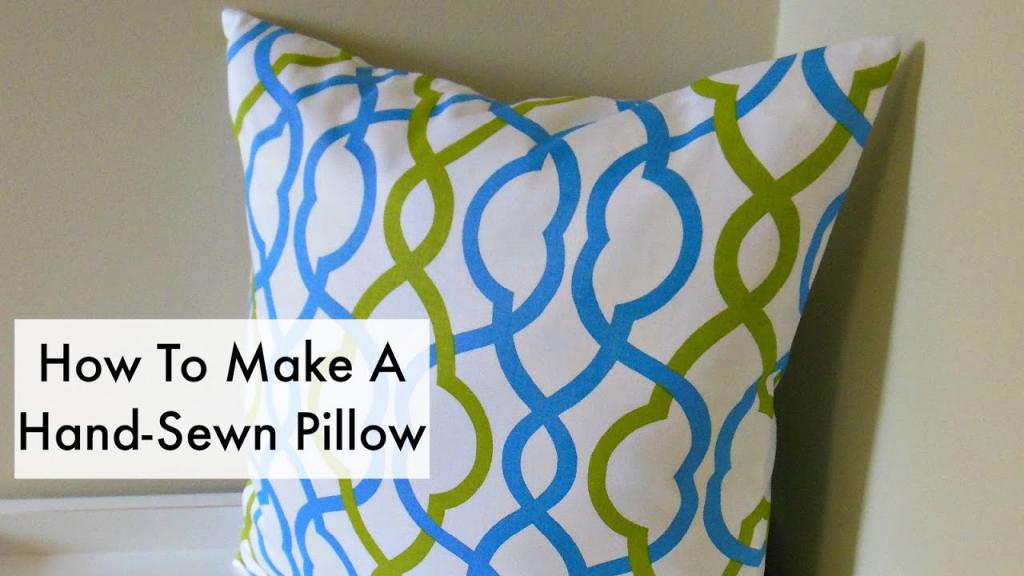
How to Sew A Pillow By Hand
To begin, you’ll need the following materials to make a cushion from scratch:
- A spool of thread
- A pair of scissors
- a little, sharp object
- A minimum of twenty sewing pins
- Stuffing for pillows
- Fabrics for pillowcases
- Chalk
To begin sewing, you’ll need the items listed above. If you’d want to learn how to make pillows for yourself and others in a matter of minutes, here are the steps you’ll need to follow.
Steps To Sewing Your Pillow By Hand
Start by deciding which side of the pillow will be the exterior once you’ve gathered all of your materials. Once you’ve made your decision, unfold the cloth so that the exterior of the cushion faces upright.
After you’ve formed the fold, you’ll need to fold the fabric in half again to make sure the outside side of the cushion is on the inside. Take a one-square-foot measurement of the fabric as you fold it up and cut it out.
Sewing can begin when you’ve finished these stages. You can sew on any of the edges that are next to the fold you’ve already created. Stitching along the edge at a perpendicular angle is the preferred method.
Threading the needle again during stitching is also possible. After stitching perpendicularly along each edge, you’ll have two sides stitched together with one edge folded and the other open.
You’ll also want to pack a small item. Make sure the desired outside section of the pillow is facing the outside by flipping the pouch over. Then, take your stuffing supplies and place them gently into the hole.
Cotton items are preferred by the majority of people since they are both soft and comfy, as well as easy to use. Overfilling your pillow could cause the seams to come apart, thus we advise against doing so.
The most important thing to remember is to maintain a professional demeanor throughout the process. Put the materials in corners with care, and don’t rush it! After that, you’ll be able to sew the open edge.
To prevent the other seams from opening, it’s critical that you sew this edge up with an even hand. Once you’ve finished stitching the open side, it’s a good idea to sew the remaining stitches.
The bag’s edge will be fastened and less likely to come out after it is filled this way. Cut the thread and tie a proper knot once you’ve seen the last few stitches.
Xem thêm : What Is The Best Heavy Duty Sewing Machine?
Make sure your knot is secure, and then trim away any excess material that may be near it. Once you’ve done that, you’ll be ready to start making your own unique cushion.
How to Make A Closed Hand-Sewn Pillow
Before sewing the pillow’s cover shut, it’s a good idea to sew the pillow’s base. This will prevent fraying of the fabric on the pillow’s edges.
Stitch roughly three-quarters of an inch from the edges of your cloth at the bottom of your garment. The user will be able to achieve a precise stitching direction and an allowance of 1 1/2 ” with this tool.
In order to begin sewing, begin by stitching on the right side of the pillow. Use a different stitch on the other side of your cushion, one that goes all the way through. Keep repeating this method, starting from left and working to the left, for the pillow’s lower portion.
Close the pillow with a knot once you’ve reached the left side. This method of stitching creates the illusion that the seam was stitched by a machine.
How To Use Images Or Designs On Your Pillow
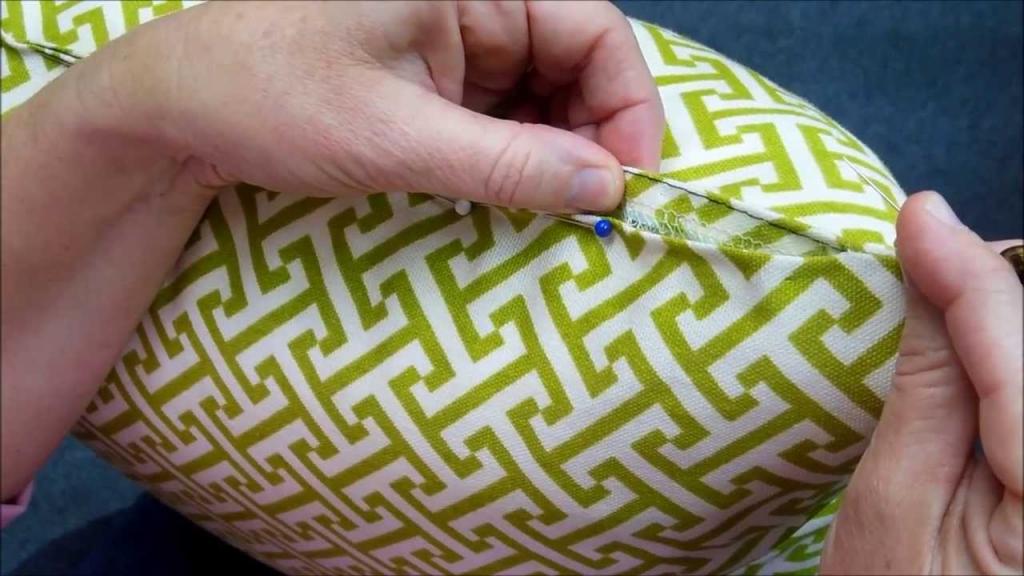
Many people want to personalize their pillow covers by adding photographs or designs to them when they’re sewing them themselves. The first step in sewing your pillows is to place the pillow’s bottom side down, with the image facing up.
There should be an unadorned side in the middle. When cutting, be sure to check that all of the sides are lined appropriately. Then, pin the two pieces of cloth together to keep them in place.
Each side of your cloth should have at least four pins placed roughly 2 cm from the outer edge of the fabric. You can begin sewing the two pieces of cloth together after you’re sure that the pins have fastened them.
The Burrito Pillowcase Method
The burrito pillowcase approach is another option for making your own pillow. Putting the pillowcase over your cuff fabric is as simple as arranging the fabric flat and facing upwards. Afterwards, it’s positioned in the proper orientation.
Check to see if the corners are aligned. Afterwards, fold the accent piece. Edges should be positioned to align with raw edges above all other materials.
Make a burrito out of your cuff material starting at the bottom and working your way up to the middle. You can lift the cuff up over the burrito you’ve formed by keeping the bottom half of it in place. Using pins, hold the whole item in place while keeping the accent strip in place. Make sure that all sides are aligned.
After you’ve made sure everything is safe and sound, use a 1/4-inch seam allowance to sew around the edges. After that, take out the burrito’s main ingredient. Gently remove it by pulling it out.
Lie it on its side to remove any creases and ensure that the accent strip is aligned with the rest of the pillowcase. In order to get a 28-inch pillowcase, you will need to measure from the cuff at the top and then from the opposite end. Cut the pillowcase at least 20 inches wide to get a full 40 inches of pillowcase width. You’ll be able to buy a standard-sized pillow this way.
It’s up to you how you want to complete your burrito pillowcase. A second option is to sew the raw edges on the right and topsides of your pillowcase before folding it in half. After that, press the pillowcase firmly into place while it is on its right side.
When folding a pillowcase in half, you can use French seams to ensure that the opposite sides face each other. Stitch together the raw edges of the seam allowance before reducing the seam allowance down to 1/4″. Before pressing, make sure to flip the pillowcase over and go through all the corners to get the full form.
Xem thêm : How To Thread A Husqvarna Viking Sewing Machine Correctly?
Then, depending on the design you desire, you should sew a seam of 1/3 or 3/4″ to ensure that the raw edges are maintained in place. This will help to make the edges more noticeable. Flip the pillowcase over and gently poke the corners with your fingertip before pushing it back into place. Your pillowcase is now ready to be stuffed with your preferred stuffing.
Common Types Of Pillows
There are several varieties of pillows, and some can overlap. Wedge pillows for pregnant women can be used in place of body pillows or as an alternative to the more traditional types of pillows used in beds and chairs. Decorative pillows like the European pillow can be made from a few extra bed pillows.
Pillows for bed
Standard-sized pillows are the first thing that springs to mind when we consider bedding. Other rectangular pillows for king and queen-sized beds are available. However, any pillow can be used as a bed pillow, so don’t become confused when shopping for pillows.
Body pillow
A body pillow is a larger pillow that is designed to help support different body parts and maintain a healthy sleeping position while you sleep. Smaller-sized body pillows are available that target specific body sections. As a general rule, a body pillow is any device that provides support for your body and helps you modify your sleeping position.
Pregnancy pillow
Despite the fact that they look similar to standard body pillows, pregnancy pillows are available in a wide range of forms and sizes to meet the specific needs of pregnant women. Pregnant women can use them to alleviate back and stomach pain and keep their preferred side-sleeping position. Postpartum, some of them can be transformed into nursing pillows.
Bolster pillow
Bolster pillows, often known as rolls, are spherical pillows that can be used to decorate and support the human body. ” Body alignment can be achieved by placing them on the neck or the legs. These pillows come in a number of sizes and are typically referred to as pregnancy and body pillows.
Wedge pillow
The wedge pillow is another excellent option for lifting the head. It comes in a variety of sizes, and pregnant women can take benefit of it as well. Additionally, the steep angle of a wedge pillow can help alleviate acid reflux, discomfort, and breathing problems.
European pillow
With a variety of sizes and forms, decorative pillows may add flair to a couch or bed. The square European cushion, on the other hand, is the most in-demand. It’s more than just a piece of decor because it doubles as a cushion.
Related Questions
How Can You Prevent Pricking Your Finger While Sewing
Using a Thimble is a simple way to keep your fingertips safe while sewing by hand. Thimbles are useful for protecting your fingers from being accidently harmed.
Should You Wash Your Fabric Before Cutting It
You may want to wash your cloth a second time if you’re worried about it shrinking. Before cutting it, it may be useful to dry and wash it.
Can you hand stitch a pillow?
Pin 2″ away from the lower corners, then 2″ away from the second bottom corner, until you’ve finished. Using a needle and thread, begin hand-sewing at the bottom of the pillow where your first pin is. Pull your needle to both sides of the fabric starting at the bottom.
What is the best stitch to sew a pillow?
Both the Slip Stitch and the Ladder Stitch are examples of this. Using the stitch to seal a pillow that was produced by hand is a good idea. It’s perfect for finishing hems because it’s practically undetectable. There will be a small amount of ticking if you use the wrong thread for the fabric you’re working with.

What are the 4 steps to sew a pillow?
Pillow insert selection is the first step. Consider the size and shape in proportion to the intended use. This is the second step in making the fabric. This is the final step. The final step is to sew the cover for the pillow.
The first step is to cut out the fabric. The Back Panel Pieces are now ready to be cut out. Join the Front and Back Pieces together in this step. The final step is to complete the project.
Conclusion
At home, you don’t need to have a sewing machine to manufacture cushions. With just two simple steps, you may learn how to sew your own pillow. The first step is to sketch and measure your pillow, then cut two pieces of fabric to fit.
Both sides of the pillow should have it. Sew them on the pillows after they’ve been lined up for ease of stitching. When sewing the pillow, be mindful of the strength of your stitches and leave a small opening in case you want to flip it over later.
Nguồn: https://spasifikmag.com
Danh mục: Sewing Tips


