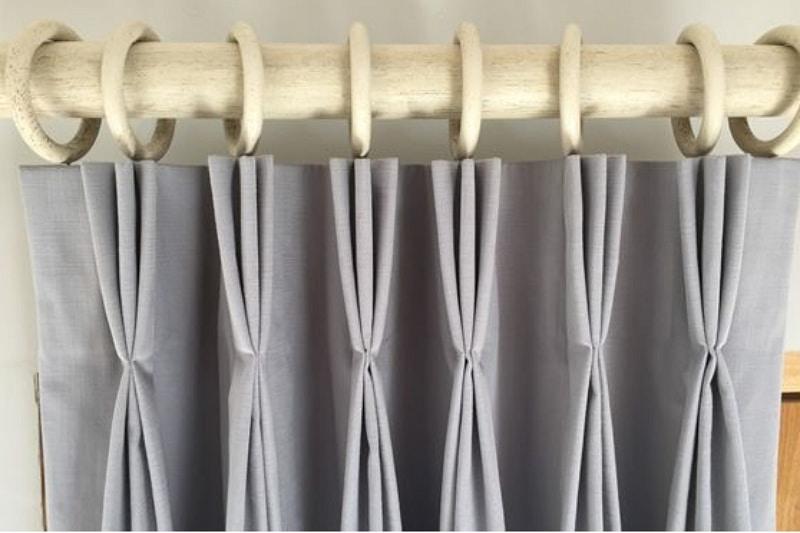
Make stitched pleats for your treatments and you’ll be able to maintain a structured fullness that doesn’t take a lot of administration. Your treatments will seem luxurious. In order to eliminate the billowy fabric look from your window treatments, these sewed pleated curtains are great.
- How To Sew A Cylinder Pillow? Easy Step-by-step Guide
- How To Open A Pfaff Sewing Machine? A Few Tips to Remember
- How To Remove Sewing Stitches? Complete Step-by-Step Guide
- How Do I Fix The Timing On My Singer Sewing Machine At Home? Tips and Warnings
- How To Make A Shirt Pillow Without Sewing? Step-by-Step Tutorial
Sewing pleated curtains is easy if you follow the instructions in this article. To make pleated curtains, simply follow the various step-by-step instructions.
Bạn đang xem: 7 Easy Tips on Sew Pleated Curtains. 5 Best Answers To FAQs!
It is possible to achieve uniformity in pleats. To avoid uneven pleats, you must measure the fabric regularly. Backstitching is also vital at the finish of your stitching, and you should know this.
Pleats hold their shape better with backstitching. Also, don’t forget to pin on a regular basis. In addition to ensuring that the pleats are evenly spaced, it also aids in shaping the pleats.
Easy Steps to sewing pleated curtains
Step 1: Measure & cut
The amount of fabric the pleats will take up and the distance between the pleats must be taken into account when deciding the width of the fabric to be cut for your curtain panel. Rather than cutting your cloth until you’ve figured this out, try it out first using tape and hooks.
It is possible to purchase pleater tapes with varied distances between the pockets into which hooks are inserted. 4′′ Multi Pleat Pleater Tape has 34-inch pockets. As a result, you have more control over how the pleats look. 4′′ Best Pleat Pleater Tape has 2″ pockets, and I’m utilizing it.
Insert each prong of the pleater hook into a separate pocket. To increase the depth of the pleats, you can also omit the pockets.
This curtain panel will have 5 12″ between pleats and a few inches on each end, with 5 sets of pleats. It’s roughly 28″ broad with the pleats. Remove the hooks from the end of the tape and mark where you want it to terminate with a pin. To get an accurate measurement of the width of the tape, measure it without the pleats.
Add 3 inches to this size to allow for side seams when determining the fabric width. Trim your fabric to the specified width.
Take the length of the curtain and multiply it by 9 12″ to get the height.
Step 2: Sew the sides of the panel
I’ll begin by hemming the panel’s two edges. Press the 34-inch-long folded edge. Repeat the folding and ironing process for a total of 3 inches.
Xem thêm : What Is Casing In Sewing? Everything You Need To Know
5/8″ seam allowance is used to sew the panel together along its whole length. To keep the stitches in place, backstitch at the beginning and end. To complete the panel, do the same thing on the other side.
Step 3: Sew the top & bottom
This curtain has the same hem at the bottom as the sides, so do the same for the bottom hem also. If you want to construct a longer hem, simply take your height into consideration.
Tuck the bottom corners in as you sew them together.
Or, if you wish to hang the panel first to get a better idea of how much hem to stitch on, sew the bottom hem last.
Fold the fabric 4″ in half and press it for the top. Fold another 4 inches and press.
Along the sides and across, sew with a 14-inch seam allowance in place. At the beginning and finish of the pattern.
If you don’t want to sew this portion yet, you can wait till you’ve pinned the tape on.
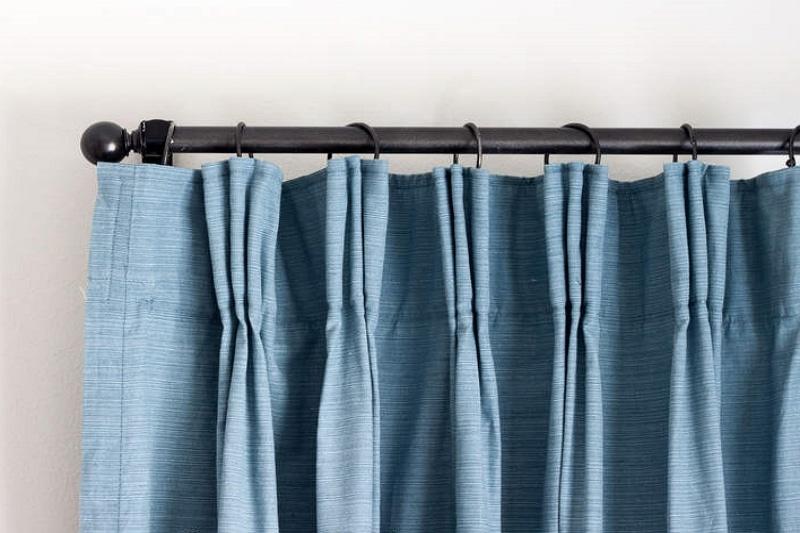
Step 4: Attach the pleater tape & hooks
Lay the pleater tape on the back of the top, fold under the ends, and pin it in place.. Place the pockets facing out on the tape, with their openings facing outward. Then, following the lines drawn by the different colored threads, sew around the tape’s edges.
Insert the prongs of a hook into the pockets. It’s time to attach the hook with the bottom piece by pushing it in all the way. Continue with the remaining pleats.
Step 5: Tack the pleats (optional)
The base of French pleats is often pinched to give them a more polished appearance. To achieve this effect, stitch the pleats together with a needle and thread. Begin by tying a knot on the inside of one of the pleats. Tuck the pleats together by going in and out of the sides a few times. Cut the thread once it’s been knotted and pulled into one of the pleats.
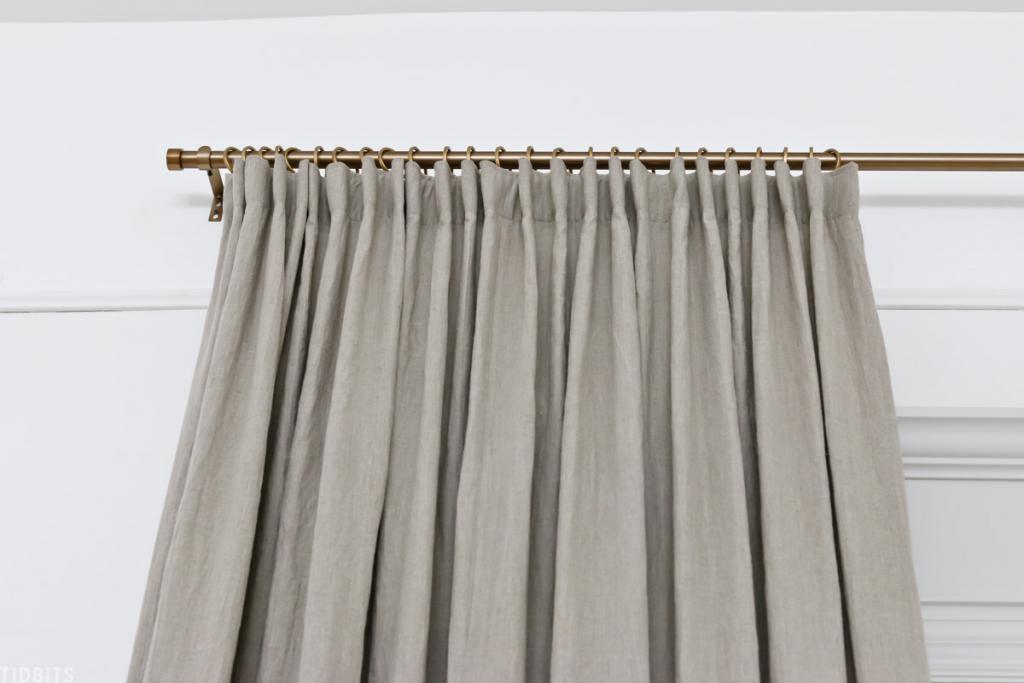
Using eyelet drapery rings or a traverse rod, attach the hooks to the curtain panel.
How to sew Pleated Curtains Attaching the Loose Lining
Xem thêm : How To Use A Double Needle On A Sewing Machine?
Your pleated curtains might also have loose linings attached to them. To accomplish this, pass the curtain hook through both the loose lining tape and the heading tape before securing it in place.
Make sure to keep repeating this until the hook is firmly in place. Your curtain’s lining is now attached, and you can quickly remove it if necessary.
How do you Calculate Pleats on how to sew Pleated Curtains?
Determine how many pleats you want on the curtain by making a tally. The length of the window is divided by the number of pleats you have specified, for example, six.
Add a few additional inches to your pleat size to account for folding.
Should I Line my Curtains?
Pleated curtains may necessitate the use of linings when they are being sewn. It’s best to use a liner if your curtains are made of cotton or polyester, so that they don’t wash out.
Adding lining to the back of your curtains is also a simple task.
How do you make perfect pleated curtains?
To ensure that the lining hem will hang straight, sew just a few little stitches along its top and a few more on its following fold. Make pleats for days by repeating this process across the draperies’ breadth, then turning them right-side out and voilà!
How do you press pinch pleated drapes?
Steam the drapes while they are still in their paper bands to achieve a more defined pleat. Steam both the front and the back of the draperies from top to bottom, as well as the lining. Alternatively, you can use a hand-held steamer with your iron if you like.
Are Diy Pinch Pleated Curtains Right For You?
Pleated curtains should be used with caution because of the following issue: It is impossible for your curtains to un-gather and close since they are bundled together.
Isn’t the style and comfort of this ensemble just wonderful?
We have these wonderful natural blinds if we ever need some privacy or just want to reduce the amount of direct sunshine we’re exposed to.
Conclusion
You may want to learn how to make pleated curtains for your home as an additional hobby. To produce distinctive, one-of-a-kind curtains that won’t break the bank, all you need is some basic sewing skills and a sewing machine.
Sew your own curtains instead of hiring a professional to do it for you, and you’ll be guaranteed an elegant and polished professional look in your room.
For those who have already learned how to make simple curtain panels, constructing pleated curtains will elevate the look to a whole new level. If you follow the following procedures and don’t forget to use pleating tapes, you can easily produce these!
Nguồn: https://spasifikmag.com
Danh mục: Sewing Tips


