During the course of a project, have you ever experienced a situation in which the thread on your needle broke? It appears lopsided because the stitch has different densities? A couple of the most prevalent threading difficulties are listed here. The machine’s threading is at blame for these problems. We’ll go over how to thread the Kenmore sewing machine in this article.
- How To Sew A Zipper In A Pillow? Complete Step-by-Step Guide
- How To Stitch In The Ditch With A Sewing Machine? A Few Tips to Remember
- What Is Batting Used For In Sewing? Everything You Need To Know
- How To Thread A Montgomery Ward Sewing Machine? A Few Tips to Remember
- How Many Joules Do I Need In A Surge Protector To Protect My Sewing Machine
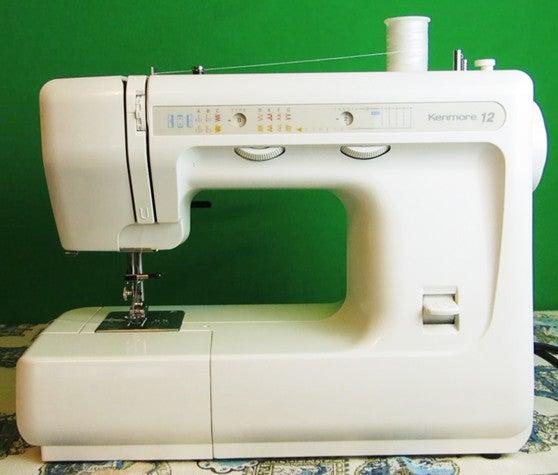
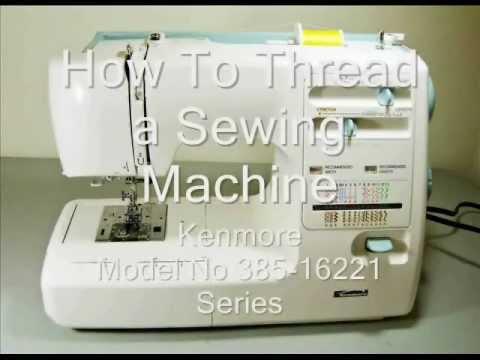
How to thread a Kenmore sewing machine?
There are a plethora of processes involved in threading the Kenmore sewing machine, which may seem confusing to beginners. We’ve broken the procedure down into four sections, each of which contains a variety of actions. As a result, you’ll know exactly what to do and how to do it without breaking a sweat.
Part 1: Wind the bobbin
Unshackle the clutch
On the left side of the device, there should be a knob for the clutch. Counterclockwise or towards you, the knob can be unlocked.
Place the thread on the spool pin
Assemble your thread spool and check that the spool pin fits in the center of the spool. Counterclockwise wrapping of the thread around the spool’s center is required.
Draw thread by the tension disc.
Your bobbin winder has a tension disc that you may use to draw the thread through. This is done by removing the thread from the spool pin, then inserting it into the little disc of tension. You’ll most likely find the disc on the side of your machine that is on top.
Make sure you know that you can’t weave the thread over the disc once the entire circle has been completed! Instead, use the upper right side of the disc to insert the thread, and then wrap the thread around the right side of the disc to secure it. As a last step, move it to the right-hand side.
Pull the thread
The thread should be dragged through the bobbin’s hole. Before inserting the bobbin on the bobbin winder shaft, inject the thread through the opening in the empty bobbin-spool. You can then mount it on the bobbin winder’s driving shaft once it’s finished.
In order to avoid the hole showing up at the bottom instead of the top after completing this step, make sure to flip the bobbin spool over after finishing it. If the bobbin cannot be placed on the shaft, make sure the thread is wrapped around the shaft starting at the bottom of bobbin and continuing up the shaft until it is secure.
Push the bobbin
Xem thêm : Who Makes New Home Sewing Machines?
Until you hear a click, keep pulling the bobbin along. Your bobbin should now be right in front of the bumper at this point in time. Using the bumper, you can adjust how much string is wound.
Wind the bobbin
The thread dangling from the bobbin should be held by one hand only. Your foot should be used to press the machine’s pedal pedal pedal. In a heartbeat, the bobbin winding procedure will get underway as soon as the machine gets up and running. Until the winder is automatically halted, do not stop at all.
Snip the thread
Then, elevate the bobbin by pushing the bobbin winder to the left. Snip the thread, leaving a small tail behind, and discard it.
Infix the clutch
You should continue to turn the clutch away from you in a counter-clockwise direction as you shift. The external handwheel should be in a slow position when you do this. When the clutch is automatically tightened, it will be obvious to anybody who looks.
Part 2: Thread the bobbin case
- Remove the additional tables. This may necessitate you removing yourself from the extension table.
- Find the cover’s marks. To open the lid, pull it off with your fingers. On the left side of the lid, the handle indicated is usually positioned.
- Once you’ve reached the needle’s highest point, keep rotating the handwheel clockwise and counterclockwise.
- Remove the bobbin’s case bolt by yanking it out. The bolt is what’s going to get the case off the shuttle. Pull the case straight away from the device to remove it.
- Make sure the bobbin is in a position where the thread can wind around it counterclockwise. Knot the thread end into the socket at the top of the bobbin case before inserting the bobbin. Keep pushing the bobbin into the socket until you can no longer pull the thread through the spring tension.
- It is imperative that the bolt be removed one final time from the case before re-entering the shuttle.
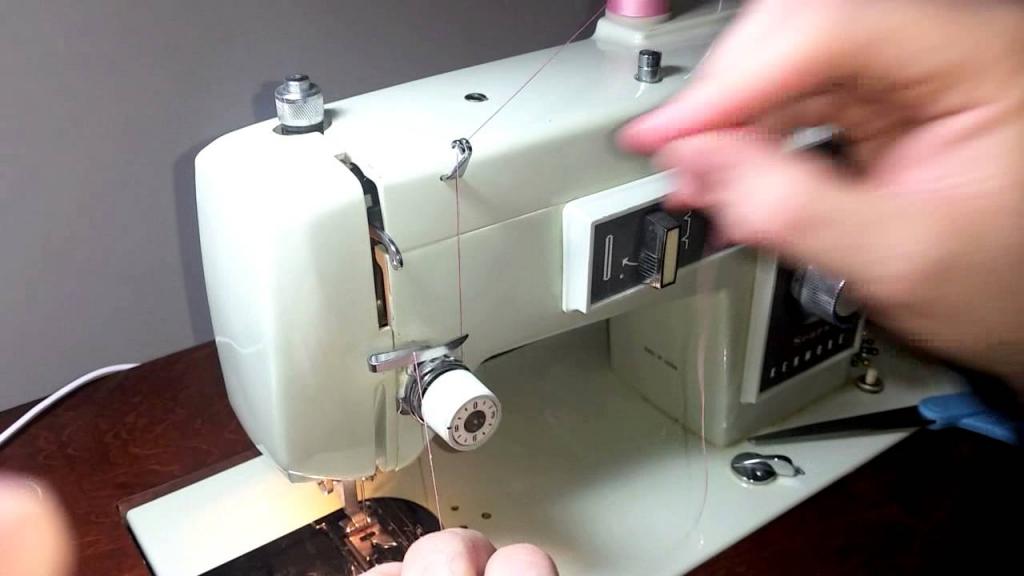
Part 3: Thread the top thread
- Counter-clockwise rotation of the handwheel is required to reach the take-up lever located at the very top of the lever.
- Lifting the presser foot lever to the top will raise the presser foot.
- Make that the thread spool is attached to the spool pin in such a way that the thread is wound in a clockwise direction before being removed from the spool.
- Rear-thread thread guides should be used to wrap the thread around and bring it back until it reaches the machine’s top.
- Depending on the machine, there may be two paths marked with the letters A and B or something else. A bolt is located at the end of Path A, so take a thread and pull it down through the path. Once you’ve done that, you’ll want to pull the thread to the left.
- A tension spring should be located at the top of path B. Afterwards, the thread should be drawn up and inserted into the spring, as shown.
- On one side of the device, there is a second labeled path. This is the proper path to take the thread.
- At the end of the preceding thread path, the thread is clipped onto the lower thread guide. When you’re done, clip it into the needle’s second thread guide, which is positioned towards the needle’s top.
- The front of the needle weaves the thread ends, while the back of the needle weaves them outward. Leave a small tail that extends beyond the back of the machine.
Part 4: Pick up the bobbin thread
- Turn the handwheel clockwise while holding the thread in place with your left hand. Elevate the presser’s foot before continuing.
- The needle plate will produce a little loop at the bottom. To smooth the loop, the thread at the very top will be carefully plucked. The bobbin thread is yanked off the shuttle, completing the process.
- Make sure the presser foot is on both threads.
Common Threading Problems in Kenmore Sewing Machine
If you use a sewing machine, chances are you’ll encounter threading problems. Many threading problems can be resolved by following the steps outlined below.
Tangling of the thread
When working on an embroidered project, you may notice that the thread is getting caught on the bottom of the machine. A faulty Bobbin is the most common cause of this problem.
A faulty bobbin isn’t always to blame for tangled threads. Thread tangling can occur as a result of improper threading. To avoid thread tangling in the future, use the presser foot up instead of the needle if you find yourself unable to thread any farther. When threading, keep your foot on the floor to avoid tangling the threads.
Jamming of machine
This happens when the thread or fabric gets stuck in the machine, and it’s impossible for the machine to move on its own. If this is the case, it’s best to carefully peel the fabric aside and remove all of the thread that is stuck in. It’s necessary to remove the bobbin and untangle the tangled thread. Restarting the computer is necessary after that.
Breaking of the thread
A break in the thread might happen for a variety of different reasons. You must first establish if the thread is stuck on the spool of thread before proceeding. It is possible that a slight incision on the spool used to secure the thread ends will cause the thread to fray. The thread feed can be redirected to correct the problem.
Xem thêm : What Is A Walking Foot Industrial Sewing Machine? 5 Best Walking Foot Sewing Machine
Thread breakage can occur if the thread is of poor quality or if the thread is too old. The thread can break if the sewing machine’s needle isn’t too old.
The machine will need to be thoroughly cleaned if the thread still isn’t working after addressing all of the issues listed above. You can check for dust by running your fingers along the thread’s course.
The foundation of any sewing machine’s operation is appropriate threading. You won’t be able to sew smoothly or finish your job on time if you don’t thread your machine correctly. Before threading the machine, it is advisable to read the instruction handbook thoroughly. Threading instructions can be found online, and they’re a great source of information.
How Do You Thread An Old Kenmore Sewing Machine?
- If you own a Kenmore sewing machine, consult the owner’s manual to learn more about it.
- The tension knob should be turned once the hook has been threaded.
- Wrap the wire loop around the hook after tying it securely.
- Bring the thread to the lever and then downward to the needle and the thread clip after releasing the wire hook. I’m using a thread clip.
- The needle should be threaded from the front, and at least two inches should be left at the end.
How To Thread The Bobbin On The Kenmore Sewing Machine?
- The extension table of your Kenmore sewing machine must be removed in order to help you load the Bobbin.
- If you have a Kenmore sewing machine, you can either drop the cover of the shuttle or lift it to open it.
- A handwheel can be used for this purpose.
- Remove the bobbin from the sewing machine by releasing the clasp.
- Carefully place the bobbin in the case, and then thread the thread end into the corresponding slot at the very top of the bobbin case.
- Make sure you’ve woven enough thread to reach the spring tension.
- A click should be heard when the bobbin casing is securely fastened in place.
Why Is My Handwheel Stuck On The Kenmore Sewing Machine?
The handwheel on your Kenmore sewing machine should be checked to see whether it’s jammed. Only disconnecting the inner wheel and restarting the machine is required. It’s also a good idea to readjust the machine’s tension.
To see if the bobbin’s case is still jammed, examine it after doing these troubleshooting steps. The Kenmore sewing machine has a problem. It’s time to get it back in working order. A dirty machine, in the context of cleaning, could potentially result in the bobbin failing to catch.
Why Is The Bobbin On My Kenmore Sewing Machine Not Catching?
Make sure you’ve cleaned the Kenmore sewing machine before you start stitching again. Verify that the machine is wound properly and that the bobbin is properly threaded. There is a good chance it is because the bobbin isn’t firmly caught. Having the bobbin in the wrong spot could lead to problems.
Why Is The Bobbin On My Kenmore Sewing Machine Not Spinning?
Keep your bobbin clean and make sure it’s placed appropriately in the bobbin. The bobbin won’t spin if the axis of the bobbin isn’t properly aligned on the Kenmore sewing machine. The bobbin case may also need to be retightened or re-threaded.
Conclusion
Threading is the foundation of sewing machines. It will be able to sew rapidly and finish your job on time if you thread it correctly.
Before threading the machine, it is advisable to study the instructions.
Nguồn: https://spasifikmag.com
Danh mục: Sewing Tips


