You’re not sure about obtaining a set of maternity photographs taken at a professional studio?
We’ll go over some tips for doing at-home maternity photography today. Here’s a quick and easy project for you to work on at home. Talk to your hubby about pregnancy photography concepts. Involve him.
Bạn đang xem: How To Take Maternity Photos At Home?
For the past year or so, I’ve been toying with the idea of writing down my best tips and tricks for taking easy, do-it-yourself maternity photographs. Finally, I’ve come to the conclusion that this is the ideal time to make this content public, along with tackling yet another major maternity project.
You’ll find examples of completed images, as well as step-by-by-step instructions for recreating them. A fair idea of where the photographer (your partner) should be and the setting we chose can be gained from these examples.
You can also take a look at the following resources.
Ideally, I want these sheets to be clear and straightforward. A fundamental awareness of light and a few basic camera settings are all that is required. There will be no need to go to the store for any of its functions.
There are three things we’ll need: a camera, a tripod, and a remote control to start the camera. A self-timer is all you need if you have a simple “point and shoot” camera.
1. Understanding light.
When it comes to maternity photography, this is a must-have component. Having high-quality lighting is already a step in the right direction.
In this case, I took the photos in Scotland during the winter. It was a cloudy day, so the light was dimmer than usual.
I’m extremely happy with the results, given the low lighting conditions and the basic camera settings we utilized on the day. Your worst-case situation in terms of light is this. In addition to the French doors, there were two small windows. It’s considerably easier to get good exposure for photos if your room is brighter and has more windows. As a result, photos that aren’t as dark as mine are produced.
Even if the sun is beaming directly into the room, it’s not necessarily easier if you don’t know how to manage the light.
The light will be more diffused and softer on your body if you have daylight curtains. This provides a more forgiving light, as I see it..
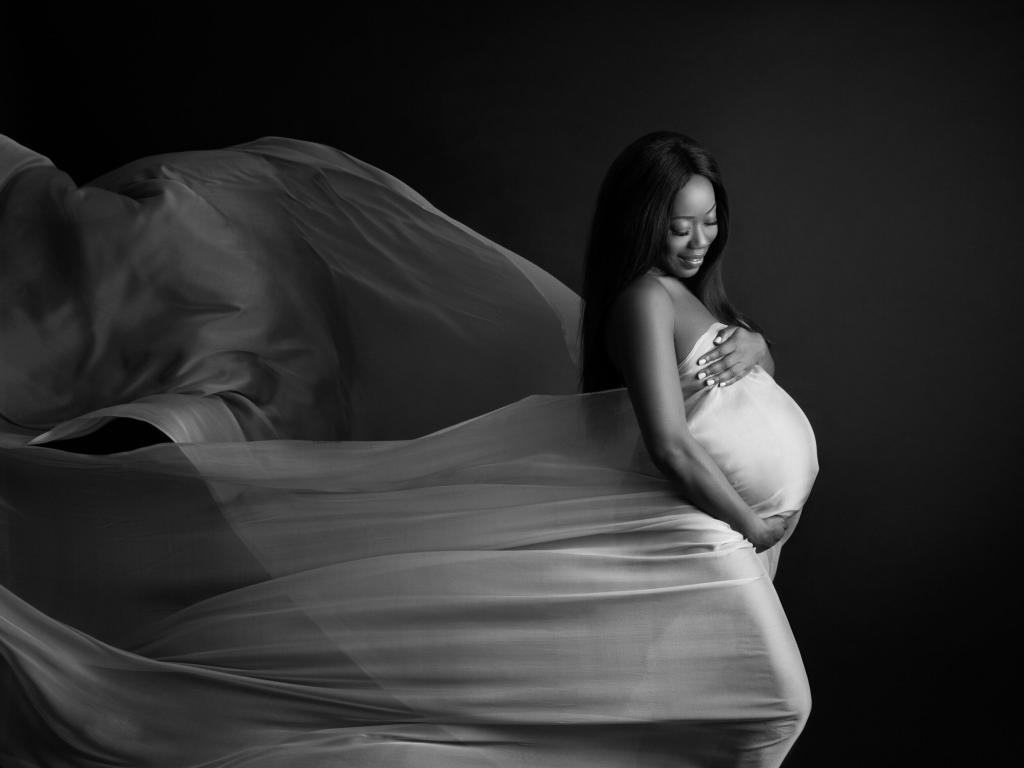
Whenever possible, I avoid using a flat light source while photographing pregnant women in favor of 45-degree, side-, or backlit images. In order for us to properly highlight your figure, we must use the right lighting techniques. There is no contour to a flat light bulb. It looks good in a selfie, but it hides the curve of your stomach.
There will be light portraits in the room if there is a lot of natural light in it. When photographing in a dark room, simply close the curtains and allow a small opening for light to go in.
In our case study, we needed as much light as possible, especially in the bedroom, where it was very dingy.
We aimed to produce melancholy photos. If you’re a little self-conscious about your figure, this is a terrific option. Your tummy will get the attention it needs thanks to this special lighting effect.
2. Remote control or self timer and tripod.
We used a remote control to take the photos in this example because the family possessed a decent DSLR camera. By having access to a greater number of images, this facilitates your work. This feature isn’t available on every camera. Self-timer functions are another possibility. To get the perfect photo, you’ll have to do a lot of rushing back and forth. We had a kid with us, which made it difficult to coordinate everyone and click the self-timer button.
A remote control might be helpful if your boyfriend wants to be in the photos, but he can take them himself. If you’re using a “point and shoot” camera, you’ll have to use a self-timer.
The clicker can be seen in his hand in this picture, but at least the entire family can be seen.
TIP:
We used a remote control to take this remote-controlled pregnancy photo of ours.
In my hand, you can see the remote. Makes photographing youngsters a breeze because you can sit with them and keep creating shots as they walk around the room. I also appreciate taking a more genuine approach to capturing a moment.
3. Watch the background.
Toss out anything out of the ordinary, such as extra furniture and clothing. Make your background as plain as possible.
It was decided to do some darker photos in an open living area for this particular example. To make the most of the available light, I placed the kitchen in the foreground of the photograph, which was a mistake.
This picture was actually created by just closing the blinds on a window behind me. It is imperative that we arrive to the kitchen area in the darkest possible conditions.
After adding a heavy vignette in post-processing, I was satisfied with the final image you see here. It would be too bright and distracting if I didn’t close the back window.
On a sunny day, you should avoid taking photos very next to a window because the light and shadow contrast is extreme. One half of your body is extremely light, while the other is extremely dark. Moving your body away from the curtain is a better option instead. Follow the path of the sun/direction of the light.
TIP:
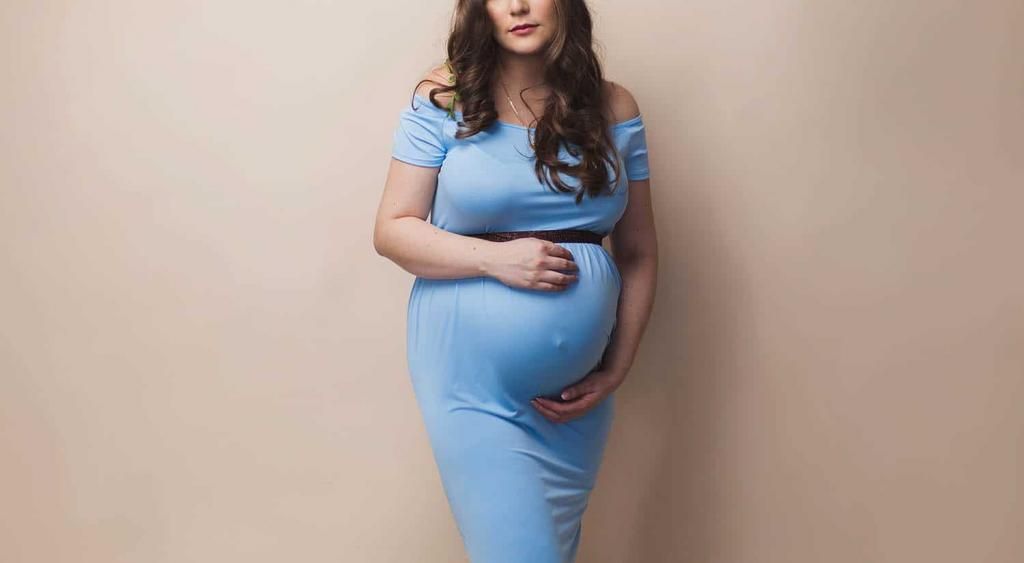
4. If you don’t want to expose your belly, wear fitted clothing.
We didn’t take any pictures of the mother’s stomach since she was uncomfortable with the idea. You may want to wear tank tops or maternity dresses, but avoid clothing with a lot of texture or creases at the front.
TIP:
Don’t stand directly in front of a window to get the best lighting. Permit the light to envelop you a little. I have purposely left the edge of the window in this shot so you can see where it is, but by cropping this image we get a very nice maternity shot with lovely lighting to show off the mum-to-be’s tummy.
5. Make a shot list.
If you want to get the best lighting, don’t stand in front of a window straight on. Allow yourself to be slightly enveloped by the light. However, by cropping this photo, we can achieve a beautiful portrait of a pregnant woman with great light to showcase her growing belly. I purposefully left the window’s edge in this picture so you can tell where it is located in the room.
Xem thêm : When Is The Best Time To Take Maternity Leave? Common Question And Answers
Pinterest is a great place to look for inspiration.
Camera Settings are a good place to start.
In this scenario, I didn’t want the family to mess about with their camera’s settings or manual functions. The following advice applies to both DSLRs and “point and shoot” cameras if you don’t know how they work.
It is recommended that you use the best possible quality option for your images. When editing the photographs, you’ll have the most info possible to work with. If you’re more experienced with photography, the RAW format might be a better choice, but for the time being, let’s keep with JPEG.
Set the camera to auto mode. That’s correct, I said AUTO. In terms of determining exposure and temperature, cameras today are remarkably adept.
6. Make up and Hair.
It seems apparent, doesn’t it? Make-up and hairstyling may not be at the top of the to-do list for many expectant mothers. For the goal of making editing your photographs easier and making you happy with the outcomes, remember to apply some natural make-up and fix your hair.
In addition, this will allow you to feel like these images are commemorating a significant event in your life.
7. Plan your session around 6-8 weeks before due date.
You’ll gain weight, and you’ll be less inclined to accomplish anything, as your tummy grows. Around eight weeks before a woman’s due date, I now photograph maternity sessions. Mums are more eager to try new poses and ideas since they don’t feel self-conscious about their expanding bellies.
Some ideas for home-based poses and set-ups.
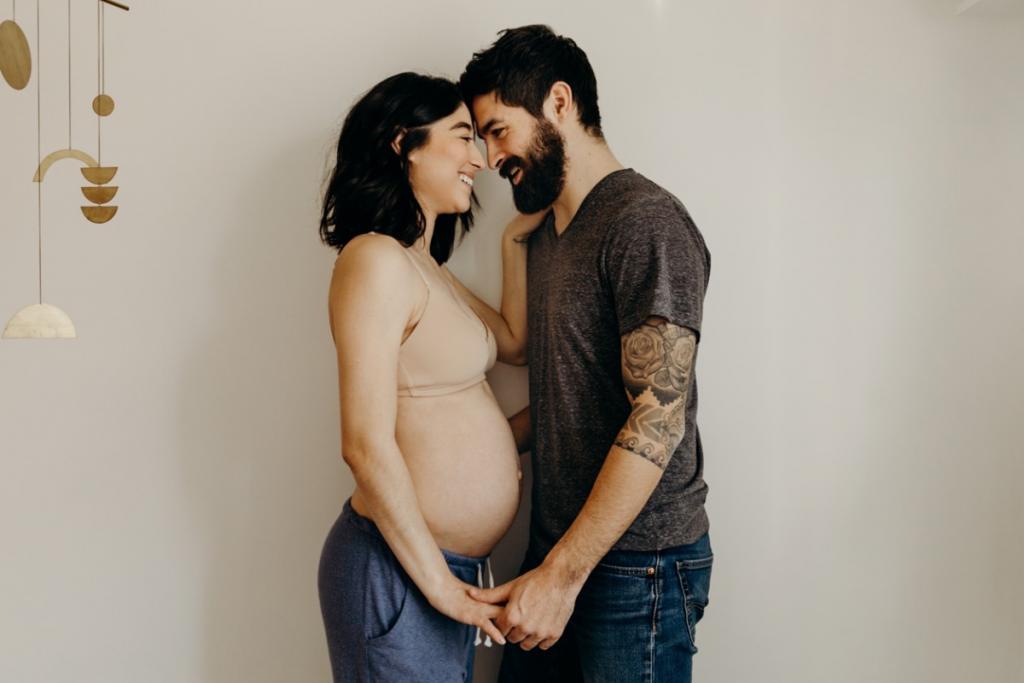
When photographing this family, I wanted to capture them as a unit, including both the youngster and the parents. The child was enamored with the camera, so I loaned him my own to keep him busy. It’s a whole new level of difficulty to maintain a toddler’s attention!
Take as many photos as possible. A professional photographer adjusts everything to his or her satisfaction before he or she begins photographing. I’d advise you to shoot additional photos with a variety of perspectives and settings so you’ll have more options when editing. Taking extra photos doesn’t cost you a penny. You’ll just have to spend more time narrowing down your favorites.
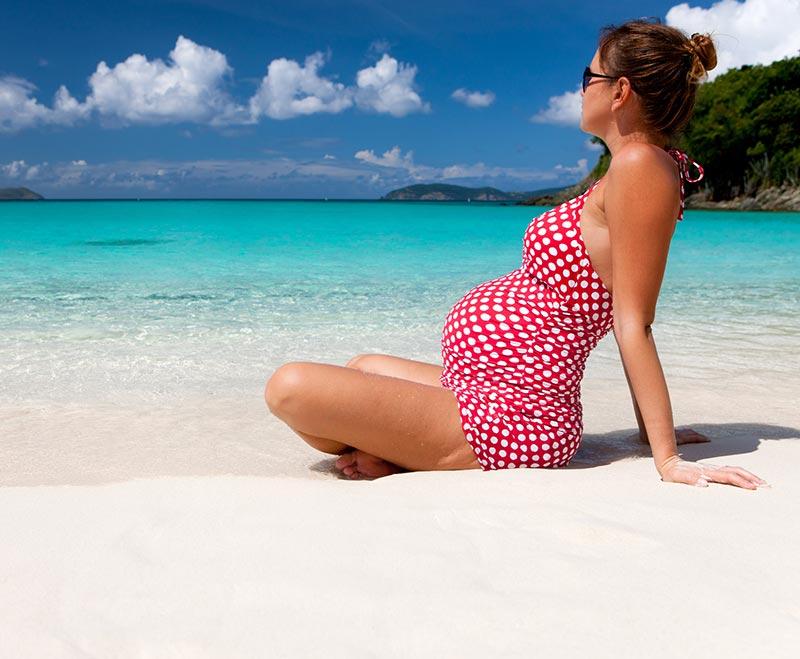
Look at things from a variety of perspectives.
Try photographing from the sky as well. Although it isn’t always simple, you may be able to get some lovely shots that show your stomach from an odd position.
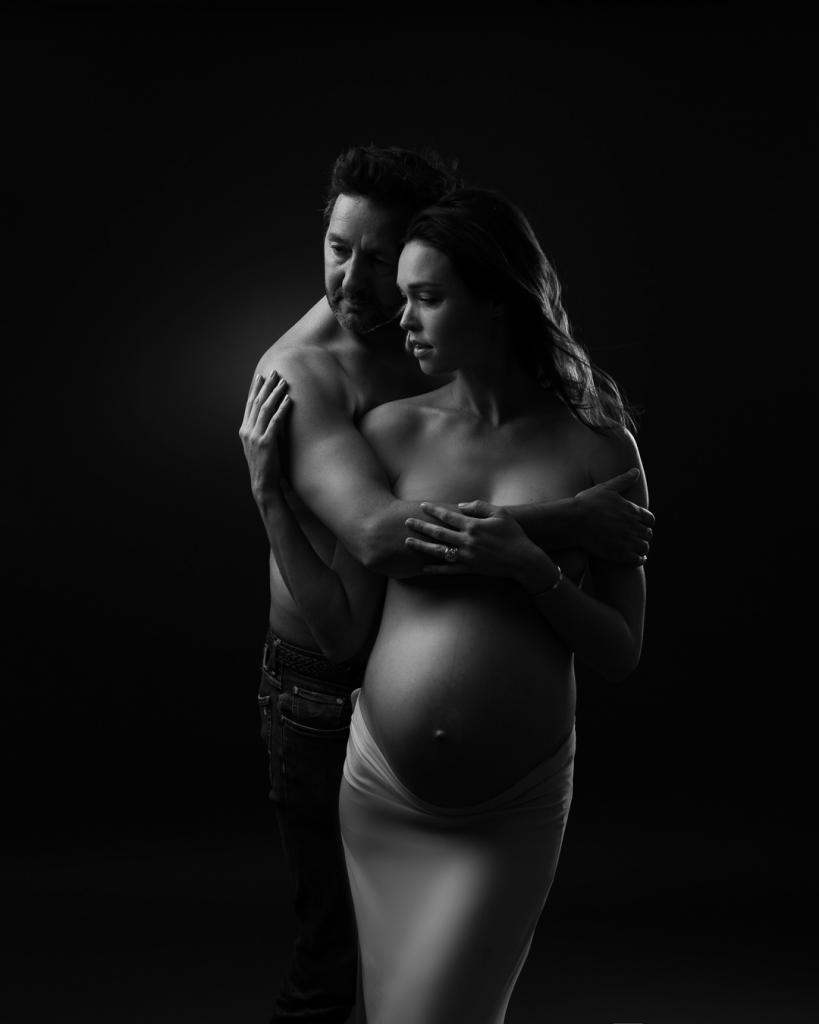
Take some time to experiment with silhouettes.
Creating silhouette images at home is one of the most popular ideas. These can include the mother-to-be, her partner, or the entire family.
TIP:
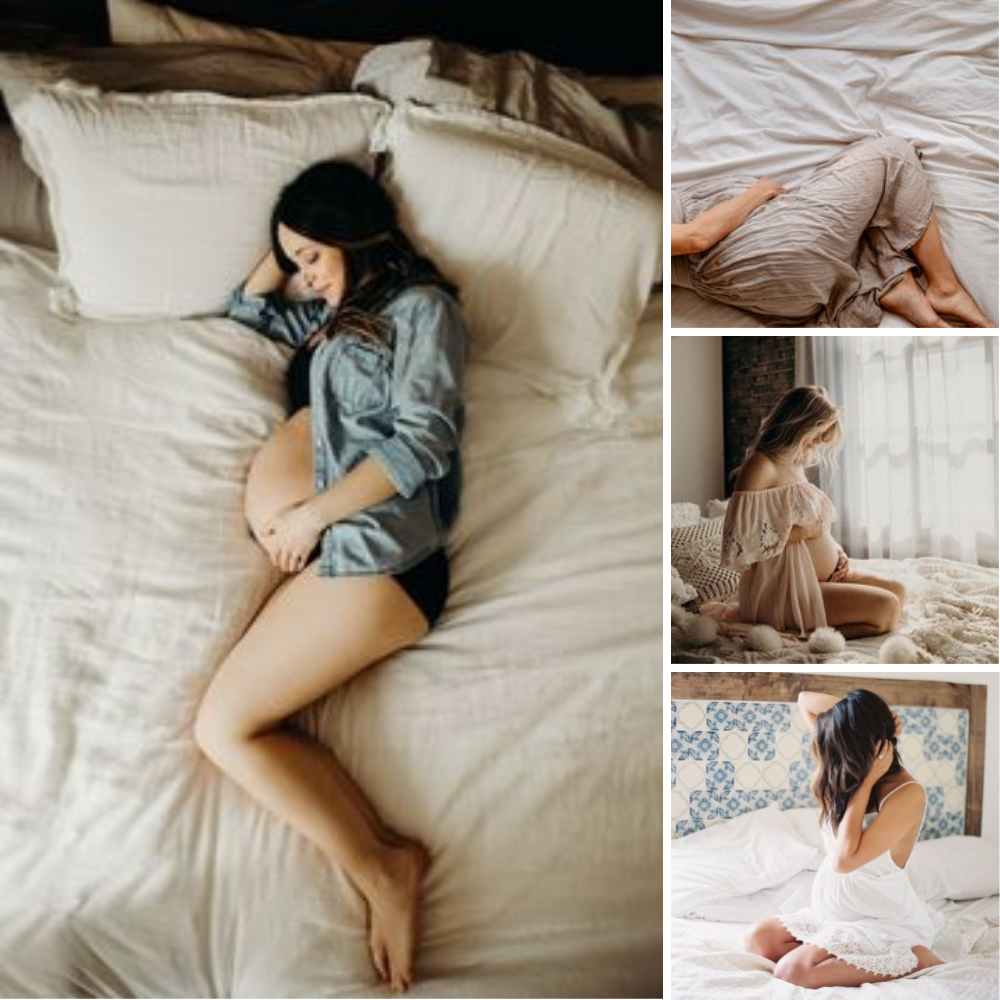
While curled up in a ball on the couch.
There are different poses on a sofa that you can use for maternity photographs. Move the sofa in front of a window for a nicer light, get the whole family on the sofa and cuddle up. Whatever you do, make sure that your bump is very visible. This is the purpose of the session, after all.
Posing for maternity photos on a sofa can be quite versatile. Better lighting can be achieved by placing the sofa in front of a window; gather the family around and cuddle up together! Whatever you do, make your bump as obvious as possible. After all, this is what the session is all about.
How to DIY a Maternity Photo Shoot Like a Pro
In general, how would someone do their own photo shoot if they were by themselves?
A little cell phone tripod is an excellent DIY photography investment. For roughly $20-$30 on Amazon, you can get one with a wireless remote and take pictures from a distance. A flexible tripod, which allows you to wrap its legs around things like tree branches or fence posts, is a great tool for taking pictures outside.
With a tripod, you’ll be able to get a single angle and then move your body around a bit to get the best shot. Try moving around (near up, far away) using your tripod so you can capture different perspectives. It’s going to take awhile and be frustrating if you have to move the tripod all the time.
Using a remote and setting your phone to timed mode is the best way to get the most natural-looking photos. In this method, you can get into position and press the shutter button before the camera really takes the picture.
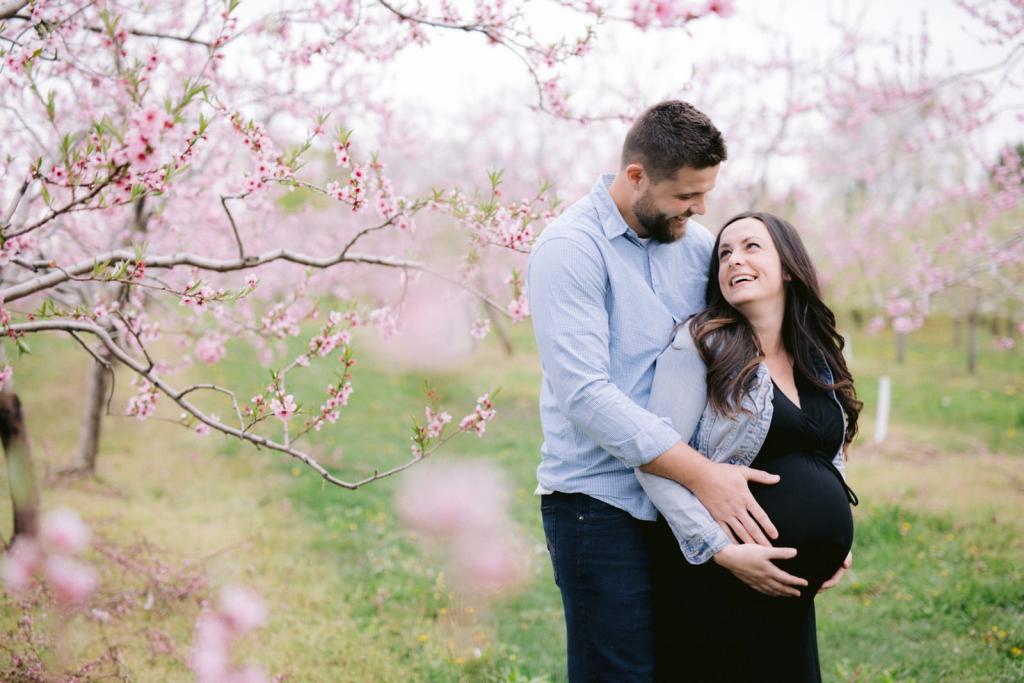
Is an assistant (like a partner or a friend) really necessary for a DIY photo shoot?
DIY photos are much easier if someone else is taking them for you. Getting support from a friend who is an Instagram addict is your best bet. The perfect “Instagram Husband” is someone you can rely on.
A full maternity shoot can be achieved by having a helper take numerous shots from various perspectives of the same scene. Just your tummy or your entire body might be seen in a variety of ways. You’ll appear to have accomplished a great deal when all you did was have your assistant move her or his feet.
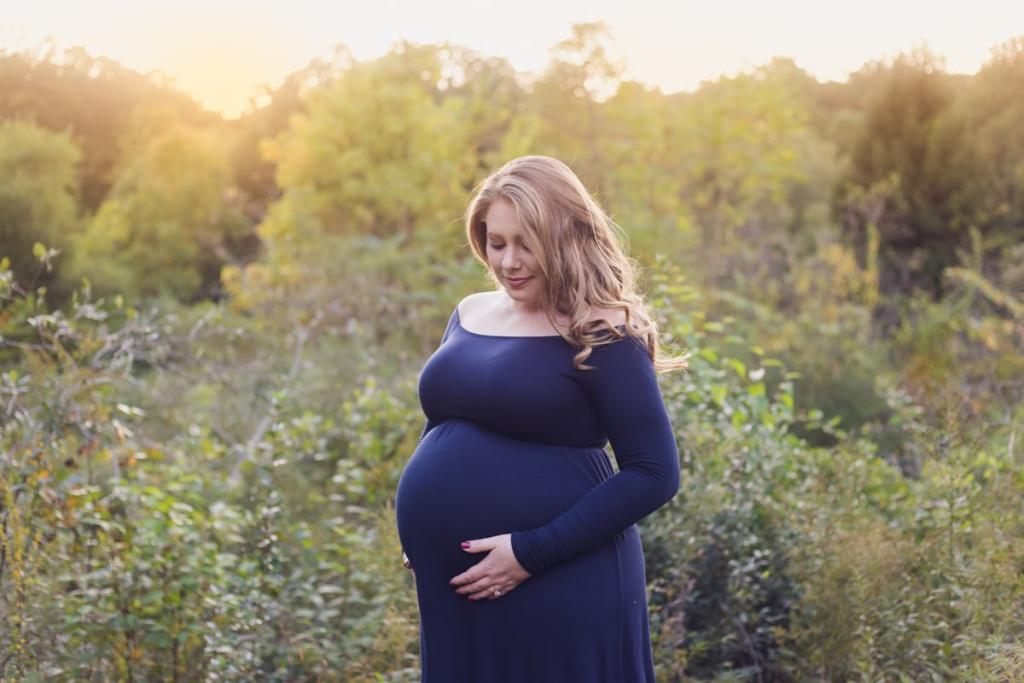
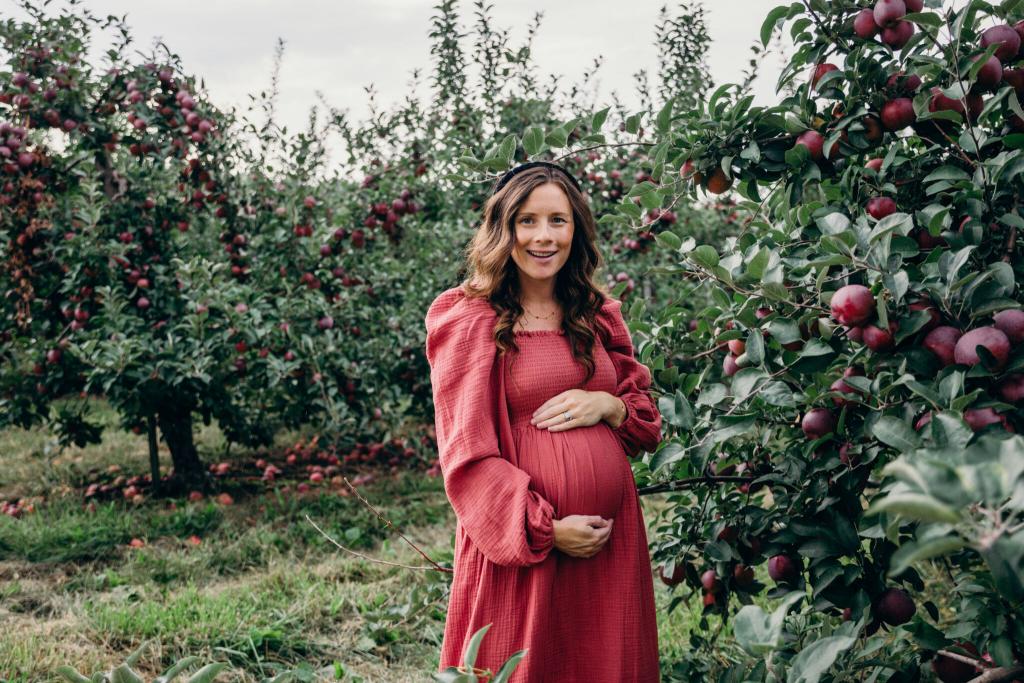
How do you DIY an outdoor shoot?
Lighting and location are the two most critical aspects of a good photograph. When photographing in the open air, seek out open shade (where the sun isn’t directly on your backdrop, but it’s still bright). The tried-and-true methods of finding open shade include sitting under a tree or in front of a shady wall.
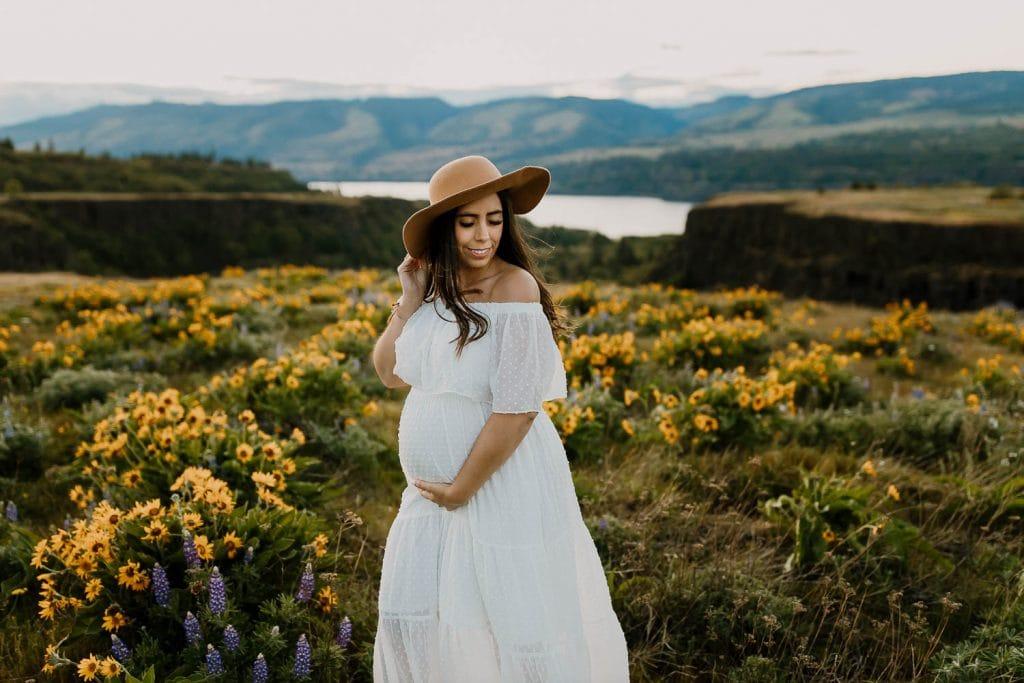
The “golden hour,” which is the first hour following sunrise or the last hour before sunset if you’re shooting outdoors, is the best time to get a wide-open shot. You may shoot pictures almost anyplace without the sun’s harsh glare, and the golden glow will give them a professional appearance.
To help you get the best light possible, if you can’t shoot during golden hour because it’s too bright, stand squarely in front of the sun. Protect yourself from the sun’s glare, and you’ll look better for it.
So location is super important. But how do you decide on the best location?
Often, the simplest solution is the best! If you’re not a professional photographer, cool lighting and magnificent backdrops can be difficult to work with. In many cases, the best images will be taken in front of a basic backdrop, such as a bright wall in your neighborhood or even your own bed.
How does lighting come into play with taking photos, and how can you make sure you’re getting the best lighting?
For good shots, lighting is almost as vital as the venue itself. Turn off any overhead or floor lamps if you’re shooting indoors in a bright space with lots of windows. When you use overhead lighting, you risk making your images look orange because of the warmth it emits. Play about until you locate a location that provides adequate light for your project. It all depends on where you are in relation to the window and the amount of light that is there in the room.
Backlit maternity photos can be found in both indoor and outdoor settings (when the light is behind the subject). Auto mode on phones and cameras may have a tougher time calculating out how to light DIY images, but it is still possible. Before taking a shot, increase the brightness or choose a non-backlit photo if the results are too dark.
What should you wear for DIY maternity photos?
Avoid wearing all white or all black unless you are quite comfortable in front of the camera (they can be hard to photograph in challenging lighting). Another tip is to stay away from patterns that are too small to be seen on screen, such as pinstripes. Wear whatever you choose, but don’t forget to have fun. In order to hide your bump, you should avoid wearing tight-fitting garments.
And if you’re going to wear makeup, apply about 20% more than you would in real life, like a slightly heavier foundation than you might normally wear, or maybe a more dramatic eyeshadow. But it’s really dependent on your baseline. If you’re not a makeup person at all, you might wear a tinted moisturizer and some Burt’s Bees lip gloss. Photos tend to downplay makeup, so the extra will make up the difference.
What poses do photographers usually rely on for natural-looking photos that parents can easily replicate at home?
Xem thêm : When Should You Buy Maternity Clothes? Comprehensive Guide
Also, if you’re going to wear makeup, go for a more dramatic look by using a heavier foundation or a bolder eyeshadow than you normally would. However, your starting point is critical. A tinted moisturizer and Burt’s Bees lip gloss can suffice even if you’re not much of a makeup wearer. Because photographs tend to minimize the effects of makeup, this extra will more than makeup for it.
Put on about 20% more makeup than you typically would. This may be as simple as a little darker shade of foundation or an even bolder eyeshadow. However, your starting point is quite important in this equation. A tinted moisturizer and Burt’s Bees lip gloss are acceptable substitutes for full-on makeup if you’re not one of them. Because photographs tend to minimize the effects of cosmetics, this extra will more than compensate.
Have you seen any maternity shoot themes trending lately? What themes can you suggest for those who want to keep things simple but still look great (and Instagrammable)?
It’s best to keep things simple if you’re taking your own shots (or enlisting the help of a partner). Look for a clean backdrop that isn’t too crowded (whether it’s a wall, nature, or your own home). This is a great use for a bed.
However, if you’re up for the challenge, the milk bath trend can be easily replicated. There are only three things you’ll need: a bathtub, milk, and a bouquet of fresh flowers. As long as the bathroom has enough light from the windows and someone to help you shoot the shots, you can try this out. Having your camera fall off a tripod and into the bathtub is the last thing you want to happen.
Any advice on including props?
Props work best when they have a purpose. Make your images stand out by using a smart letter board or pair of baby shoes as props (especially as a close-up). Alternatively, you can employ props to keep yourself occupied while taking shots in a more natural setting.
Having an activity to focus on, such as throwing confetti or gazing down at a group of letter balloons, might make it easier to achieve a natural photo when standing for the camera. One thing to keep in mind when utilizing a timer or remote is that you’ll need at least one hand free to activate the shutter.
How can you do DIY maternity photos with kids and/or pets?
When it comes to children and dogs, the less posed the better. It can be helpful for small children (kissing mama’s belly, talking to the baby, singing the baby a song, etc.) to have an activity or direction to focus on.
Also, be realistic about the length of time you expect them to engage. Make sure your camera is ready before you ask your child to join in on the photo-taking fun. Then, you should expect them to lose interest within a few seconds. When possible, take advantage of the burst mode on your phone or camera. The more photos you take, the better your chances of getting a good one!
Pets and children are more likely to get excited about participating if there is something exciting going on that they aren’t already a part of. Find an alternative location for your child so you aren’t forced to be both a toddler wrangler and a model during your photo shoot if you don’t want them there. Because if you don’t, you might end up with a lot of photographs of a three-year-old wielding a wiffle bat.
What are your favorite photo editing phone apps or computer software that is fairly easy to use (i.e. parents won’t have to spend a ton of time working with)?
It’s easier than ever to edit images on your phone! Astonishingly high-quality results are achieved as a result. VSCO, A Color Story, and Lightroom Mobile are excellent choices for quick and simple editing on Android and Apple devices. A Color Story is ideal for bright photographs with rich colors, and Lightroom Mobile gives a lot of flexibility for natural editing.
Presets with a natural look are the easiest to work with, but you may need a few trials before you find the right one for your image. Make your photographs stand out by increasing the brightness and contrast a little, but don’t go overboard.
FAQs
How do you take maternity pictures with your phone?
As Mehu suggests, you should place your camera or phone up higher and inclined downward toward you. If you want to show off your growing baby bump, she recommends taking photos from an angle that faces the direction of light coming from above.
What week should I do maternity photos?
As long as pregnant women are not too near to their due dates and are still able to move around with their developing baby bumps, they can enjoy a maternity photo session. The optimal time range for maternity photography is between 28 and 36 weeks of pregnancy.
How do you take a pregnant belly pic?
Shoot in front of a window to get the best light possible. Shoot against a basic wall or backdrop. Choose a wardrobe staple that will grow with you as you get larger in the womb. Use a self-timer or enlist the help of a friend or loved one to take the photo.
How can I take my own photoshoot?
- Keep a safe distance between the camera and the subject.
- Make sure the camera is a few feet above your head.
- Make sure the lighting is enough.
- Think about the overall structure of the piece.
- Smile!
- Set a timer or an intervalometer.
- Shoot in a special mode.
- Learn the basics of photo editing.
Do I need maternity photos?
Because you won’t be pregnant forever and your pregnancy will go by faster than you expected, it’s crucial to document these precious moments. As a memento of your miraculous pregnancy, having maternity images to look back on will serve as a constant source of joy and peace of mind.
Is 32 weeks too early for maternity photos?
When it comes to photographing maternity sessions, I photograph women between 28 and 35 weeks pregnant. If you’re expecting a visible baby bump by the time you’re 32 weeks along, you’re in luck. If a mother has already had one or more children (or all three! ), I recommend trying for delivery as early in the pregnancy as feasible: around 28-30 weeks if possible.
Is 30 weeks too early for maternity pictures?
When a woman is 30 to 33 weeks pregnant, it is ideal to have a maternity session done. It’s not too close to the due date at this point, and the belly bump is showing well. Before 30 weeks, the stomach may not be as rounded and may not be visible in photographs.
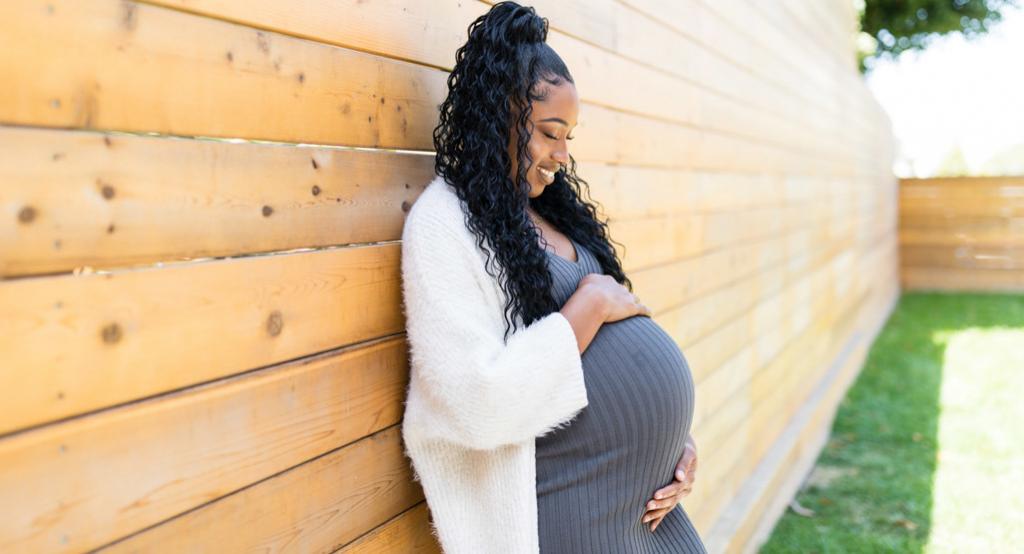
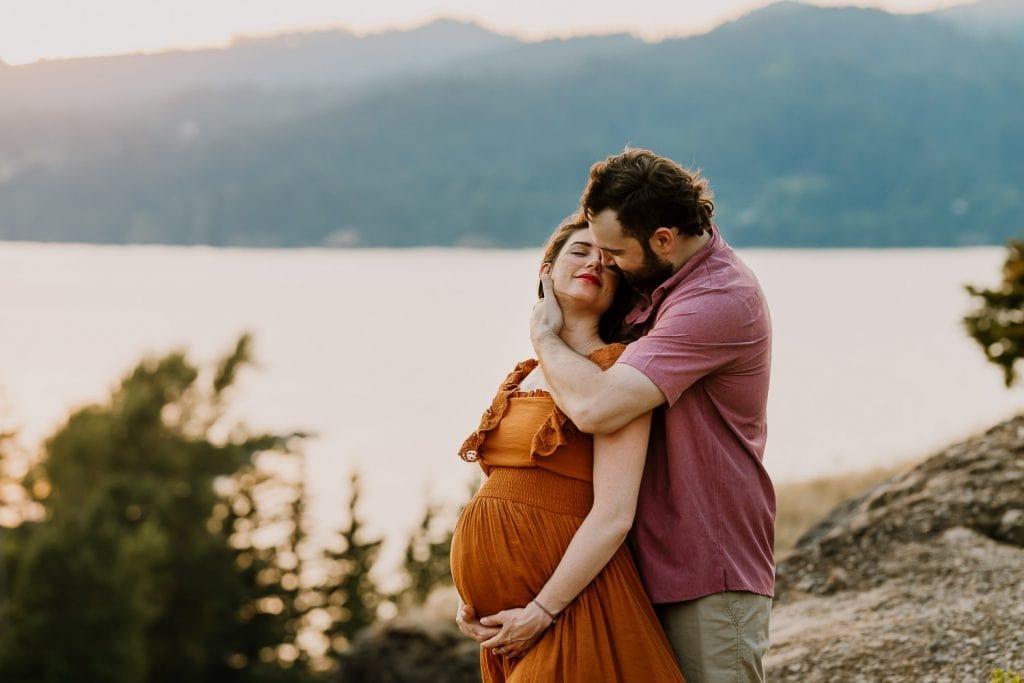
How do you pose with a bump?
I recommend photographing your bump from the side, as this provides the best profile and allows us to track your progress over time. Drop your weight onto your back foot and frame your bump with your hands for the greatest stance.
What benefits can I get when my maternity pay stops?
When your maternity pay ends and you are not eligible for benefits, sick leave, or vacation pay, this is considered income. Canada employment benefits may be available for those who worked in Ontario during that time period.
Can my employer ask when I will return from maternity leave?
In Canada, it is against the law for your employer to inquire about your anticipated return date after maternity leave, regardless of whether a specific date has been specified. Employees have a right to privacy when it comes to their health and safety, and employers must respect that right by not putting undue pressure on them.
Under Section 74(a) of the Pregnant Workers’ Benefits Program Act, if an employee’s rights are violated by coercive queries regarding their pregnancy or parental status, they may face legal action (PWBPA). A punishment of up to $1000 per day can be imposed on any organization found in violation of these laws.
As a result, other organizations will be made aware of the infraction, potentially affecting their ability to conduct business with them.
What does a labour and delivery nurse do?
Before, during, and after childbirth, a labor and delivery nurse provides support. They can be found working in a wide range of facilities, from hospitals to clinics to labor and delivery homes.
Is it illegal to work while on maternity leave?
In the United States, it is unlawful to work while on maternity leave. Section 74(a) of the Pregnant Workers’ Benefits Program Act prohibits employers from discriminating against pregnant employees (PWBPA). A punishment of up to $1000 per day can be imposed on any organization found in violation of these laws.
What are some things a labour and delivery nurse does?
Before, during, and after childbirth, a labor and delivery nurse provides support. Hospitals, clinics, and birthing centers are all places where they can be used.
How much notice do I need to give my employer after maternity leave?
After returning from maternity leave, you may be required to give your employer two weeks’ notice. Do not exceed the number of days stated in your employment contract, otherwise you could face legal action and be fired from your job if you violate the contract.
What happens if I don’t return to work on time?
Contacting your HR department as soon as possible if you have been on family medical leave is the recommended course of action. If you don’t follow these rules, you could be subject to disciplinary measures such daily fines of up to $1000, which would be a violation of Section 74 of the Internal Revenue Code (a).
How long do I have to wait for my employer’s response when filing for unemployment benefits?
Once you submit your claim, you’ll have to wait at least three days to hear back from them.
What’s the difference between maternity leave, parental leave & sick leave?
Allowance for women who have recently given birth to take maternity leave: (or adopted a child). Six weeks before your due date and up to two weeks after the birth of your child.
When a new baby or an adopted child is under the age of five, parental leave allows up to 18 weeks of unpaid time off from work to care for them. This includes some periods when parents return to work part-time. Maternity leave must be taken, even if a mother chooses not to return to work full-time following the birth of her child.
Time off for illness or injury that is paid is known as sick leave.
Conclusion
You don’t even have to leave the comfort of your own home to create an exquisite and endearing maternity photo shoot. There is absolutely no reason why you can’t get one right now!
Nguồn: https://spasifikmag.com
Danh mục: Maternity