A friend of mine recently asked for advice on how to photograph pregnancies.
- Can You Wear Maternity Dresses When Not Pregnant? Helpful Guide
- When To Start Wearing Maternity Clothes? Tips for Buying Maternity Clothes
- How To Report Maternity Leave On Taxes?
- When To Buy Maternity Clothes? How to Buy Maternity Clothes?
- When To Buy Maternity Clothes First Pregnancy? Complete Guide
I found myself rapidly spouting concepts, so I compiled them here for easy reference.
Bạn đang xem: How To Maternity Photography? 18 Tips To Success!
For several reasons, belly shots are among my most favored types of alcohol. They have been unfairly maligned over the years, and we’ve all seen the “what not to do” pictures on those amusing websites, but in reality, they can be rather lovely.
Preparation, transition, and enthusiasm are all appropriate emotions to record during this period. It’s great to work with subjects that follow instructions, and meeting the proud new parents is a special bonus before you begin caring for their newborn.
Maternity photo shoots with multiple children in the family, especially toddlers, are an other animal altogether. but the advice still stands!
Posing and Angles
Your top priority should be making a pregnant woman feel beautiful, and that includes making the most of her belly.
Women can carry their babies in an infinite number of different ways due to the wide variety of body shapes. What works perfectly for one mother may not at all suit another.
Some standard poses and camera settings for expectant mothers are outlined below (and daddies).
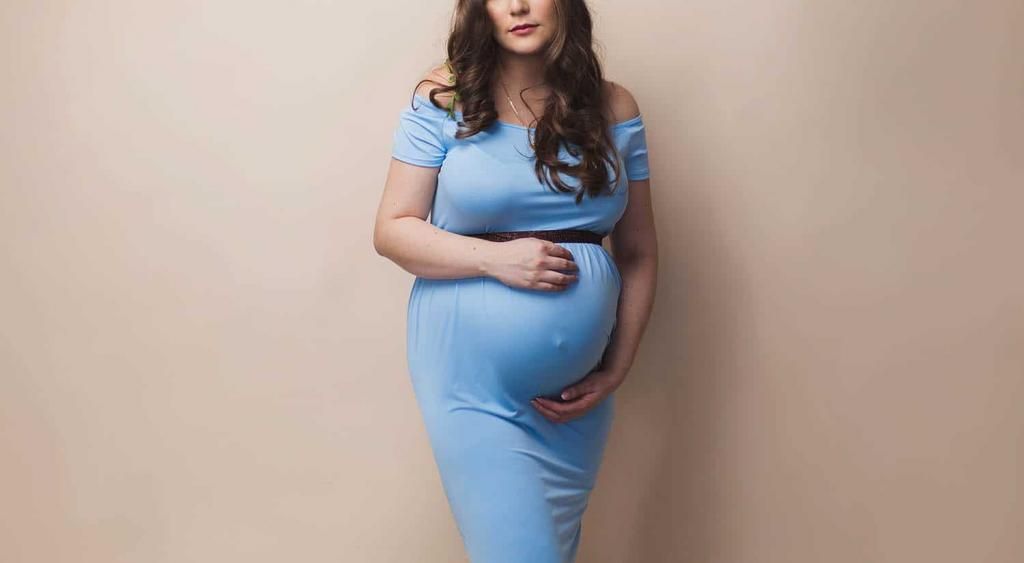
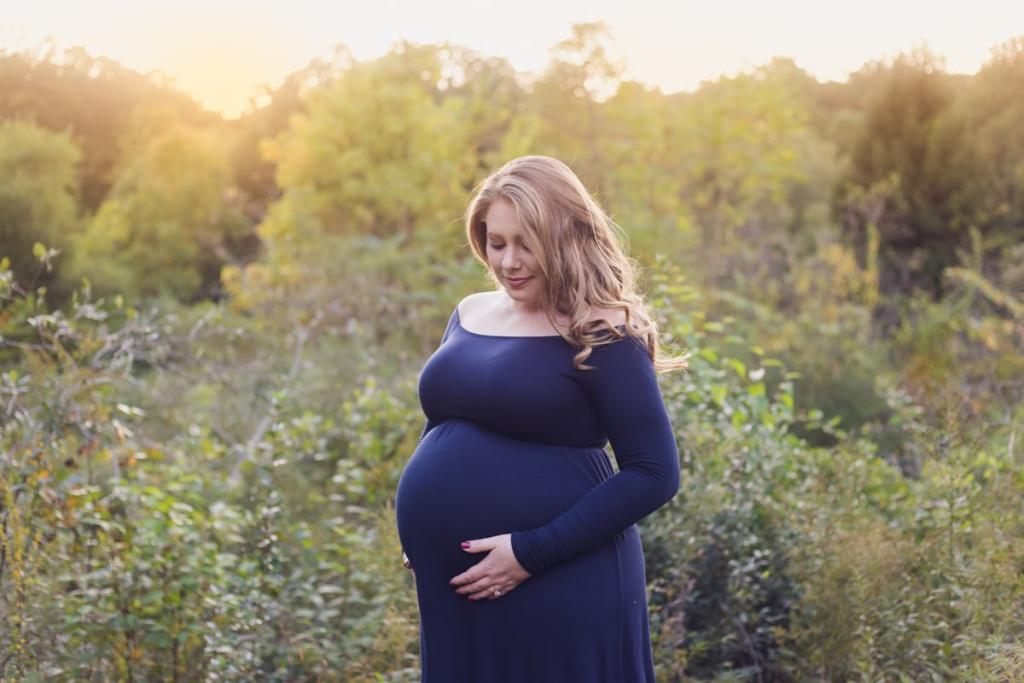
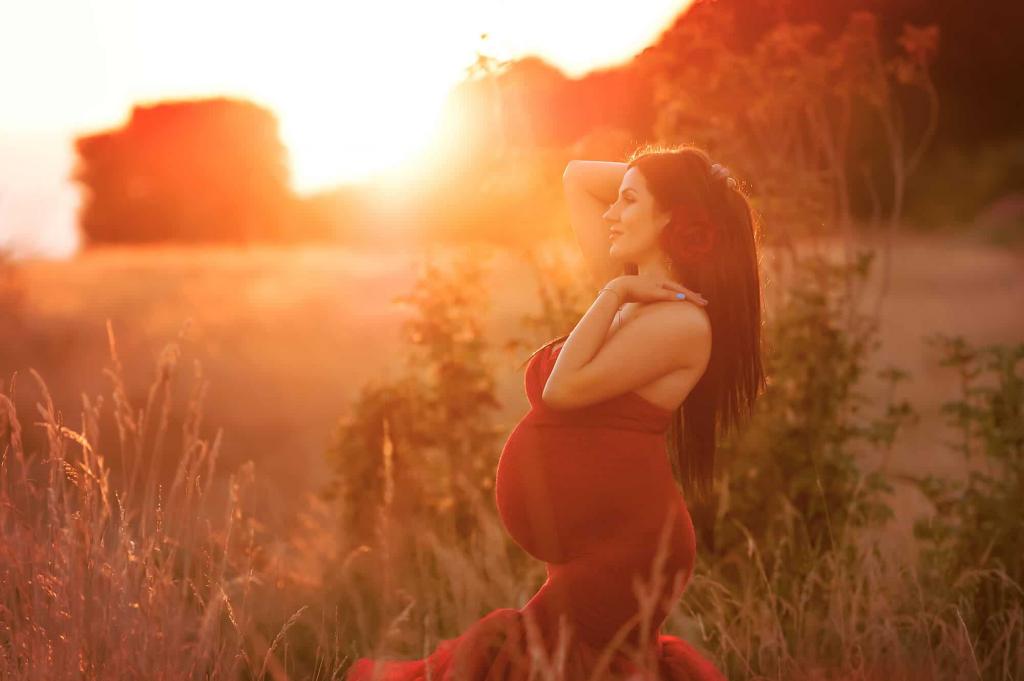
1. HANDS ON THE BELLY
So of course she wants to feel the bump! This does a great job of highlighting her belly and offering her a comfortable resting spot for her hands.
You can also try placing your hands on her hips, in her pockets, or even in her hair for a change of pace.
2. UP HIGH
Bring a stool with you to the session, or at least something to stand on, if you need to. The taller you are and the bigger your belly, the more flattering you are to your subject.
Put your imagination to work! Your subject(s) will look great in a top-down shot, so have them lie on a quilt or blanket. Elevation can help hide the expansion of other body parts (besides the belly) that occurred during pregnancy.
3. KEEP IT NATURAL
Make sure her head isn’t cocked too far back while she examines her growing tummy, as this can give the appearance of a double chin. Instruct her to focus on a spot that is out of sight of her lump.
Make sure to smile and make direct eye contact. A timeless photo like that is appreciated by all. Use a wide range of emotions, from lighthearted to serious.
In the style of a child session, I enjoy having the new dad stand to one side or behind me and make faces, crack jokes, or dance. A dress rehearsal for the real thing!
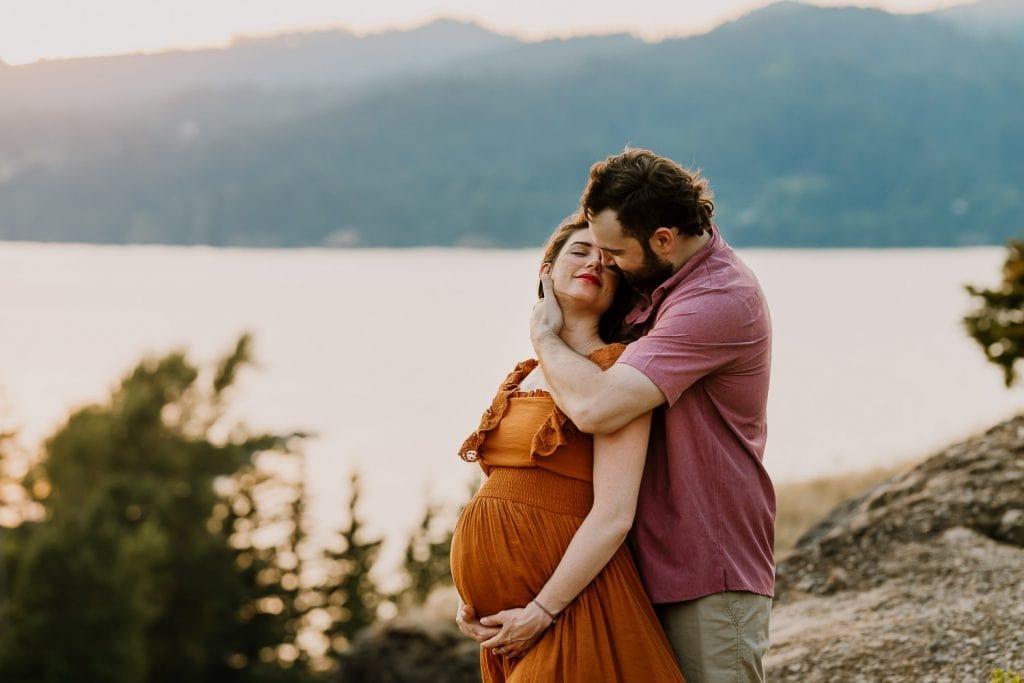
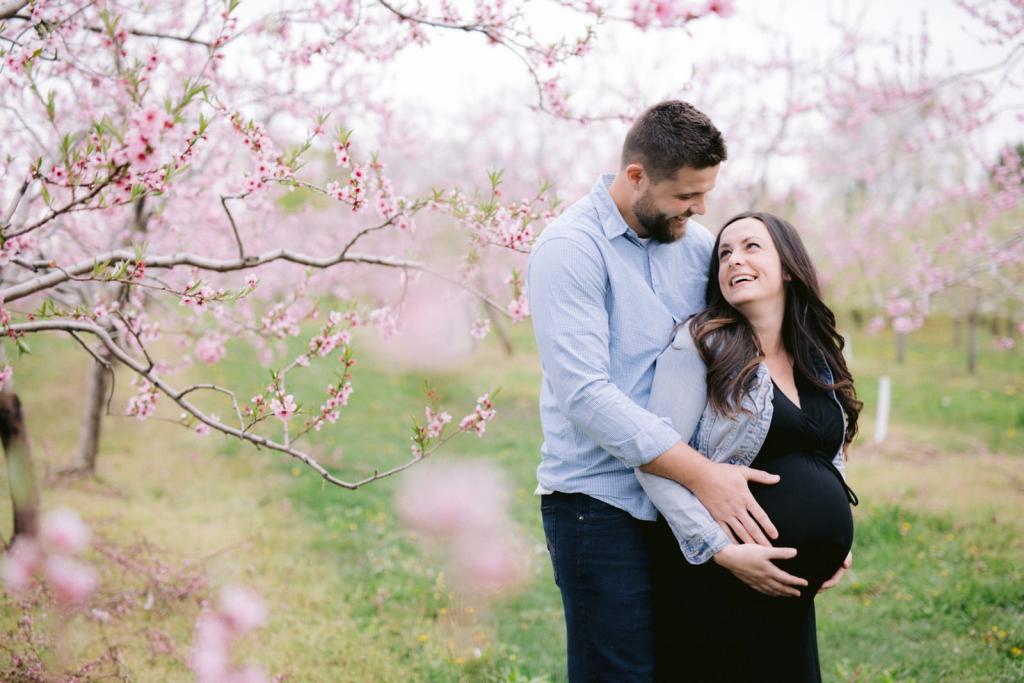
4. GET COUPLES CLOSE
Squeezing the air out of each other is a pleasurable activity for couples.
Tell him to touch her as much as he wants (within reason, of course). You should get as many wide shots, medium shots, and close ups as you can of the two of them together. sans the stomach as well
Simple couple poses can be really effective here; if the pregnant woman’s belly gets in the way, simply roll with it; it will likely make everyone laugh.
5. STRAIGHT ON
What she wears and how noticeable the bump is are the two most important factors. Make careful to get a head-on shot of mom if you can tell she’s expecting.
All pregnant mothers should twist to the side, but she need not turn all the way; a 45-degree angle would do just fine.
6. STANDING VS. SITTING
Pregnant ladies look their best when standing, but you still want a natural pose, so have your subject pop a knee or bend at the hip.
However, I’ve found that sitting is ideal for shooting groups such as families and couples. Take special care to avoid any sloppy turns.
Composition
Photographs taken during pregnancy can feature some very imaginative poses and backdrops, which is one of the many reasons why people love them so much.
Right now is a fantastic moment to experiment with your piece’s structure, colors, and angles, and to break some norms. especially if you have two people who can and will follow instructions. That can be really taxing and irritating on my part at times!
It can be challenging to think on one’s feet when photographing children and infants because we are often required to follow their lead, making it more difficult to frame a more intriguing composition when we do have a moment to relax. Take it easy and think forward to what you might like to do or experiment with during the session.
The trend during belly sessions is to take pictures of “only the bump” (guilty!) while I agree that such photographs can be entertaining, I would advise adding human faces whenever possible.
Emotion
Discuss the potential for awkwardness with the mother or the expecting couple beforehand.
Most individuals (including myself) get quite awkward when they’re being filmed. Assure them that this is a terrific way to practice for baby photos in the future.
During our session, I make them think about and acknowledge the feelings they are having. Their expressions and gestures can become visibly animated as they begin to feel the baby’s impending arrival. Make good use of your hormones.
Lenses
Any lens would work for a maternity shoot, in my opinion. Usually, I’ll switch between my 85mm and my 35mm lens. There is no reason why longer lenses can’t produce the same excellent results.
Make sure the distortion isn’t too bad if you decide to use a wide-angle lens; you wouldn’t want mom to look disproportionately large. Taking a wide angle can help stimulate imagination and provide context for any given situation.
You may try out that Lensbaby you’ve been meaning to get or that tilt-shift lens you’ve been meaning to try out, or you can just shoot wide open and see what happens.
Location
Infinite variety exists. An unplanned pregnancy is an adventure. Locations that are urban, outside, at a client’s house, and don’t require waking anyone up for naps are all possible.
Due to the impossibility of doing so after the birth of the baby, now is a fantastic opportunity to take advantage of the sun’s beautiful backlighting (clearly my passion) or even visit the city center. Get the mom’s input on whether she wants a natural look or a colorful and cheerful theme for her newborn photo shoot.
Keep in mind that Mommy is probably getting extremely uneasy right about now. Please consider her wellbeing and prevent her from having to trudge up a mile of steep slope or sit on a bed of gravel.
Wardrobe
Can you suggest an outfit for me? This is by far the best question I am asked by expecting mothers before their session. To paraphrase what I tell them repeatedly: “Don’t hide the bump… we need to see it, that’s the point!”
I let them choose between two different outfits and even let them bring their own clothes for my assistance. It’s far more difficult to control a bump in a confined area, so be sure to plan ahead and have them change somewhere!
When in doubt, clingy garments are the most flattering option. If mom is wearing a flowy dress, you can still get some great images, but she’ll need to gather and keep it close under the belly to get some nice, defined belly shots, or you may try facing her into the wind, if you have any.
What you wear may also be affected by the setting and the goal of your session. If you’re going into a city, bright colors and sturdy shoes are probably a good idea. If you want her to appear more natural, suggest that she wears basic colors and loose fitting clothes.
After she gives birth, she may not put as much effort into her appearance, so this is a great time to show off her sense of style with a new necklace, scarf, or pair of shoes. Like a typical family or couple session, have the new father complement her attire, but avoid having them be too matchy-matchy.
When
When would be a good time for a maternity photo shoot? Again, this may depend on whether or not this is the expecting mother’s first child.
When it comes to timing, I usually advise starting in the third trimester, ideally before 35 weeks. When they are that far along, it becomes difficult to feel “beautiful” and difficult to get up and down.
Remember your past pregnancies if you’ve had any. The session becomes more challenging, if not impossible, if it is scheduled too early in the pregnancy and the expectant mother still does not have a noticeable bump.
Talking things over and settling on a common time is the best course of action. Make sure the mother isn’t facing any difficulty that would necessitate postponing the session, such as a high risk of premature delivery, physical limits, the potential of bed rest, or the pregnancy of more than one baby.
Family
Pregnancy photo shoots with the whole family may be beautiful and challenging all at once. It can be difficult to pose the elder sibling(s) alongside mom’s pregnant belly if they are still very little.
Keep in mind that Mom doesn’t have to run after them all the time, so it’s up to you and Dad to assist corral them. Just make sure to keep things light and humorous. You should take some “traditional” photographs like you would ordinarily, but you should also try to capture the connection between family members.
Fancy yourself a big brother or sister by bragging about it. When children are included, posing and guidance become a whole new ballgame. Keep the baby belly visible and focus on making mom feel special.
Pregnancy photos with pets are a terrific idea. Many of the couples I’ve met have expressed a desire to incorporate their pets. If you need to work with animals, pick a suitable site.
Props
Xem thêm : When To Buy Maternity Clothes? How to Buy Maternity Clothes?
Although I’ve never been one to use props in photos, I’ve heard that they’re all the rage for maternity shoots. There is (in my opinion) a delicate line between being cute and being unnecessarily corny.
By providing examples of your work from previous maternity shoots, you can let your clients know exactly what to expect from you. Selectively add props and ideas the new mom has seen on Pinterest into the session. Make every effort to realize their idea, but don’t be afraid to add your personal flair to it.
Here, up-front conversation is crucial.
Selfies
Congratulations on your pregnancy, miss fancy photographer! Maybe you might think about photographing your own pregnancy.
I am currently expecting my third son. Oh, we are so thrilled. I haven’t been very good about shooting pictures on a weekly basis, but I have a couple to show for it.
You can take pictures by setting up the camera, using a timer and remote, or even utilizing the bathroom mirror. What about the view from your own tummy!
If you want family photos taken, you should definitely book a session with a different photographer.
There you have it: a few pointers for taking better photos of your tummy.
It’s important to remember that most expecting parents would rather not have a million and one pregnancy photos, so it’s smart to structure your packages and prices accordingly. If you book a complete newborn session with me, I provide small maternity sessions at no extra cost.
Offer a free small maternity session to clients who book a newborn session with you, or take use of the opportunity to take photos of your pregnant best friend (they make a terrific baby gift!).
Finally, here I am at 27 weeks.
Getting ready to jump head first into maternity photography?! Read on for our 18 tips to success!
It’s hard to find a more magical time to take pictures than the last few weeks of a pregnant woman’s life, just before her kid is born. You can make her feel like a million bucks, but you should be mindful of her comfort during what may be a difficult moment for her.
Planning ahead for these pregnancy sessions and coming prepared with a variety of postures and techniques will make the experience more enjoyable for the expectant woman and everyone involved.
It’s time to get down to business, then. Here are 18 ways to improve your chances of taking stunning maternity photos that you’ll cherish forever.
1. Be on Time!
There is a sweet spot between 33 and 36 weeks of pregnancy for a maternity photo shoot. ALthough, make sure to ask your client if there are any unique considerations she needs to make for the time of her appointment.
To avoid disappointment, clients who are expecting multiples, who are experiencing problems, or who may be facing an early delivery are welcome to book their consultation in advance. Respond flexibly to the needs of your pregnant clients.
2. Prepare Lenses for Maternity Photo Session
The 50mm lens is my go-to for maternity shoots because it allows me to get beautiful images in a wide variety of settings, including a wide range of poses, compositions, and lighting options.
Many different lenses are suitable for maternity shoots; long lenses work well and produce beautiful compression, while wide-angle lenses allow you to take in the entire scene. Avoid excessive distortion when using wider-angle lenses, as doing so could make expectant moms appear abnormally huge in the photograph.
Examples of great pregnancy photography lenses are:
35mm
This lens is ideal for photography since its focal length falls between between being too long and being too wide. In practice, it provides an accurate viewpoint, with the mother’s body distorted as little as possible.
50mm
With a 50mm lens, you may achieve a shallow depth of field, perfect for artistic maternity photographs if the couple so desires. By doing so, you can concentrate on the expecting mother and her growing belly without having to worry about the rest of the scene being in focus as well.
85mm
Since you probably won’t want every single portrait to be a tight close-up, you should reserve this lens length for use in addition to your 35mm or 50mm. Even so, an 85mm lens is helpful for catching more of the body in the shot.
24-70mm or 70-200mm
Excellent for low-light outdoor maternity shoots.
3. Practice Different Camera Settings for Maternity Shoots
You can get some terrific experience with wide-open shooting during these sessions. There’s nothing quite like some lovely bokeh to draw attention to the pregnant woman’s glowing belly.
To begin, make sure your camera is in manual mode so you have complete command over all of the dials and settings. Your camera’s settings should ideally fall within these parameters:
- Aperture: For family photographs, use an aperture of f/5.6 to f/8, and for maternity photos, use an aperture of f/2.8 to f/4.
- Shutter speed: There are a variety of factors to consider, including the setting, the maternity postures, and the final result. 1/1000 is recommended for faster action, while 1/50 to 1/60 is adequate for any static pregnancy posture.
- ISO: Use a somewhat narrow focal length setting, such as 100–400, on your camera. If you require a quicker shutter speed, you should ascend.
When taking pictures, make sure the father-to-be and any other siblings are clearly visible by zooming in as much as you need to. If you’re looking for further advice on how to properly adjust your camera’s settings, click on this fantastic page!
4. Use Props Appropriate for a Maternity Photo Shoot
During pre-session communication, suggest to the parents that they bring along some important events from their pregnancy, such as an ultrasound photo or an object with the child’s name on it.
These can be used to give the portraits an individual flair. Asking this question upon initial contact or in a follow-up survey really helps to set the tone for your business.
In case they can’t think of anything else they’d like to include, you can even bring a few extra to the session! Use your imagination and make it unique for each client.
5. Prepare Comfortable Clothes
When taking pregnancy photographs, it’s important to dress the subject comfortably, just as you would for any other type of photography. Whether or if the couple shares a sense of style and choose to dress similarly can affect how they shop for clothes.
Some expectant mothers, for instance, could want a more laid-back environment, while others would prefer something more akin to a high-fashion look. No of the event’s theme, it’s important to advise expecting mothers to dress comfortably and stylishly to show off their growing bellies.
6. Plan Your Compositions
Composition plays a huge role in portrait and maternity photography since it draws focus to the subject (the mother and her growing baby bulge). A strong layout can alter the feel of the maternity photos even if the mom only wants black and white shots or casual positions.
You may take striking maternity photos by experimenting with these and other compositional changes.
- Up high: Encourage the person you’re photographing to lie down on the ground or a blanket. Elevating the mom’s stature by standing on a stool will draw attention to her pregnant belly while also improving her overall appearance.
- Straight on: Perfect for highlighting the pregnant woman’s curves, especially if she already has a large stomach.
- Side: If the pregnant woman’s tummy isn’t showing yet, have her twist to the side or even to a 45-degree angle.
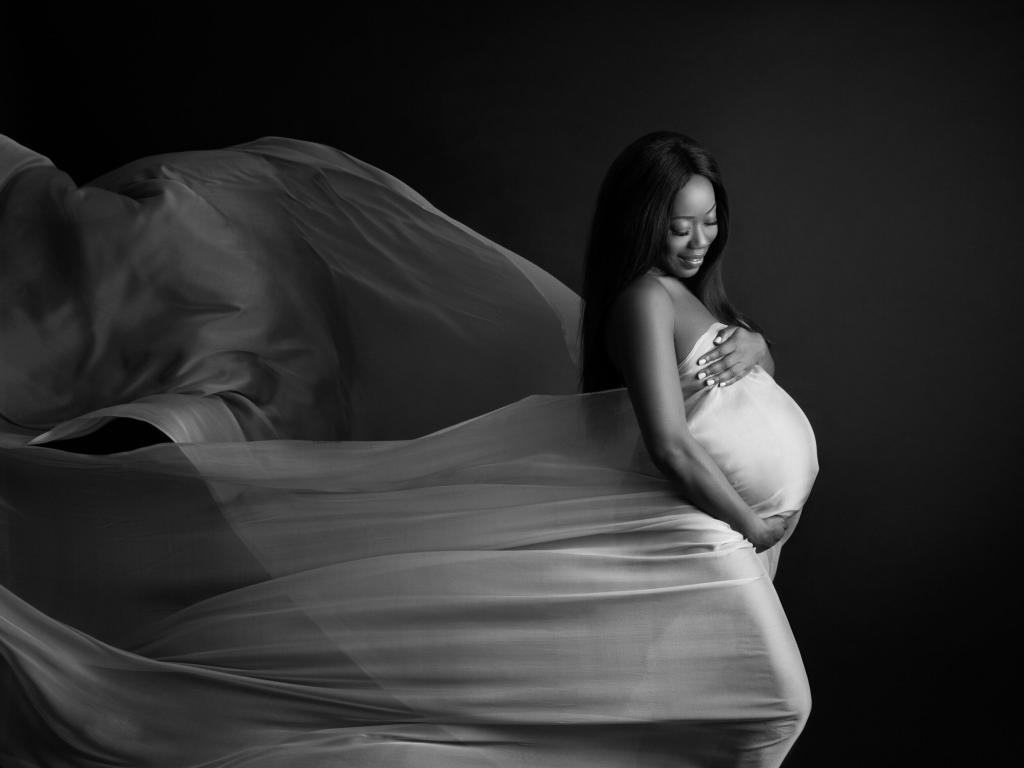
- Silhouette: If the client is uncomfortable being photographed, silhouette maternity images are a great option. Make sure to photograph the mother’s body at an angle that shows her profile and makes her pregnant tummy stand out.
7. Determine the Right Lighting
Any interior setting, including a photography studio, is ideal for shooting pregnancy photos since a large soft light may be used to fill the scene with a heavenly glow.
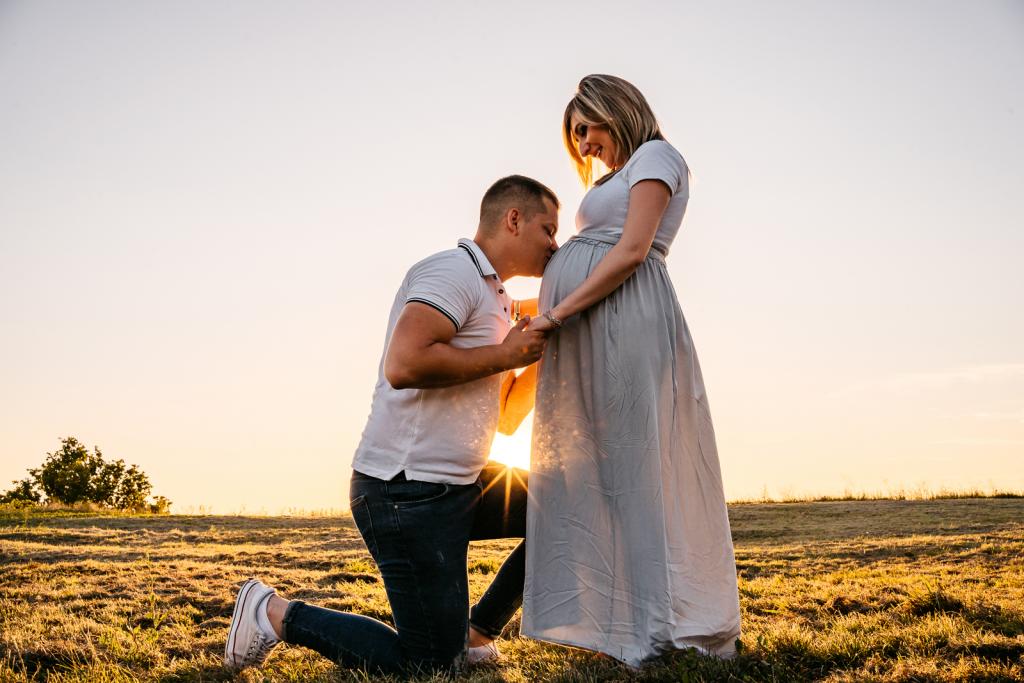
When shooting a maternity session outside, natural light is your greatest bet, especially if you can time it for either sunrise or sunset.
An effective photographer will also routinely bring a flash or reflector to manage fill light and highlight the bump.
8. Include the Siblings
Having the kids in the photos together is a wonderful idea, but it can be difficult to coordinate, especially if the kids are very small. Advise the parents to bring an iPad or a coloring book and crayons so that their children can occupy themselves while the mom receives her shots alone.
Ask a friend or family member, like Grandma, to come along to help if the sibling(s) are little. Children who are able to follow instructions well can achieve a priceless expression of maternal love by hugging or kissing her pregnant abdomen.
It may be more difficult to guide the affection of smaller children, but simply positioning them close to the expecting mother and her growing belly can result in some adorable cuddle images.
9. Learn Several Maternity Poses
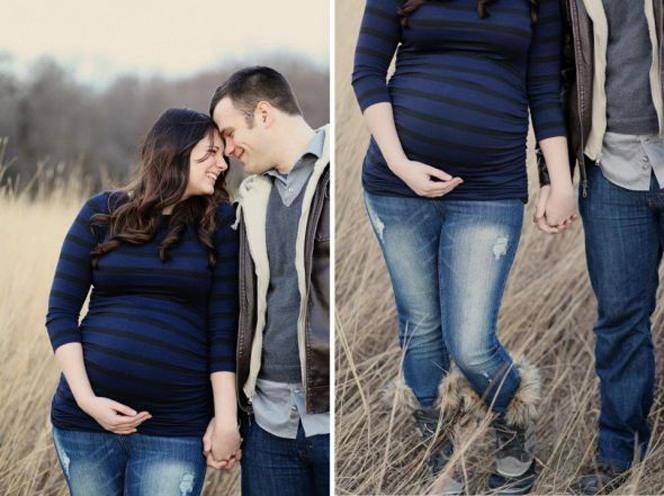
It’s normal for a pregnant woman to want to feel her tummy, so let her! All you have to do is give her some pointers and show her how to switch up her hand placement and pregnant poses as you snap away. There are many acceptable positions for the hands: on top of the belly, on the bottom, one on top and one on the bottom of the belly (I like the left hand on top to show off the bling!), in a pocket if she has one, or even in her hair.
When she is standing, you can assist her look thinner by bending one knee; when she is seated, you can make her look more proportionate by shifting her weight to one hip and pointing one toe.
Incorporate some straight on angles, some profile pictures, and don’t forget the close-ups of her belly, which I always find endearing. You should put an emphasis on getting to know your Dad and your siblings. Get everyone to touch, and don’t pass up the shots where everyone has their hand on their stomach.
10. It’s All About that Bump
In this case, the FIT is more important than whether or not you wear a long, dramatic dress. Tell the expectant mother in advance of the shoot that more figure-hugging clothes look great on her and will help highlight her amazing baby bump (which is the whole point of the photo shoot).
My studio wardrobe includes a selection of maternity dresses in a range of materials and colors (try plum purple—gah, gorgeousness! ), and I am happy to let clients try them on at no extra cost. You can always clamp in the back, but it’s much difficult to loosen, so if you’re going to stock up, buy a big in most dresses.
Instruct your clientele on how to avoid matching clothing by providing suggestions for dressing Dad and siblings in complementary but distinct styles. If you want to make your client look their best from the very beginning of your session, it’s a good idea to provide them a client style guide with pictures and advice on what to do and what not to do.
11. Bring Out Emotions
Provide the expecting couple with advice that will help them relax and enjoy the experience of having maternity photographs taken. See if there are any uncomfortable maternity poses they’d prefer to avoid.
Assuage their nerves so they’ll feel safe allowing you to take their picture. As a result, they’ll feel more at ease expressing genuine feelings.
Make them feel comfortable being goofy in front of the camera. You can also encourage them to picture how they will feel when they first hold their child. This would allow you to observe their expressions and body language in order to gauge their levels of enthusiasm, eagerness, and love.
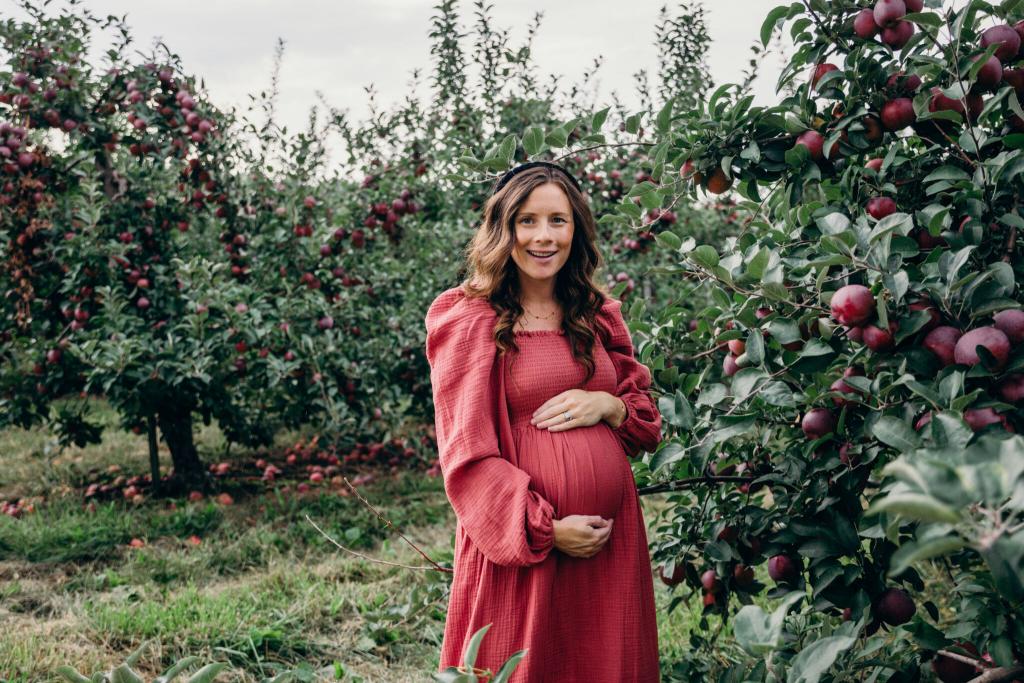
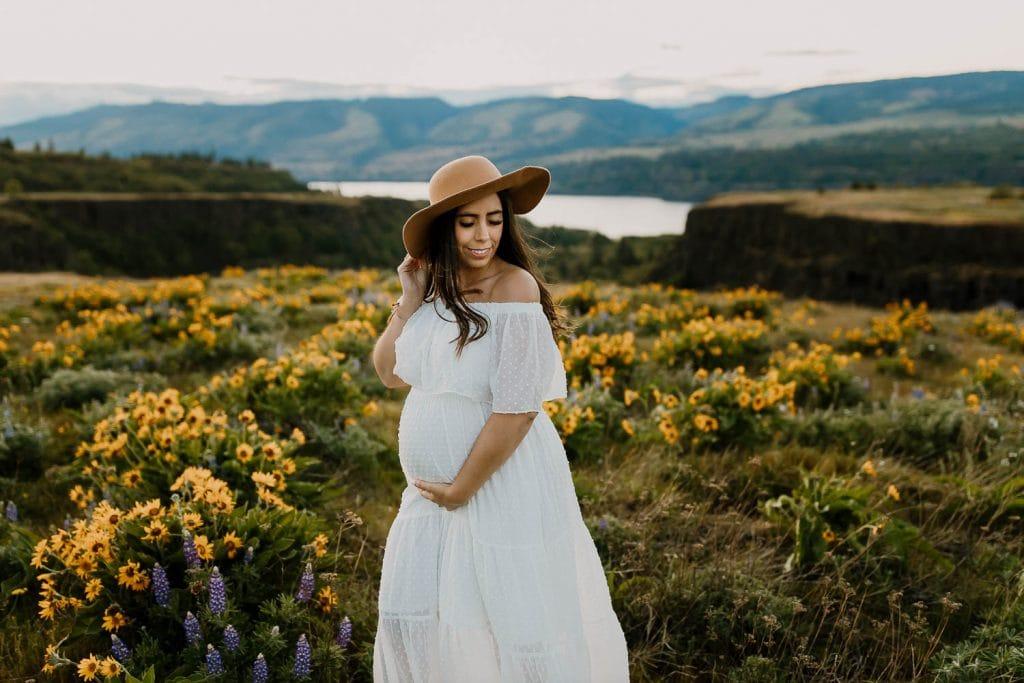
12. Choose a Location for a Maternity Session
Xem thêm : Where To Buy Maternity Clothes Online? Buyers Guide & Reviews
Maternity sessions can be held anywhere, but some of the most popular times and places are on beaches and in open fields during golden hour (the hour just before sunset or right after sunrise). spectacular gowns and seamless paper (we recommend Savage Seamless) indoors to create beautiful works of art. There is no way that you could go wrong with this choice.
Don’t be afraid to get in the water or lay low on the ground to obtain the shot of the stunning natural landmarks around where you live.
You should never encourage clients to do anything that makes them uncomfortable or puts them in any risk, so keep the expecting mother and her baby bump in mind. Long hikes uphill or over rough terrain may be out of her comfort zone at this stage in her pregnancy.
13. Set a Maternity Shoot Price
Unless they are being added to a Newborn session or 1st-year bundle (hello, discount! ), I charge the same amount for maternity shoots as I do for all other photo shoots utilizing my usual three-package portrait sheet. in this case there is a little price change.
To guarantee yourself a larger sum of money up front and to combine two life milestones that fit so smoothly together, try incentivizing your clients to combine prenatal and newborn shoots. So, to illustrate:
Average 30 min session: $200
Average 60 min session: $275
With Newborn Session as Mini Maternity (30 min): $650 (25% off)
14. Manage Your Time During a Maternity Session
I provide 30- and 60-minute maternity sessions; however, if the client chooses the former, I cannot accommodate any additional family members except the parents-to-be, including any older children, dogs, or other relatives.
If this comes up, simply outline for your customers why you think a longer session is warranted when dealing with these extra factors.
Remember that if you invite the whole family, it will quickly become a family session, but the expectant woman will also want some pictures of herself taken. Don’t forget to factor that into your calculations!
15. Take Short Breaks
Keep in mind that a pregnant woman may tire just by maintaining an upright position, let alone striking a variety of positions and moving about. Schedule brief pauses in between takes, and make sure there’s enough of water on set. This free time is ideal for touching up makeup or switching outfits.
16. Show Same Day Sneak Peek Photos
This is something I do with every shoot, but it’s extra enjoyable if the parents-to-be are saving their announcement of the pregnancy, the gender, or the name for the maternity images itself.
You may show your clients how dedicated you are to their experience and how happy you are to share their images by giving them a sneak peek the same day. They’ll be excited to check out the remainder of the exhibit after this! If you want to impress your customers even more, you can write up a blog post and send it to them four or five days later along with your best work.
17. Use an Image-Sharing Phone App
Pixieset and Shootproof both now have a free option that lets you send clients a branded app for their mobile devices. That’s a wonderful opportunity for the parents-to-be to share their pregnancy pictures with friends and family who are also waiting for the new addition to their family.
The convenience of not requiring a desktop login makes seeing and sharing images with loved ones much easier. Score! In just three minutes, you may greatly improve the quality of your service by doing this. Keep in mind that PRICE is NOT everything.
18. Give Free Prints
Similarly to Betsy’s suggestion in #17, you might send the new parents a couple free 4x6s or 5x7s to help them show off your work during their baby shower and thereafter.
FAQs
What month should you do maternity pictures?
Even while the ideal time for a maternity photo shoot is between the 28th and 36th week of pregnancy, shoots can be enjoyed by expectant moms at any point in their pregnancies as long as they are not too near to their due dates and are still physically able to do so.
What should my husband wear for maternity pics?
Men are encouraged to wear dark bottoms, such as jeans or khakis. White, non-starched shirts should be worn. You can’t go wrong with either cotton or linen. You should also include a standard, crew-neck, white and/or black t-shirt.
Are maternity photo shoots worth it?
Pregnancy is a fleeting time in your life, and you should make the most of it by taking lots of pictures and video. Having photographs taken during your pregnancy will always serve as a poignant memory of the miraculous moment when your unborn child was developing inside of you.
Is 32 weeks too early for maternity photos?
Most photographers agree that a maternity photo shoot is best scheduled between 26 and 34 weeks of pregnancy (around the 7th and 8th month of pregnancy). In the third trimester, your tummy will start to show more of its round, pregnant form. However, this time can change based on how quickly or slowly your body heals.
How much should I charge for a baby photo shoot?
The median cost for a photographer to take pictures of a baby is from $400 to $800. In contrast, hiring a photographer with decades of experience will cost you more than $1,000.
In general, how would someone do their own photo shoot if they’re by themselves?
Purchasing a compact cell phone tripod is one of the best investments you can make for taking images on the cheap. They cost about $20-$30 on Amazon, and the majority of them have a wireless remote so you can take the picture from a long distance. Wrapping the legs of a flexible tripod around objects like tree limbs or fence posts can be really helpful when taking pictures outside.
Using a tripod, you only need to set up the camera at a single angle and then shift your body to achieve a variety of different perspectives. Set up your tripod so you can easily change your position (near, far away) to capture different perspectives. It will take a long time and likely be frustrating to have to constantly reposition the tripod.
Using the timer function on your phone and the remote shutter release can yield the most candid shots. That way, you’ll have time to get into place after pressing the shutter button but before the shutter really fires.
Is an assistant (like a partner or a friend) really necessary for a DIY photo shoot?
Having someone else take the images makes DIY photography a breeze by a factor of a thousand. Your best bet is to enlist the aid of the friend who is the most addicted to Instagram. Find the person who can best fill the role of “Instagram Husband” in your life.
To create the impression of a comprehensive maternity shoot with a helper, have them take numerous shots from various perspectives of the same situation. From a great distance, up close and personal (on your tummy), overhead, and from the side, etc. It will appear as though you exerted much effort, while in fact all you did was direct the footwork of a helper.
How do you DIY an outdoor shoot?
Lighting and location are the two most crucial aspects of any photograph. When taking pictures outside, open shade is ideal because the sun is still out but not directly in your eyes. It’s common knowledge that the best places to relax in the open shade are under a tree or in front of a shady wall.
However, if you’re hoping to capture a wide-open scene in nature, try taking your pictures during the “golden hour” (the hour immediately following dawn or the hour immediately preceding sunset). The golden light will make your photographs look expertly taken no matter where you happen to be when the sun isn’t directly overhead.
If shooting during the golden hour isn’t possible, or if the light is too harsh, one trick is to position yourself so that you’re facing the sun. Aside from shielding you from the sun’s rays, it will also give you a warm glow.
So location is super important. But how do you decide on the best location?
When in doubt, keep it simple! Though impressive in the hands of a trained specialist, cool lighting and magnificent backdrops can be a pain to work with when you’re not. The finest images of you and your bump will likely be taken against a plain background (such a colored wall in your neighborhood or maybe just your bed).
How does lighting come into play with taking photos, and how can you make sure you’re getting the best lighting?
A good photograph’s lighting is more crucial than its setting. Indoors, choose a space with plenty of window light and turn off any additional lights, including any overhead lights or floor lamps. Photos taken under overhead illumination tend to have an orange tint due to the light’s warmth. After that, experiment until you locate a location with sufficient illumination. Your images can either be light and airy or dark and melancholy, depending on how close you are to the window and how much light is coming in.
Numerous stunning pregnant pictures, both indoors and out, are backlit (when the light is behind the subject). DIY images can still be used for this purpose, but cameras and smartphones in automatic mode may have trouble determining the best lighting. If you’re having trouble with overly-dark photos, consider raising the brightness of your environment before you snap the shot or choosing a different angle.
What should you wear for DIY maternity photos?
You should probably avoid wearing all white or all black unless you are a seasoned camera pro (they can be hard to photograph in challenging lighting). Also, very small patterns (like pinstripes) should be avoided because they distort badly on a computer or TV screen. But other than that, dress how you like. Tight-fitting garments are more likely to expose your pregnancy.
Also, if you’re going to put on makeup, put on around twenty percent more than you would ordinarily. This could mean using a heavier foundation or more dramatic eyeshadow than you would typically. However, this is highly context dependant. The extent of your makeup application might consist of tinted moisturizer and Burt’s Bees lip gloss, if you’re not into that sort of thing. Makeup is often understated in photographs, so applying more than usual is recommended.
What poses do photographers usually rely on for natural-looking photos that parents can easily replicate at home?
If you want your baby bump to really pop in a simple stand-and-pose photo, put your hands on top and bottom of it and turn your body slightly to the side. You can also make the stance look more natural by bending a knee or moving a hip. (There’s a phrase photographers live by: “If you have a body part, bend it!”)
Other than that, if you want your images to look more candid, try taking them while moving about. If you need assistance taking photos, stroll gently towards the person taking them while making eye contact with the camera and then looking away. Try to ignore the camera and concentrate on your loved one(s) or children(s) when taking pictures together. And explore new ways of moving your body. If you feel awkward standing and posing, try photographing while sitting or lying on your bed.
Have you seen any maternity shoot themes trending lately? What themes can you suggest for those who want to keep things simple but still look great (and Instagrammable)?
If you’re going to be taking the pictures alone (or with a friend), it’s best if things are as easy as possible. Locate a great, uncluttered wall, someplace in nature, or a spot in your own home that won’t distract from the focus of the photo. Beds are ideal for this purpose.
But if you’re feeling adventurous, you can easily recreate the milk bath trend at home. Nothing more is required but a tub, some milk, and some newly cut flowers. If you’re going to do this, make sure you’re in a bathroom with plenty of natural light coming in through a window and have someone else snap the pictures. You definitely don’t want your camera to fall off a tripod and splash down the drain.
Any advice on including props?
When used correctly, props can enhance the performance. You can keep your hands busy while adding visual interest to your photographs using props like a letter board or a pair of baby sneakers (especially as a close-up). To achieve a more candid photo, you can also employ items to divert your attention.
If you’re having trouble getting a natural expression while posing and staring into the camera, try distracting yourself with an activity, such throwing confetti or looking down at a group of letter balloons. Keep in mind that you’ll need at least one free hand to push the shutter button if you’re manually capturing the shots rather than utilizing a timer or remote.
How can you do DIY maternity photos with kids and/or pets?
When it comes to photographing children and animals, the less they are poised, the better. Getting young children involved and focused on a specific task (kissing mama’s belly, talking to the baby, singing to the baby, etc.) can be very helpful.
And be realistic about how long they’ll stay involved. It’s best to wait until you’re ready to take the picture to ask the kid to participate in. Then you can assume their interest will wane after the first minute. Use the burst mode on your phone or camera if it has one. Take fifty shots in rapid succession, and you might just get one good one.
If there is something exciting happening on and your kids or pets aren’t a part of it, they will probably want to be included. If you’d rather not have to play toddler wrangler and model during your photo shoot, consider making other arrangements for your child. If you have a three-year-old with a wiffle bat, half your pics might feature that (just me?).
What are your favorite photo editing phone apps or computer software that are fairly easy to use (i.e. parents won’t have to spend a ton of time working with)?
In this day and age, editing images on a mobile device is a breeze. (The output is of remarkably excellent quality.) Quick and easy editing can be done on the go with VSCO, A Color Story, and Lightroom Mobile, all of which are compatible with Android and iOS. You can’t go wrong with VSCO if you’re looking for natural or film-like presets, A Color Story if you want vivid, eye-catching colors, and Lightroom Mobile for a wide range of options for editing in a more organic style.
Expert advice: natural presets are more user-friendly, but it may take a few trials before you find the one that best complements your shot. When in doubt, boost the brightness and contrast of your photographs (just a touch).
Overall, what are your top tips for DIY-ing a maternity photo shoot?
- Keep it simple. Good lighting and a simple background are two things you’ll notice in all the greatest pregnancy images.
- Move your body if you can.
- Remember you don’t have to look at the camera! Avert your gaze downward, to the side, to your companion, or far away with longing.
Let’s Recap: 11 Tips for a DIY Maternity Photo Shoot
- To get a variety of shots, have a friend or partner help you move the camera about.
- The camera should follow your body’s movements, not the other way around.
- Buy a little tripod for your phone.
- Utilize a wireless remote in conjunction with the timer mode.
- The best lighting is essential. When within, let in plenty of light from windows, and when outdoors, throw open the shades.
- Maintain a minimalist and tidy backdrop.
- The most successful positions are those that feel natural and effortless. Doing some physical activity can assist.
- If you’re uncomfortable posing by yourself, feel free to use props.
- You’re free to wear whatever you like, but remember that photos may turn out blurrier if you choose to wear all white, all black, or a lot of patterns.
- Prepare the photo ahead of time to reduce waiting around when involving children and/or animals.
- Using a photo editing program is a breeze and can make your work look more polished.
Conclusion
There is no better way to create lasting memories for your clients than with maternity photos. If you wow your clients here, you may get requests for other services, such as baby, milestone, and family portraits.
Thank them profusely, provide exceptional service, and send along some maternity photos to further impress them. You can’t go wrong with that and these suggestions for photographing a pregnancy. Joyful jamming, to you!
Nguồn: https://spasifikmag.com
Danh mục: Maternity