A soft spot in the carpet may have prompted you to look out information on how to replace subfloor that has been damaged by water. Maintaining your subfloor by inspecting it often might save you money on pricey repairs down the road.
- How To Save Water Damaged Wood Furniture? Simple Tips
- How To Repair Water Damaged Plug Sockets? Comprehensive Guide
- How Long Before Baseboard Gets Damaged From Water? Tips And Tricks To Avoid Water Damage
- How To Fix Water Damaged Spot On Wooden Table? Step-by-Step Tutorial
- How To Refinish Water Damaged Wood? Step by Step Instructions
It’s possible that your floor is making more noise than usual. Exposure to high levels of moisture is a common cause of damage to the subfloor. The reason could be something as simple as a leaky faucet or a fissure in the foundation.
Bạn đang xem: How To Replace Water Damaged Subfloor? Step-By-Step Guide
The type of flooring, the extent of the damage, and the cost of repairs versus replacement all factor into deciding which course of action is preferable in any given situation. To help with water-damaged floors, follow these simple guidelines.
What is Subflooring?
The flooring under the mail walking floor is called a subfloor. The main purpose of a subfloor is to prevent the surface flooring from water and moisture damage.
The term “subfloor” is used to describe the flooring directly beneath the mail walking floor. A subfloor’s primary function is to protect the top layer of flooring from dampness and wetness.
Because it is not permanently fastened to the joists, surface flooring cannot withstand heavy foot activity on its own and therefore requires a subflooring.
How do I determine if my subfloor needs to be replaced?
When your flooring begin to sink, that’s a warning sign. If you hear a click or creak under your carpet or hardwood floors, it means the floor panels or wood have worn down. In order to prevent further rot from spreading, it would be necessary to replace the affected sections of the subfloor.
The loud squeaking of the floor is another possible indicator. There may be structural damage to the floor panels below any spots where the wood or carpet is noticeably softer than the surrounding region. There is some debate as to whether or not replacing the entire subfloor is necessary; nonetheless, any damaged sections should be yanked out and replaced immediately to avoid any additional degradation.
Also, if your ceiling is leaking, this could be the case. Your subfloor is not at blame if your ceiling springs a leak, but neither is the ceiling contractor.
If this is indeed a leak, it may be a sign of a slow leak elsewhere in your house. Water can soak through plywood and OSB (Oriented strand board) before it even reaches the ceiling.
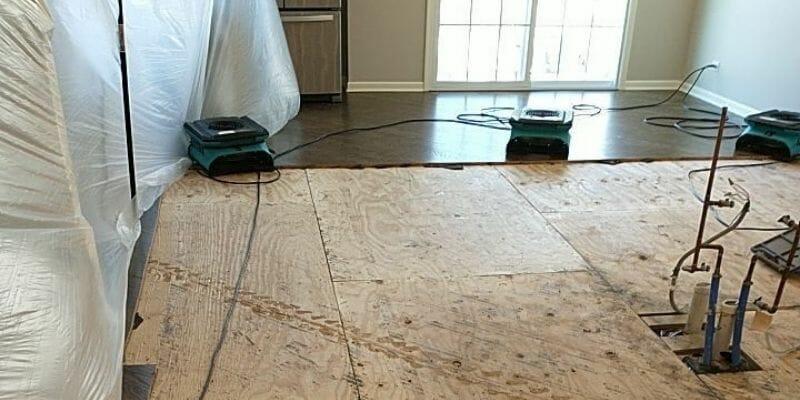
Replacing Water Damaged Subfloor
Step #1. Remove the floor vent
Taking off a floor vent requires a screwdriver. Begin by looking inside your home and examining the cross-section of your present flooring.
Adjusting the depth setting on a circular saw is how you get precise cuts when working with steel. In the event of an overlay, accurate measurements are essential. If you don’t have a vent, you should turn on the blade and set it to a depth of 1 inch.
Step #2. Draw a rectangular or square
Draw a rectangle or square that is at least 6 inches longer than the damaged area using a straightedge. It is crucial when joists are used to support subflooring. If the pattern for the cutout does not completely cover a joint or seam, you should get as near as feasible.
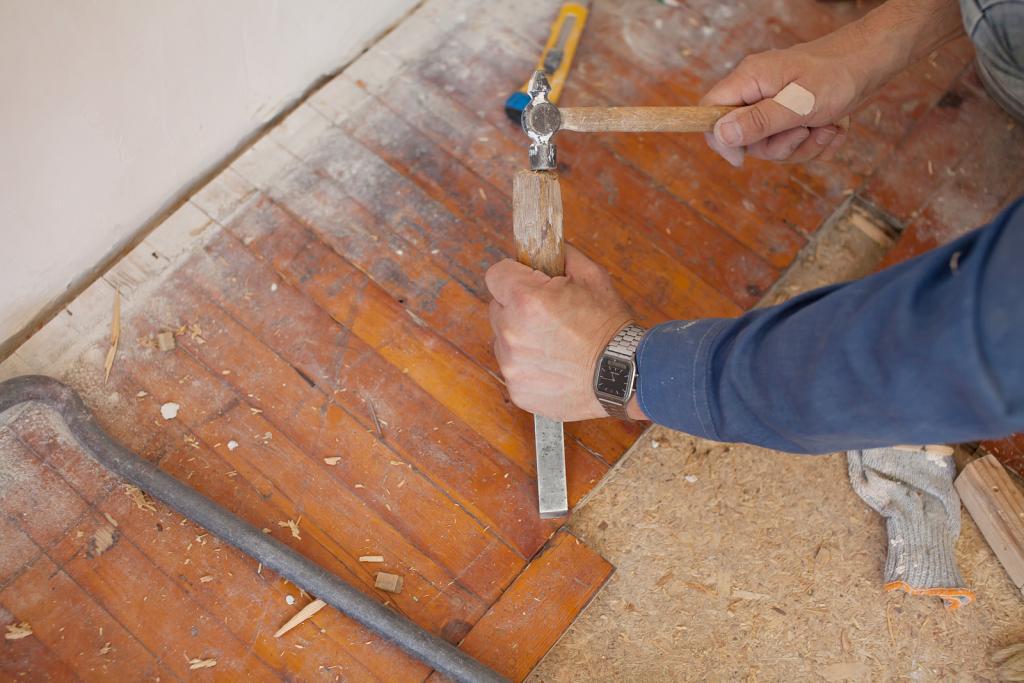
Step #3. Remove the nails
Strike the end of a pry bar with a hammer to force its way into the opening. You can get the nail to protrude more by prying at its ends very gently. A claw hammer would be useful for removing any protruding or exposed nails.
If your nails break off, use a hammer to pound them into place or apply diagonal pliers to pull them out. Continue to lift, probe, and remove the section(s). Use the sections to nudge difficult nails into place.
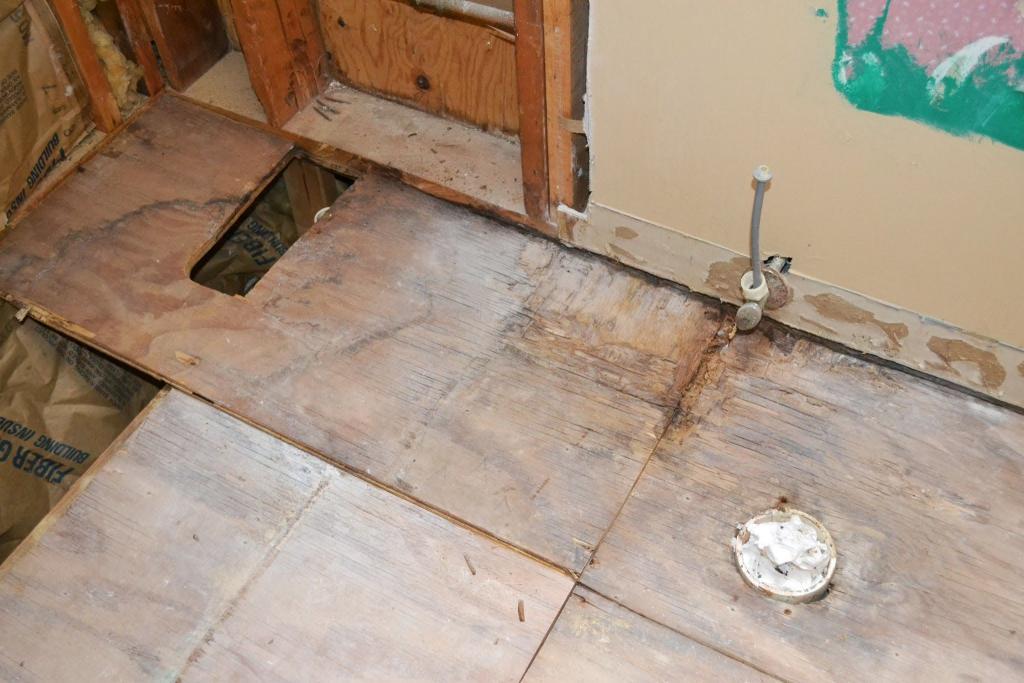
Step #4. Measure the damaged area
If any of your nails come loose, you can either pound them back into position with a hammer or remove them with diagonal pliers. Maintain the process of probing, raising, and removing the section(s). Nudge stubborn nails into position with the help of the sections.
First, determine the material and thickness of the original installation. When working with curved materials, a jigsaw is important. Replace the subfloor in the newly created hole.
Step #5. Install new subfloor
Use 2-inch screws to fasten the subfloor to the joists and blocks. Deck screws 112 inches in length are ideal for fastening the overlay to the subfloor.
With a tape measure, measure out 24-by-36-inch sections to use as replacement subflooring. Cut the pieces out using a circular saw.
An advantage of a reciprocating saw over a circular saw is that it can make cuts parallel to the wall. Dismantle it and take apart the parts.
To install a new subfloor, center it on the joists and nail it down, making sure the seams and edges overlap the wood. If necessary, divide the difference in half to hold up both halves.
Attach the subfloor to the joists with 2-inch screws. The overlay, if necessary, should be fastened using 1 1/2-inch deck screws.
Does homeowners insurance cover the subfloor?
In most cases, homeowners insurance will pay for the cost of replacing a home’s subfloor if it is damaged by water. Find out what your insurance will cover and whether you should undertake the repair yourself or pay someone else.
How Much Does It Cost to Replace Subflooring per Square Foot?
Xem thêm : How To Repair Water Damaged Trusses? 7 Easy To Follow Steps For You!
The average cost to replace a subfloor is between $3 and $10 per square foot. This range is subject to change based on the quality of the subflooring you select and the labor charges (which might add $25 to $30 per hour). To help illustrate the variety of possible expenditures for subflooring, we have provided several case studies of both inexpensive and more expensive alternatives.
Depending on the circumstances, “subfloor replacement might be basic or highly difficult,” says Raleigh, North Carolina-based general contractor and Angi Expert Bob Tschudi. Flooring and subflooring are often removed before the full scope of any problems can be seen.
Plywood Subfloors
The most typical material for subflooring is plywood. Price per square foot for 5/8-inch thick plywood panels ranges from about $2.50 to $3.50. However, the additional stability and durability of thicker plywood comes at a higher price per square foot.
Moisture-Proof Subfloors
Amdry panels are one option to consider if you need a moisture-resistant material for a bathroom or basement. These moisture-resistant panels are roughly $3 per square foot in price.
Warmboard Subfloors
Visualize this: it’s the dead of winter in Ohio, and you’re walking through your warm, inviting living room. Subflooring that can tolerate radiant floor heating is necessary for this indulgence. The price of Warmboard is approximately $7 per square foot, or $2,100 for a 300 square foot room.
How Much Does Subfloor Replacement Cost by Type?
Subfloors come in a wide variety of types to meet a wide range of requirements. A bathroom renovation will require subfloors that are resistant to moisture, like Amdry or DRIcore panels. Barricade panels, or even just plywood, can be used as a soundproofing alternative in the living room or bedrooms to help with naps and nighttime sleep.
Oriented Strand Board (OSB)
Subfloors come in a wide variety of types and textures to meet a wide range of requirements. Moisture-resistant subfloors, such as Amdry or DRIcore panels, are essential for a bathroom remodel. For quieter naps and nighttime sleep, soundproofing materials like Barricade panels or even just plywood can be installed in your living room or bedrooms.
Amdry
Specifically designed for use in subterranean environments, Amdry insulated subflooring is waterproof and vapor permeable. About $900 will get you a 300 square foot space treated with Amdry at a cost of $3 per square foot. In addition, specialized connectors (sold in packs of 15 for $20) are needed for the installation.
DRIcore
DRIcore, a brand of moisture-proof subflooring, lives up to its name as a popular choice for damp environments like basements, bathrooms, and kitchens. DRIcore subfloor replacement for a 300 square foot room can be expected to cost roughly $530.
Barricade
Without the high cost of installing radiant underfloor heating, this insulated subfloor can assist raise the warmth of your final flooring. Although Barricade brand panels are designed for use in basements, their ability to suppress noise makes them a good option for any room where silence is desired, including bedrooms, living rooms, and offices.
The average cost to barricade a 300 square foot room is $600.
Concrete
A concrete slab is a versatile option because it may be used as either a subfloor or a main floor. Additional subfloors, such as DRIcore, can be installed on top of concrete for further moisture protection. The average price for a concrete subfloor is $6 per square foot.
How Much Does It Cost to Replace Subflooring Yourself?
It is important to pay attention during the subfloor installation process to avoid having to make expensive repairs or replacements in the future. Working with a local flooring contractor is recommended, although DIY-ers with experience installing subfloors can get the job done.
There are several advantages to hiring a professional. A professional can not only remove the old flooring and lay the new subfloor, but can also advise you on the best material to use and whether or not a moisture barrier is necessary.
“If you’re remodeling a kitchen or bathroom and that remodel involves adding heavy materials, such as granite countertops, it’s best to consult a structural engineer,” says Tschudi. “Many homes—especially older homes—will need extra support to prevent serious problems down the line.”
Materials
Circular saw: $40+
Circular saw: $40+
Over $40 for a good circular saw.
Prices for nail guns typically range from $150 and above.
Squeak-proofing construction glue (at least $15)
Labor
You’ll save about $25 to $30 per hour for labor by going the DIY route. The labor cost to finish a 120 sq. ft. bedroom would be between between $100 and $300. But if you install the subfloor or measure incorrectly, you’ll spend extra time and money buying more subflooring to fix those mistakes.
Subfloor Replacement Cost Breakdown
Labor
Costs for subfloor replacement might be increased by $25 to $30 per hour when a local flooring expert is hired. The cost of the labor to replace the subfloor does not include the cost of the new flooring or materials.
Xem thêm : How Can I Mend A Water Damaged Pergo Plank? Step-By-Step Process
A skilled contractor will complete the work efficiently and make sure it’s done right. You certainly don’t want to end up with uneven floors after trying to replace subfloors yourself, especially if you are only replacing a section of subflooring.
Common Repairs
Xem thêm : How Can I Mend A Water Damaged Pergo Plank? Step-By-Step Process
A skilled contractor will complete the work efficiently and make sure it’s done right. You certainly don’t want to end up with uneven floors after trying to replace subfloors yourself, especially if you are only replacing a section of subflooring.
Supply Chain
A professional contractor will get the job done quickly and correctly. Even if you’re just repairing a little part of subflooring, you don’t want the result to be floors that aren’t level because you attempted the job yourself.
Tips to Keep Your Subflooring Dry This Winter
Combatting Snow and Ice
To protect your AdvanTech® subflooring from damage, never use salt, whether in solid or liquid form. While these are good for melting snow and ice, they can open the surface of AdvanTech subflooring and let water into the wood’s pores. The following techniques should be used to assist keep the panels together.
Subflooring made from AdvanTech® should not be exposed to any salt, whether solid or liquid. Despite their usefulness, these can cause the surface of AdvanTech subflooring to open, allowing water to seep into the wood. For the panels to keep their shape, try these alternate approaches.
Time is of the essence when dealing with bare ground liquid ice melt. If the temperature is below 35 degrees, use it one to two hours before the storm. It may be sprayed on with a garden sprayer and comes in containers holding a gallon.
Dealing with Water Exposure
When it rains a lot, the floor deck may become flooded. The subflooring from AdvanTech is guaranteed not to need sanding for 500 days after being exposed to water. All the usual caveats and restrictions apply, In order to get more information, go to huberwood.com/AdvanTech/ResidentialWarranty.
Tented tarp systems can be used to protect materials from the elements if protracted cold, wet, or dry cycles are expected before the wall framing is complete. Utilizing temporary framework or equipment that allows airflow beneath the tarp is the greatest approach to reduce the likelihood of water accumulating there. Tarps are an excellent precaution, but they must be removed as soon as the rain stops to avoid the spread of mold and mildew.
You can still get rid of rainwater even if it’s too late to make any kind of preparations. Wet vacuuming and sweeping are the most effective strategies for removing standing water. Keep in mind that wet vacuuming may be easier than sweeping if the wall framing is up.
It is important to wait until the panels are totally dry before laying the completed flooring, just as you would with any subflooring.
Choosing the Right Adhesive
AdvanTech subflooring is created with a special resin mix and procedure that makes it resistant to snow, ice, and rain without flaking or swelling while also maintaining its strength and stiffness, unlike standard commodity OSB materials.
AdvanTechTM subfloor adhesive is a moisture-curing polyurethane glue, so keep that in mind if you’re working in the cold and wet. Foam-to-gel technology allows for easy application via gun without the hassle of squeezing frozen cartridges, and the resulting bond is stronger than industry standards (exceeds ASTM D3498 standard specification for field-gluing plywood to lumber framing for floor systems, dry, wet, frozen, and gap filling adhesion tests).
Using AdvanTech subfloor adhesive with AdvanTech® panels creates a strong panel-to-joist connection that is resistant to moisture, as well as sturdy and rigid enough to prevent warping, buckling, bounce, and squeaks, even in harsh winter conditions.
How to Prevent Subfloor Moisture Problems
Take proper measurements before, during, and after installation of the moisture level
Check that the humidity settings in the room are set to what you’d expect it to be at on a typical day. Take multiple readings at different spots throughout the room to get an accurate reading, and use the right instruments for the job (such as those designed for your subfloor).
The concrete slabs that serve as subfloors are crucial to the success of any floor construction, and moisture is a major concern. It is important to take accurate readings of the moisture content of your concrete floor slab to prevent problems like mold and mildew growth, as well as degradation, rotting, warping, bowing, and bubbling.
Add a flooring underlayment with a vapor retarder barrier, also known as a moisture barrier
This step may be necessary depending on the weather conditions and the material of the subfloor in the area where the installation is taking place. Because concrete is porous and can absorb excess moisture, this is especially crucial when placing flooring over a concrete slab subfloor.
Vapor retarders can be divided into three classes based on their permeability to fluids: class I, class II, and class III.
The type of flooring being laid should guide the selection of a moisture barrier. Therefore, it is vital to consult a flooring professional or examine the manufacturer’s requirements when looking for the appropriate barrier.
Make sure that your contractors don’t penetrate the vapor barrier
Nails or other measures required to correctly lay the flooring should not go through the vapor layer that has been installed on top of the subflooring. This is something your installers should be aware of at all times. To illustrate, if a nail were to puncture the moisture barrier while installing a solid wood floor, water would slowly leak in. When renovating existing floors or installing them in a new building, it’s important to hire a qualified flooring contractor who can advise you on the best options for your specific needs. When doing so, it’s important to inquire about the subfloor options, the testing procedures, and the relative humidity of your business.
FAQs
Why should I replace my subfloor?
There are a few telltale indicators that it’s time to replace your subfloors. One of the telltale signs of water damage is a musty odor in the home. Damage to the subfloor can cause the floor above it to sag or create uneven areas in hardwood or carpeting.
Cracks in tile floors indicate that the subfloor isn’t sturdy enough to support the tile, while squeaky flooring may indicate that you need to repair broken joists or loose nails.
What factors should I think about when choosing a subflooring material?
To choose which subflooring material is best, you must first consider the room’s dimensions and the existing flooring. The usage of Warmboard is essential for any radiant heating installation. Options like DRIcore and Amdry are great for preventing water damage in moist areas such as bathrooms, kitchens, basements, and other similar areas. Think about how much traffic will be passing over it and what kind of wear and tear your subfloor can take.
What other projects should I do at the same time?
It stands to reason that if you are installing new flooring, you are also installing new subfloors. It is important to include the expense of new flooring in your project budget and to select a subfloor that will adequately support your flooring of choice. Concrete slab subfloors are ideal for installing ceramic tiles, while OSB subfloors are not.
Conclusion
These instructions will guide you through the process of replacing subfloor that has been damaged by water. If you find yourself in a bind, don’t be afraid to ask for assistance.
Nguồn: https://spasifikmag.com
Danh mục: Damaged


