As to how long your RV floor will remain wet after it has been damaged by water, it all depends on the activities that have been made to locate and fix the problem. Although it may be challenging to determine the source of the water damage to your RV’s wooden floor, fixing the issue should be a breeze once the source has been identified. To complete any task, you need to apply some persistence and utilize suitable resources.
- How To Replace Water Damaged Framing Plate Behind Toilet? 14 Framing Mistakes to Avoid at All Costs
- How To Replaster A Water Damaged Ceiling? Step-By-Step Guide
- How To Repair A Water Damaged Concrete Slab? Step by Step Instructions
- How To Take Down A Water Damaged Ceiling? Step by Step Instructions
- How To Repair Water Damaged Beadboard Sheeting? Easy Step-by-step Guide
Depending on what you did to find and patch the leak, the floor of your RV could be moist for a while after it was damaged by water. If you have a wet and rotting RV wood floor, determining the source of the problem might be challenging, but fixing it is a breeze. Having patience and the appropriate equipment is all that is required to complete the task.
Bạn đang xem: How Long Will Water Damaged RV Floor Be Wet? The Secret To Keeping Your RV Floors Clean
3 Things To Remember When Having Water Damaged RV Floor
To avoid more costly and inconvenient repairs, it is essential that water not sit on your floor for a lengthy period of time.

1. Check-up of RV parts
Determine whether sections of the RV floor are damaged by water before attempting to calculate how long the floor has been under water. The mildew and mushy texture of a floor that has been affected by water are regular complaints.
To properly inspect the situation, you’ll need to know how bad the damage is. By inspecting these components, you can get a good idea of how long the leak has been doing havoc on your RV’s flooring. The information you gather from answering these inquiries can also be put to use in the planning and execution of subsequent improvements.
2. Leak source location
Finding the source of the leak is step one in fixing a water damaged building. The RV floor damage must be stopped immediately, so it is imperative to locate the source of the water damage.
The pipes behind the wall, the seal around the slide-out and the window, and the water lines under the floor should all be checked. Water damage on the ceiling could potentially be the result of a leak in the roof vents, so inspect them as well.
3. Best restoration procedure
If you choose and apply the right repair method, a damaged RV floor can be brought back to life. You can use wood putty filler or epoxy to fix the damage after thoroughly cleaning and drying the area.
It could take a week or more for the floor to dry, given the RV’s unusual interior layout and the current weather. However, if your examination finds serious damage, you will need to undergo replacement treatment.
Put that money toward a new sheet of plywood that is identical in thickness and width to the one you’re replacing. It is possible that the insulation beneath the soaked floor may also need to be replaced.
How Long Should I Dry Out Water Damaged RV Floor?
Plywood floors in recreational vehicles are susceptible to water damage, and the length of time it takes for the floor to dry out depends on the severity of the damage. Perhaps a day or two is all that’s needed to fully dry off a small area of damp carpet.
Damaged floors may need to be left to dry for several weeks or even months. Air circulation and the use of dehumidifiers, air blowers, and plug-in fans can also speed up the drying process.
How long it takes for laundry to dry is also affected by local climate. A longer wait time is more likely when the weather is humid. If the wood hasn’t been thoroughly dried, the mold could return.
Can I Fix A Water Damaged RV Subfloor?
You can fix it yourself, or you can hire a pro. If there isn’t much damage to the subfloor, fixing it is a simple process.
Finding the root of the issue is the first step towards fixing it. Locate the area that was harmed by water and start fixing it.
Before beginning floor restoration, clean the wood with a bleach-water solution. Use the putty filler to patch the hole and smooth the damaged wood back to its original level.
Always wear protective gear when handling bleach and other harsh chemicals. Finally, use a mold-resistant oil primer before painting.
Does RV Insurance Cover Water Damage?
Water damage to an RV is often not covered by insurance. An all-inclusive RV policy should cover any water damage that occurs for reasons other than an accident. This insurance will pay to fix or replace anything broken in your RV while you’re on the road.
As enticing as it may sound, the coverage does not apply to water damage caused by specific causes. Neglect, old age, manufacturing defects, and low temperatures are all probable explanations.
Still, it’s a good idea to talk to your insurance agent about your RV insurance alternatives. If you want to know more about getting full coverage for your RV, you can always ask about it.
How to Restore Your RV After Water Damage
For many, having a recreational vehicle (RV) significantly improves their quality of life. As long as you bring along some of the comforts of home, you may travel in style and ease. Obviously, buying a recreational vehicle requires a large investment of money. Therefore, constant upkeep is required for optimal performance. Water damage to your RV is a possibility, and we know it. If your RV has been damaged by water, here are some things to keep in mind.
Clean Out Dirt
When you think of mud, dirt and grime probably come to mind. Don’t wait for it to dry completely if you care about minimizing stains. This is an excellent time to check for damage as you travel through the various parts of your RV, as you will be able to distinguish between small stains and real discoloration.
Remove Damaged Parts
It’s safe to assume that mud contains a good deal of filth and grime. Waiting for it to dry entirely will only increase the likelihood of permanent discoloration. Now is a good time to inspect your recreational vehicle for damage as you move from room to room, as you will be able to see the difference between minor discoloration and actual damage.
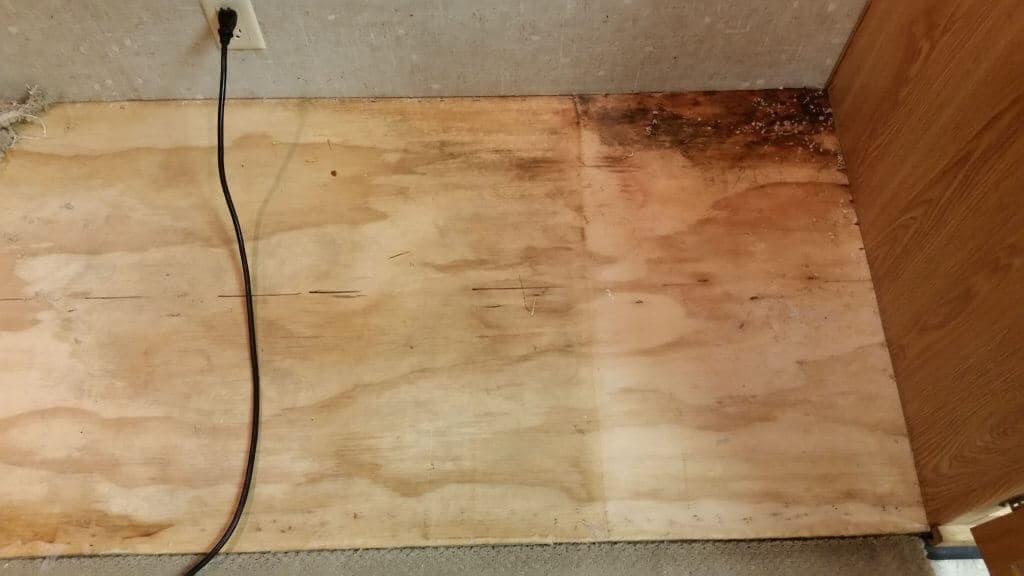
Floor
For the floor of your RV, you can usually count on using plywood. This material is susceptible to water damage. Compared to newer versions, older ones are especially vulnerable since they lack the extra safeguards that have been implemented.
Checking for rot requires getting down on hands and knees and pushing toward the ground. Look out for places that give when you bend them or that have a softer, mushier texture. You may also use a screwdriver to check the exposed wood in your floor for signs of rot. Obviously, rotting wood is useless. When a floor is rotten, it must be replaced entirely.
Walls
Xem thêm : How To Spackle Water Damaged Ceiling? Easy Step-by-step Guide
We’ve already warned you to look out for water stains, discoloration, and crumpled wallpaper. The removal of your wall covering has the additional benefit of revealing any concealed damage.
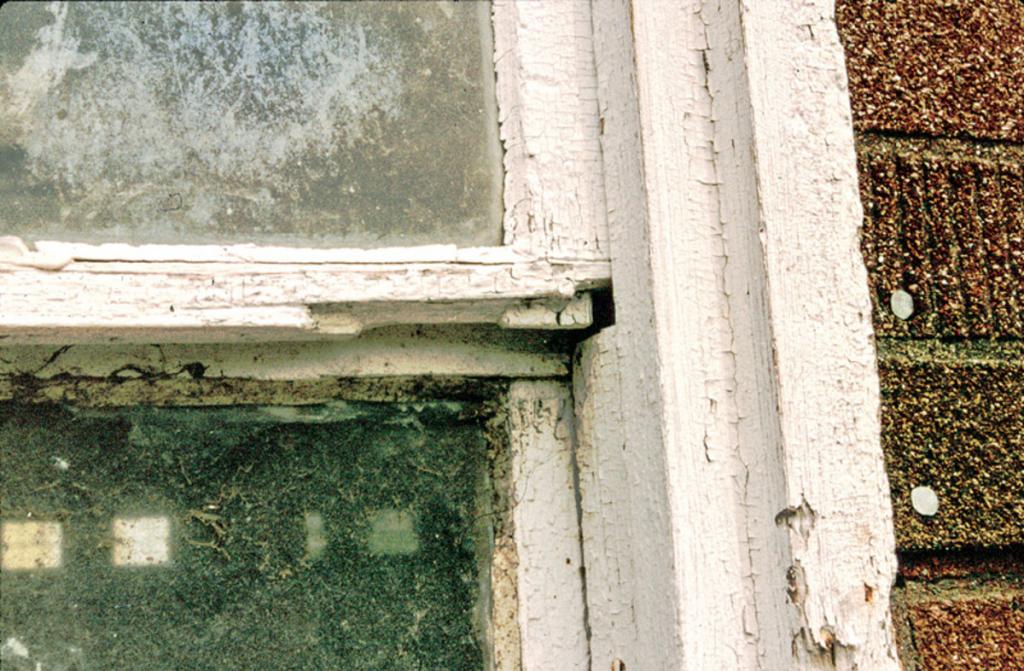
Windows
Windows are our first choice because they last for a long time and rarely need to be replaced. Most of the time, all that’s needed is a new set of seals. Unless there’s water damage from a broken window or some other source, that is. If this is the case, you should probably replace it. Lucky for us, it’s a really straightforward procedure. Specifically, you should know:
- Verify that the window’s opening is the proper size (and not your old window).
- Sealing foam tape should go underneath the glass, not on top of it.
- Spray the foam seal with water before attaching it. This will make it less susceptible to moisture damage.
- You can only put in a window from the outside. Press it flat, and then screw it firmly into the interior frame.
- It’s also a good idea to replace the drapes in your RV.
Remove Any Mold Growth
Minor cases of mildew and mild odors can be treated using a solution of one part bleach to four parts water. Directly spray the solution into the affected region, let it sit for a few minutes, and then scrub it clean.
Extreme cases may call for the assistance of a mold removal company. Wear a face mask and gloves to protect your hands and arms if you opt to perform the removal and cleaning tasks yourself.
Air Out Until Thoroughly Dry
After rinsing the RV down with soap and water to remove the bleach solution, let it air dry completely before driving it again. You might also use a blower. Using a pressured device like this one can give supplemental airflow. The result is a quicker drying time for the inside, and less risk of water damage from excess moisture.
Replace All Damaged Areas
At this point, you can replace the broken parts you took out with the brand new ones. Spend as much as you can afford on top-notch materials. They may set you back more initially, but in the long run, they will save you money by protecting your home from future flooding.
Restoring RV Water Damage
There are a variety of things you can do to protect your RV from flooding. If you regularly check your automobile for leaks and broken seals, for instance, you can avoid a lot of trouble by having a backup plan.
But if your RV does sustain water damage, you can restore it to its former glory. Check for deterioration to determine the cause of the problem. Those parts that were damaged the most should be removed. Do away with the moldy spores that have settled on the surface. Likewise, the worn or damaged components must be swapped out for new ones. You are in our thoughts and prayers, and we hope you travel safely.
The Secret To Keeping Your RV Floors Clean
To keep things tidy while out in the wilderness, it’s best to start with the ground.
There’s a good reason why RV floors are the first to get dirty, and the filth quickly multiplies in the limited space. On a sandy or muddy campsite, it can be a real challenge to keep the flooring clean.
Now, what’s a tidy RVer to do? However, there are measures you may do to prolong the life of your flooring. Let us offer some advice.
Lay down an outdoor rug
Finding a good outdoor rug should be your first step. This size rug is ideal for your patio or deck. Having an alternative walking surface immediately outside the door can assist you and your family avoid tracking dirt or dust inside.
Furthermore, it will help remove dirty shoes before they even reach the front door, which could have a significant effect on your flooring.
Create outdoor shoe storage
The situation would be ideal if the shoes had never entered the rig. It’s possible that an outdoor storage shed is the answer to all your problems. An unassuming plastic container with a top can serve as an outdoor shoe shed.
Slip-on shoes, such as Crocs, are great for this strategy since they are both easy to put on and take off and are not damaged by water.
Strategically place small rugs
The most important thing you can do to keep your floors clean is to invest in an outdoor rug. Contrarily, a few little carpets can prove to be indispensable. Put a small rug at the RV’s door or another high-traffic area.
By simply shaking off the dirt and dust outside, you can reduce the amount of time spent cleaning or vacuuming by using these rugs.
Keep pets clean
Both humans and their pets are at fault for muddy footprints. It’s possible that some are much more to blame than others. So, before letting your pet inside the house, give it a good bath.
Brush their fur to get rid of any leaves or twigs that got caught in it after dragging their paws on the outdoor rug. Consequently, the dog will not bring in as many messes.
Replace RV carpet
Carpet is the hardest floor material to keep clean. Due of this, carpets should never be used in recreational vehicles. Carpet can still be found pre-installed in many brand-new recreational vehicles.
If your RV or trailer includes carpeting, you may want to consider replacing it. Vinyl flooring is cost-effective and long-lasting. It’s also quite simple to clean, which is a huge plus.
…Or invest in a good vacuum
If you decide to keep the carpet, you’ll need a powerful vacuum. Our research led us to conclude that the Dyson V8 Absolute is the ideal vacuum for a recreational vehicle. You can find the RV vacuum cleaners we recommend right here.
Move it outside
The frequent entry and exit of people from tents causes the ground to quickly get dirty.
Moving your stuff outside and spending the day there is a great way to reduce the amount of garbage you bring inside. And you can rest easy knowing that when the day is done, your mobile home will be clean.
Sweep daily
Of course, keeping an eye on things can hasten the floor-cleaning process. Because of this, sweeping needs to be done on a daily basis. It’s convenient that this element of your daily routine can be completed just before bedtime.
Xem thêm : How To Replace Section Of Water Damaged Wall? Comprehensive Guide
With these suggestions, you’ll never have to sleep on a soiled floor again when camping. Can you say anything else? Give us your feedback in the section below!
Love RVing? You’ll Love RV LIFE Pro
That need comes from a yearning for exploration and independence on the road. The journey itself is more important than the destination. This is a trip around the world. You never feel far from home when you’re exploring the world, so you can save money by not buying a house. And that, my friend, is RVing.
It can be difficult to arrange everything necessary for a fantastic RV vacation. At RV LIFE, we believe in keeping things simple and easy. As RVers ourselves, we’ve guided tens of thousands of other travelers to their destinations.
Our RV Trip Wizard will help you organize the perfect trip, and our RV GPS app will get you where you need to go without a hitch. If you have any questions about RVing, you can find the answers you’re looking for on our RV discussion boards.
Next, map out your perfect RV vacation.
FAQs
How do you repair water damaged RV floor?
Motorhome on wheels How to Replace Wooden Floors in 6 Easy Measures Look at the extent of the destruction that has been done. The most practical course of action is to have the broken pieces removed. Dried wood is required for the framing. To eliminate mold, use an anti-mold agent. Spread epoxy resin that has been diluted on the wood. The wooden structure and flooring are both replaceable and upgradable.
Why do campers get soft spots in floor?
The most typical cause of floor softness in an RV is water damage. While weather could be to blame for a leaking roof, it could also be your leaky sinks and showers. Water drainage from dishwashing and showering can weaken the flooring in front of sinks and showers.
How much does it cost to replace RV floor?
Replacement of an RV floor can cost anywhere from $620 and $6,000. Everything from the available square footage to the materials used in the flooring to the extent of the project should be taken into account. New floor joists, for instance, will set you back a pretty penny to have installed.
What kind of plywood do you use for camper floors?
There are a variety of plywood and OSB grades that are better suited to different RV projects. The APA-RATED SHEATHING RANGE, EXPOSURE 1, is suitable for use as subfloor, wall, and roof sheathing. It is important to note that APA RATED SHEATHING Exterior serves the same purpose as APA RATED SHEATHING Interior under conditions of excessive wetness.
When should I replace my subfloor from water damage?
If they are properly sealed against moisture, most subfloor materials can last the lifetime of the house. If the subfloor is constantly wet, you may need to repair it before its time.

Can you put vinyl plank flooring in an RV?
Vinyl plank flooring is a fantastic choice for RVs because of how easy it is to maintain.
What are travel trailer floors made of?
Most RVs and trailers these days are built using particle board. Wood chips are held together with an adhesive made from water. The board is quickly dried after being pressed together so that it retains its shape.
How thick should a trailer floor be?
The most typical wood thickness is 3/4 inches. We also accept 0.063′′ (1/16′′) and 0.045′′ (3/32′′) if you happen to have either of them on hand. Gaining weight loss structure and stability from the ground up. For the thinnest, we recommend 0.045 inches.
Is OSB board better than plywood?
Osb has greater resistance to shear forces than plywood. Because of its thickness, its shear values are roughly twice as high as those of plywood. This is why oriented strand board (osb) is often used in hardwood I-joist webs. However, the capacity of nails to retain nails is what ultimately determines performance in shear wall applications.
Can you put laminate flooring in a camper?
Laminate is an excellent material for recreational vehicles. The goal of the designers of recreational vehicles (RVs) is to provide vacationers all the conveniences of home while they’re on the road. Laminate flooring comes in a wide variety of designs, including those that mimic wood grain and ceramic tile.
How do you fix water-damaged floors?
What to Do If Your Wood Floor Gets Wet Take Out The Top Layer of Water. Shop vacuums with a “wet mode” may quickly and efficiently remove standing water from floors (without a bag). Clear the Area. The presence of mold requires attention. Remove any debris and disinfect the floor. Water-damaged wood floors should be sanded. Remove Mildew from Painted Wooden Surfaces. Take the laminate out of there and throw it away.
What is floor hump?
Long floor joists that don’t connect to the central beam properly can cause the floor to bulge outward. When joists sag, the end away from the central beam rises, just as it would on a teeter-totter. The joist end has risen, which causes the hump.
Can OSB be used as subfloor?
Use of OSB as a subflooring material is feasible in most regions. The local building department should be consulted before installing OSB as a subfloor. OSB’s size advantage over plywood is a major selling point. Plywood typically comes in 8′ and 10′ sheets.
Can water-damaged wood floors be fixed?
In order to refinish a wooden floor that has been damaged by water, it is often necessary to replace any damaged boards. It takes time and the expertise of a professional to replace wood floor planks properly.
How do you remove a water-damaged subfloor?
The first step is to take out the broken parts. Cut the subflooring down to the bare joists using a circular saw set to a depth of 1 inch. You should use a pry bar to get rid of any nails that are sticking out before you start sweeping up the debris.
Will wet subfloor dry out?
Restoring a subfloor after water damage has occurred. A little or temporary leak that reaches the subfloor might not be a problem if you can stop the leak and properly dry the subfloor and any neighboring parts (framing, floor and wall finishes, etc.). Only complete drying out may protect against mold and rot.
What are the disadvantages of vinyl plank flooring?
While vinyl plank flooring has many advantages, it also has some negatives. Vinyl flooring isn’t the most foot-friendly option. Vinyl flooring will lack the classy appearance of real hardwood flooring. Vinyl plank flooring cannot be refinished. LVP flooring that has been glued down may be difficult to remove.
What laminate flooring is waterproof?
Luxury vinyl plank flooring can be considered waterproof, unlike laminate flooring. These days, you can find luxury vinyl in a wide range of colors and designs, and it’s just as simple to set up as laminate.
Is vinyl plank flooring too heavy for RV?
Vinyl planks may look like the ideal RV flooring solution, but in reality, they are not designed for outside use. It’s not ideal to have to worry about this floor when you’re away on a camping trip because it needs constant care. Moreover, it’s a heavy item.
Conclusion
Knowing this, you can relax knowing that you won’t have to worry about how long the floor of your water-damaged RV will remain damp. You need to take precautions to stop the water from doing any more damage.
Nguồn: https://spasifikmag.com
Danh mục: Damaged