Refinishing water-damaged wood is a straightforward five-step process. Don’t worry if your wood has been harmed by water.
- How To Repair Water Damaged Natural Wood? 7 Easy To Follow Steps For You!
- How To Replace Section Of Water Damaged Wall? Comprehensive Guide
- How To Resurface Water Damaged Window Seals? 8 Easy To Follow Steps For You!
- How Electrical Fixtures Get Water Damaged? Everything You Need To Know
- How To Replace Water Damaged Brick Sheathing? Step-By-Step Guide
How can you spot water damage on wood?
It’s well-known that water damage may be a real nuisance. In addition, wood is particularly vulnerable to water damage.
Bạn đang xem: How To Refinish Water Damaged Wood? Step by Step Instructions
Taking care of water damage as soon as possible is the greatest way to prevent your wood from rotting and becoming useless. Repairing small water damage is more cost-effective and more long-lasting than major water damage restoration. Simple indicators of this condition can be easily identified.
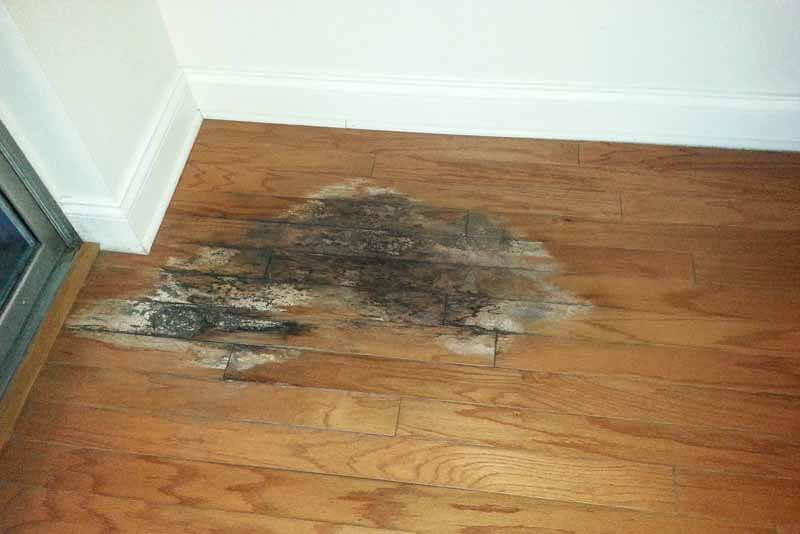
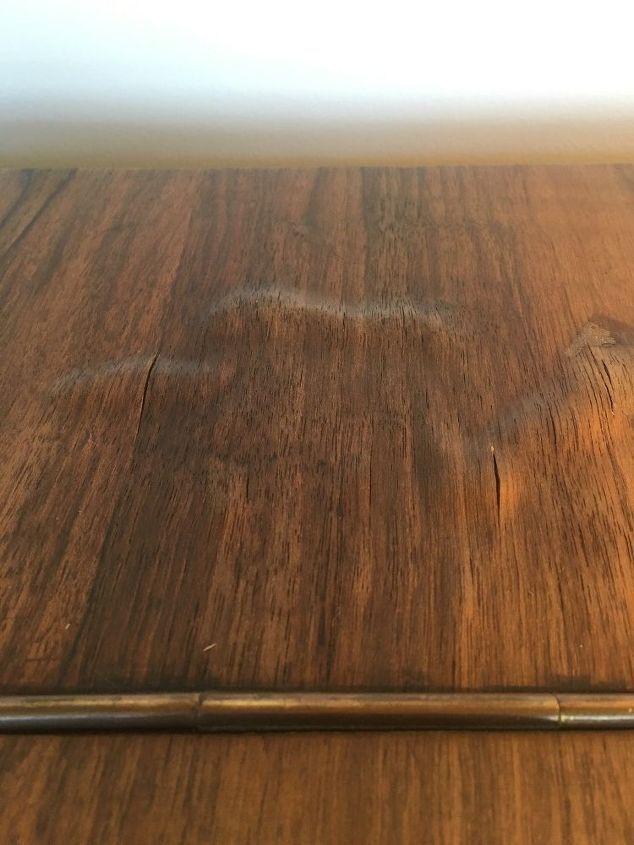
In what ways might water damage be detected? Take a look at the wood’s surface. A water-damaged piece of furniture will show water-shaped streaks, white spots, or deterioration on the wood’s surface.
Water damage can cause musty odors and soft wood surfaces. You must promptly refinish the wood that has been harmed by water.
How To Refinish Water Damaged Wood
It’s not as difficult as it sounds to refinish wood that has been damaged by water. Do it all by yourself, or enlist the aid of a few friends. Water-damaged wood can be repaired by following these instructions.
Before anything else, the wood must be allowed to dry out for a period of time. Remove everything from within and on top of the wood. To expedite the drying process, a portable electric fan can be placed near the wood.
Step #1. Prepare the materials
For this project, you’ll need a few items from the hardware section. Use a sanding block with coarse grit to sand the surface.
Use a plastic sheet or old newspapers to shield your workspace. As a result, your space will remain clean thanks to the sheet. Let’s get to work now that you have all of your supplies.
Step #2. Sand the wood’s surface
Before sanding, make sure to remove any bad wood. Remove any swollen or discolored areas from the wood using a sandpaper. Sandpaper with a coarse grain should be used for this task.
Sand the surface either manually or with a machine. Next, you’ll want to smooth up the surface and remove any stains that remain.
Step #3. Apply auto-filler on crevices
Putty that fills in dings and dents is known as auto-filler. To make putty, follow the mixing directions on the package.
Apply the auto-filler to the dented and cracked areas of the wood. Using a putty knife or a spatula, you may uniformly distribute the filler.
Allow a few hours for the auto-filler to dry. When it’s entirely dried, you can sand it again.. Painting will go on more smoothly if the wood has been sanded first.
Step #4. Prime and paint the wood
Xem thêm : How To Fix Water Damaged Wood Studs? Step-By-Step Process
Prior to painting, it’s a good idea to prime the surface. Primers based on shellac, oil, or alcohol are all viable options. Make sure to steer clear of any that are water-based because the wood will just soak them up.
Primer improves the adhesion of paint to wood. It also helps to avoid water damage.. The wood can now be painted after the priming has dried.
Hue your wood to match the original color. Refinished areas should be painted, but the entire surface should be painted, not only the refinished areas. This will give the wood a more polished appearance.
In between coats, allow the paint to dry. Before applying the second layer of paint, you should lightly sand the first layer.
Once you’re satisfied with the results of your painting, it’s time to add the final touch.
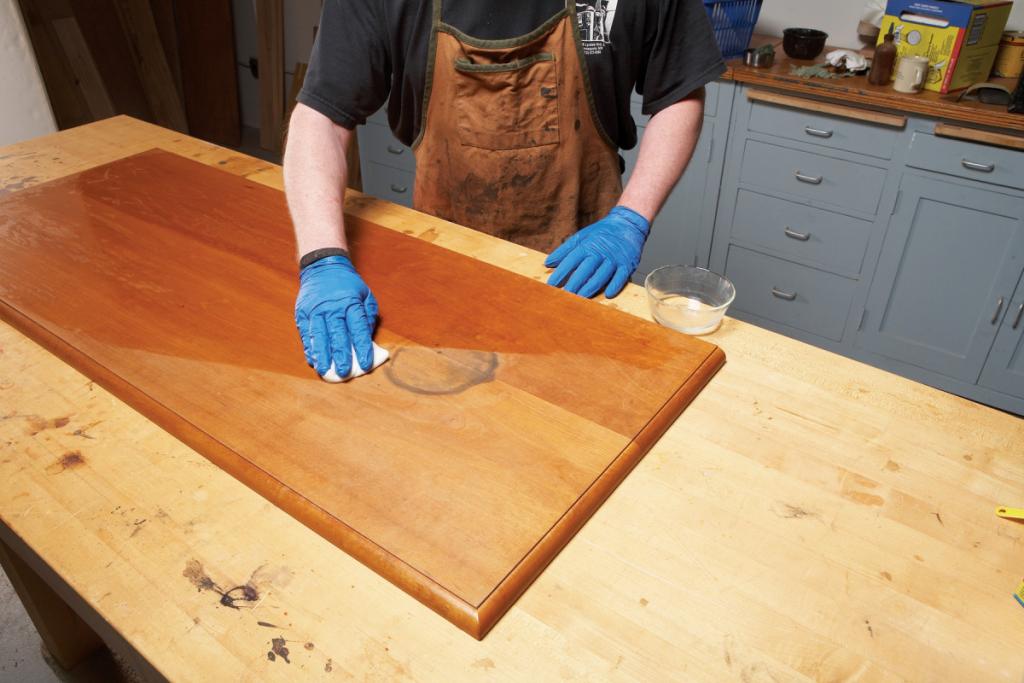
Step #5. Coat with sealant
Wooden surfaces should be protected with a water-resistant sealer. The final line of defense against water damage is sealant. Apply a sealer to wood that is completely dry.
Wait for the sealant to dry out. The items can be returned to their original locations on the hardwood surfaces after a few days.
When should you call for professional help?
When water damage is limited, refinishing wood is a cinch. Do you know what to do if the harm is extensive and widespread?
If you have water damage to your walls, floors, or other structural components, you should seek the assistance of a skilled contractor very away. It is possible for their services to be covered by homeowner’s insurance in certain situations.
Water damage caused by carelessness, rather than an accident like a burst pipe or a hurricane, is not covered by insurance.
Water Damaged Floor Repair Cost
For water-damaged floors, these are some ballpark figures for the cost of repairs. Repairing flooring is more expensive than replacing them, as you’ll discover. Hardwood, tile, and polished concrete are all examples of surfaces where it may be worth it to have them repaired. Because synthetic flooring can trap moisture beneath it and harm the subfloor and floor joists, replacing water-damaged vinyl, laminate, engineered wood, or carpet flooring is more cost-effective in the long run.
Hardwood Floor Water Damage Repair Cost
Damaged floors can range from $8 to $30 per square foot, depending on the difficulty of the repair and the type of wood used. It’s more expensive, but if you’re on a tight budget, repairing your hardwood floors may be a better option because it’s less disruptive and can be done over time.
Money-Saving Tips for Fixing Water Damaged Floors
It’s important to keep in mind that restoring water-damaged floors is more expensive per square foot than replacing them. Attempting to restore a floor made of low-quality materials like vinyl or laminate is usually not worth the effort. When water damage is widespread, whether in a single location or in numerous, this is especially true.
Water-damaged floors can be repaired more cheaply if the affected material can be removed. Removal of material accomplishes two goals. This could speed up the drying process by allowing more air to circulate. In addition to the water damage, you may want to check to see if there is anything else that requires attention. Second, you’ll save money by not having to hire a professional to remove the wet flooring.
Xem thêm : How To Spackle Water Damaged Ceiling? Easy Step-by-step Guide
Make sure you don’t harm the surrounding flooring, subfloor, or joists when you remove the damaged flooring if you decide to go this route.
Fixing the floor and replacing what needs to be replaced yourself could save you a significant amount of money. A professional, on the other hand, is more likely to do a better job of blending the repaired region into the rest of the structure. Functional and aesthetic integration go hand in hand when it comes to the use of color and pattern. If you’re going to have the service done by a professional, make sure you acquire a quote for the cost of floor repair so you can shop around.
Hardwood Floor Water Damage Repair Tips
In some cases, if you take action quickly, you may be able to save your hardwood floors without having to replace them. Tips for repairing hardwood flooring problems, such as warping, stains, spots, cupping, etc.
When the moisture in your hardwood floorboards collects more on the underside than the top, this is known as “cupping.” As a result, the board takes on a cup-like shape. This can become permanent if not addressed, but there are steps you can take to avoid or correct cupping. Wet mopping, for example, should be avoided as a first step. A dehumidifier can be used in the affected area as a second option. When in doubt about how bad the damage is, consider opening up a crawl area under the floor and installing an exhaust fan there. This will help circulate and speed up the drying process.
There are numerous “folk” methods for removing stains. However, we’re only going to focus on two. Soak up the water as quickly as possible if you have just spilt some water on the hardwood floor. With a clean, dry rag, scuff it up. A blow dryer set to the lowest setting can be used to slowly remove any remaining moisture if there is still visible damage or concern that the water has penetrated. It’s critical to proceed “carefully,” since even a small water stain can quickly turn into a permanent heat mark. If necessary, use an appropriate polish to cover the area.
There are commercial wood bleaches that can help remove moisture stains that have set in. Once the finish is removed, you can apply the wood bleach with a brush to the stain. After letting it sit for four hours, you can remove the bleach by mixing water and vinegar in a ratio of two to one. Let the area dry out. You can try again if the stain persists. Refinish the wood afterward, and you’ll have a like-new result with a little effort and good fortune.
Water from above or below can cause warping or buckling. To cure a tiny warp, simply moisten the area, place a heavy object on top, and leave the item there for several days. Sanding aggressively may be able to remove the warp if that doesn’t work. It’s important to keep in mind that the floorboard will thin out as a result of this procedure. It’s not a meaningful remedy if the moisture source remains neglected, however.
When to Replace Subfloor from Water Damage
If your subfloor is showing signs of wear and tear:
- It appears as though your flooring are sunk or unevenly laid out.
- When you walk on the floor, you feel like you’re “bouncing” or “sponging.”
- The air and flooring have a musty odor. That’s a telltale symptom of decay.
- Cupping in your hardwood, warping in your laminate floor and bubbling up in your vinyl are all signs that your floor needs to be replaced. Moisture from the bottom could be to blame for this.
What wood holds up best to water?
To avoid water damage, it’s better to start with the wood you choose. Water-resistant woods include teak, cedar, and white oak. Outdoor flooring and furniture made of hardwood are also common.
Because these materials are made of wood, they are susceptible to water damage. Not to fear, there are still steps you can take to protect yourself.
Prime, paint, and protect your wood to keep it free of water damage. Help your wood absorb less moisture with these three tips! It will also improve the durability of your timber.
Protecting Wood From Water Damage: Here’s How
Use Natural Oils
Natural oil treatments, such as linseed and tung oil, are excellent for extending the life of wooden surfaces. Woods like mahogany and walnut benefit greatly from the use of these oils. You can remove scratches and scuffs, restore wooden furniture, and protect it from water damage by using natural oils, mineral spirits, and polyurethane. In order to properly use a natural oil blend, consider the following suggestions:
- The mixture should be fully mixed.
- Only use a natural bristle paintbrush to apply the mixture on dark-grained wood (make sure that you sanded and cleaned your lumber beforehand)
- Reapply the oil if necessary after letting it sink in.
- Wipe away any extra oil with a dry, clean rag.
- Allow the oil to completely dry before applying it to the skin.
- Sand the lumber once more with fine-grit sandpaper.
- If you don’t get the desired result after the first try, repeat the process.
Use a Sealant
It has been shown that the waterproofing qualities of polyurethanes, varnishes, and lacquers. Clean, sanded wood can be painted or sprayed with them. Finally, let the sealant cure completely. Recoat and re-sand as necessary to finish the project. Make sure the temperature is at room temperature to get the best effects. The sealants should also not be shaken before to application. Leaving air bubbles on the surface of the wood after it has dried completely is possible if you ignore this suggestion.
Use a Stain-Sealant Combination
This is a great choice if you’re working on a major project. Here, a wooden deck serves as an excellent illustration. A stain-sealant combination allows you to add color while also guarding against water damage. Color pigment with oil, water, or alkyd-based binders are used in stain-sealant formulations. Interior woods can only benefit from alkyd finishes if they won’t need to be re-coated in the future. Waterproofing external wood should be done at least once or twice a year.
Conclusion
The sooner you notice water damage on wood, the more options you have to fix it! Refinishing water-damaged wood is as simple as following this step-by-step guide.
Nguồn: https://spasifikmag.com
Danh mục: Damaged


