Do you find it hard to find resources for fixing flooded trusses? If you want to find out more about this topic and get some advice on how to solve it, you’ve found the right page.
- How To Repair Water Damaged Acoustic Spray Ceiling? Troubleshooting Guide
- How To Replace Water Damaged Door Frame? Easy Step-by-step Guide
- How To Patch Water Damaged Ceiling Tape Joint? Things You Should Know
- How To Repair Water Damaged Wallboard? Step-By-Step Guide
- How To Resurface Water Damaged Window Seals? 8 Easy To Follow Steps For You!
What Is A Truss?
What is a truss, and what can it do? Let’s start with the basics. This reference will help you recognize trusses and expand your knowledge of them.
Bạn đang xem: How To Repair Water Damaged Trusses? 7 Easy To Follow Steps For You!
When only axial pressure is applied, the components of a truss, which are arranged in a triangular fashion, remain in place. Due to the fact that only one end of a member is subjected to the applied force, we classify such members as either “compression” or “tension” types. By maximizing its adaptability, bridge design is able to reduce construction costs and span vast distances.
Stuck joints prevent the normal distribution of shear and moment forces. Because of this, it’s important to recognize the differences between truss and frame construction. When compared to a frame member, which typically bears shear, axial, and bending forces, a truss member just bears axial force.
Furthermore, trusses also provide some benefits. Some of its advantages are as follows.
- Trusses allow you to span great distances with a minimum of expensive and inconvenient materials.
- Axial loads are induced in the members along the direction of the member. Because the force is being applied in several places, the entire system is more effective.
Trusses come in a variety of shapes and sizes, each serving a specific function. Some examples are provided below:
It’s important to understand the various components that go into making a roof truss. The chords on the outside of the frame support the webs inside the triangles.
You can choose between two alternative sizes and shapes based on the requirements of the project. The king post in a set of roof trusses is a vertical support that ensures the trusses themselves remain stable.
King post truss
It’s a temporary truss that can be employed over relatively short lengths. Numerous common uses include elongated structures, garages, porches, and storage sheds. Numerous older structures include king post trusses that are left exposed to the eye.
Queen post truss
This is a queen post truss, therefore it has two triangles on each side to support the vertical upright. These are now considered to be out of date because they have been superseded by the Fink truss.
Fink truss
A fink truss, which is a typical type of roof truss, can be recognized by the ‘W’ shape formed by its chords. It’s a flexible shape that lends itself to many applications.
Double pitch profile truss
Commercial structures are more likely to feature double pitch profile trusses, but private homes may also have them.
Truss with a single pitch
A mono-pitch truss, a right-angle truss with a single rafter, is commonly used to build lean-to or single-pitched roofs.
Scissor truss or vaulted truss
Using a scissor truss, you may create a vaulted ceiling or any other unique ceiling design.
Tie truss with raised tie
Vaulting the ceiling requires raising the tie trusses. It is possible to flatten the look of high tops with diagonal edges by raising the lower chord.
What Makes a Roof Truss Stand up?
There are three main properties that a structural engineer may use to calculate the maximum allowable load for a truss.
- Only structural kiln-dried timber, typically pre-treated against insect and rot attack, is used in modern trusses. When purchasing timber, you can specify a TRADA Strength Grade (ranging from C16 to C24) if an engineer supplies the design specifications.
- The way the load is distributed among the components – the design – is crucial. Eliminating or weakening a single part (by, say, notching pipes) will have a devastating effect on the whole.
- The nuts, washers, bolts, plates, screws, glue, or pegs that secure the assembly. A professional’s help is required before cutting or modifying these.
What Causes Roof Truss Failure?
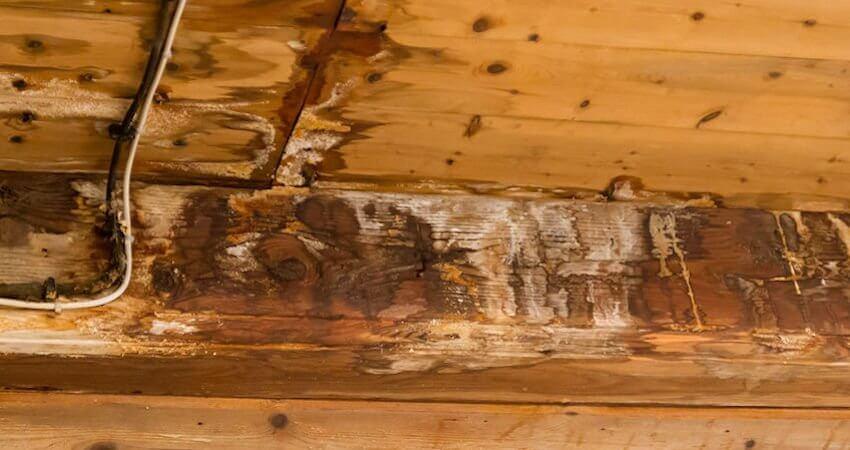
Rainwater is the greatest threat to any roofed structure.
- The presence of water makes the wood vulnerable to rot and insect assault, regardless of whether or not it has been treated. Some of the most dangerous spots in old buildings are the intersections of walls and the spots where rafters and tie beams lie. When wood has been damaged by water, boron-based treatments are the best option.
- Older homes with solid, non-cavity wall construction or thick random stone walls that hold the bearing ends of rafters and/or tie beams are especially vulnerable to decay and insect attack because of the high humidity levels in these buildings. Preservative treatment with a boron-based product is necessary to keep the roof from caving in. Look for mold and mildew using a flashlight and a screwdriver in these areas. An Auger with a very small diameter drill bit should be used if there is any uncertainty about the strength of a component.
- Since using nail plates or plywood plates joined with nails, screws, and glue saves money over more conventional methods, they are widely employed in contemporary roof construction. Older roof timbers were usually connected using wooden pegs and Mortise and Tenon connectors. Woodworms love to eat these, resulting in sagging roof beams and loose joints. Resin Repair is able to fix the problem by inserting Tie Bars and injecting resin into the resin.
How To Fix Water Damaged Trusses
Xem thêm : How To Repair Water Damaged Wood Siding? Troubleshooting and Repair Guide
After the leak has been fixed, the roof struts should be inspected for wood decay caused by termites or wood rot using a small screwdriver.
If the screwdriver can be inserted into the water-damaged section of the roof truss and withdrawn without causing further damage, then this is the next step. Damage assessments are best achieved through conversation with a local expert in the area.
Temporarily brace or support the truss to prevent further damage and ensure worker safety.
Step 4: Report any problems, changes, or damage to the truss maker at once.
Step 5: Do what has to be done now. Without a repair plan approved by the building designer and/or the manufacturer of the structural components, you should not attempt to fix the structure.
Place the truss flat on a sturdy, level surface before beginning the repair. If a truss is already installed, it should be strengthened to bear less weight.
Seventh, restore the truss by meticulously adhering to the provided repair instructions. Do not try to fix something without the right tool for the job. Ask for help from an expert if you need it because you don’t know enough about the subject.

Replacing an Entire Roof Truss
If the timbers are beyond repair, the only option is to replace all of the trusses with new ones. Obviously this is a worst-case scenario.
If you want to replace your roof, you’ll have to tear off most of it, if not all of it. It’s possible this could cause major problems down the road, including high costs and more hassle. When putting in a new truss, it’s common to need a crane or other heavy-duty lifting apparatus.
Depending on the truss type and the type of roof structure utilized, it may be possible to dismantle and rebuild the trusses from within the loft space.
Timber Resin Repairs for Roof Trusses
It is possible that the rafters, joists, or trusses in your home have deteriorated and collapsed due to prolonged exposure to moisture, especially in older homes.
New, simple technology has made it possible to repair or replace joists and rafters in-situ (the proprietary Timber-Resin Splice Kit). Some illustrations of this in action are shown below.
It is common practice to try to remove and replace a damaged truss, joist, or rafter. Having many joists that need to be replaced increases the difficulty of the job and the time and money required to complete it. To restore these timbers, the old method of removing the roof and replacing it was both possible and preferred.
The introduction of novel solutions, such as the timber resin splice kit, can eliminate a lot of the hassle and tension associated with repairs. The repair technique is organized as follows, according to the following:
- Once the timbers have been located and examined, it will be decided whether or not they can be repaired.
- Deeper inspection of timber is performed to determine the extent of damage and the best location for a splice along the timber’s length.
- During the restoration procedure, appropriate props are inserted along the wood to support it and take the weight of the floor above or weight of the roof.
- Remove the loft boards or floor boards to gain access to the joist or truss from above.
- When a section of a tree is taken down, only the sound wood is left behind.
- A new timber section can be made by measuring the desired length and then cutting the lumber to size. Next, bind high tension threaded steel bars into place by drilling the required number of holes along the front facing end of the board.
- Now is the time to make the existing timber section ready for the new addition. The length of the threaded steel bars in the new timber section necessitates cutting a “U” form into the existing truss, rafter, or joist.
- Threaded steel bars have been inserted into the slot in the new piece of wood. When all of the surfaces are brought together in a flat plane, bonding takes place.
- Blend the resin per the instructions on the packaging.
- Fill the existing wood with resin all the way to the top. The resin will usually self-level, making pouring much simpler.
- Allow the resin to cure as directed by the manufacturer.
- Once the scene is finished, the props can be taken down and replaced with the original floor or loft boards.
- If you have a lot of rotten wood to fix, it’s best to tackle one section at a time.
Joist End Repair Plates for Roof Trusses
This other method is not drastically different from the one I just mentioned. After the broken end is removed and the replacement is added, the two halves are joined using galvanized steel plates.
Here’s a quick review of the procedure’s key points:
- The damaged section of wood must be cut out, so locate it and check it carefully.
- Use acro props or other sturdy props that can support the wood’s weight to prop it up along its length.
- The damaged end can be removed after it has been stabilized, exposing the pristine wood underneath.
- Replace the damaged wood by cutting a new one to size. If the existing lumber is 8 x 4 inches, for example, the replacement wood must be 8 x 4 inches.
- Insert the replacement wood into the repair plate (s). The manufacturer of your plates will choose their design. Two “L” shaped sections and a “U” shaped section are also viable alternatives. Next, secure the wood to the plate unit or plate sections with coach screws, making sure to put it flush against the base.
- Fix the damage with a nailed-in piece of new wood that was cut with a jigsaw and equipped with a repair plate. Make sure the plate end is flush with the original timber and that the two are butted snugly together.
- Before screwing the plate to the original timber, place a second prop under it and push it firmly against the base of the original timber.
- Once the two timbers are securely joined in place, the supports can be carefully released and removed.
Take care to use the proper end plates by checking the manufacturer’s specifications. Plates must be strong enough to support the loads they will incur.
Cost to Reinforce the Roof
Xem thêm : Professional Repair For Water Damaged Wood Floors A Perfect Guide For You!
Experts may be able to fix the roof’s sagging trusses and add support to the entire structure. This method of repair is often reserved for roof trusses that have sustained just superficial damage that does not threaten their structural integrity.
Most companies who fix and reinforce roof trusses won’t even give you a ballpark figure for what it would cost to fix them. It’s not uncommon for issues to become apparent once reinforcement or repair work has begun. For this reason, most contractors will provide hourly rates for their estimates. The total price incorporates both an hourly rate and the price of the supplies used. On average, a rate of $55 per hour is charged for these kind of fixes.
Cost to Replace Roof Trusses with Rafters
Changing from a trussed roof to one with rafters is an option if the truss company does not have access to the original rafter plans. That’s why it’s more customary to use prefabricated roof trusses instead of constructing rafters from scratch. The average cost to finish roof framing is $13,500.
The size and complexity of a roof have a significant impact on the price of roof rafter construction. If a roof frame design drawing is required by your municipality in order to obtain a building permit, you may need to hire an engineer.
Getting an Estimate from a Contractor
Before repairing or replacing your roof trusses, you should receive an estimate from a specialist. A reliable contractor will have all the credentials — licenses, bonds, and insurance — essential to protect you. A professional contractor will also be familiar with any regulations or limitations imposed by your municipality.
Keep these tips in mind as you search for a contractor to install your roof trusses.
- Get at least three estimates from various service providers and compare them.
- Have the applicant provide a list of references upon request. The qualifications of a contractor can be gauged by looking at their previous work and the number of satisfied customers they have.
- Before signing any contracts, make sure the contractor has obtained the required licenses, bonds, and insurance. Contact your local permitting office to find a contractor who is up to code.
- Make sure the estimate includes all costs and time spent.
Using a cost-plus technique is a red flag and indicates that the contractor should be avoided. Once a contractor has started demolishing your roof, it gets harder and harder to keep costs down.
Consider Building Codes
In any case, you should keep an eye out for updates to the local building codes. Permits are often required for any sort of house improvement or alteration, no matter how little. The requirements of a permit may include visits from building inspectors.
When compared to permits for professionals, permits for homeowners are often more affordable. Repairs or replacements to roof trusses usually necessitate a building permit. The price of a house owner’s building permit is very variable depending on the scope of the project. Prices for building permits typically range from $ 500 to $2 000.
Other Repair and Replacement Considerations
There are other considerations to make before to repairing or replacing roof trusses. Consider these additional considerations.
- To get a roofing repair permit, you may have to pay an engineering charge. The cost of engineering plans is affected by factors such as the roof’s intricacy and the materials utilized to construct the roof truss.
- Truss construction adds cost to your project. Most companies that manufacture roof trusses will take your engineering plans and offer you with a quote for the cost of each truss. Standard trusses can be purchased for as little as $35 per truss and as much as $400 or more.
- The cost of your trusses depends on the material you choose. For most residential trusses, wood is used. Steel trusses may be specified by your engineer if the spans or intricate geometries of the structure preclude the use of wood trusses.
Depending on the material you select, the price of your trusses can vary widely. Wood is typically used for house trusses. If the spans or complex geometries of the project prevent the usage of wood trusses, your engineer may recommend steel trusses instead.
Trusses vs. Rafters Cost
There is a first impression that residential trusses cost more than rafters. Price differences like these are misleading for a number of reasons.
- Trusses need to be built and shipped to your location, both of which cost money. Framing rafters can add a significant amount to the overall cost of a project, and oftentimes these costs and the work involved are overlooked.
- It is common for trusses to reduce building time. Placing the trusses is much faster than framing the rafters once they have arrived on site.
Trusses are frequently used to speed up construction times. Once the rafters have been delivered, it takes far less time to set up the trusses than it would to frame the roof.
To rephrase, the average cost of trusses for a home construction project is between $9 and $11 per square foot. The cost to build the rafters in a comparable house ranges from $7 to $16 per square foot.
How Much Does a 20 Foot Truss Cost?
The average price range for a 20-foot timber truss with a 4/12 pitch is $30 to $50. Installation and delivery are not included in the quoted price. Specialty trusses may have a higher price tag than standard trusses because of their unique construction or design.
How Much Does a 40 Foot Truss Cost?
A timber truss with a 4/12 pitch and 40 feet in length typically costs between $125 and $155. As the length of something grows, so do the costs of materials, fasteners, and labor. These truss prices do not include shipping and installation.
Conclusion
This guidance will make it simpler to fix trusses that have been damaged by water. Prior to beginning work on a case, it is preferable to have a firm grasp on what kind of case it is. We started with some context for the truss so you could grasp it better.
You may increase your productivity by using the right resources and methods. If the water damage to your truss gets too much to handle, don’t be afraid to contact for assistance. Carefully adhere to each step, and read the fine print if necessary.
Nguồn: https://spasifikmag.com
Danh mục: Damaged


