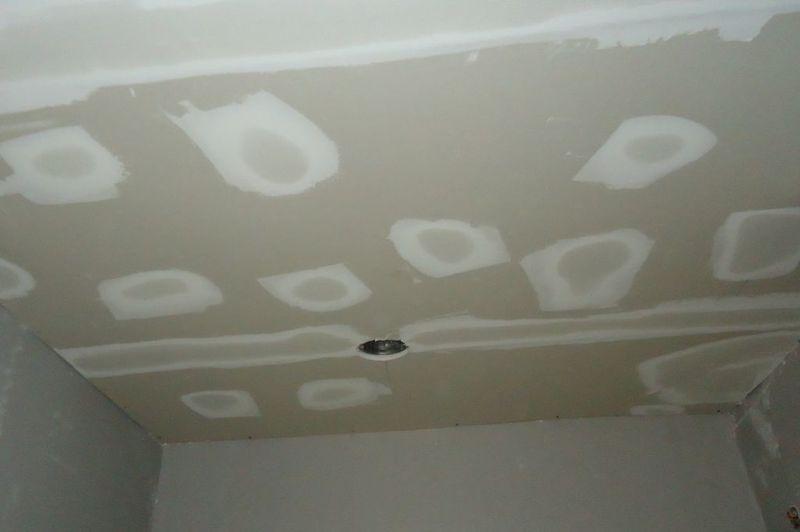
Your drywall will be safe again in no time if you learn how to mend water-damaged ceiling tape joints. Patching up the damaged section is as simple as assessing the damage, cleaning the area, using more mesh tape and joint compound, and then sanding and painting the new ceiling to complete the repair.
- How To Soften Water Damaged Leather? Complete Step-by-Step Guide
- How To Diagnose A Damaged Water Heater? Comprehensive Guide
- How To Sell Water Damaged House? Comprehensive Guide
- How To Fix Water Damaged Windows In Mobile Home? Easy Step-by-step Guide
- How Long Before Wood Gets Damaged From Water? What You Need to Know
Is there a way for you to fix the ceiling joint tape that is broken? Continue reading to find out how to swiftly patch up your ceiling tape junction that has been damaged by water.
Bạn đang xem: How To Patch Water Damaged Ceiling Tape Joint? Things You Should Know
Why Should You Repair Water Damaged Ceiling Tape Joints?
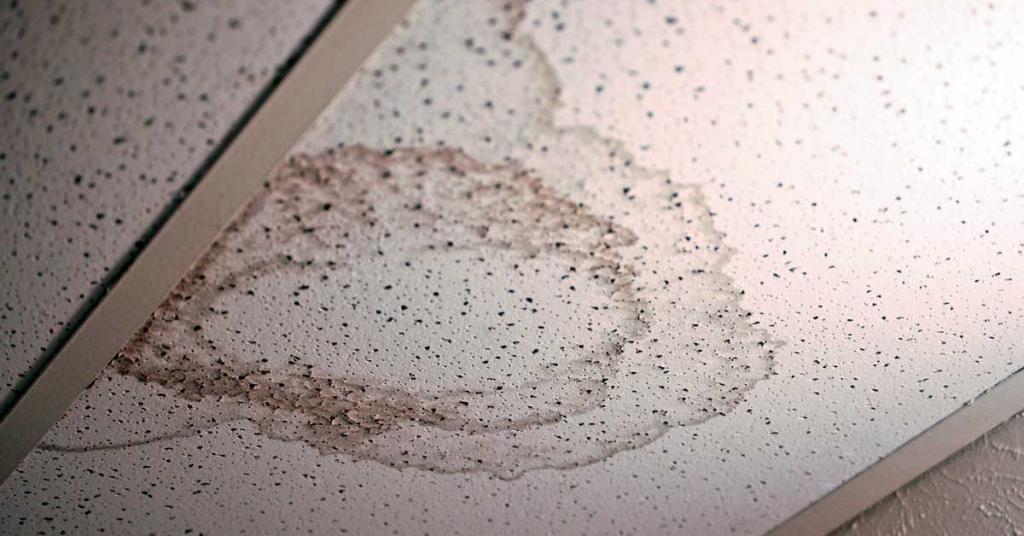
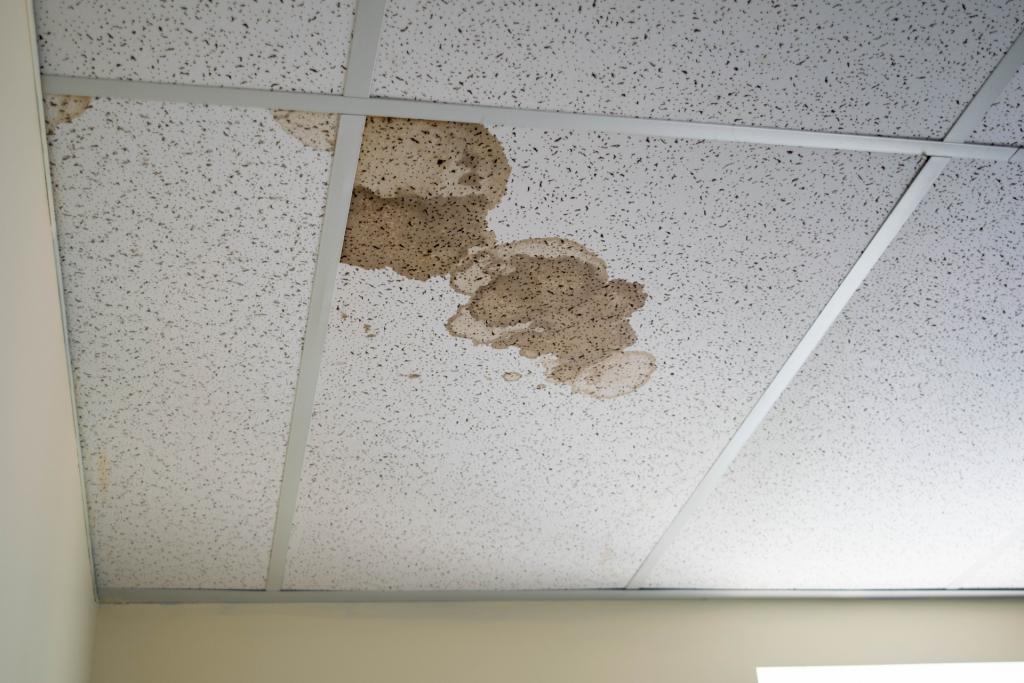
Water damage is a major problem that needs to be treated swiftly. You could be exposed to dangerous scenarios like collapsing ceilings if you don’t keep an eye on things. The formation of mold and mildew can also be a result of water damage.
The cost of replacing the entire ceiling may be prohibitive if your ceiling has been damaged by water for a long period of time.
Repairing The Water Damaged Ceiling Tape Joint
Step #1. Assess the damage
Before beginning any repairs, make an assessment of the damage. The amount of materials you’ll need, the time it will take to complete the project, and the stages you’ll take will be determined by the extent of the water damage. Inspect your ceiling for evidence of water damage.
To begin with, you must determine what caused the water damage in the first place. Ask your insurance company if the cost of fixing any faulty plumbing is covered by your policy. You can then move on to the following stage after repairing the leaky roof or plumbing.
Step #2. Clean the area
Before you begin repairing, make sure the area is thoroughly cleaned. The tape can be easily cleaned off with a clean, dry cloth in the event of small damage.
Wearing goggles is a good idea because the debris can get into your eyes. A piece of fabric can be placed on the ground to catch the bits of drywall that fall to the ground.
If there are large bubbles and cracks in the drywall, you may need to replace the tape’s length. Using a scraper or a putty knife, remove the masking tape from the surface.
Using a putty knife, pry a small section of the tape and pull it free of the surface. You should only remove the strip of tape that is weak enough to unstick on its own, rather than pulling out the entire length of tape that is sticky. See if there is any water damage or mold growth in the immediate vicinity.
If the damage is considerable, it’s better to wait until it’s completely dry before moving forward to avoid trapping moisture or causing more damage. To avoid mold growth, scrape away any damaged drywall or plaster. Fans and blowers help hasten the drying process.
After the area has dried, use a 150-grit sandpaper to sand the area behind the tape, and then vacuum away the dust.
Step #3. Repair the damaged tape joint
Prepare your joint compound once the region is prepared. First, you should replace the tape you removed if the damage is considerable. The tape should have at least an inch of overlap when you place it and pull it from one end to the other.
Using a putty knife, add joint compound to the mud pan. Use joint compound to patch up small dings and dents. Allow 4 to 5 inches of clearance in all directions around the hole to prevent peeling in the future.
Using the tape as a guide, apply joint compound in the same direction. Apply a thick layer of mesh tape and remove any excess with a scraper. Excessive joint compound application makes sanding more difficult once the compound has dried.
After applying the joint compound, let it dry. The drying process can take anywhere from 12 to 36 hours. A fan or blower can help speed things up by being pointed in the right direction.
Step #4. Finish up
Allow the joint compound to dry completely after applying it. 12 to 36 hours is the range of drying time that can occur. Turning on fans or blowers and directing them toward the repair helps speed things up.
Once the wall appears to be smooth, it’s time to tidy up the surrounding area. To ensure that all of the sanding dust and debris are removed, we recommend using a vacuum cleaner.
It is now time to paint the area in the color of your choice once the area has been cleaned. Repainting the entire ceiling to give it a fresh look is an option, as is painting just that part.
How Much Does Ceiling Repair Cost by Square Foot?
Every day, the ceilings in our houses take a lot of abuse. They protect the above-floor structure from shifting temperatures and humidity, while also housing possibly leaky pipes.
Xem thêm : How Long To Dry OSB Board In Water Damaged Wall? Things You Need To Know
Damage to the ceiling can range from a little hairline crack to sagging drywall due to major water damage, and everything in between.
It is common for ceiling repair experts to charge either per square foot of the repair or per hour, based on how big the project is. Expect to spend anywhere from $45 to $90 per square foot in damages.
The hourly charge of $60 to $90 an hour may make more sense for lesser issues, such as nail holes or damaged joints.
Square Foot Rate by Ceiling Material
Some types of ceilings are more difficult to restore than others. Houses built more than a century ago, whether they have popcorn ceilings from the 1960s or plaster and lath construction, necessitate more effort and specialized knowledge.
If your ceiling is made of wood, for example, the price per square foot will vary.
- Cost per square foot for traditional drywall: $45 to $55.
- Cost: $50 to $60 per square foot for light-weight sheetrock
- 65-80 cents per square foot for plaster and lath.
- 75-90 cents per square foot for popcorn ceilings
Drop tile ceilings are unique in that they may be easily repaired by the homeowner. The price per square foot of new drop tiles ranges from $2 to $17. Repairs that are beyond the scope of a do-it-yourselfer are typically priced between $60 and $90 an hour.
How Much Does It Cost to Repair a Ceiling Near You?
For a variety of factors, the cost of home repairs varies, but location has a significant effect in the final price. The overall cost of living in your location affects the costs of local labor, licenses and fees, and materials.. etc.
It’s also possible that the initial cost of a ceiling repair will be affected by where you reside because it typically calls for a variety of materials and tools including plaster, spackle, and construction materials.
Let’s take a look at a few real-world instances of how much it really costs to fix a ceiling:
- From $570 to $1,380
- $580 to $1,000 in Massachusetts
- From $470 to $1,230
- $400–$1,380 in Florida
- $550 to $1,660 in California
Which Ceiling Repair Services Can I Get on My Budget?
Any fracture or water stain on your ceiling is cause for alarm. Ceiling problems can be as expensive as several thousand dollars, or as little as a few hundred dollars.
Under $100
In this category are most of your DIY projects, such as replacing drop tiles and repairing small fractures. You might expect to pay less than $100 if a contractor has to mend a tiny area in less than an hour.
$100 to $500
You should expect to pay between $100 and $500 to have a small to mid-sized piece of your ceiling repaired and replaced by an expert. Large painting tasks and basic structural repairs for drooping ceilings also cost around this amount.
$500 to $1,000
You should expect to pay these fees for more extensive repairs such as water damage, massive cracks, and drooping ceilings, As an added precaution, enlist the assistance of a plumber or structural engineer.
$1,000 and Up
Replace the ceiling of a mid- to large-sized room, as well as any leaks, HVAC concerns, or foundation repairs that may be related to the ceiling. Lath and plaster ceilings, as well as other unique materials and design, may necessitate more than $1,000 worth of ceiling work.
How Much Does It Cost to Repair a Ceiling Yourself?
Many various things can be construed as a repair to a ceiling. Natural wear and tear, such as flaking paint, is a far cry from a sudden outbreak of mold or water damage.
We recommend only basic repairs that don’t require a lot of time or money:
- Materials in the ceiling framework must be replaced (anything other than drop tiles)
- Get into contact with the pipes or the power lines
- Caused by deeper problems
Is there something else going on here? Don’t wait for things to get worse before acting. If you notice a musty stench in the room where the leak is occurring, don’t hesitate to call a plumber.
Having said that, painting your own ceiling or replacing drop tiles without the help of a professional is both safe and cost-effective. Paint, primer, ladders, drop sheets, and other painting equipment can add up to $200 to $600 to the expense of painting a ceiling.
For $2 and $17 a square foot, drop tiles provide a low-maintenance, low-cost alternative to traditional ceramic tiles.
Ceiling Repair Cost Breakdown
An estimate of prices will be provided by a certified ceiling repair specialist depending on a few parameters. It is likely that your quote will include the following:
- Rate per hour for labor (with an estimated number of hours)
- The price of ceiling tiles
- For the repair, special materials were needed.
- Plumbing, structural, or aesthetic issues may require additional work.
How Much Does It Cost to Fix a Ceiling by the Type of Repair?
How much will it cost to fix a little leak or a rapidly breaking ceiling, depending on its severity? We’ve broken down some estimates based on forms of typical ceiling damage to help you figure out how many hours your contractor will need to address the problem.
Water Damage
Xem thêm : How To Replace Water Damaged Subfloor? Step-By-Step Guide
From a recent storm, your roof, a damaged pipe, or even broken HVAC vents, water can infiltrate your home and cause damage. Expect to pay between $45 and $55 per square foot for water damage ceiling repairs, which includes everything needed for the task.
In addition to this expense, remember to include the water damage’s cause, such as:
- $175–$3,000 is the range for plumbing repairs.
- A new roof can cost anything between $3.50 and $5 per square foot.
- $200 – $1,500 for HVAC repair
- $360 to $1,550 for a new roof.
Sagging Ceiling
Ceilings that are sagging or “pillowing” require labor at a rate of $75 per hour or more, not counting materials. Drywall replacement is inevitable, but outdated insulation or spacers between the ceiling and trusses may need to be addressed as well.
Ceiling Holes
There are countless reasons why there are holes in the ceiling. That old chandelier can be making you want to replace it with something new. In an ancient house, you might have had your foot caught in the rafters.
According to the type of ceiling and patch size, ceiling hole repairs might cost between $180 and $370.
Ceiling Cracks
It’s not uncommon to find cracks all over the house. Small ones, especially those seen around the room’s perimeter, are not uncommon. Hairline fractures are frequent in homes that settle over time.
More than two-inch cracks, those that deepen over time or those that encircle a beam should be investigated right away. A foundation or structural problem could be the cause of these symptoms. Depending on the degree of the problem, foundation repair can cost up to $4,500.
What Factors Influence the Cost to Repair Ceilings?
The cost of repairs varies widely depending on the individual characteristics of a house. The cost of ceiling restoration will be affected by the following factors:
- Your house’s age
- What’s causing the issue? (plumbing, structural, or natural aging)
- The area in question’s size
- The material of your ceiling
- Where you live is a matter of personal choice.
- Whether or not more experts are needed to complete the repair
Everything You Need to Know About Ceiling Maintenance
Cleaning Your Ceiling
As a result of the white color of the majority of ceilings, any blemishes will stand out. It’s only natural that you’d want to clean your ceiling from time to time to remove bugs, dust, and other undesirable elements. You should always perform a spot test before using any new product. Always bear in mind that the type of ceiling you have will dictate what you can and cannot do with.
Small portions can usually be cleaned with a clean, moist cloth. To avoid water stains, use only a small amount of water, and be sure to dry the area thoroughly afterward. You can use a duster or the brush attachment on your vacuum cleaner to get rid of dust and cobwebs. When you’re cleaning the rest of the house, be sure to lightly dust the ceiling and any ceiling fans to keep them clean.
Painting with Care
Over time, even high-quality painting done by a skilled tradesman will require some level of upkeep or repair. Interior painting should last a minimum of ten years. There is a temptation to just paint over minor imperfections, but it might be difficult to achieve an exact match in terms of color.. Before any paint can be applied, the surface must be lightly sanded.
Unique Features
It’s a good idea to preserve any cornices and rosework that have been part of your home for a long time. They can, unfortunately, weaken and chip with time. A restoration professional is necessary to preserve these aspects of the home’s design. We at WA Ceiling Fixers can match and re-paint any special elements on your ceilings and walls in a seamless manner before they are lost to time and history forever.
Fighting Mould
Mold is a problem that many homeowners have to deal with. It spreads rapidly and poses a health risk. The presence of even a small amount of mould on the ceiling can be an indication of more serious issues. Mould can be a symptom of leaks because of water damage. A sagging ceiling might be caused by water damage, which should be remedied as soon as possible by a professional. If there are no structural issues, you can use bleach and water to eliminate mould from your ceilings, or you can purchase specialized items. Prevent ugly discoloration by performing a spot check on a regular basis.
Warning Signs
There are a few telltale indications that suggest that more than simple ceiling maintenance is needed. Any of these warning indicators could cause the ceiling to fall. Cracks, cracking sounds, bubbling, and drooping are all things to look out for.
We can help if you’re worried about the condition of your ceilings. Your ceiling can be repaired or replaced by our team of experts in Perth. Please get in touch with us right away so we can go over your requirements.
FAQs
Your homeowner’s to-do list should always begin and end with healthy ceilings. Over time, problems might arise, and having a professional inspect the situation can bring reassurance as well as a lesser expense in the long run.
How do I know when it’s time to repair my ceiling?
There are several methods to tell if a ceiling is in deterioration other than the obvious ones like holes, leaks, and major fractures. Be on the lookout for these things:
- Ceilings are plagued with long, straight fissures in the middle.
- Smells of mold or mustiness in a space
- Your wall may have minor water damage or perhaps mold growth.
- Anyplaces that feel moist or damp
- When visitors enter the room above, there are loud cracking noises.
- Ceilings that sag, bow, or sag inward
- Even after applying a new layer of paint, the paint continues to peel.
What should I consider when hiring a general contractor for ceiling repairs?
General contractors frequently employ ceiling repair specialists. It’s possible that a structural engineer or a plumber will also be needed for the repair. Make sure that any professional you choose has:
- the repair can be done by licensed and insured professionals
- earned excellent feedback for similar positions
- Before beginning any work, submit a precise estimate and contract.
- make it clear how long the project will take to complete
What other projects should I do at the same time?
In the course of ceiling repairs, it’s a good idea to inspect the health of your HVAC system, plumbing, and even the design of the ceiling itself.
You may also want to consider painting the entire area, installing a light fixture, or freshening up the space with crown molding as a decorative option.
Conclusion
It is imperative that you learn how to fix water-damaged ceiling tape joints in order to save your ceilings from collapsing. In only four easy steps, you can save a lot of money on auto repairs. Naturally, if the damage appears to be severe and widespread, you should seek the assistance of experts.
Nguồn: https://spasifikmag.com
Danh mục: Damaged


