If your plywood has been damaged by water, the most effective approach to fix it is to replace the damaged planks. To maintain your other wood in good condition, you must keep the rot from spreading.
- How To Repair Water Damaged Camper Ceiling? Step by Step Instructions
- How To Protect Electronics From Water Damage? Comprehensive Guide
- How To Hide Water Damaged Particle Board? 5 Easy To Follow Steps For You!
- How To Fix Water-Damaged Baseboard? Step-By-Step Guide
- How To Fix Water Damaged Wood Studs? Step-By-Step Process
Epoxy penetrants and fillers are great for smaller holes and dings. The edges of your board should be coated with epoxy.
Bạn đang xem: How To Repair Water Damaged Plywood? Ultimate Guide
What Is Plywood?
A high-quality adhesive can be used to stack numerous pieces of wood together to create plywood. Because of the glue’s “cross graining” design, the material is extremely durable and unlikely to deform.
If you look around your house, you’re likely to find plywood-based products, such as cabinets and flooring. This wood is a great option for floors and ceilings because it’s inexpensive and long-lasting.
Depending on the climate, some plywood classifications, such as dry, humid, or outdoor, will perform better. Try to figure out which is best for your structure’s water resistance.
Causes Of Water Damage In Plywood
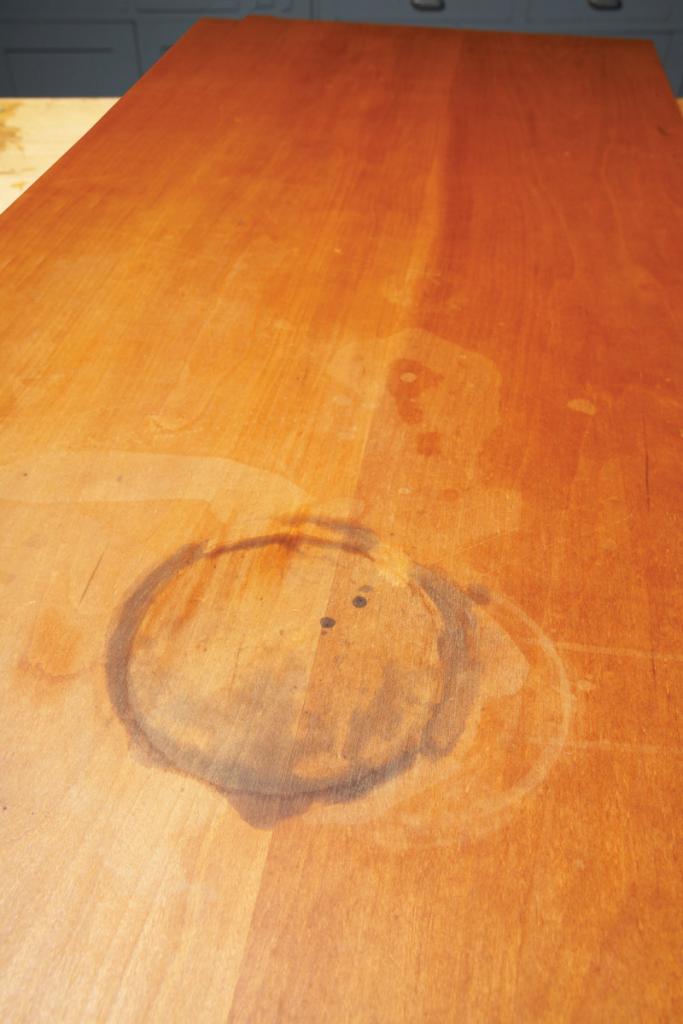
However, exercise caution when using plywood. Unlike wood, this material isn’t impenetrable; it may be damaged by water just like any other sort of wood.
Water damage to plywood can be caused by a variety of ways. Planks may have been wet because you left them outside in the rain or because there was a leak in your home and the boards were submerged for a lengthy period of time.
In the event of flooding, your plywood will swell and the layers will come apart. If the wood is damp, mold growth is possible.
If you’re lucky, allowing your boards to dry will let you save what you can. A simple day in the sun won’t suffice for some water damage.
Repairing Your Water Damaged Plywood
Depending on how much water damage your wood has sustained, you’ll need to use different methods to repair it. To make things easier, take action as soon as you notice evidence of water damage.
Method #1. Small area damage
Some of your plywood may be exposed to dampness from time to time. It’s simple to remedy if this happens at the edges. It’s as simple as getting some epoxy.
Step #1. Remove wood paint or sealer
Removing anything that could impede the adhesion of your epoxy will leave your wood naked.
Step #2. Apply epoxy penetrants
Using a roller brush, generously coat your board in a layer of paint. Allow it to cure for a few days so that it has time to penetrate into the wood’s pores.
Step #3. Apply epoxy filler
Occasionally, water damage might lead to the growth of rot in your planks. These spots may be repaired with an epoxy filler, and your wood will look like new again!
Step #4. Paint over the area
In order to match the wood grain, you can now paint over it. Your plywood will be even more durable once you’re done!
Method #2. Large area damage
Epoxy isn’t always sufficient for damage repair. The best course of action is to replace the entire piece of plywood if you notice a substantial area of damage. As a result, you’ll be able to keep any dirt or damage contained.
Step #1. Check for mold and mildew
Moisture in your wood might lead to the growth of mold. Some mold species are hazardous, so use caution and a mask when handling them.
Step #2. Dry out the area
To avoid further damage, dry any wood that has become wet as soon as you see it.
Step #3. Remove damaged carpet
Moss can grow atop carpet or insulation that is placed on top of plywood in some homes. Disinfect the remaining material after removing the severely damaged components.
Step #4. Remove the damaged wood
Remove the damaged board and disinfect the space beneath it before placing it back in its proper place. Make sure you have adequate support if you do this on the structural element of your home.
Step #5. Replace with new wood
Now that the area has been thoroughly cleaned, you can proceed with the installation of the new wood. To ensure compatibility, check the dimensions and class of the new boards.
Other Special Repairs For Plywood
Water damage isn’t always the only issue you have to worry about. Keep a look out for additional plywood repairs that may be necessary!
Bubbles
When the wood’s glue breaks, water seeps into the cracks and crevices. Your board may expand as a result of this moisture, which generates bubbles.
It’s a simple fix, so don’t worry about it. Using a utility knife, chisel, or similar tool, cut the veneer around the bubble, then wait for the region to cure before peeling away the rest of the exterior veneer. Keep an eye on the boards underneath, since they are in terrific shape.
Dents and cracks
You may see some dents and cracks on the surface of plywood because of its regular use. To repair the damage, all you need is a little epoxy putty. Remember to sand the epoxy down to an even surface when it has dried.
Keep an eye on the condition of your plywood and solve any issues that arise as they arise. Keep an eye on things so that substantial repairs are not necessary.
Will Your Insurance Cover Water Damage For Plywood?
Water damage can occur for a variety of reasons, all of which are covered by your homeowners insurance. However, it’s important to be aware that some insurance policies only cover leaks.
Xem thêm : How To Fix A Water Damaged Camper Wall? 3 Easy To Follow Steps For You!
You’ll need a second coverage to cover your costs in the event of flooding. To have a clearer perspective of your coverage, always visit your lawyer.
How to Protect Plywood From Water Damage
Indoor or Outdoor Use
Protecting your plywood begins with determining whether you’re working in an indoor or outdoor environment, as each has its own set of issues to consider. A penetrating oil with an anti-fungal preservative may suffice if you are dealing with an entryway subfloor where water and moisture concerns are minor. If you’re using plywood for an outside siding, you’ll need to spray or paint on a waterproofing coating to keep the plywood safe from the elements.
Types of Waterproofing
Plywood can be protected using a variety of waterproofing options. Paint-on or spray-on waterproofing is the most prevalent form sold at home improvement stores. In most cases, moist liquid latex is applied to the plywood’s surface. They harden into a plastic-like coating once they’ve dried. Sheet plastics and interlocking membrane systems are also available. Penetrating oils and sealers are another option.
Application for Liquids
Whether you’re using the plywood as a finish or as a building material will have a significant impact on the application method you choose. Waterproofing and sealant products can be applied with a brush or roller, sprayed on with an electric paint sprayer, or mixed with water and applied by hand. Plastic sheeting and overlapping and interlocking membranes both require tacks or staples to secure them in place. Overlapping membranes are utilized for external siding applications under the layer of siding, whereas paint-on and interlocking membranes are typically employed for plywood under tile or natural stone installations. Spray-on sealants and preservatives are commonly used on finished plywood to keep the wood’s natural appearance.
Importance of Manufacturer Guidelines
Following the manufacturer’s instructions is critical when applying a protective layer to your plywood installation. If you’re using plywood under ceramic tile, you’ll need to follow the tile manufacturer’s advice on the optimum way of waterproofing for that sort of installation. In the same way, protecting the plywood under your home’s siding requires that you follow the instructions provided by the siding maker. To maintain the guarantee on any products used in the installation, always follow the manufacturer’s instructions.
Can You Waterproof Plywood?
Waterproofing material adheres well to plywood. In spite of the plywood’s smooth appearance, it is nevertheless porous enough to allow sealers and paints to adhere. For outdoor and maritime applications, plywood can still be employed. You don’t have to worry about your outdoor deck, boat dock, or even the boat itself getting waterlogged thanks to waterproof plywood!
It’s critical to waterproof your plywood to avoid having to replace it fully every year or two. One damaged sheet of plywood covers a big area because plywood is typically used in sheets rather than narrow planks. If you have plywood flooring and walls, you may have to replace a big portion of your home!
Benefits of sealing Plywood
Waterproofing is a useful tool in many ways. The following are a few advantages to treating your plywood with a waterproofing solution:
Prolonged Life
2X4’s, which are made of untreated wood, can last for around two years in the open air. If plywood is exposed to the weather, it will certainly degrade much more quickly. Inside, a water leak is just as lethal to untreated plywood as a downpour or a blizzard. For plywood that has been properly treated, you can expect a life expectancy of 20 to 40 years
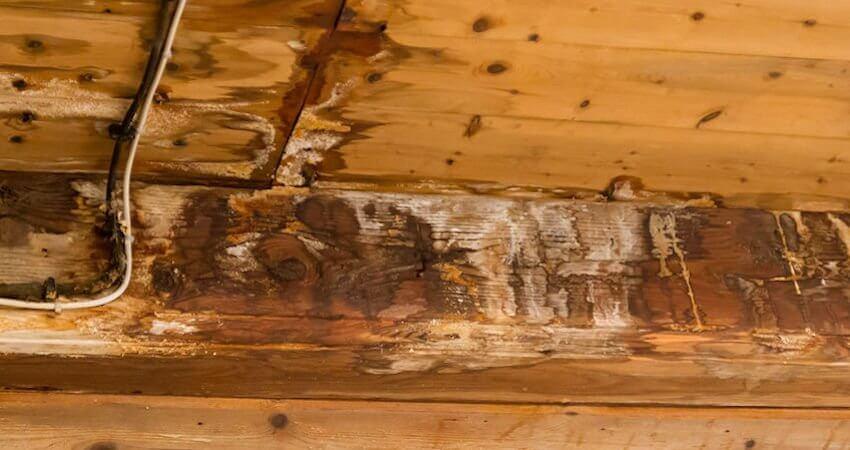
Prevents Rotting
Excessive water exposure, even if the plywood does not crack completely, can lead to rot. In addition to looking unpleasant, wood rot smells bad and degrades the material. Water damage to your deck, house, or boat might be a result of wood rot. Waterproofing your plywood can spare you from having to cope with a panel of plywood that is progressively deteriorating!
Prevents Dry Rot
Isn’t natural decaying the same as dry rot? Dry and moist rot both have comparable consequences, but their sources are very different. Because dry rot is invisible to the naked eye until it’s too late, it’s the most common cause of wood decay. As the wood dries, the fungi begin to grow, so it doesn’t need a lot of moisture.
Protects from Moisture and UV Rays
Exposure to moisture and heat on a regular basis will quickly warp plywood. Plywood becomes a modern art sculpture after just one rainy summer If you’re looking for an unusual deck, floor, or siding, you might want to look elsewhere. If you want your plywood to last for years, not months, waterproofing the sheets is an excellent solution.
Reduces Splitting
When plywood is exposed to water, splitting is one of the most devastating consequences. When the wooden layers separate, the sheet is completely destroyed. Even if you can’t see the split, the water will have already damaged other portions of your deck/home/boat by the time you do. Before placing plywood, make sure it is waterproofed!
How to Seal Plywood for Outdoor Use
Outdoor plywood can be sealed using a variety of methods. The good news is that the most of them are quite reasonably priced and easy to use. As long as they’re applied correctly, they’re all about the same. As a result, it might be difficult to determine which approach is the best for sealing plywood because each one does the job well.
In this article, we’ll look at the six most effective ways to waterproof plywood.
Epoxy Sealer
The most common method of protecting plywood from the weather is to apply an epoxy sealant. Typically, epoxy is applied in paint or spray form. Epoxy’s benefit is that it strengthens and waterproofs the plywood at the same time. The epoxy creates a water- and scratch- and dent-resistant exterior layer.
A transparent epoxy coat is applied to the plywood, allowing it to keep its natural color. Plus, you may paint over hardened epoxy by sanding it lightly with a sandpaper.
Drying Oil
Outdoor and maritime applications benefit greatly from drying oil since the plywood retains part of its original wetness and elasticity. Whereas epoxy creates a protective layer around the plywood, drying oil penetrates deeply and leaves a thin but effective finish.
You should use drying oil if you want to use plywood in a high-moisture region like a dock, a boat, or if you reside in a damp area. In contrast to epoxy, paint, and other sealers that entirely prevent water from the wood, this one strengthens the wood against water damage.
As a result, the wood will last far longer without being completely “waterproof” in the conventional sense.
Water-Based Paint
Paint waterproofing isn’t as long-lasting as epoxy or drying oil, but it does the job just as well when it comes to water resistance. For outdoor use, water-based paints are fine, but they may need to be reapplied every few years. Over time, water-based paint will develop minor flaws, such as peeling or cracking.
Waterproof paint will protect your plywood from further damage if you encounter any of these issues. Paint seals plywood better than most other treatments because it adds color! The “trouble” of retouching waterproof paint every few years is well worth the time it takes to choose the perfect shade.
Varnish
You may seal plywood with a varnish without creating an apparent thick covering by using it. Varnish is a generic name for any thin coat of resin or resin mixture that is brushed on and then allowed to dry to form a hard surface.
In comparison to epoxy or paint, it isn’t as thick or apparent. When dry, most varnishes leave a glossy finish that is pleasing to the eye.
Varnishing above the water line maritime applications, such as wooden boats or your dock, is suitable with this varnish. It can withstand salt, mildew, and wetness for years if not submerged. As a result, it’s perfect for use outside (in locations other than the ocean).
Liquid Latex
Using a spray or brush application of liquid latex may be the most convenient method of waterproofing plywood. On the other hand, it can be difficult to detect if you have enough liquid latex on the plywood to properly seal it when using this method.
It’s also prohibitively expensive when applied to a wide scale. However, if you’re willing to fork up a little more money for the convenience of spraying liquid latex generously, you may want to do so.
A way that works almost everywhere is liquid latex, provided you use it correctly, such as by getting proper covering. It adheres effectively to plywood and is guaranteed to last for several decades.
Xem thêm : How To Clean Water Damaged Bare Wood? Step by Step Instructions
Water will seep into the plywood through the gaps left by improperly sprayed latex, negating the purpose of your labor. When using liquid latex, make sure the plywood is completely covered in a thick layer of spray!
PVA
Bookbinding is a common application for this sort of adhesive. All the qualities you need in a waterproofing material may be found in PVA, which dries clear and thin, adheres nicely to plywood, and is entirely waterproof.
It’s a good idea to dilute PVA with water before applying it to plywood as a sealant so that it goes on thinner and penetrates the board more deeply before drying.
How to Waterproof Plywood
It’s time to seal the plywood now that we’ve examined the various waterproofing solutions.
Step 1: Prepare the Plywood
The plywood must be prepared before liquid latex, paint, or PVA may be applied. Remove any dirt or grime from the plywood’s surface with a brush or a dry cloth.
After that, smooth out any rough patches on the sheet’s surface with wood filler. This will ensure that there are no gaps in the waterproofing and that the surface is uniformly smooth. Before moving on to the next stage, allow the wood filler to dry and firm.
After the wood filler dries, use a moist cloth to clean the sheet. The sealer will stick better to the plywood sheet if there is a tiny amount of moisture in the wood.
Sand the board using medium-grit sandpaper as the final preparation step (60-100 grit). You can use this to smooth out the sheet and eliminate any rough patches that can interfere with painting or sealing.
Step 2: Apply the Sealer
If you’re using a brush or roller to apply the sealant, do it as you normally would. Make sure the first coat is completely dried before applying the second, and don’t rush the process. Adding a third coat of waterproofing may be necessary for some applications and materials. Despite the fact that this may not be required, it’s always a good idea!
You should read the manufacturer’s directions carefully if you are utilizing a spray approach. Using spray-on sealer incorrectly can lead to one of two outcomes:
- failing to apply enough sealer to adequately cover the surface, and
- an uneven distribution of sealer; some areas have a significant amount, while others have none at all.
Spray-on sealers pose more of a risk because they are more difficult to see and manage than brush-on sealers. As a result, when applying the sealer, pay close attention to where you aim the can.
Step 3: Let it Dry, and Keep an Eye
If you have the time, allow the plywood to dry for at least a few hours, and up to 24 hours if possible. Finally, after it’s entirely dry, you may go ahead and put it in place. Seal the screws and nails once you’ve installed the plywood to keep it watertight!
You should still examine the waterproofness of the plywood sheets every few months, even if they are now sealed. A simple “eyeball test” to make sure everything is in order will reveal any water damage that may have occurred.
How to Seal Plywood Edges
While we’ve covered how to seal the plywood’s surface, how about the edges? To protect the plywood edges, should they be waterproofed? The edges of plywood are particularly sensitive to water because of its several layers.
When plywood margins are exposed to water, they are more susceptible to splitting than the rest of the sheet. As a result, waterproofing the borders is crucial, perhaps even more so than waterproofing the surfaces itself!
Applying numerous coats of varnish and letting each coat cure for about an hour is a straightforward way to seal plywood’s edges. You’ll need to apply several coats of varnish to ensure that the varnish cures and forms a protective layer around the edges.
Which Plywood to Choose For Outdoor Use?
To believe that all plywood is the same and equally susceptible to water damage is a mistake. Plywood is a broad group of wood products, and each variety is better suited to a particular application.. You don’t even have to worry about sealing plywood yourself if you buy pre-treated plywood!
CDX Plywood and ABX or “marine-grade” plywood are the best options for outdoor application. CDX is constructed of low-quality wood that has been intensively treated for water resistance, making it perfect for roof sheathing and other applications.
Plywood made from marine-grade plywood is the smoothest, highest-quality, and most waterproof of all. Marine-grade plywood is intended for use in the construction of shoreline structures such as decks, boardwalks, and piers.
Types of Waterproof Plywood
Using an A-D scale, plywood is rated from best to worst; A is best and D is worst. For the front and back faces, respectively, the first letter is finer while the second letter is coarser.
The third letter is less significant, but it indicates the type of glue that is used to join the layers together. The appearance of the wood, not its strength, is what these letters are referring to here. ABX, on the other hand, is more visually appealing than CDX, but both have the same level of durability and water resistance. Check out the various kinds of waterproof plywood and their suggested applications.
ABX Plywood
Marine-grade plywood (ABX), commonly known as smooth, sturdy plywood, is available. It’s designed for usage in the nautical industry, but it’s also a terrific choice for external plywood. With the “AB” rating, you can be sure this plywood will withstand the salty air as well as water, making it a great choice for outside applications.
ACX Plywood
ACX is a type of waterproof plywood that shares many characteristics with marine-grade plywood, although it is not treated specifically for use in the maritime environment. Decks, external walls, and renovations can all benefit from its durability and waterproofing.
ADX Plywood
It’s similar to ACX plywood in appearance, but it has a rougher, knottier back side. For a more affordable option, you can get away with just the “A” graded veneer on the front face. It can be used as a subfloor in a house or as an exterior building material.
BWP Plywood
The letters “Boiling Water Proof” on this piece of plywood mean exactly what they sound like. In the presence of boiling water, this plywood is exceptionally resistant to deformation. Construction sites with a constant supply of hot water and steam are prime candidates for this product.
MR Grade Plywood
This plywood is suitable for indoor use because of its “moisture resistant” (MR) designation. While it can withstand moisture and small water droplets, it isn’t totally watertight. MR plywood is appropriate for interior use in humid locations since it does not warp when exposed to moisture.
BWR Grade Plywood
Plywood labeled as “Boiling Water Resistant” (BWR) is a lesser cousin of BWR plywood. Although it is not watertight, it can withstand steam and boiling water. Cabinets, sinks, etc. are all good places to use BWR grade plywood if you don’t want to deal with water or steam all the time.
Conclusion
Your home’s foundation is made of plywood, therefore it’s important to take care of it. You can keep your home safe and beautiful by learning how to fix water damaged plywood.
Nguồn: https://spasifikmag.com
Danh mục: Damaged


