For camper ceiling repair, here are five steps. In most campers, the ceilings are made of PVC or vinyl tiles that are water-resistant. Water damage to a ceiling can result from even the tiniest fractures and holes in a waterproof roofing system.
- How To Soften Water Damaged Leather? Complete Step-by-Step Guide
- How To Fix Water Damaged Wood Finish? Step by Step Instructions
- How To Replace Water Damaged Sink Cabinet? Easy Step-by-step Guide
- How To Prevent Fence From Well Water Damage? Complete Step-by-Step Guide
- How To Replaster A Water Damaged Ceiling? Step-By-Step Guide
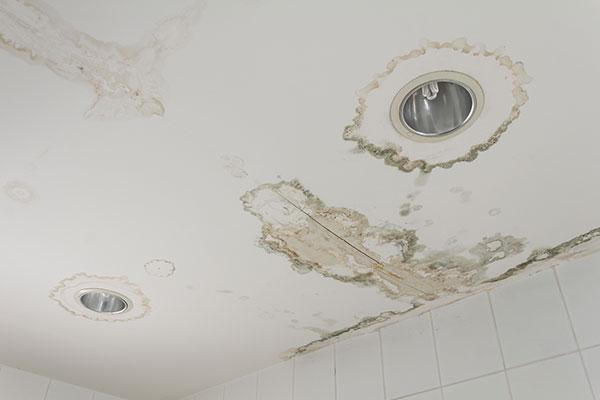
Because of the waterproof coating on the ceiling, water that penetrates through the material cannot be rinsed out. The stagnant water will eventually cause the ceiling to give in and crumble if it isn’t removed quickly enough. As soon as you notice damage to the ceiling of your camper, you must have it repaired.
Bạn đang xem: How To Repair Water Damaged Camper Ceiling? Step by Step Instructions
Steps For Repairing Water Damaged Camper Ceiling
Every camper owner’s worst dread may be the discovery of water damage to the ceilings of their rigs. The repair must be done as soon as feasible in order to prevent accidents from occurring. What you need to know about restoring water-damaged camper ceilings is outlined in the following paragraphs.
Step #1. Damage assessment
Before you begin the repair, you must determine the extent and severity of the water damage in the camper ceiling. Damage assessment is essential since it can reduce the cause of the damage and make the repair process easier. Determine where water damage has occurred and search for possible causes.
Mark the region where the damage will be repaired after you’ve discovered the damaged areas and determined the source of the harm. Also, think about how you’ll handle any potential sources. To avoid future problems, you need to find and fix the source of the damage.
Step #2. Prepare for the repair
Now that you’ve identified the problem regions and provided the source with the solution, it’s time to begin the repair process. Gather all of the tools and safety gear you’ll need for the repairs.
Also, make sure the location you’ll be working in is ready. Lay down a tarp or drop cloth under the damaged ceiling to prevent debris from piling up around the camper.
Step #3. Take down the damaged ceiling
You’re now ready to remove the broken section of the ceiling after assembling all of your supplies and cleaning the area. Use a pry bar to remove the damaged ceiling and a screwdriver to release the fasteners. Remember to completely remove any area of the ceiling that has been damaged by water.
Frames should be removed together with the water-damaged ceiling if there is damage. No deteriorating frames, ceiling boards, and insulation should be left in the house. Everything that has been harmed by the water must be properly cleaned and sanitized.
Step #4. Cut out replacements
All you have to do is follow the dimensions of everything that was removed when cutting new replacement frames, ceiling boards, and insulation. It’s best if the ceiling planks are of the same thickness, and the same composition is even better. To ensure that your new fix lasts as long as possible, take all precaution.
Step #5. Installation
Xem thêm : How To Repair Water Damaged Formica? Step-By-Step Guide
Begin the installation process as soon as you’ve got the replacements ready. After the framing, the insulation, and then the ceiling boards, you’re done.
Everything should be screwed and fastened in the same way it was before the water damage occurred. Finish the repair by applying your sealants and fillers to the seams.
What are camper ceilings made of?
Camper ceilings are often constructed from wood-based particle boards. Although PVC or vinyl tiles can withstand fire and water damage to some extent, some camper ceilings were constructed with these materials.
As the name implies, fiberglass is used by some campers to construct their ceilings, which are constructed of plastic and fiber. Fiberglass is a low-maintenance material that is inexpensive.
The ceilings of campers are similarly covered with metal tiles. It’s long-lasting and nearly mold and mildew-proof. In spite of its high price, it is extensively utilized because of its simple installation and cheap upkeep costs.
What is the total cost of camper ceiling repair?
Camper ceiling repair costs will vary greatly depending on the severity of the damage. If you’re going to engage a professional, you’ll also want to think about the materials they’ll use and the amount of time they’ll devote to the project.
If you know how to fix the problem yourself and have insurance for your camper, you can reduce the cost by choosing the finest choice on the market and doing the repair yourself.
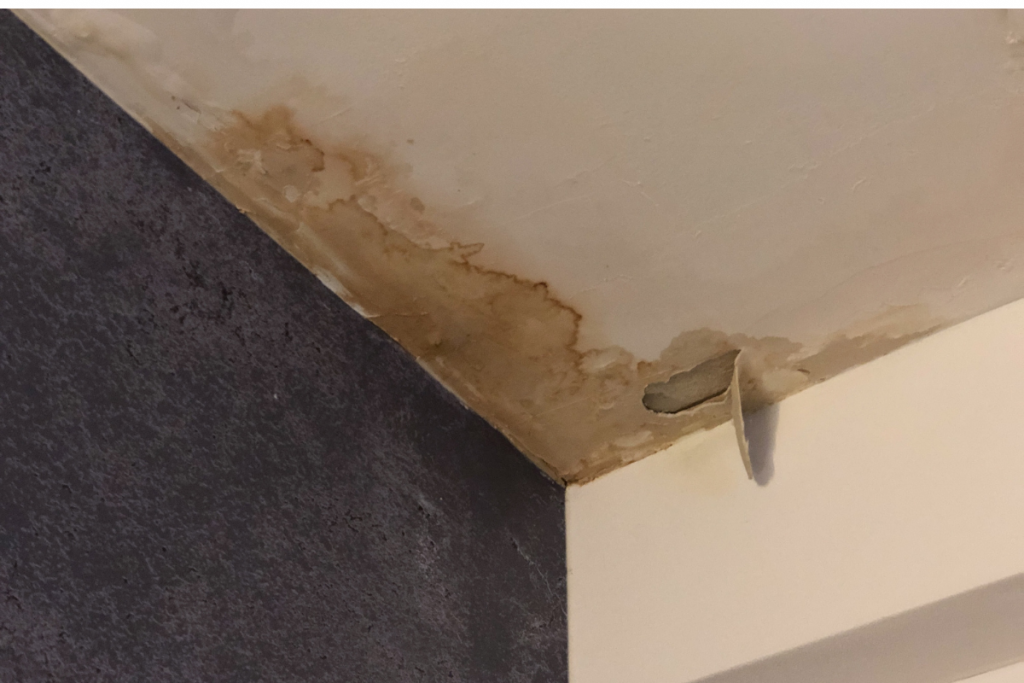
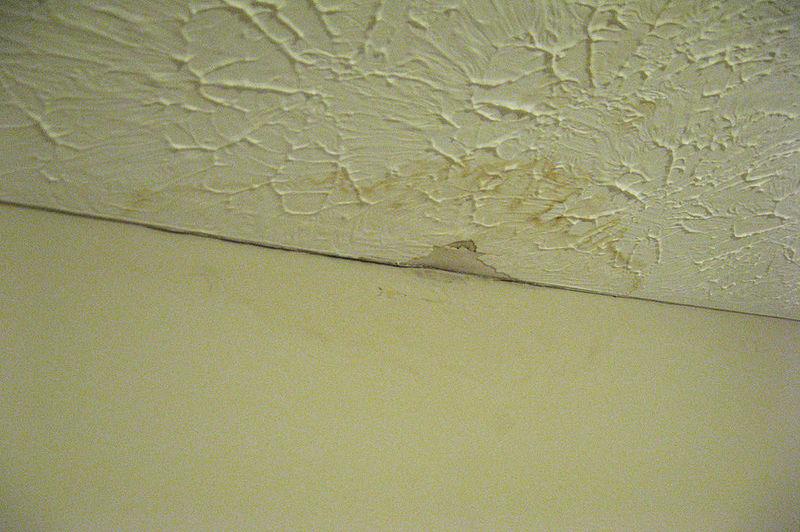
How can you tell if your camper ceiling has water damage?
If you see stains, mould, or drooping in your camper’s ceiling, you’ve got water damage. Some other constructions, such as dry walls, show nearly identical indicators of water damage.
Tips For Tent Care and Maintenance
1. Treat it like your home in the outdoors.
A no-shoes policy is a great way to extend the life of your tent floor. Aside from trekking through mud and grime, hiking boots’ firm bottoms can easily ruin a tent’s floor. In other words, unless you have an emergency, try to avoid stepping inside the tent with your footwear.
2. Act quickly on fabric tears and stains.
If you’re camping, you’re going to get some wear and tear on your tent’s walls and roof. Stains and tears are typical on a tent’s outer covering, from acorns to bird droppings. Clean up spills and mend tears as soon as you notice them instead of letting Mother Nature take her toll on your shelter. If you deal with minor damage as soon as it occurs, you can keep your tent from ending up at the bottom of a trash can.
3. If your tent’s not waterproofed in the factory, do the job yourself.
It’s not a bad idea to restore waterproofing to your tent after a few hard rains. For tent walls and roofs, you’ll find an all-purpose waterproofing spray at most home improvement stores. Using the spray on a regular basis will assist to prevent any leaky tents.
4. Store it in a safe place.
In rare cases, stowing away tents in garages or barns can lead to unexpected surprises. In storage, a tent can be ruined by mice, bugs, and water damage without the owner’s knowledge. When you’re not using your tent, store it in an interior closet or storage room, and you won’t have to deal with any unpleasant surprises.
5. Bring a small tent maintenance kit on camping trips.
If your tent breaks down at the campground and you don’t have a way to mend it, you’re in trouble. It’s not a bad idea to take a small kit with needles, thread, a washcloth, and cleaning solution if you don’t plan on sleeping under the stars.
Your tent, like many other camping essentials, needs a little TLC from time to time in order to remain in peak condition. It may be easy to ignore a small hole in the carpet or smudge of mud on the floor, but preventing and correcting small issues as soon as they arise will help to delay the occurrence of larger ones.
Rooftop tent camping – overland style
Right now, overlanding is a huge deal. It removes you from the bustle and pollution of modern life and brings you closer to the natural splendor of the world. There are no walls, which is something you can’t get in an RV, van, or camper van. There are many types of overlanding, but the most common type is vehicle-dependent travel to remote areas where the purpose is to experience the journey rather than to arrive at the final destination. There are many comforts of home that you’re used to, such as a refrigerator, a full kitchen, and, of course, a comfortable mattress in the rooftop tent. If you’re planning to go overlanding, rooftop tents will be your greatest buddies.
The pros of rooftop tent camping
- Rooftop tents outperform ground tents in terms of comfort and spectacular views. An excellent night’s sleep is virtually guaranteed with the majority of rooftop tents’ memory foam mattresses (we also like to pack good quality pillows, cozy blankets and twinkle lights). One perk of using a rooftop tent is that you don’t have to lug your sleeping bags up and down every day. The elevated position of the tent, together with its numerous windows, allows you to enjoy stunning views of the surrounding area.
- A dry, warm night is ideal for camping on the ground. Because the floor of the rooftop tent does not become chilly at night like it does in the ground tent, being elevated above the ground keeps you far warmer at night in any given temperature. When it rains, an awning (imagine a tarp attached to the roof that opens up) is usually included with overlanding vehicles and overland rental cars.
- Rooftop tents aren’t just for sleeping, they’re also wonderful for relaxing during the daytime. Whether it’s hot and sunny or raining or snowing, the tent will keep you dry and comfortable. On a gloomy or rainy day, we usually curl up with a good book and take a power nap.
- Winter camping may be a lot of fun, but only if you have the right equipment and a heated tri-layer rooftop tent to keep you warm (think Lake Tahoe in December). In order to enjoy a winter paradise, a fully insulated rooftop tent, heater, and adequate sleeping bags are required.
- In the early stages of rooftop camping and overlanding, everyone will be curious about what that item on the top of your vehicle is. During our overlanding travels, we are frequently asked about our rooftop tent, and we’ve made great friends from all over the world because of our camping set-up.
- Overlanding gives you the opportunity to plan your journey around the incredible things you want to see, rather than the availability of campgrounds along the way, allowing you to avoid the restrictions that come with traditional camping arrangements. You can camp for free at nearly every National Park in the United States thanks to a nearby National Forest.
The cons of rooftop tent camping
- With a rooftop tent, overland travel is recognized for being bare bones and even spartan. A five-star hotel cannot and should not be compared to this experience.
- While setting up the rooftop tent just takes a few minutes each morning and evening when you’re on the road, it might grow tedious if you’re doing it every day for several days on end. Setting up a tent can take anything from 30 seconds (for pop-up campers) to 5-10 minutes, depending on the cost and quality of the product (regular rooftop tents).
- Even if rainy days are unpleasant, a dedicated overlander doesn’t give a damn about the weather. However, if you’re a novice rooftop tent camper, the weather might have a significant impact on your experience. Even if you have a rain cover on your rooftop tent, it’s best to store it dry (to avoid mold and humidity) so if it rains excessively, you’ll have to wait.
- For a comfortable night’s sleep, it is vital to find an even spot — securing an event location is a must. If you park your automobile at an unnatural angle, you run the risk of having dreadful dreams as a result of the rush of blood to your brain. The inclinometer, a device that determines whether or not you have your automobile parked straight, may be found in virtually every new car.
- People who are afraid of being mauled by wild creatures can greatly benefit from being elevated. While overlanding, if you’re worried about your safety, arrive early to survey the area and pick a hidden position away from the road. When you’re done for the night, make sure to lock your car. A well-organized campground where you will be among other campers is preferable if you are planning on camping in an area where you are concerned about your safety.
- Getting up and down the ladders – especially at night – brings to mind nocturnal pees. However, caution must be taken when getting in and out of the rooftop tent, especially if you’re weary and tired.
Top 3 tips for your first overlanding trip:
Don’t rush
Relying on maps becomes more difficult the further you travel from paved highways. Because dirt and unpaved roads can be dangerous, you never want to be in a hurry to get there, no matter how short the distance appears to be. That’s a good thing, in fact! You can travel at 30 mph in some spots and stop every 10 minutes to take in the sights in others on most overlanding routes, which provide stunning scenery. Before setting up camp, make sure you have enough time to go to your next destination.
Plan your route before you leave
Plan your route ahead of time, especially if you’re heading into a new location. It’s easier to plan from home with the internet than in a dark, unfamiliar environment. Consider renting a vehicle from a business that will handle all of the route planning and itinerary creation for you if this is your first time doing so.
Bring your sense of adventure
Not much room is needed for this! Overlanding is about the trip, not the goal. Do not be afraid to take risks, such as crossing a shallow river or driving on a bumpy gravel road — you will soon be back in the city and miss those wild outdoor moments where the only traffic you see is a herd of elks grazing on a field.
Conclusion
To keep your camper in tip-top shape, you’ll need to do regular inspections and repairs, which includes learning how to fix a water-damaged camper ceiling. When water damage is ignored, it can lead to major issues, therefore getting on top of it as soon as possible should be a top priority.
It’s not a bad idea to hire a professional to inspect and maintain your home, but doing so yourself will save you money and time. In the long term, having knowledge and abilities will always be an asset.
Nguồn: https://spasifikmag.com
Danh mục: Damaged


