When you reside in a flood-prone area, it’s important to know how to repair water damage to baseboard. If you loosen the baseboard using a tool knife, you can replace the sections that have been damaged by water.
- How To Tell If Wood Is Badly Damaged By Water? Step-By-Step Guide
- How Electrical Fixtures Get Water Damaged? Everything You Need To Know
- How To Repair Water Damaged Base Cabinet Under Sink? Troubleshooting and Repair Guide
- How To Refinish Water Damaged Wood? Step by Step Instructions
- How To Repair Water Damaged Soft Floating Floor? Step-By-Step Guide
More details on how to fix your water-damaged baseboard are provided below. Keep reading to find out what happens if you ignore the warning indications of water damage to your baseboards.
Bạn đang xem: How To Fix Water-Damaged Baseboard? Step-By-Step Guide
Steps On Fixing A Water-Damaged Baseboard
Step #1. Identify the affected areas
Locating the source of the damage, be it a leak or a flood, is paramount. If a puddle occurs on a certain section of your baseboard, for example, you will know exactly where the damage is.
But if you only look for puddles, you won’t get the full picture of water damage. This is because, in addition to being signs of water damage, cracks and peeling should also be monitored.
Step #2. Prepare your tools
Locate the damaged region, then gather the appropriate tools. You will need a screwdriver, a hammer, a paintbrush, a sealant, and a utility knife. Depending on the extent of the damage, you may also require wood glue, wood filler, and replacement wood.
Step #3. Loosen the baseboard
Use a sharp utility knife and work it along the top inside edge of the baseboard to pry it off. The purpose of this is to remove the old caulk.
The drywall must be protected at all costs throughout this process. Make sure to use uniform and smooth motions with the utility knife to avoid doing any more harm than necessary.
Step #4. Remove the damaged area
Pry off the damp baseboard after releasing the dashboard screws. Take your time and be cautious so that you don’t destroy the area around you.
Step #5. Clean the baseboard
Carefully pull out the ruined baseboard, and then use a utility knife to chisel away the adhesive residue. Sand down the area once the adhesive remnants have been removed to provide a flat surface.
If there’s a lot of water, you should call a plumber because the leak might not go away on its own. It would be pointless to install a new dashboard at this time.
Step #6. Measure the replacement
Find a new piece of baseboard that is the same size as the old one by using it as a template. If you’re a novice, make sure you replace the broken baseboard with one that’s a few feet longer. The purpose of this is to provide some leeway for mistakes.
Step #7. Paint to match
New baseboards should be painted before being installed. This is preferable than fitting then painting, which would need covering the floor and walls.
Step #8. Cut and secure
After the new baseboards have been painted, use a miter box to cut the ends at a 45-degree angle. Use a coping saw to make a secondary cut just inside the first miter cut.
Then, gently place your baseboard after applying caulk on the back of it. The final step is to nail it to the wall and caulk the top.
Signs of a water-damaged baseboard
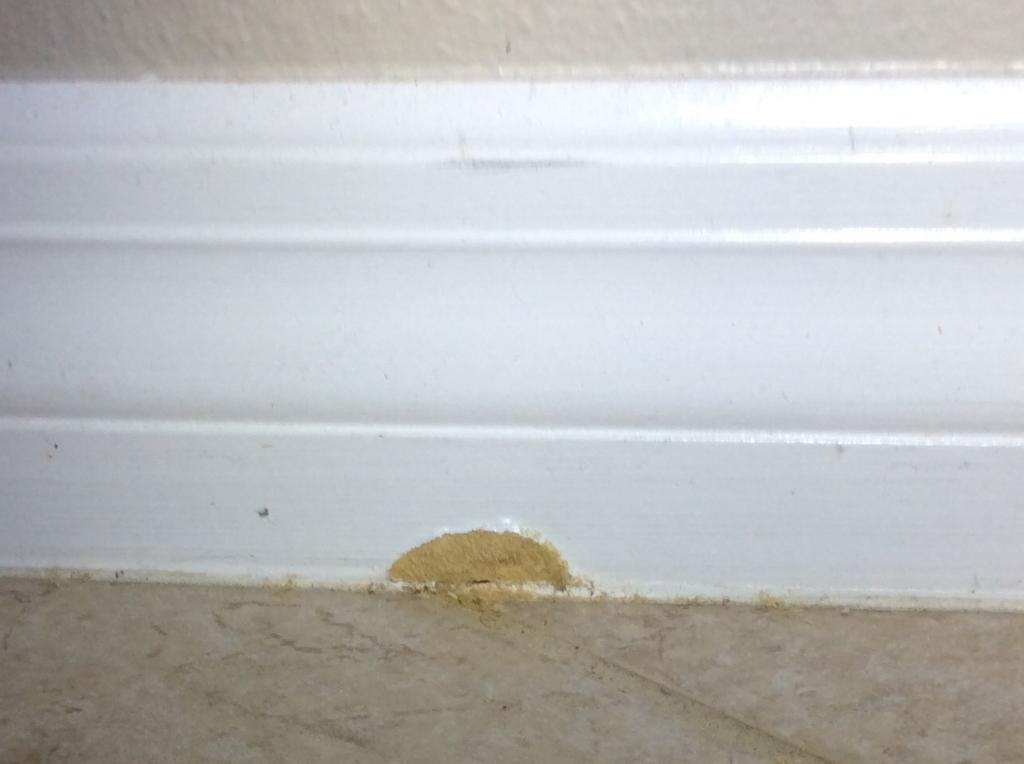
1. Swelling
The baseboard in your home has swollen because it absorbed water. If this happened, the wall would likely crumble or become warped. Water collecting behind your walls could be the source of swollen baseboards.
2. Peeling
Interior wall dampness is the root cause of peeling. Since water can easily penetrate peeling walls, this is a sure sign of water damage.
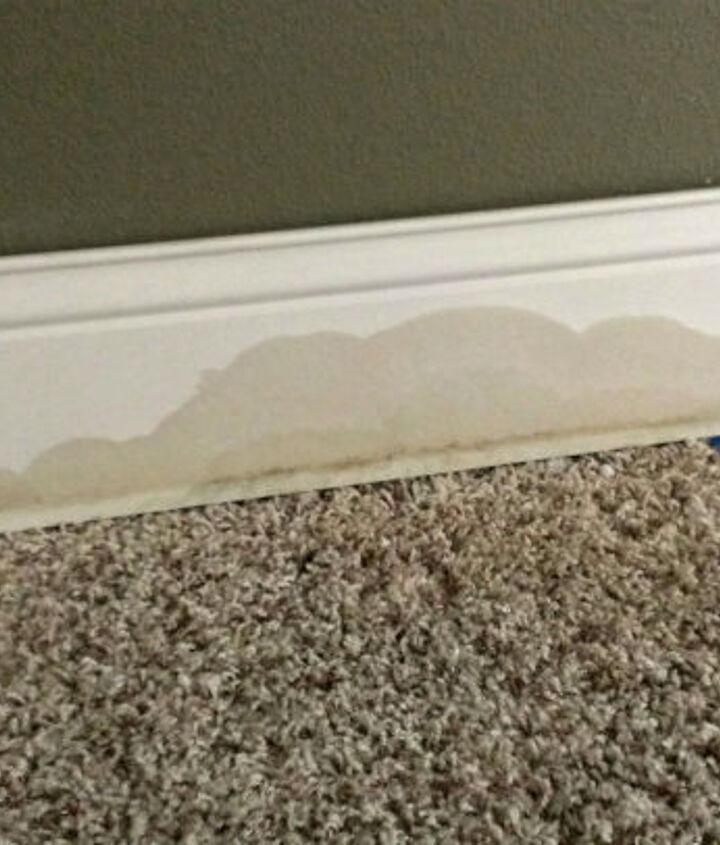
3. Stains
Discoloration is the result of water damage that allows mold to thrive. Water stains on your walls that grow in size over time indicate the need for professional attention. This is due to the fact that a large discrepancy indicates a persistent leak.
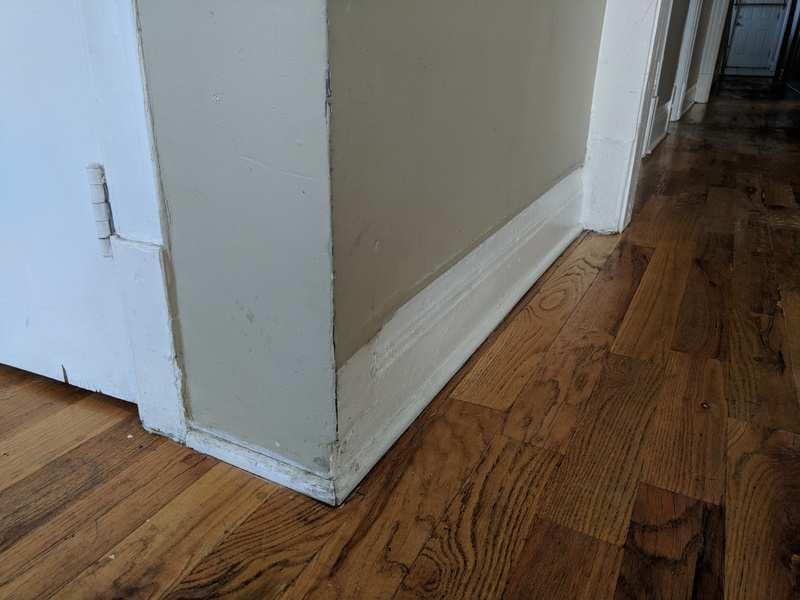
4. Warped walls
Xem thêm : How To Pull Apart Water Damaged Cardboard? Complete Guide
The wall itself was damaged because of water seeping in through the baseboard. In the worst case scenario, this could cause your walls to buckle, which would force your boards to move out of their usual placement. Water damage is a serious problem that necessitates the inspection and advice of a water damage restoration professional.
What happens if you don’t fix water damage on baseboards?
There are potential dangers if you simply replace the boards without addressing the underlying issue.
Structural damage
First, by doing nothing to stop the water, you’re hastening the deterioration of your house’s foundation. It’s possible that this could cause damage to your home’s structure.
The value of your home may drop, but structural damage also poses a safety risk. Because most homeowner’s policies only cover incidental water damage, this could increase the total cost to restore the home.
Talk to your insurance carrier and legal counsel to learn more about your options.
Mold growth
Wet places are breeding grounds for mold and mildew. Their rapid reproduction makes them a major problem in any size home. Your home’s structural integrity would be compromised as a result.
In addition, mold can irritate the respiratory system, particularly the nose and throat. In some cases, it may even trigger asthma attacks.
Water Damaged Floor Repair Cost
These are ballpark figures for repairing water-damaged flooring. You will find that the cost of floor repairs is higher than that of new flooring. Hardwood floors, tiles, and polished concrete are just a few examples of flooring types where it may be financially beneficial to have repairs done. In particular, synthetic flooring can trap moisture beneath it and rot the subfloor and floor joists, so replacing water-damaged vinyl, laminate, engineered wood, or carpet flooring is likely to be a better long-term investment.
Hardwood Floor Water Damage Repair Cost
Costs range from $8 to $30 per square foot to fix water damage on floors, depending on the type of wood used. Hardwood floor repairs can be just as costly as new installations, but they are less disruptive and can be spread out over time if necessary.
Money-Saving Tips for Fixing Water Damaged Floors
One way to save cash is to replace rather than repair water-damaged flooring. The cost of fixing a floor made of vinyl or laminate is usually not worth it. That’s especially true if water damage has spread across a sizable portion of the floor in more than one spot.
Removing the damaged flooring material on your own is a simple approach to save money when restoring water damage to the floor. There are two effects of removing matter. For starters, it could improve airflow, leading to quicker moisture evaporation. Along with the water damage, you can check to see if anything urgently requires attention under the flooring. Another benefit is that you won’t have to pay to have the water-damaged flooring removed by a professional.
If you choose this route, remove the afflicted flooring carefully so as not to damage the adjacent flooring, subfloor, or joists.
You might potentially save a lot of money by repairing the floor and replacing the necessary components on your own. Having the work done by a professional, however, will usually result in a more seamless repair. This applies to both the aesthetic (color) and the practical (fit, preventing cracks and gaps) aspects of cohesion. In order to discover the best price for floor repair, it is important to get many quotes from professionals.
Hardwood Floor Water Damage Repair Tips
Hardwood flooring can be saved from total destruction in the event of water damage if immediate action is taken. The following are some recommendations for fixing various problems with hardwood floors, such as warping, stains, spots, cupping, and so on.
When the underside of your hardwood floorboards retains more moisture than the surface, you have cupping. The result is a cupped shape formed by the board as it curls upward. This will become permanent if nothing is done, however cupping can be prevented and treated. Do not wet-mop the floor or otherwise add more moisture to the surface. Second, a dehumidifier can be used to reduce the moisture level in the air. Third, if you have a crawl space under the floor and are concerned about the severity of the damage, you can remove a floorboard from each end of the room, set up a fan within, and turn it on to circulate air and speed up the drying process.
In fact, several “folk” approaches exist for eliminating stains. We’ll focus on just two, though. Get the water up off the hardwood floor as soon as possible if it has just spilled or hasn’t been there for long. Use a dry cloth to buff it out. Using a blow dryer on the lowest setting, you can carefully remove any remaining moisture if you notice a mark or are anxious that the water has soaked in. Causing a water stain to transform into a heat mark requires extreme caution. Use a suitable polish to go over the area if necessary.
Commercial wood bleach may be able to remove the moisture stain if it has penetrated deep into the wood. Taking off the finish is the first step before applying wood bleach with a brush to the stain. After 4 hours, dilute the bleach with vinegar to neutralize it. Stop working there and let the area dry. You can give it another go if the stain persists. The wood, after being refinished, should appear as good as new, given enough time and practice.
Xem thêm : How To Patch Water Damaged Ceiling Tape Joint? Things You Should Know
The infiltration of water from above or below causes warping or buckling. It’s possible that a light soaking, followed by the placement of something heavy on top and the passage of a day or two could repair a small warp. If it doesn’t work, you could try sanding the warp out with a lot of pressure. It’s important to remember, too, that this will reduce the thickness of the floorboard. However, if the original source of moisture remains unresolved, neither of these will be effective.
FAQs
How do you cover water stains on baseboards?
Place a thick, clean towel over the soleplate of a hot iron. Hold the iron over the towel-covered water spot on the baseboard for about 5 seconds. Take away the iron. Put some furniture polish on a rag and buff the baseboard until it shines like new. To remove water stains, try using a homemade polish.
What does water damage on baseboard look like?
Discoloration that’s plain to see When the baseboards are white, the stains from water damage are more noticeable. No matter how carefully you try to avoid having the water touch the baseboard, it will still end up discolored. The surface above your baseboard, if exposed to water, may also get discolored.
How do you repair water damaged wood trim?
Using a metal putty knife or similar scraper, remove any loose or damaged wood from the surface. Take off any flaking paint or splintering wood that you find. Danny Lipford recommends using a paintable wood filler and a putty knife to patch tiny holes in structurally solid wood. Don’t rush the drying process; take your time.
Can water damaged MDF be repaired?
Baseboard consisting of medium-density fiberboard is best replaced when it is damaged by water. If the damage is little enough, though, you can try fixing it. If the MDF hasn’t cracked or separated too badly, the bumps can be smoothed down with some sandpaper.
How do you restore baseboards?
If your baseboards have seen better days and are showing signs of wear and tear, refinishing the trim is the best way to get it looking like new again. First, clean the baseboards. In the second stage, sand the trim. Third, sweep up the sawdust. Fourth, tighten any loose nails. The fifth step is to use wood putty. Sixth, stain the wood. The seventh stage is to use a polyurethane coating.
How do you restore old baseboards?
How to Fix and Renew Damaged Trim The first order of business is obviously a good cleaning. Taking off the previous paint spots in Photo 1. Damaged parts should be scraped and sanded in Step 2. Image 2: Clean up the deteriorated parts. Third, roughen the surface and patch any holes you find. Fourth, cover up any blemishes with a coat of stain. In the fifth step, you’ll put on the new coating.
What happens if baseboards get wet?
Wet baseboards are a sign that water has seeped into the wall through the paper backing, and a lack of green coloring on the wall indicates that the rock itself may be soaked. And, as a matter of fact, wet baseboards will almost always cause damage to the floor, sometimes even seeping down the walls and into the subfloors below.
What causes wet baseboards?
When the material used for baseboards absorbs water, it expands. It’s possible for it to get distorted or detach from the wall. Fiberboard and wood are the two most prevalent materials for baseboards. Due to its composition, fiberboard absorbs more moisture than wood baseboards. It is essentially compressed sawdust and resin.
Why are my baseboards warped?
Deformation of the Wooden Subfloor or Wall Trim Due to the contraction of the spirally organized wood fibers, warping occurs when wood flooring or baseboards absorb water. Floors and baseboards that have changed color or texture may be hiding water damage.
What can I spray on water damaged wood?
Bleach solutions are the most popular alternative, but there are also some DIY recipes you may try. Before beginning water damage restoration, lightly spray and wash down the area to ensure no mold spores remain.
How do you repair white laminate cabinets?
Squeeze a tiny amount of waterproof adhesive between the substrate and the laminate and peel away. Place the laminate over the glued area and cover it with a thick layer of masking tape. Tie this around the hinges of the other door and lock it.
Can you sand down MDF?
After the MDF is primed, sand it. Apply light pressure with your fine-grit sandpaper when sanding primer. The final product ought to feel smooth as silk. Use a clean rag to remove sanding dust. After sanding, the primer’s color may fade a bit, but it should still be clearly discernible.
Can water damaged particle board be repaired?
Particleboard can be fixed after getting wet, unless the damage is severe. Paint or waterproofing material should be applied to particleboard that will be exposed to water.
Can you repair MDF?
It has a smooth, polished surface that readily receives paint at a fraction of the cost of solid wood. The top layer of MDF is papery and easily damaged by knives and other sharp implements before it is painted. Wood putty works just as well on damaged MDF as it does on wood.
Can you sand baseboards?
You should sand the baseboards using long, sweeping motions in the direction of the wood grain. To smooth up the flat spots in the baseboard, wrap a flat sanding block with medium-grit sandpaper. For preliminary sanding, grits between 60 and 100 work well. Use fine sandpaper (120–180 grit) to finish the surface so that it is satin smooth.
Is DAP wood filler waterproof?
This product is not waterproof, despite what the label claims.
Conclusion
In spite of the challenge, we believe you successfully completed all eight phases of repairing water-damaged baseboard. Keep up with regular home maintenance so you won’t have to start from scratch.
Nguồn: https://spasifikmag.com
Danh mục: Damaged


