The walls of your camper have been damaged by rain, and you don’t know how to fix it. Yes? If so, we’ve got all the information you’ll need to get to the bottom of it in this article.
What Is A Camper Wall?
For the most part, campers have three walls: a front and back outer skin, a middle layer of insulation, and an inside wall. For the outside of the camper, fiberglass, composites, or aluminum are frequently used.
Bạn đang xem: How To Fix A Water Damaged Camper Wall? 3 Easy To Follow Steps For You!
The most well-known name in aluminum-clad travel trailers is Airstream. Most other campers have fiberglass or composite exterior walls.
After that, a layer of insulation is placed between the interior and outside walls of your camper. RVs are often insulated with a combination of fiberglass, spray foam, or rigid foam.
Fiberglass is the most common type of insulation found in campers. In addition, “R-Values” can be used to measure the camper’s insulation.
What Causes Water Damage in an RV?
Several factors contribute to water damage. It’s possible for water to get into your RV in a number of ways, but here are the most common:
- The internal plumbing in your kitchen or bathroom may be leaking water if you don’t perform regular maintenance on it.
- We had this happen to us, which is why we had to remove our toilet and install a Thetford Portable Toilet!
- Water damage might occur if your RV is not properly stored.
- Warped wood can be caused by excessive moisture and high humidity.
- Many different aspects of your RV might be damaged by leaving it parked in a flooded location.
Owners of RVs should be able to tell if their vehicle has been damaged by water and have the tools to make basic repairs. Consistent maintenance should help you avoid more serious issues that might necessitate the services of a professional.
How to Check for Water Damage in Your RV
Even if you keep your RV in storage or are full-timing, you should check for symptoms of water damage and see if anything needs to be repaired or replaced before you buy a secondhand RV. You’ll need to pay special attention to the following “trouble areas”:
- Verify the integrity of each and every one of the seals. To find any soft or moist places, run your fingers across the seals of every door and window. Cracks and flaking can occur in older sealants. Re-sealing these locations is necessary if you see any of these warning indications.
- Open all of the drawers and cabinets. It is possible to smell water damage even if you cannot see mold development, which is a sure sign of water damage.
- The wood cabinets and the ceiling should be checked for any discolouration. If water damage is evident, the paint around windows and doors will turn a different color.
- Verify the exterior of the building. This could be a hint of a leak if you notice any warped areas or bubbles in the paint.
- Check the underside of the carpets to see if they are glued down. A water leak is evident if it’s cold or damp. Check the glued carpets for any cold or moist patches with your fingers.
- Water damage can cause metal parts to corrode and molded parts to come loose.
- Look for rusty spots on windows and doors.
- Test for weak or soft points on the RV’s roof and ceiling with a stick. (*Leaks in the roof are a severe issue. Even a minor leak might lead to the entire roof needing to be replaced if left ignored. An RV roof replacement can run into the hundreds of dollars, so don’t skimp here.)
RV Water Damage Repair Costs
The cost of fixing water damage in an RV varies greatly depending on the severity of the damage and whether or not the repairs can be done by the owner. When dealing with water damage, you may encounter the following scenarios:
- Just a few applications of sealant are all that is needed to fix a minor window leak. This modification should cost no more than $20. Keeping water leaks at bay, we use Gorilla Clear caulking on our windows. Investing $20 now will save you a lot of money in the long run.
- Dehumidifiers are an excellent purchase if you’ve been parking your RV in an area with flooding or high humidity. They range in price from $30 to more than $100 and will keep your RV dry.
- In rare circumstances, a malfunctioning refrigerator may be to blame. You can typically fix a fridge problem on a budget if you’re handy with tools and have the know-how, but RV fridges are notoriously expensive to replace if you’re not: The price ranges from $200 to more than $1,000.
- If the problem is with your toilet, a new one is an inexpensive and simple solution. The typical price is about $130, but it can go as high as $1,000. With a few common hand tools, most RVers can simply swap out the more typical $130 toilets. If you can address this problem yourself, you’ll save a lot of money in the long run, just like with everything else in an RV.
- Depending on the type of RV floor you have, and whether or not you can fix it yourself, repair costs can vary greatly. Because of its durability and low cost, laminate flooring is extremely popular. Laminate can be purchased for as little as $15 per sheet! Vinyl flooring, on the other hand, is inexpensive and self-adhesive, making it a breeze to install. Vinyl flooring can be purchased for as little as $12 per square foot.
What Are Different Types Of RV Interior Wall Materials?
The internal walls of your RV can be constructed from a variety of materials, each with its own set of advantages and disadvantages.
1. Compound or composite plywood
Several thin wood sheets are pressed together to form plywood. Interior walls made of plywood are increasingly typical in more expensive campers. Remove all wallpaper, veneer, or paint from plywood inside walls before making any color changes.
Here are the advantages and disadvantages of the composite plywood:
PROS
Plywood has a high degree of tensile strength. It’s quite difficult to shatter or bend, and it’s highly rare that you’ll accidently punch a hole in it. The plywood walls of a secondhand RV can be readily painted or covered with wallpaper of your choice if you don’t like the color.
CONS
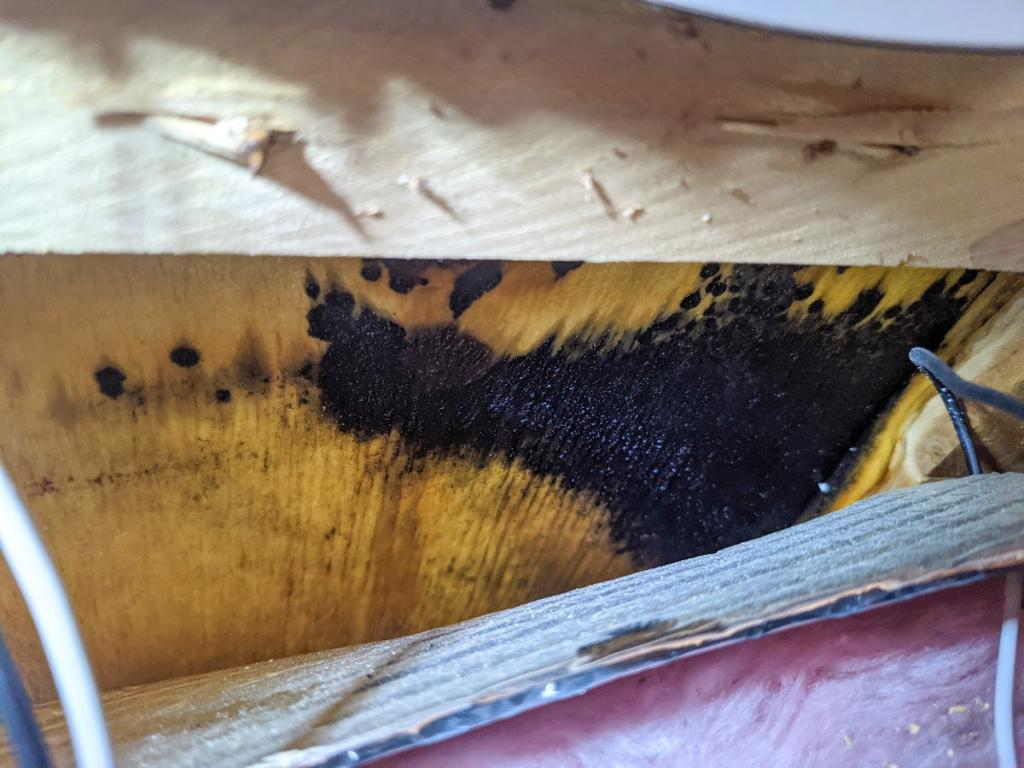
The plywood used in RVs is susceptible to water damage, and this is a common issue. Plywood walls become extremely brittle very rapidly if there is a leak in the roof or another hole in the wall that allows water to fall.
Xem thêm : How To Clean Water Damaged Concrete Masonry Unit Walls? Step by Step Instructions
There is a reasonable chance that mold will grow in your RV’s plywood walls if you have a significant water leak inside. By rapidly detecting and repairing water leaks, you can avoid this issue.
2. MDF (Medium Density Fiberboard)
RV interior walls are often made of MDF. Wood veneer is layered between two sheets of sawdust, which has been cemented together.
The following are some of the advantages and disadvantages of MDF:
PROS
For a low price, MDF can be used to replace the inner walls of your RV. Keeping the weight of your RV down is essential if you’re traveling by automobile.
An easy-to-cut MDF form for RV interior walls means that it is a flexible material. Additionally, it’s adaptable in that it may be painted over, decorated with wallpaper, and hung with family photos.
CONS
MDF’s lifespan is shorter than that of other RV wall materials. Because it’s built of glued sawdust, the entire wall is vulnerable to deterioration over time.
3. Vinyl
In recent years, vinyl has come a long way and is now a cost-effective option for RV interior wall coverings. Unlike other plastics, vinyl has the ability to tolerate a lot of abuse. For RV interior walls, it’s a popular choice because it’s lightweight and easy to put up.
PROS
It’s a bargain. A large sheet of vinyl for the interior walls of your RV can be purchased at a reasonable price. You’ve already saved money if your RV’s inside walls are composed of vinyl!
CONS
Vinyl is the least long-lasting material for RV interior walls. After around two years, vinyl starts to show symptoms of wear. However, because it is so cheap, you can usually replace it multiple times before paying what other RV interior wall materials would cost.
How To Fix A Water Damaged Camper Wall
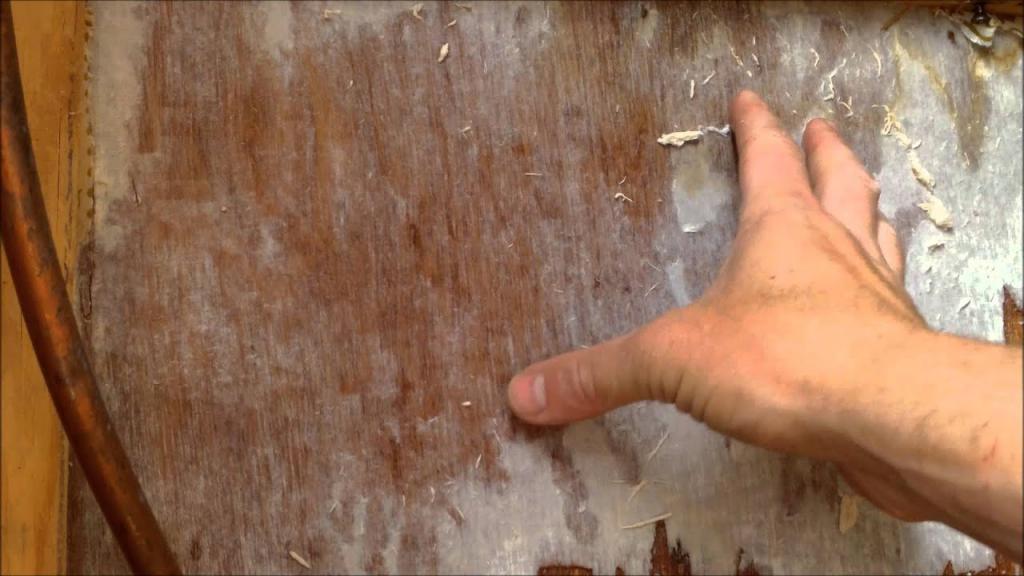
Locate the source of water damage to the wall of your camper first. Be sure to get rid of any mould and dirt before you start cleaning. When scanning the camper’s wall, it can help you find other damages.
Remove the damaged part after it has been assessed in Step 2. Consider hiring a professional for the task if it is too much for you on your own.
Take a look at the ground. Replace any damaged pieces by pressing your hands on them to make a visual representation. If the water damaged camper wall has reached this point, it’s time to replace the window seals.
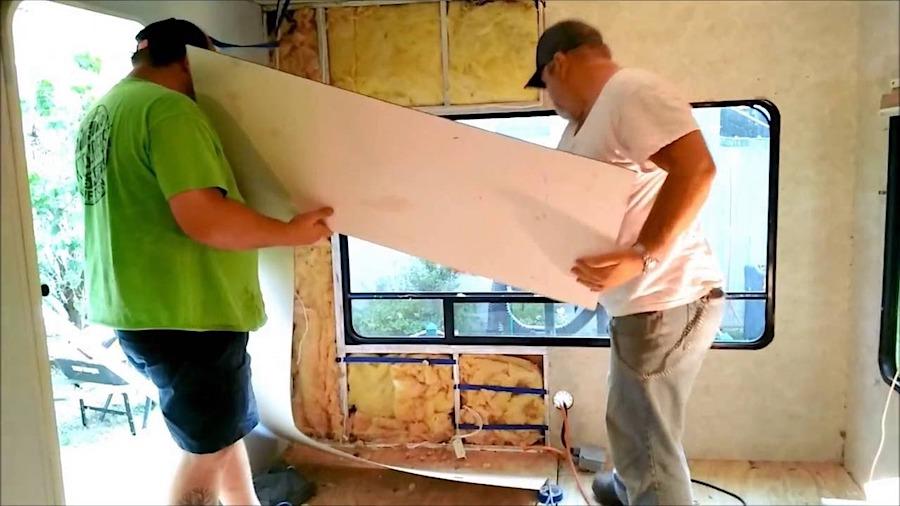
Removing the old wallpaper and installing a new one is the third step once the camper wall has dried completely and been thoroughly inspected and repaired.
FAQs
Will water damage total a camper?
Non-accidental damage to your RV is covered by comprehensive RV insurance. A comprehensive insurance policy will pay for things like fire, hail, and water damage.
How do you fix a water damaged RV floor?
Six Steps to Replace Rotting Wood Flooring in a Travel Trailer The full scope of the harm must be discovered. Remove the portions that have been damaged to the point that they are unsafe. Allow ample time for the wood framing to dry. Apply a mold-killing product. The wood should be coated with a diluted epoxy resin to protect it from the elements. Incorporate wood into the structure or replace it.
How do you fix a water damaged vintage camper?
Xem thêm : How To Replace Water Damaged Door Frame? Easy Step-by-step Guide
I believe our home has been flooded. Are there going to be a lot of hours spent on this project? Start with a screwdriver test. Peel back the sections that have been damaged. Step 3: Apply a sealant to the seams and around the screws of the structure. Remove the previous framework and then reframe the content. Make Sure Your Lights Work. In step six, insulate. Install new paneling and trim in the seventh phase. It’s time to get creative with the paint.
How do I find a water leak in my travel trailer?
Some of the first indicators of a possible water leak in your RV or travel trailer include water stains and damaged lamination. Damage to the walls, floors, slide-outs, and other mechanicals may result if left unchecked.
Does insurance cover mold in camper?
Sadly, RV insurance typically excludes mold from the vehicle’s interior. Damage to your RV and personal goods within the vehicle can be covered by RV insurance depending on the additional coverage you purchase. When it comes to mold and comparable issues like rust and dry rot, most RV insurance policies don’t cover these issues.
How do you know if your RV has water damage?
Damage from water is frequently obvious to the naked eye or ear. If the RV has a musty smell or is damp to the touch, this is a red flag. Inspect the wood surrounding skylights and air conditioners on the roof for mineral stains or water stains caused by mineral deposits. In addition, go around the RV or trailer and push in on all of the sides from top to bottom.
Will insurance cover a leaking camper roof?
Your new RV roof may be covered by your insurance policy. The radius of the roof is frequently torn off in collisions of this nature. A tree branch falling on the roof would cause this kind of damage. The roof, substrate, and any damaged fixtures on the roof are all covered by insurance in the event of a storm or collision damage.
How do you repair an outside wall on an RV?
A GUIDE TO TRAVEL TRAILER WALL REPAIR Step 1: Remove the Siding. Step 2: Evaluate the Damage. As a starting point, use the existing wall. Step 4: Get to work if you have to rebuild the entire wall. Finish the framed wall by affixing your interior paneling. Make sure you know exactly where your new wall is going before you begin the process of building it.
What are travel trailer walls made of?
Plywood, medium density fiberboard (MDF), or vinyl are the most common building materials used to construct RV walls.
How do you dry wet wood in an RV?
Drying the floor of an RV Use a dehumidifier to keep things dry. An RV dehumidifier can help dry the floor by removing excess moisture. Use a fan to circulate air in the RV. Ventilation is critical. To dry the underbelly, turn on a blower. Make use of absorbents such as a wet vacuum cleaner.
How do you remodel the inside of a camper?
Tips for an inexpensive RV renovation include painting, painting, and painting some more. Remove the wallpaper edging by peeling it off. Re-arrange the room’s decor. Add a kitchen backsplash. Curtains can take the place of the valances. Renovate the countertops. Decorate.
Why is my camper leaking water underneath?
Punctures in the roof, loose siding, and weak seams are the most typical entry points for water in an RV. Driving under low-hanging branches or impact from an accident may have revealed the location of the hole in your RV.
Why do campers leak?
When RV roofs are damaged or exposed to extreme weather, they often leak. In order to prevent problems from worsening, an RV’s roof must be inspected and maintained on a regular basis. An RV’s greatest foe is water.
How do I stop my RV from leaking?
In order to “re-seal” your RV and avoid leaks, you must remove windows, doors, trim, and other components. Keeping an eye on your rig will help keep moisture at bay. There are many ways to seal windows and doors, but the most common method is to simply apply an even bead of silicone to the surface.
How much damage does it take to total a travel trailer?
What on earth is going on here? Repair or total loss is possible after receiving a repair quotation. The RV is considered a total loss if the estimate is at least 75% of the purchase price.
What does insurance on a camper cover?
Vandalism, theft, malfunctioning objects, fire, storms, floods, and other natural disasters are all included in this category. In the event of an accident with an uninsured or underinsured motorist, this RV coverage will assist you and your passengers get the compensation they deserve.
Does RV cover freeze damage?
It’s true that storm damage, including wind and hail, is usually covered by insurance policies. Some insurance policies may also allow you to exclude hail coverage from your policy. If your RV was damaged by hail and you accepted a monetary settlement instead of repairing it, this is a regular occurrence. There will be no coverage for hail damage after that point.
What kills mold in a camper?
A gallon pail of hot water, a cup of powdered dishwashing detergent, and a dash of bleach can be used to make a DIY mold and mildew remover. To remove mold, mildew, and scum without damaging the paint or fiberglass, simply use this product. Make sure to rinse and wax before you’re done.
What causes a soft floor in a camper?
Water damage is the most common cause of a soft place on the floor of your RV. Some of the time, it’s your sinks and showers that are leaking, but it might also be rain. Soft areas can develop in front of sinks and showers as a result of water runoff.
Conclusion
A water-damaged camper wall can be repaired using the information provided in this article. If you can’t fix it on your own, you should seek the help of a professional.
Nguồn: https://spasifikmag.com
Danh mục: Damaged


