You’ve come to the right site if you’re wondering how to replace a portion of water-damaged wall. When it rains, heats up or whatever else happens outside, our walls are there to protect us. If these walls are vulnerable to damage, we must also take precautions.
- How Much To Repair Water Damaged Foundation? Comprehensive Guide
- How Long Will Water Damaged RV Floor Be Wet? The Secret To Keeping Your RV Floors Clean
- How Much To Repair Water Damaged Soffit? Perfect Information For You!
- How To Dry Water Damaged Floor Under Cabinet? Easy Step-by-step Guide
- How To Fix Water Damage Undersink? Complete Step-by-Step Guide
For today’s discussion, we’ll be using this guide to assist you replace a water-damaged wall. To learn more, keep reading!
Bạn đang xem: How To Replace Section Of Water Damaged Wall? Comprehensive Guide
Why You Need to Know the Signs of Water Damage in Walls
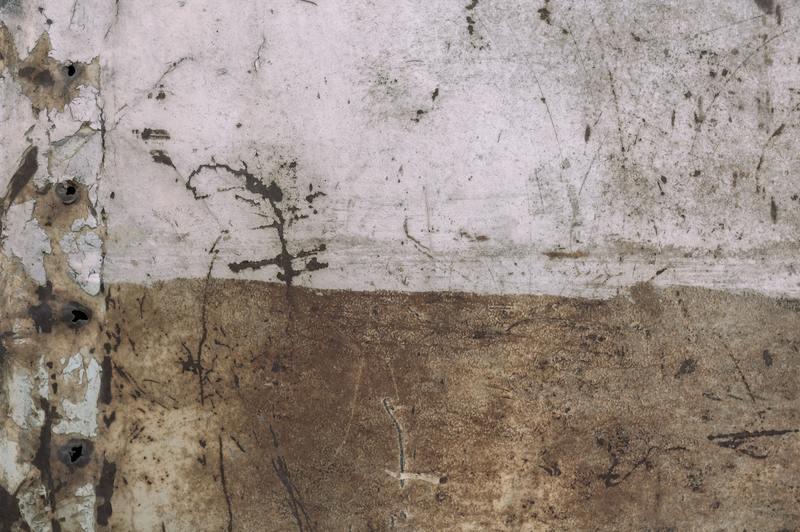
Sign 1: Wet or Dark Spots
Water with dark streaks on the walls indicates that it has recently been drank. When it appears on the wall, it can take up to 24 hours. This indicates an ancient stain if it appears yellow, brown, white, or chalky. Even yet, the issue has not been resolved. Seeing inside the wall is impossible since it is opaque.
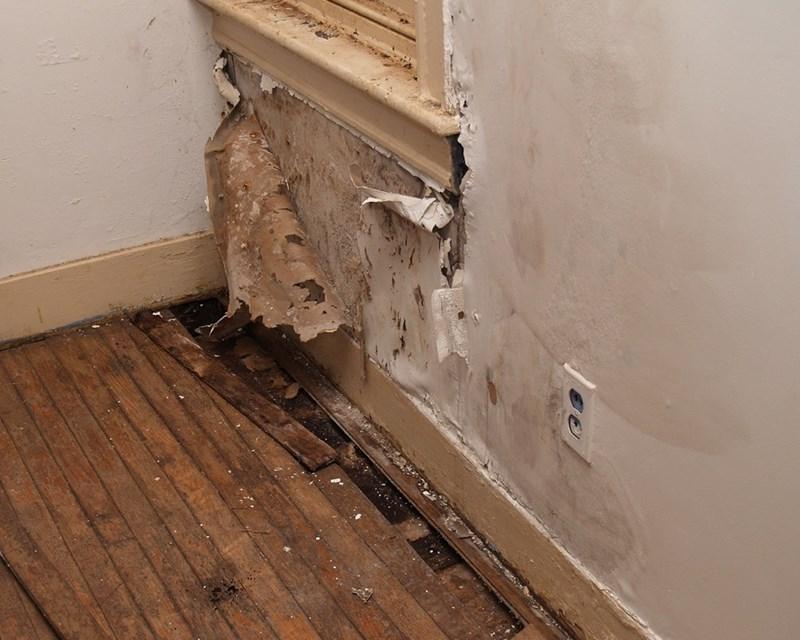
Sign 2: Cracking, Bubbling, and Flaking
Detecting water damage in the walls early on can save you a lot of money in the long run if you know what to look for. Wet areas tend to spread, resulting in the formation of cracks in the wall. There will be bubbles or flaking in the paint or drywall if the wall is damp on the inside.
Sign 3: Sounds of Running Water
Water damage in walls can be heard as well as seen. Look up and down the wall to see if you can pick up the sound of water. The sound of dripping or rushing water is what you’re looking for.
Sign 4: Increase in Your Water Bill
It is possible that you have a leak in your water supply if you notice a rise in your water bill even though nothing unusual has occurred in your daily routine. With your water meter, you can begin.
You’ll first take note of the water meter’s reading.
Then, for about three hours, turn it off. When the three hours are up, turn it back on and write down the result. If you see an increase in the number, you should investigate any of the above-mentioned symptoms to see if there is a leak in your indoor plumbing. If you are still unable to locate any, seek the assistance of a specialist.
Sign 5: Musty or Damp Smell is a Sign of Water Damage in Walls
This has a distinct and powerful aroma. Near where the water leak is, the smell of wet paper or cardboard can be very strong. You may also be able to detect the odor of water before it appears on the wall. Because you cannot see what’s going on behind the wall, this does not rule out a leak.
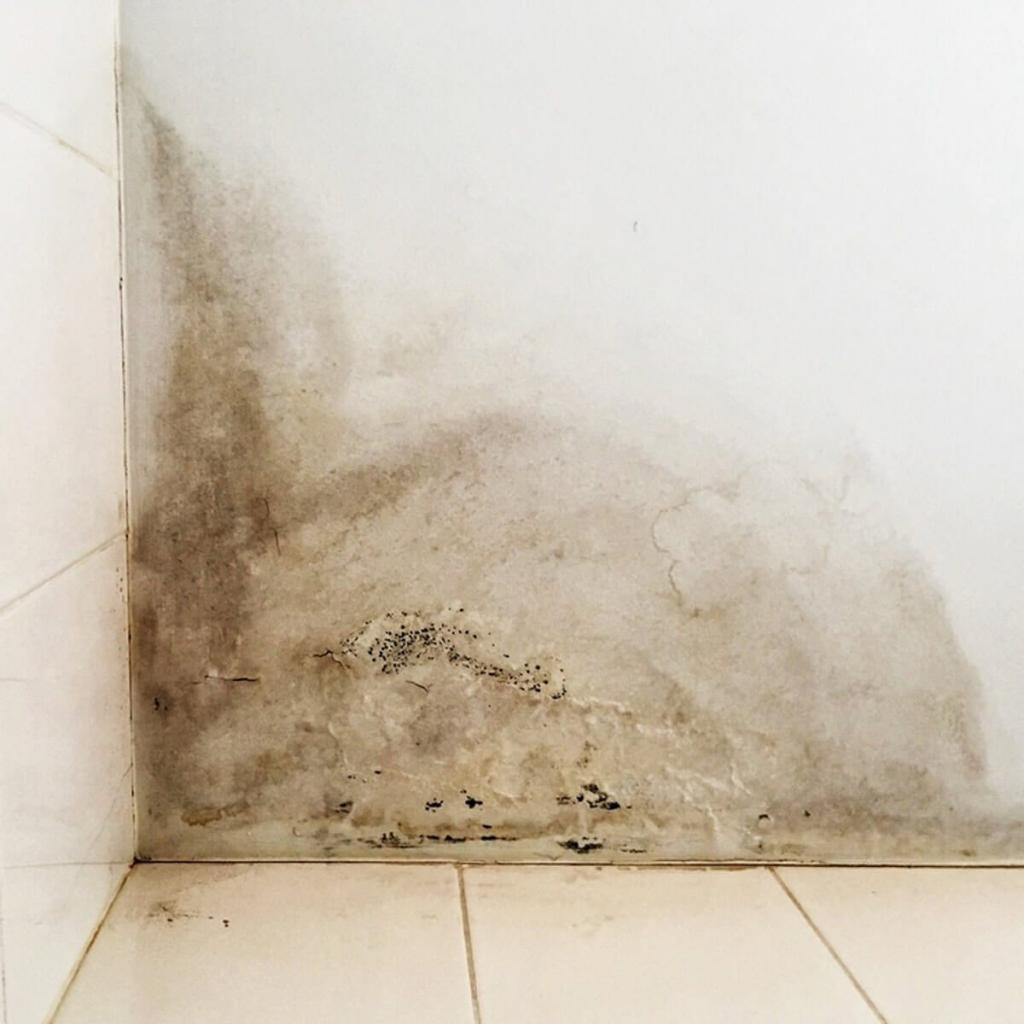
Sign 6: Mold or Mildew
Mold can begin to grow in a home if there are small brown or black spots. The source of the problem can be discovered by a professional inspection. It is possible to clean a 3×3 space. A professional is needed for any region larger than that.
Sign 7: When it Rains, Water Comes into the Home
As it rains, it appears that water is dripping from the window. What’s causing this? If it’s raining inside, it could be coming in through the window, the siding, or even the roof runoff.
How Do You Replace A Section Of A Water Damaged Wall?
Replace your water damaged wall using one of three options. Depending on whether your wall is made of plaster, concrete, or drywall, your options may be different.
A dry and clean wall is a prerequisite for any repair work. Molds should be cleaned up if they are present. The source of the water damage must also be repaired.
Method #1. When your wall is plaster
Underneath the plaster is a layer of lath. When the material begins to absorb water, it expands, causing the wall to crack and eventually break down completely. You may find this circumstance difficult to handle, but here are some possible solutions!
To begin, remove flaking paint and water-damaged plaster and lath from walls and ceilings.
Prepare a fresh set of laths and screw them to the originals that are in good condition. 3.
This is the third and last step: Drill holes around the perimeter of the portion of plaster that has been damaged.
Xem thêm : How Much To Repair Water Damaged Foundation? Comprehensive Guide
Adhesives are injected into the perforations to secure the loose plaster. Remove excess glue with a wet cloth.
Staple plaster to the lath by using washers and screws. You don’t need to put washers in every single hole for this stage; just a couple are sufficient.
Afterwards, wait for the first coat of plaster to set before moving on. The washers should be removed, and the surface should be buffed.
Apply a second coat, wait for it to dry, and then smooth the top down.
Using a moist sponge, lightly scuff the joint compound off the surface.
Method #2. When you have concrete walls
Concrete walls are more robust and solid than those made of wood. Despite this, water’s high pressure might still cause damage to the system. Following these methods will help you replace water-damaged concrete walls:
Step 1: Determine the extent of the damage.
Removing the damaged concrete wall is the next step.
Drill holes for metal strips and insert metal reinforcements.
Secure the bar in place by applying an appropriate adhesive. Wait for it to dry out.
Concrete glue must be sprayed on old concrete to make the new one adhere to it.
Pour the new concrete mixture into the molds. Alternatively, you can use forms to guarantee that the concrete does not extend beyond the designated area. If you like, you may seal the concrete with a sealant.
Method #3. When replacing drywalls
Lastly, drywall is also a popular material for interior walls that can also face water damages. If the wreckage becomes worse, it is better to replace it immediately. To do that, here are the steps!
Finally, drywall is a common choice for interior walls, where it may be damaged by moisture. It’s advisable to replace it right away if the wreckage worsens. Step-by-step instructions are below!
Step #2: Using a keyhole saw, cut the hole into a rectangle or square shape.
This is the third step. Measure the hole and cut new drywall to fit.
You’ll need to secure the hole in the wall with a piece of wood in order to screw in the drywall later.
Xem thêm : How Much To Replace Water Damaged Ceiling? The Best Guide!
Make sure that the drywall is screwed into the wood correctly. Make sure it’s secure and doesn’t budge.
In order to complete step #6, you must first apply the drywall glue and then adhere the drywall tape on top of it. Make sure to press it firmly so that it’s smooth and adheres to the surface.
Step #7. Repeat step #6 until the damaged drywall has been repaired completely.
Using sandpaper, smooth down the surface and add joint compound.
Hiring A Professional To Replace A Section Of Your Water Damaged Wall
You can always employ an expert if you’re not confident enough to do the job yourself. There are a few things to keep in mind when hiring a handyman, however.
You should engage a certified and insured handyman for several reasons, the most important of which is to avoid being held liable for their work. While working on a project at your house, an uninsured person has the right to sue you for any damages they suffer.
In order to know what to do in the event of an accident, you should inquire about their insurance coverage before utilizing one of their services. You must use caution during this process, as it is always preferable to have complete confidence in the safety of everyone involved.
7 Simple Steps to Waterproofing Exterior Walls
Only if rains or moisture causes the walls to become damp should external walls be waterproofed. It’s critical to eliminate any further sources of structural moisture before looking at waterproofing options. Anything from a leaking pipe to a fracture in your brickwork could be at blame. It is possible to apply a waterproofer after correcting the problem.
It’s not just that clogged gutters can spill over the edge and down your walls, but they can also hold rainfall, which can lead to rotted wood, leaks, and mold if the roof’s wood or fascia boards aren’t properly cleaned. Cleaning your gutters twice a year can prevent all of this and keep your home safe and healthy.
A cement-like compound, concrete waterproofing coating binds permanently to concrete and masonry and can be applied to any surface, even painted ones.
sealant containing silicate, which interacts with masonry and concrete elements to generate a waterproofing covering; this sealant can only be used on walls that have not been sealed or painted;
Acrylic wall paint is quite similar to waterproofing paint, although waterproofing performance is much superior. If you want your walls to be able to breathe and expel moisture, you need a breathable formulation. Surfaces that have already been painted can be painted over using this substance.
Plastering can improve the looks of a room, strengthen the walls, and protect them from moisture infiltration. Even though most exterior plasters contain waterproofing properties, a waterproofing admixture can be added to the plaster to address water infiltration issues and prevent reoccurrence.
Regardless of the substance you choose to waterproof outside walls using, you must first prepare your walls for waterproofing. If you want to fix a crack or a hole, you’ll need a competent filler for the job. Before grinding, let the filler to dry thoroughly. As soon as the walls are dry, use a sanding block to smooth out any rough or uneven spots. Then use a water-based cleaner to remove any dust from the surface.
Using a roller or a brush, apply the waterproofer to the surface. Allow the first coat to dry completely before adding a second. Use a sufficient amount of product to form an impenetrable barrier.
A water-tightness test is critical to determining the performance of exterior wall waterproofing systems. Spray water on the wall for around two hours, maintaining an angle of 30 degrees, to conduct this test. Only a moisture meter can determine whether or not your house passes the inspection. Your home’s value will rise as a result of protecting your outside walls from water damage.
Conclusion
As robust as our walls may be, they are still vulnerable to water infiltration. The greatest technique to safeguard a wall from water damage is to know how to replace a part of it. It is possible to have well-built walls that will constantly make us feel safe if we follow the appropriate procedure!
Nguồn: https://spasifikmag.com
Danh mục: Damaged


