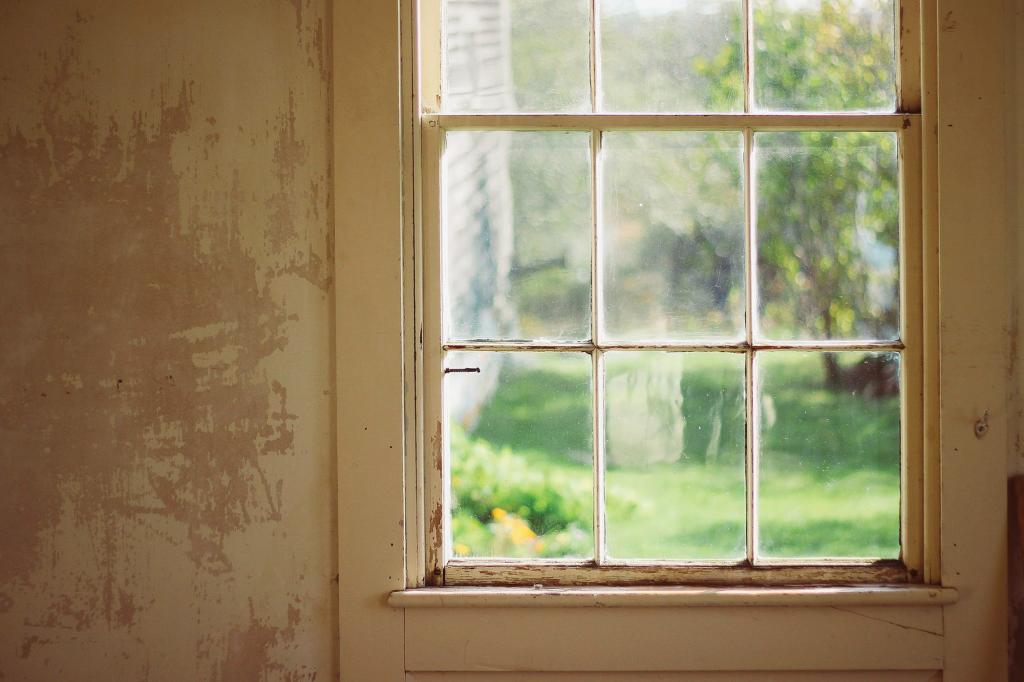
The sashes of several homes are broken due to water damage. No one likes having to deal with a stained window sill and sash, but nobody wants to have to replace their windows either.
- Who Can Repair Water Damaged Ceiling? Comprehensive Guide
- How Long To Dry OSB Board In Water Damaged Wall? Things You Need To Know
- How To Replace Water Damaged Underlayment? Easy Step-by-step Guide
- How To Repair Water Damaged Cabinet Doors? Complete Step-by-Step Guide
- How To Fix Water Damaged Cupboard? Troubleshooting and Repair Guide
Regrettably, repairing broken windows is a do-it-yourself project that can be accomplished with a few inexpensive tools and a little bit of time. Take a look at this guide, and in less than two hours you’ll know how to repair your window sill.
Bạn đang xem: How To Refinish Water Damaged Window Sash? Special Tips and Tricks
In addition to fixing your windows, I’ll also give you tips on how to keep them in good shape and prevent future damage.
Index
- The Necessary Tools and Materials
- In what ways can a window sash become broken?
- Marks on the Glass
- Information That Can Be Printed Out as Directions
- Preventing Water Damage to Window Sashes
Tools and Materials Needed
Repairing window sills and sashes doesn’t require a lot of specialized tools. The equipment I suggest using for a simple and fast task is detailed below.
Multi-Tool with Sanding Head
A multi-versatility tool’s makes it perfect for a wide variety of DIY projects around the house. For this task, I turn to my multi-tool, namely the sanding attachment. Sanding damaged areas in the tight corners of window sills and sashes can be done quickly with a triangle sanding pad.
You may also get the similar result by using a detail sander. On the other hand, the multi-tool offers a great deal more flexibility for the price.
Other Tools and Materials
- Shop-Vac
- Paper Napkins for Tables
- Painter’s tape
- Minwax’s colorfast, waterproof polyurethane.
- White Bristle 1.5″ Stain Brush
- Hardener by Minwax for Wood
- Minwax Wood Filler is a product that can be used to repair holes in wood.
- Wood stain remover with oxalic acid.
What Causes Window Sash Damage
Window sill damage is almost always caused by water vapor condensing on or on the wooden frame of the window.
Most cases of wood rot on window sills can be traced back to water vapor condensing on or around the window’s wooden frame.
Damage to your window sash occurs over time as a result of water collecting on the glass and seeping through the sash. Initially, it eats away at the clear finish on the window sill before moving on to the wood itself.
How To Repair Water Damaged Windows
Asses The Damage To The Window Sash and Sill
Water seeping through the sash after accumulating on the glass is a slow but sure way to damage your window sash. It begins by dissolving the window sill’s glass coating, and then it moves on to the wood underneath.
Do you think the clear finish on the wood is wearing down to the point that it is cracking and flaking off? Since this is the most elementary of your required repairs, you’re in luck.
The wood you have might have suffered some black water damage, but it’s still good to use. This can and should be fixed before the wood rots.
Would you say the wood is soft and pliable? Your wood has started to rot, and you need to decide if the entire window is beyond repair or if you can salvage even a small section.
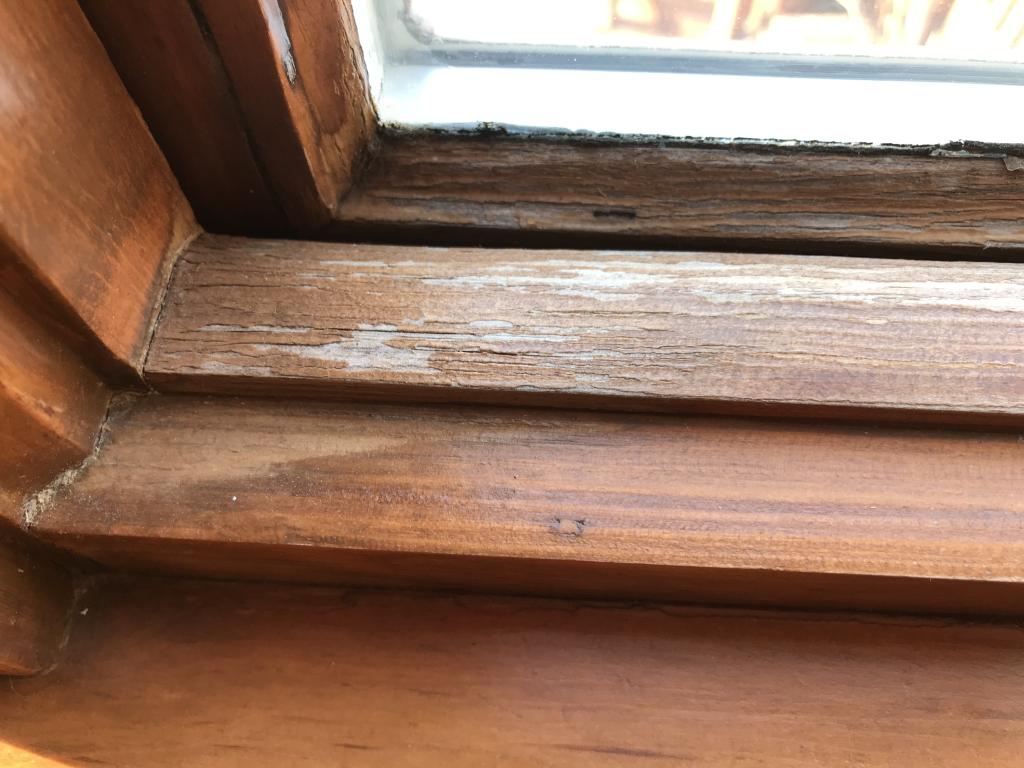
The accompanying picture shows the sash and sill of a window that has been damaged due to water and failed clear coat. Although damaged, the wood is still strong and may be fixed.
Prep Your Work Area
Before beginning a painting project, make sure your workspace is set up to contain your messes and protect the surrounding areas.
I cover the window with a drop cloth and tape it shut to keep the sanding dust out. For when I sand the window sash, I don’t want the glass to get scratched.
Sand Away Water Damaged Wood
I’ll start by sanding down the damaged spots.
However, the amount of sanding required is entirely proportional to the severity of the window’s damage.
It is possible to simply sand down the current clear coat if there is no decay or blackening in the wood and the damage is limited to the clear coat itself.
If you want to get rid of the black water damage on your windows, you should use a sanding tool to get rid of the clear layer first. Sash and sill edges may be reshaped, but that’s a price worth paying for security. Maintain a level that can be easily handled.
Stabilize, Remove, or Replace Rotten Wood
If you notice that the wood around your windows is soft or deteriorating, you have a couple of options.
Moldy wood must be restored to its original condition. For projects like this, my go-to product is Minwax Wood Hardener (and a lot on exteriors as well). Although it has its flaws, this approach is often quite effective.
By entering the rotting wood and employing a resin, Minwax Wood Hardener binds and hardens the wood fibers. Additionally, it prevents further flooding in the area.
Routing wood can also be replaced by excavating it and then filling the hole with wood filler. This is a common practice for painters since it allows them to work on smaller spaces. It is important to sand, stain, and seal wood filler after it has dried to avoid it from rehydrating and becoming unsightly. The use of wood filler in this way should be approached with caution because it will never stain the same color as the surrounding wood and will therefore stand out quite obviously.
The alternative is to discard the wood and begin again. In other words, save this for when you have a lot on your plate. The subject matter of this piece will not include that.
Bleach Out The Water Stains
After the clear coating has been sanded down, the water stains that remain can be cleaned with oxalic acid.
An efficient technique for removing light surface stains from wood is to use oxalic acid. The process is laborious and requires multiple layers of paint.
Oxalic acid can be used to reduce the visibility of black stains on wood, or even remove them entirely.
Xem thêm : How To Replace Water Damaged Brick Sheathing? Step-By-Step Guide
Beat in the oxalic acid and protect your skin from the acid by using gloves and a face mask.
Once the bleaching procedure is complete, the affected areas can be neutralized using baking soda. Baking soda and water will neutralize the acid in the wood.
Sand and Clean Any Remaining Discoloration
After you’ve fixed any broken planks and bleached away any water stains, it’s time to do your final Sanding.
I use fine sandpaper (between 150 and 180 grit) to get rid of any residual dark stain or clear coat that was missed during the initial cleaning.
After you’re done sanding, you should clean the windows and get ready to apply stain.
A shop vac can be used to collect as much dust as possible before a damp cloth is used to wipe up what’s left.
Re-Stain The Window Sill
Simply applying the stain and waiting for it to cure can restore the original color to your window sills and sashes, provided you have the stain in the original color on hand.
Recreate the original stain color or find new furniture in the same shade.
You can achieve a perfect match if you take a piece of trim from your house and bring it to the paint store. One of my favorite things to do is to sneak into a storage closet and steal a hidden piece of trim. The trim can be reattached using liquid nails or another adhesive.
Customization in the form of a one-of-a-kind match is another viable option. My massive stain kit has a wide variety of colours and dyes that I use frequently. That is to say, it probably won’t help everyone.
Also, if you look at the color from afar, you have more room to experiment with it. A golden oak stain is a common choice for homes. Try it out if you think your skin tone might be close to one of these common stains.
Clear Coat The Window Sill & Sash
The final step in mending rotten window sills is applying a clear finish.
Use a paintbrush to apply two coats of Minwax Clear Polyurethane clear coat, ensuring that the sheen is consistent with the prior finish (usually stain or semi-gloss). In between coats of finish, sand with 220 grit sandpaper to get the smoothest surface possible.
Can Insurance Cover These Repairs?
An individual’s way of living can have an impact on the relative humidity at home. In the event of catastrophic storms, these repairs may be covered by some insurance policies.
There are many factors to think about when purchasing home insurance. Date of damage discovery and window age are two such factors.
Average Cost of Window Repair Near Me
The price of window repair can vary from one state to the next depending on the specific legislation in effect. Below are average costs for window repair in nine different states to give you a sense of regional pricing trends.
- There is a difference of $374 in Ohio.
- This is the cost of living in California: $264.
- Costs Texans $243
- The cost in Massachusetts is $393.
- The sum of $512 is Florida’s portion.
- In Michigan, the annual cost of living is $689.
- The cost of living in Manhattan is $466 per month.
- The Show-Me State of Missouri Will Receive $919.
- To the State of Nevada:
Window Repair Cost Breakdown
Common window repairs typically cost about
- Most homeowners will only have to pay between $70 and $120 to repair a broken thermal seal on their windows, which still costs $245.
- If you need to replace a broken window pane, expect to pay between $40 and $100.
- The average cost to replace a window pane is between $200 and $500, but more extensive damage can easily push that up to $2,000.
- Labor to replace a broken window can cost anywhere from $30 to $50 per hour. The price of labor may increase if you need specialized glass, unusual hardware, or have a particularly high number of hard-to-reach windows fixed.
- Depending on the size of the window and the degree of complexity of the repair, you may expect to pay anywhere from $200 to $600 on average.
- To replace a window latch, you may expect to pay between $75 and $200.
Single-Pane, Double-Pane, or Three-Pane: How Much Should I Budget for the Repair?
There is a wide variety of window styles available. Different varieties have different numbers of glass windows and panels. Here’s a breakdown of costs for some of the most common types of window repair.
Repairs for windows with a single pane of glass start at $200. This includes:
- Fixed, framed windows
- Windows in the hoppers
- Windows that open inwards and outwards are called casements.
- skylights windows
Prices range from $200 to $400 for repairing a single double-pane window.
- Windows with a single pane
- Double-paned, hanging windows
- Snap! A window slams
It is estimated that the cost to repair a three-pane window ranges from $600 to $1,100.
- bay and sash windows
- a rounded glass panel
Five-pane or bow windows may cost between $1,250 and $3,250 to fix.
What Factors Influence the Cost to Repair a Window?
There are several variables that can affect how much it will cost to fix your windows.
Material
Windows made of vinyl or aluminum might be easier to fix on the cheap in the long run than wooden ones.
Window Size
Costs will increase proportionally with the number of glass panels in a building. Due to the increased labor and materials required, fixing larger windows will take more time and money.
Extent of Damage
Extreme damage could be very costly. Damage to the window sill, the seal between the panes, or rotting wood around the window will be difficult and expensive to fix.
Window Accessibility
It will be more expensive to fix the exterior window on the second floor if it requires a ladder or access to the roof.
Hardware Availability
The replacement of obsolete or hard-to-find window hardware will be more of a hassle. Repairing specialist hardware will be more expensive and time-consuming if you have to go to the trouble of locating and installing a replacement part.
On-Site vs. Off-Site
Xem thêm : Who Can Repair Water Damaged Ceiling? Comprehensive Guide
Instead of letting the repairman try to fix the window on the spot, you should remove the sash and bring it to the shop.
Emergency Window Repair
A simple window repair should cost you between $30 and $50 per hour. A handyman or glass installer’s time is worth at least two to three times that amount, but you should set aside more money for an emergency situation.
How Much Does It Cost to Repair the Window Myself?
It’s a good idea to fix a window yourself if you think you’re handy. Fixing something yourself can save you money if you have the time and resources to do it.
It’s not always easy to fix a broken window. In order to save money on labor costs, a homeowner may choose to perform such simple and affordable window repairs as mending a cracked or broken window, replacing the screen ($25), or sealing the glass ($10).
Experts should be called in to remove cloudiness from windows and replace broken panes.
Tips for Maintaining Home Windows
Clean Your Windows Monthly
Cleaning your windows once a month may do wonders for their appearance and functionality. Unfortunately, many homeowners take their windows for granted and don’t give them a thorough cleaning on a regular basis.
The first place to look is at the windows that typically have some sort of covering over them. Unfortunately, these are the windows that usually go unmaintained because of their out-of-sight location.
You can start checking for dirt and fingerprints on these windows once they are exposed to sunlight. When washing a window, focus on those areas that are the dirtiest.
Look out for any signs of glass damage, too. A broken or cracked pane of glass in a window should be replaced as soon as feasible. Instead of having to repair or replace the complete window, usually only the insulated glass unit needs to be fixed.
You should clean your windows more frequently if they are frequently touched by many people. Depending on how many people live in your home, you might be able to put off washing them for a couple of months. Don’t forget this if you happen to call a highway or a heavily industrialized area home. You may need to wash the glass more often if this is the case.
Cleaning Guide
There are several methods for washing windows, each with its own advantages and disadvantages. Spread a thin layer of window cleaner across the glass to clean it. Then, wipe it down well with a chamois cloth or other soft, lint-free cloth. Clean extremely dirty windows with a mixture of warm water and a few drops of mild to moderate dishwashing detergent.
When applying this to your window, pay special attention to the stubborn spots. After scrubbing, rinse with clean water and flush to remove any trace of the cleaning solution. A squeegee is what you need for this.
Window Frames
It’s easy to forget about the importance of keeping your window sills and frames clean. As it is the most visible surface, most people’s thoughts immediately turn to cleaning the glass. Keep in mind that the window frame is what keeps the glass in place and creates a seal when the window is closed.
Remove any dust, grime, or cobwebs that may have settled on the window sill by vacuuming the area surrounding it. Use a sponge and some multipurpose cleaner to remove any debris or dirt from the framing materials.
Use a gentle brush to remove dust and bird poop from the exterior frame. Further, if your windows are double-hung, use the tilt-in feature to make cleaning a breeze.
Opening and Closing
Inconveniences associated with opening and closing windows are a frequent source of stress for many people. Debris accumulates along the track and becomes wedged in the track’s cracks and crevices, making cleanup impossible. Cleaning the track on a regular basis with a little detergent and a vacuum will keep this annoyance at bay.
Painting Your Windows
In order to preserve your older wood window frames in good shape and to protect them from damage, you should paint them once a year. The paint on your window frame may eventually break and peel if it is constantly exposed to the sun. Because of this, you need to keep an eye out for signs of damage so you can take appropriate action.
Paints made from water-based ingredients are the best choice for painting windows because they peel less easily. Paint made from an acrylic-urethane hybrid will last longer. Any tiny spaces between the window and the frame material can be caulked. Fill any gaps larger than a quarter of an inch with expanding foam to insulate and seal off the area.
Weatherstripping
A rubber seal or a thin fur-like rope can prevent water from getting in or out. It’s important to investigate any signs of injury to this, as it could lead to complications. This may help a little with energy efficiency if installed along the inside of the window frame. This can be used as a stopgap measure if the windows are always drafty. Because of this, the annoying cold air will be kept out all winter long.
Proper Lubrication
Lubricating your windows will make them easier to operate. Lubricating the tracks and rollers in your windows once every few months will keep them operating smoothly. You shouldn’t use silicone spray to lubricate moving parts since it can damage the glass. Instead, you could inquire about manufacturer suggestions. Keeping the moving parts well oiled can keep them from sticking and ensure smooth operation. If the tracks and rollers are well-greased, you can verify the lock’s sealing.
Consider Adding Window Tinting
This could be useful for blocking the sun if your windows are older. There is no Low-E glass layer on older windows, which reflects UV radiation.
This could be useful for blocking the sun from entering your home if you have older windows. Older windows do not have a coating of Low-E glass that shields the home from harmful ultraviolet rays.
FAQs
Is it better to repair or replace windows?
When dealing with issues like shattered glass, jammed windows, or small leaks, it is more cost-effective to replace only the damaged area of a window rather than the entire window. But if the frames are deteriorating or there are major leaks, it’s better to invest in new windows.
How long does it take to repair a window?
One to three hours is typically how long it takes for a specialist to fix broken windows. It may take more time, though, if the window frames need to be replaced or if the window is particularly large.
How can I save money on window repairs?
While saving money by repairing rather than replacing windows is one option, it’s not the only game in town.
- Many window repairs can be done at once for a bulk price. The price tag on fixing each window goes down dramatically when a pro is on hand.
- You should seek the advice of an expert whenever possible.
- It’s important to regularly clean the windows. Window replacement is a great way to save money and reduce your carbon footprint. It will save you money and cut down on your energy consumption over time.
- Never put off repairs, as the costs of ignoring them could quickly add up.
Conclusion
Weatherstripping is a common problem for property owners. As a result of their actions, mold begins to form on the inside of the glass. As with wooden lids, metal ones can rust.
In order to prevent water damage, check the window sash. Correct installation of insulation, sash stops, window covers, and epoxy for wood is essential.
You may now repair your own water-damaged window sash the next time it breaks.
Nguồn: https://spasifikmag.com
Danh mục: Damaged


