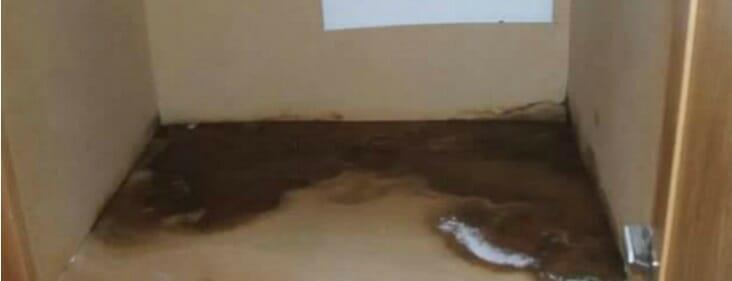
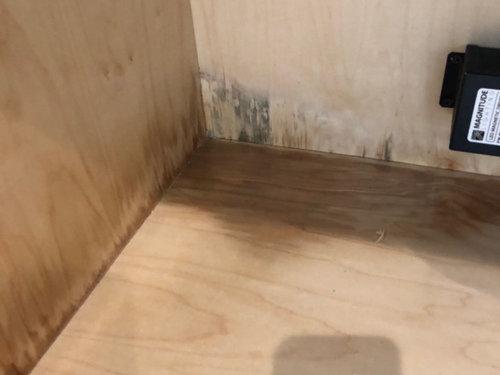
Kitchen cabinets that are located under the sink or that face the refrigerator are put under a lot of pressure, especially if they are made of cheaper materials like MDF or particle board. Cabinets may not look their best due to water damage caused by a combination of the water in the sink and the humidity in the air.
- How To Diagnose A Damaged Water Heater? Comprehensive Guide
- How To Fix Water Damaged Undersink Kitchen Cabinet? Complete Step-by-Step Guide
- How To Fix Water Damaged Laminate Cabinet Doors? A Step-by Step Learning Guide
- How To Replace Water Damaged Door Frame? Easy Step-by-step Guide
- How To Fix Water Damaged Plaster Ceiling? Easy Step-by-step Guide
Water damage to cabinets increases their propensity to expand, which can cause the paint to chip or the laminate to bubble and degrade the cabinets’ aesthetic. Depending on the severity of the water damage, you may find that the laminate surface of your cabinets is totally flaking off.
Bạn đang xem: How To Fix Water Damaged Cupboard? Troubleshooting and Repair Guide
Regardless of how much water damage your kitchen cabinets have sustained, you need to get them repaired as quickly as possible to avoid further damage. Even though wood has some natural resistance to water, the professionals at Kitchen Infinity know from experience that cabinets can be severely damaged by water.
In this post, we’ll take a look at the best ways to repair water damage to kitchen cabinets, as well as ways to prevent it from happening again.
Let’s get to work!
9 Steps For Repairing Kitchen Cabinets After Water Damage
These are the primary steps that can be taken with most cabinet door materials and styles. If your cabinets have been exposed to water, apply common sense to assess the damage and decide if they can be salvaged.
Following these nine steps, you may restore water damage to cabinets made of MDF, particle board, plywood, and other materials.
So, what can you do about water damage to wooden cabinets?
1. Prepare the cabinets for repair
Before you can begin, there are a few things you need to attend to.
You need to remove the cabinet door from its hinges and place it on a work surface which is safe and protected for tools/paint. Put drop cloths around it and store it in a shed or garage.
In order to stop water from getting inside the cabinet any further, you may need to take out the hinges, door knobs, and other hardware. You could find this procedure useful regardless of how bad the water damage is.
Make sure the doors are totally dry before you start working on them. They couldn’t have been hurt by water recently. Take them down a few days ahead of time in case you need to make repairs.
2. Use a shellac-based primer on the wood
Shellac-based primers are widely available and can be used to repair minor imperfections and damage on timber furniture like our cabinets.
Primers made with shellac are widely available and easy to use because they often come in spray bottles. Apply one or two applications of this substance to the broken portions of your cabinet door.
Primers made with shellac are compatible with any paint. It will even out the wood’s surface and provide you good paint adhesion.
3. Apply plastic wood filler if necessary
Water damage to your kitchen cabinets can be sealed and repaired with plastic wood filler. Take additional care to remove any dents or wrinkles from particle board cabinets if you don’t have MDF ones.
My preferred way for applying and smoothing out wood filler is with a small putty knife and a tube of plastic wood filler. It goes without saying that how much and where you put it will vary from one circumstance to the next.
Before moving forward, check that the surfaces of the cabinets are as level as possible.
4. Get sanding that cabinet door!
The time has come to start sanding!
Sandpaper is an essential part of any kitchen cabinet repair. Cabinets that have been damaged by water need to be sanded to restore the wood’s natural appearance and remove any bubbling or swelling.
My go-to grit for sandpaper is 120, but anything in that range should do the trick. While this step can be done by hand, I find that an electric sander works best for me.
If you’re going to use an electric sander, choose for a trusted name in the home improvement industry.
If you sand the cabinets too much, they won’t appear as good as new again immediately quickly. Be sure the surface is smoother and less damaged after sanding.
5. Repeat the previous steps if necessary
If your cabinet sustained significant water damage, you may need to repeat the aforementioned steps multiple times.
The level of the damage to the cabinet door will determine whether or not the primer, filler, and sanding process may be reused.
If you don’t know if something is right for you, ask a friend who is skilled in home improvement. Repetition of stages 2–4 is necessary until the wood is flat and smooth.
For now, forget about choosing a new stain and concentrate on getting the wood repaired.
6. Start painting your kitchen cabinet!
After the water damage to the cabinet door has been minimized and the surface has been smoothed off, painting can begin.
Apply a new coat of paint to the cabinet, but keep the same color scheme and paint brand as the first. In order to improve paint adhesion to wood, a shellac primer is applied first.
If you’re painting a huge cabinet door, you might find an airless paint roller the most convenient tool, and save your paintbrush for the finer touches. It’s also possible to use paintbrushes, albeit this method requires a higher skill level and may not be as appealing to certain people.
Only painting over the water damaged areas of the cabinet door will result in an uneven and patchy appearance.
Make sure you give the cabinet door as much time as it needs to dry after painting it, taking into account the type of paint you used. It’s important to give yourself plenty of time between coats when painting wood using oil-based paint.
7. Sand the painted cabinet doors down
Xem thêm : How To Clean Water Damaged Bare Wood? Step by Step Instructions
If you want to show how good you are with sandpaper, fix this.
After the paint has dry, sand it down again using finer grit paper. The goal here is not to alter the form of the wood, but rather to improve the look of the paint job. When you sand a cabinet door, you create tiny holes and grooves in the surface that help paint adhere better when you apply successive applications.
For this step in the repair process, I turn to sandpaper with a grain of 220.
You can re-sand the painted wood with either a manual sander or an electric sander. In this phase, hand sanding is preferable to power tools because of the paint’s sensitivity.
Please don’t be so critical!
8. Apply a final coat of paint and sand it down again
You can finish up the sanding using a fine 220 grit sheet of paper or something similar. The number of times you’ll need to perform this depends on the state of your cabinet door.
No visible symptoms of water damage or paint flaking should be present at this time. The door to the cabinet must look as though it were just put in. Repairs are coming to an end; we can see the finish line!
9. Apply a water-proofing varnish or seal
If you are serious about restoring the water damage to your kitchen cabinets and keeping it from happening again, I suggest putting a final topcoat or clear finish.
Waterproof sealants, clear coatings, and varnishes are all options for protecting wooden kitchen cabinets from moisture and wear. It’s crucial that you select one that works well with the wood and paint you plan to use.
Mind the clear coat’s finish, too. For instance, a flat matte paint finish calls for a clear coat that dries without a glossy appearance.
It’s also important to think about the final clear coat. If you’re going for a matte paint job, for instance, you need a clear coat that won’t dry looking shiny.
How Do I Protect My Kitchen Cabinets From Water?
Now that your kitchen cabinets have been repaired, you need take measures to prevent further damage. It’s better to prevent damage to your cabinets in the first place, rather than fix them over and over. There are five main strategies for achieving this goal:
Get them laminated
Kitchen cabinets made of laminate material are widely used. The use of a “laminate” on your wooden cabinets and frames will protect them from moisture and rot.
This lamination layer can be constructed from plastic or another similarly water-resistant material. Water may be prevented from penetrating laminated cabinet doors and reaching the wood core, but these doors are not watertight.
Although laminated cabinetry tends to be glossy, it can be painted to better suit the room’s aesthetic.
Use a water-proofing varnish, seal, or clear coat
You can use a variety of transparent coatings to make your kitchen cabinetry watertight. This procedure will protect your kitchen cabinets from water damage even if they are constructed of cheap wood.
Kitchen cabinet doors can be finished with a variety of watertight sealants, varnishes, and transparent coatings, from oil-based to water-based, depending on the wood and paint used.
It is important to remember that your new kitchen cabinet design’s finish must coordinate with the clear coat’s finish (glossy, matte, or satin).
Get a deeper style of sink
If water constantly drips down the cabinet doors, you may want to reconsider the layout of your kitchen.
Is it necessary, for instance, to build a sink that is deeper so that water doesn’t splash out? If water is leaking from around the edges of your sink, you may need to replace or repair the seal.
If you want to stop water from spilling in your sink in the first place, maybe you should consider a different design. When compared to the cost of prevention, the cost of remediation is obvious.
Try new countertop edges
The borders of your countertops can be modified as well. It’s possible that water damage to your cabinets could result from the shape of your countertop’s edges if you’re not careful.
Water spills are more prone to travel over the edges of bullnose countertops (counters with rounded corners) and into the cabinets below.
However, if your kitchen counters have beveled edges, any accidental spills will just roll to the floor rather than seeping into your cabinets.
If you don’t have any little children in the house, having countertops with square or beveled edges will assist prevent damage to your cabinets.
Get better ventilation or dehumidification
If, for instance, you find that the problems in your kitchen stem from excess moisture, you might want to upgrade your ventilation system. If you routinely boil large quantities of water, the steam your stove generates should be directed outside.
This isn’t really an area of advanced science.
You can open the windows to let in some fresh air and dry things out, but you might also want to think about investing in a kitchen extractor fan or a dehumidifier.
Spray-on Rubber Coating
If you spray on a rubber cabinet coating, your cabinets will be protected from water. Varnish spray coatings are designed to prevent water damage to your hardwood cabinets and are offered by a number of different manufacturers.
Spray coatings should be long-lasting and resistant to heat so that they don’t peel off even when the temperature in the room rises dramatically, as it often does in kitchens. The application process will be much simplified if you can find a product that cures (dries) rapidly.
Rubber mat under the sink cabinet
To protect against the high temperatures that can develop in a kitchen, you should use a spray coating that can withstand the heat for an extended period of time. Choose a material with a quick drying time to facilitate application (i.e. cures quickly).
They can withstand up to one gallon of water, ensuring that your cabinet remains dry.
Xtreme
The cabinet mats created by Xtreme, a business known for producing high-quality products, are worth considering if you’re concerned about water damage in your home. Protect your cabinets against leaks and spills with Xtreme mats, which can be made to fit any surface and hold up to a liter of water.
Xem thêm : What Does Water Damaged Insulation Smell Like? A Detailed Guide
Alternatives to Xtreme! among several alternatives for cabinet floor mats.
Peel-and-stick Vinyl Floor Tiles
It’s not always necessary to shell out a lot of cash to ensure that your home is protected from water damage. To prevent water damage to your under-sink cabinet, try using peel-and-stick vinyl floor tiles.
Building a watertight barrier for your cabinets couldn’t be easier than with these vinyl tiles, which can be easily cut to size and installed. Vinyl tiles for your base cabinets come in a wide range of colors and styles.
WeatherTech Sink Mat
If you’re looking for a high-quality floor mat to put under your sink, go no further than WeatherTech’s offering. While WeatherTech is most known for their automotive solutions, they do offer a few niche options for use with wood cabinetry.
Having a peek at them is a must.
Sink mats come in black and brown and may be trimmed to fit any size sink. In the event of a leaky cabinet, they can hold up to a gallon of water. If you want to protect your cabinet’s finish against drips, then you should get one of them.
Polyurethane Sealer
Don’t forget to give the edges and corners of the floor some attention while you’re putting down mats and other waterproofing measures. Water damage prevention systems are especially susceptible at their corners and edges. There is a potential for mold growth due to water seepage in this area.
That won’t be accepted in our storage space!
Applying a high-quality polyurethane sealer to the edges and corners of your cabinets can prevent water from leaking out. In the long term, whether it’s in the bathroom or under the sink, using liquid polyurethane can save you a lot of time and effort.
Fix pipe leaks early!
Did you know that if a leak in a pipe that just measures 1/8 inch goes undetected, it might waste as much as 250 gallons of water every day? If you are a landlord with picky tenants or a frequent traveler, you should check the plumbing at least once a year.
Be sure to fix any dripping or leaking pipes before it gets worse. The stability of your home depends on this.
If you have plumbing issues, you run the risk of weakening the foundations of your home, making it dangerous to live in. If you have any dripping pipes, you should call a plumber right away, and you should also think about scheduling routine plumbing system inspections.
It is preferable to have water-resistant floors so that, should the worst happen and the room flood, the water will just pool on top of the surfaces rather than being absorbed into the ground. The floors in your home need some sort of waterproofing in the bathrooms and kitchen.
The following are some of the alternatives available to homeowners interested in waterproof flooring:
Laminated wooden flooring
Laminate flooring, often called laminated wood flooring, is a type of wood flooring in which the wood is protected from moisture and dirt by a laminate covering.
Tiles
Tiles are frequently used in these areas since they don’t soak up water, last a long time, and require nothing in the way of upkeep. Tiled surfaces with grout lines are not recommended for a high-traffic area where there will be a lot of splashing because of the water absorption that can occur.
Linoleum
Flooring made of linoleum, a vinyl-like material that is waterproof, is commonly installed in rooms where flooding is a concern. Using just a tape measure and a standard installation method, you may trim this material to the exact dimensions you need for your floor.
Invest in a good backsplash
Where else would splattering oil and liquid go if there were no backsplashes in kitchens? Protecting the cabinets below your sink from water damage caused by splashes from the sink is as simple as keeping the water from reaching the wall.
Certainly, that’s not out of the question.
Water, oil, or food splashes on the wall may not seem like the biggest threat to your sink cabinet’s safety, but they can do serious harm if they penetrate the cabinet.
If you want a classic aesthetic that will last for years, subway tile is a great choice. This product might help you avoid costly repairs to your walls and cabinets caused by water splashes and leaks.
Sink cabinet plastic tray
A simple and aesthetically pleasing remedy to leaking pipes is to use a broad plastic tray with tall edges to cover your cabinet. When shopping for a plastic tray that will fit, keep a tape measure handy and think about any pipes that might be in the way.
It is quite inappropriate to make a purchase without first determining the correct size.
If you can find one the right size, this is a simple method to store your cleaning products in your sink cabinet while simultaneously collecting gallons of water. It may not work for all cabinets, but it is the least complicated method for achieving the desired outcome.
Leak & flood alarms
One of the best ways to prevent leaks and water damage is to install a leak alarm or flood alarm. One of the best-selling leak alarms is made by Zircon, and it employs a water sensor and a 90-decibel siren to alert homeowners of a leak.
The Zircon alarm will continue to sound for up to 72 hours if leakage is detected at the places, making it an excellent choice for folks who are frequently away from home.
Putting one of these alarms in your basement, storage shed, or garage is a great way to keep an eye on less-used parts of your property. Since you’re less likely to spend time in these areas, which are more vulnerable to flooding and dampness, the water can quickly spread throughout the remainder of your house.
Do you need to waterproof a kitchen?
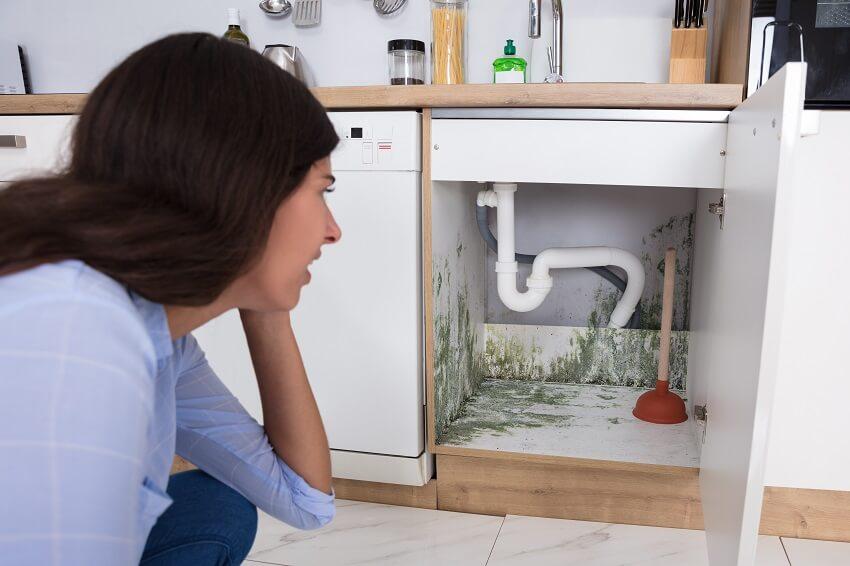
Waterproofing your kitchen is a great idea, particularly if you have cabinets and the cabinet under the sink is at risk of flooding. When the cabinet below the sink begins to leak, it is usually due to a problem with the line connecting the sink to the cabinet.
This cupboard has no defenses whatsoever!
If water comes into your cabinets, follow these 11 steps to prevent further damage and keep them looking nice. When it comes to flooding, a cabinet that has been waterproofed has a much better chance of surviving.
The Bottom Line
Fixing broken kitchen cupboards isn’t a picnic, but it’s not impossible either. Plan ahead of time, as the time it takes to repair damp cabinets will change based on the type of paint you use and the level of damage.
To protect your cabinets from water damage, I recommend installing deep sinks with good seals and counter edges that slope gently downward into the room. Whether you’re fixing an existing leak or trying to prevent future leaks, I hope you have great success in your endeavor.
Restoring the cabinets to their former grandeur requires taking your time and working in a safe setting.
Nguồn: https://spasifikmag.com
Danh mục: Damaged


