Removing everything from the base cabinet is the first step in learning how to fix a water-damaged base cabinet under the sink. It’s unproductive to try to restore these wet constructions while objects are inside because water is infamous for its damaging characteristics, especially on wooden structures at home.
- When To Replace Water Damaged Sheet Rock? Helpful Guide
- How To Clean Water Damaged Concrete Masonry Unit Walls? Step by Step Instructions
- How To Dry Water Damaged Floor Under Cabinet? Easy Step-by-step Guide
- How To Fix Water Damaged Lion Claw Table Feet? Complete Step-by-Step Guide
- How To Lighten Water Damaged Wood? Step by Step Instructions
Under the sink, we’ve provided repair instructions for a moist base cabinet. So you know what to look out for and what causes water damage to your base cabinets, we’ve also included moisture causes below. We also discussed how to waterproof your cabinets and how much it would cost to fix them if they were to become damaged.
Bạn đang xem: How To Repair Water Damaged Base Cabinet Under Sink? Troubleshooting and Repair Guide
What Is Kitchen Cabinets Water Damage?
Hardwood, plywood, wood veneer, particleboard, and MDF are all wood-based components that are commonly used to make kitchen cabinets. These are sturdy materials for kitchen cabinetry, but they are not water-resistant.
In most cases, preventing water damage is tough, especially when you don’t know that it’s already occurring until your cabinets have been soaking in water for several hours or days.
A leaking kitchen faucet or sink, water getting in from the outside, or a splash of water throughout the years are all possibilities for causing the damage.
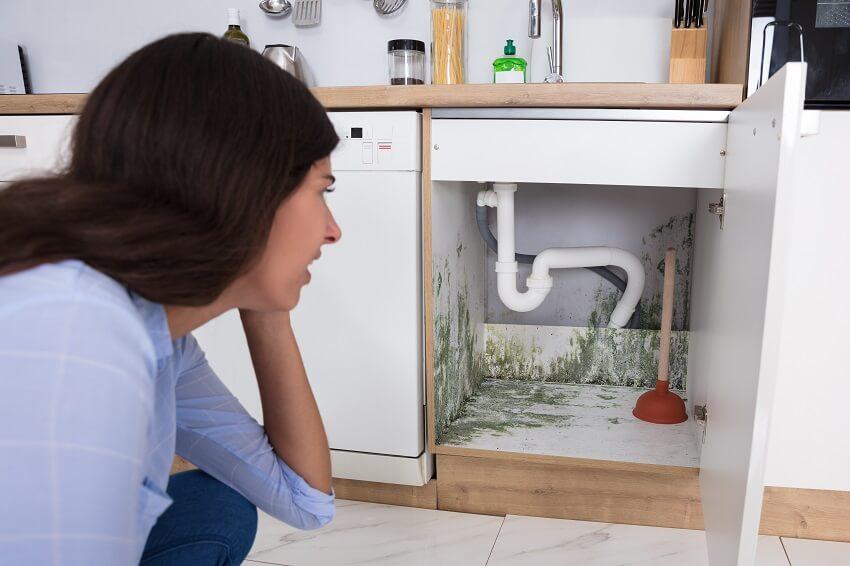
These elements have the potential to spread water damage throughout the kitchen. Mold and mildew thrive in a moist atmosphere, and they can spread swiftly through baseboards, flooring, and walls.
For plywood or medium-density fiberboard kitchen cabinets, delamination and warping can be severe enough to necessitate a complete cabinet overhaul.
Water damage to plywood kitchen cabinets can be detected by the loss of finish or a change in color.
The staining on the cabinet is caused by water resting on it for too long, which will eventually fade the wood’s polish and cause discoloration. As a result, the paint on wood kitchen cabinets can peel off.
Particle board kitchen cabinets, on the other hand, are particularly vulnerable to water damage. The first giveaway for telling if your medium-density fiberboard (MDF) cabinets have water seeping into them for a while is if they are swollen in some places.
As a result of water saturation and expansion, the MDF boards in your kitchen cabinets have become damaged, resulting in bubbles and paint damage. When water seeps into your cabinets, the laminate begins to peel away in large sections.
How Long Does It Take For Water Damage To Show?
Having an adequate supply of water in the kitchen is essential, but if it leaks and contaminates kitchen cupboards, it may be disastrous.
Overflowing sinks, dishwashers, broken refrigerator water lines, cooking steam, and frozen water pipes are the most common causes of water leaks. Within three weeks, you may notice signs of water damage.
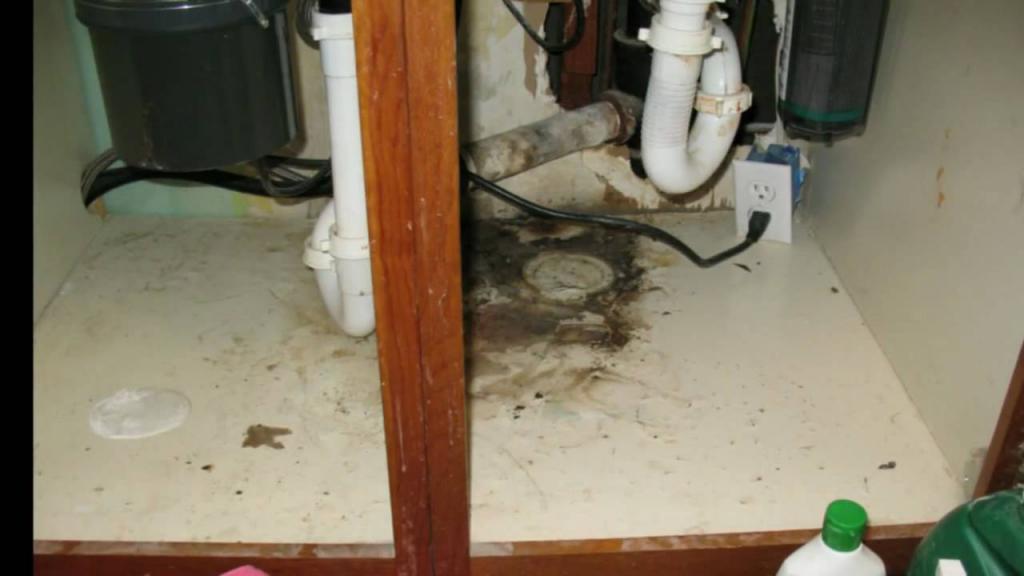
When water seeps into a kitchen cabinet, it’s most likely to appear in the lower portion of the cabinet, which is closer to the drain or water valves that leak.
The indicators of water damage may not be visible for up to five weeks if the leak is small due to long-term damage from a persistent leak or high humidity.
Repairing Your Water-Damaged Base Cabinet
Step #1. Remove content and moisture
Remove everything from your base cabinet first. The next step is to look for any pooling.
Remove any pooling by laying towels on top of it. The doors of your cabinet can be removed if your workspace is too tiny for your needs.
Step #2. Remove the base
Check for other damp places in the base cabinet after the moisture has been removed before removing any more of the base cabinet. Then, use a hammer to remove the damp base cabinet behind your sink.
Step #3. Build a frame
You’ll need to construct a frame for your floor after removing the cabinet’s foundation. You’ll need to figure out the dimensions of the area where you wish to place your board.
Then, take an old pallet of wood and set it on the floor of your sink. You should then set up a front and a back seat.
Xem thêm : How To Spackle Water Damaged Ceiling? Easy Step-by-step Guide
It may be necessary to stack on another piece of wood to get the height you want, if necessary. Afterwards, secure both on the ground.
Step #4. Measure and cut the cabinet floor
Trace the floor’s perimeter onto a piece of plywood, then cut it out. If your cabinet does not have a centerpiece, then simply insert the wood. You can cut the board in half if you have a centerpiece, and the break will be exactly in front of it.
Make sure the two sections of the room connect behind the centerpiece by measuring them. Insert the two pieces of wood into the cabinet after they’ve been measured.
Finally, use nails to secure them. To avoid making additional holes in your foundation, be sure to glue the floor down to the existing studs.
Causes of moisture on your kitchen cabinets
In a kitchen, water is essential. Whether it’s for cooking or cleaning, this is an essential item. However, if left for too long, especially if the structure is not watertight, it can cause significant damage.
Moisture buildup in your kitchen can be caused by a number of things, including:
- Faucets are leaking.
- Coolers are letting off steam.
- Dishwasher overflow
- Overflows
- Pipes that have burst
Your wooden structures might be protected from water damage if you take proper care of these.
How do you waterproof the cabinets under your sink?
It’s possible to safeguard your cabinets by avoiding these typical sources of excess moisture.
Seal the area around the sink
Scrape the old sealant from the sink’s edges to begin. The adhesive can be broken apart with Unibond Silicone Sealant Remover.
It’s time to get rid of the old sealant.
- Wipe off your work space with a moist cloth.
- Clean the area with an all-purpose cleanser and dry it with a cloth.
- Apply the sealant around the sink’s perimeter.
- Remove the excess glue from the surface by wiping it away.
The sealant should be dry before using the sink.
Seal the cabinets
A day before you want to seal your cabinets, thoroughly clean them. After they’ve been cleaned and allowed to dry, use a wood sealant to coat the inside of your cabinets.
Cover the cabinet on all sides and in the corners twice to prevent the wood’s corner joints from cracking. Allow the wood sealer to settle on the wood for 24 hours, then cover the exterior.
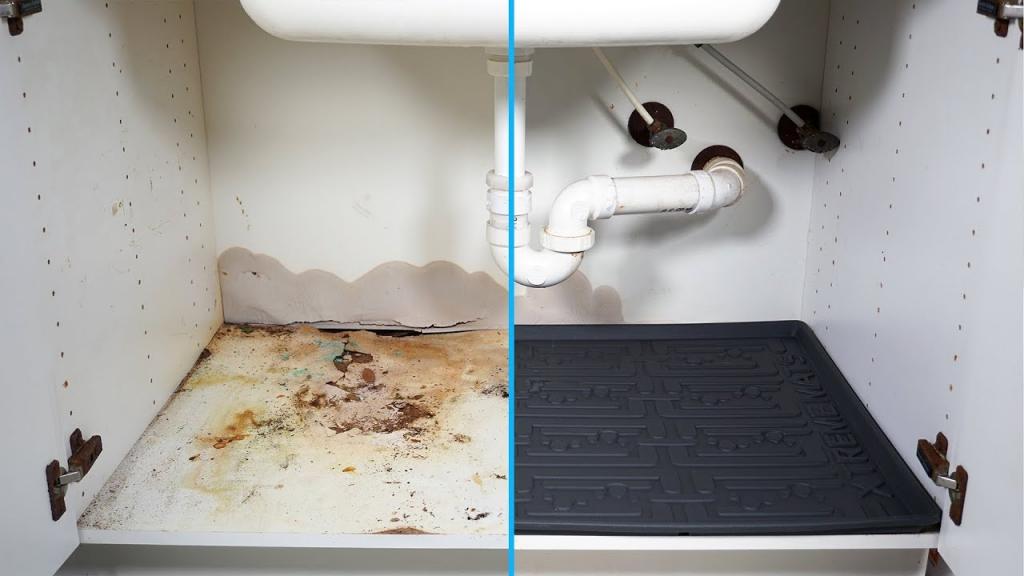
Install under-the-sink mats
After you’ve applied your waterproofing sealants to your cabinets, you may also add under-the-sink mats for further protection. Mats like this are inexpensive, and they come in a wide range of hues. In addition, because they are often constructed of rubber, water has no effect on them.
Repair Water Damage Under Kitchen Cabinets Cost
Damage to kitchen cabinets caused by leaks can be repaired for an average of $300 in materials and labor, which includes anything from changing hinges to installing a new sink. Depending on the square footage, it can cost anywhere from $3 and $10 to repaint a room.
Professional work costs between $20 and $60 to re-paint kitchen cabinets with minor damage. Materials such as paint, priming, sandpaper, brushes, rollers, drop cloths, and tape will cost between $200 and $600 for DIY projects.
Based on labor and materials costs of $4 and $10 per square foot, kitchen cabinet refinishing can cost between $1,600 and $4,100. Repainting is less expensive than replacing your kitchen cabinets, but the process of removing the old finish, putting a fresh coat, and sanding in between coats often costs more than painting.
Kitchen cabinet doors can be refaced using veneer or laminate without the need for a complete replacement. Typical cabinet resurfacing costs fall somewhere between $1,600 and $3,900. Kitchen cabinet bottom replacement costs between $150 and $200 on average.
Is Water Damage Covered By Insurance?
Burst pipes, frozen pipes, and spontaneous overflow from broken plumbing are all examples of unexpected water damage that may be covered under your homeowner’s insurance policy.
In most cases, however, a normal homeowner’s insurance policy will not cover damage caused by water that enters your house from the outside. If you don’t already have a separate flood insurance policy, this can be a supplement to your current home insurance policy.
Water damage from rain or snowstorms, water damage from extinguishing a fire, leaking roofs, sudden or accidental overflow of an appliance or fixture, vandalism, and mold damage as a result of covered water damage and not as a result of lack of maintenance and neglect are all covered by homeowners’ insurance.
Xem thêm : How To Replace Water Damaged Sink Cabinet? Easy Step-by-step Guide
Unresolved maintenance issues like a malfunctioning sink or other plumbing equipment that hasn’t been fixed for several months, repairs or replacements to a machine or other genuine source of water damage are not covered by most homeowners’ insurance policies
However, if your floors, drywall, or ceiling are damaged, your insurance will pay for the repairs. Typically, a standard homeowners’ policy will not cover water damage to your cabinets caused by water backup from an exterior sewer or drain. However, if you need additional coverage for water backup, you can do so.
How To Protect Kitchen Cabinets From Water Damage?
Even if the damage is covered by insurance, it is still important to protect your kitchen cabinets from water damage. Ensure that all of your appliances’ hoses are in good working order by doing regular checks and replacing any that are cracked or worn out.
Verify the transparency and openness of your water supply lines to make sure they aren’t kinked or pinched.
Drain your water heaters twice a year to avoid sediment buildup. To prevent exterior pipes from freezing and exploding, keep them warm and insulated. Apply silicone or elastomeric caulk, both of which are water-resistant, around the edges of sinks to prevent them from leaking.
We recommend caulking the gaps between the countertop, sink, and backsplash. It’s possible to find spray-on rubber coatings for wood kitchen cabinets that are both waterproof and heat-resistant.
Install an exhaust fan, splatter shields, and regularly open your kitchen windows to help reduce the humidity in your kitchen.
Ensure that your kitchen’s water supply lines, drains, and appliance hoses are free of leaks on a regular basis. Spills should be cleaned up very away to prevent water damage to your kitchen cabinets.
Rubber mats made of waterproof material should be placed under the sink cabinet in case of a leak.
In addition to using peel-and-stick vinyl floor tiles to line the base of your under-sink cabinet, you may waterproof it. In order to protect your kitchen cabinets from water leaks, apply polyurethane sealant around the edges and corners.
Purchase a good backsplash to keep water from dripping into your kitchen cabinets and creating damage, as well as to protect your sink’s under-cabinet cabinets from water splashes. Discover even more kitchen backsplash options right here.
Installing leak and flood alarms in various parts of your house, such as basements, sheds, and garages, is another excellent alternative. A water sensor and a 90db siren built into this system could detect leaks and alert homeowners to a problem.
How Can I Replace My Kitchen Floor Without Removing Cabinets?
Replace kitchen floors without taking out the cabinets by using one of several methods. You’ll also want to think about the style of flooring you want to use. Linoleum or wood laminate flooring is the simplest and most uncomplicated material to use and install.
Trim the linoleum or laminate pieces to fit the cabinet base as close as possible, and you’ll have a clean, finished look. Read on to learn more about our list of the most cost-effective kitchen flooring options.
Although porcelain or ceramic tile flooring can be installed as well as hardwood flooring, cutting the tiles is more difficult and requires a special equipment for installation.
In order to install the tile on top of an existing floor without removing the cabinets, you may have to take into account the height difference between the countertop and the linoleum or wood laminate flooring.
Removing the majority of your kitchen floor and just leaving the tile under your cabinets is another alternative. If you have an oscillating or rotary saw, you may produce tile cuts that are perfectly flush with the cabinet’s edge, providing a clean and polished appearance.
If you want a clean and unobtrusive look, consider installing strip molding to cover up the space between the base of your cabinets and the flooring.
Kitchen cabinets, floors, and even walls can be ruined by water damage if you ignore it. You may have found this information helpful in protecting and repairing your kitchen cabinetry from water damage.
For more information, see our advice on how to repair a water-damaged wood floor.
Conclusion
When your base cabinet under the sink has been damaged by water, you now know how to fix it, from removing the things to refinishing the cabinet floor. If you ever find yourself dealing with water damage under your sink cabinets, we hope this information helps you out.
Nguồn: https://spasifikmag.com
Danh mục: Damaged


