In only five simple steps, you can learn how to sew with ornamental stitches. Getting beautiful ornamental stitches while sewing is easy if you follow the instructions in this article.
- Who Makes New Home Sewing Machines?
- What Is A Mechanical Sewing Machine? 16 Best Mechanical Sewing Machine Reviews
- How Many Joules Do I Need In A Surge Protector To Protect My Sewing Machine
- 4 Ways How To Use A Cone Thread On Sewing Machine
- How To Use A White Sewing Machine? Step by Step Instructions
In addition, we’ll show you how to make a sampler and how to combine stitches to help you choose the best one for your project. This article also offers information on the many sorts of ornamental stitches for the benefit of new sewers.
Bạn đang xem: How To Use Decorative Stitches On Sewing Machine?
The topstitch is a stitch that can be used for decorative purposes. You can learn how to topstitch by using a sewing machine if you’d want to add some visual appeal to the edges of your project.
How To Make Decorative Stitches On Sewing Machine
Decorative vs. Embroidery
First, a bit of terminology is in need. Decorative stitches are sometimes referred to as “embroidery stitches” by some people. A sewing machine’s “embroidery” refers to stitching done by an embroidery machine with a particular carriage and hoops, even if some of them seem like lines of hand embroidery. Sewing decorative stitches is similar to sewing normal stitches.
Preparing your fabric
Decorative stitches are more likely to cause your cloth to pucker than simple utility stitches since they are broader and utilize more thread.
Spray starch might work for stabilizing your cloth. Follow the directions on the can. To test your sewing, sew a single row of stitches.
Spray starch can be used to stabilize your cloth. The can’s instructions should be followed. Then, sew a test row of stitching to see how it goes.
Ask a professional at your local sewing machine or fabric store for advice on choosing the correct stabilizer for your project.
Slow down a little
With a decorative stitch, you’re covering a lot of ground with your sewing needle. The quality will decrease if you try to make an intricate stitch too quickly. In other words, take your time and go easy on your computer. With the results, you’ll be delighted.
Guidelines
Using fabric guidelines is a fantastic idea. Stitching decorative stitches can be challenging since the needle goes to the right, left, and backwards while the machine creates each stitch. Things will be easier to remember if you follow a set of rules. Determine exactly where you want your decorative stitching line to appear and draw a line directly on the fabric with a clear ruler. You’ll want to choose a cloth marking pen that can be readily removed or washed away.
Feet and tension adjustments
This type of stitching can be done with a Satin Stitch foot that came with your sewing machine or another type of decorative stitching foot. Make an appointment with your local sewing machine shop to inquire about the best decorative stitch foot for your machine if you don’t have one.
Now, keep an eye on that toe! Keep an eye on the foot instead of the needle when stitching fancy stitches. As I mentioned earlier, the needle will wiggle around a lot as the machine stitches. The center of the presser foot indicates where the center of each stitch will be stitched, therefore the presser foot is your greatest guide for stitch placement. The Satin Stitch foot from Janome has a red arrow at the exact center, making it simple to keep track of where you’re going.
You may need to lower your upper thread tension by 1-2 notches for ornamental stitches because they pull a little harder on the fabric.. You won’t have to worry about the bobbin thread getting caught on something.
Decorative stitching for appliqué
Xem thêm : How To Shorten Curtains Without Sewing? Complete Step-by-Step Guide
It is common to utilize decorative stitches for appliqué, one of the most popular applications. This technique can be used on almost any machine that has a selection of decorative stitches. These are simple stitches used to conceal the seam between the background cloth and the appliqué (while also fastening the appliqué). Stitches such as the Herringbone, Blanket, and the traditional Satin can all be used for appliqué. Try a few other approaches if you’re feeling adventurous. Using fabric scraps, find a stitch that has a wide swing from side to side.
Check out our earlier post, Decorative Stitches: Part Deux, for additional information on decorative stitching for appliqué, ribbon adornment, and even scrapbooking and card creation.
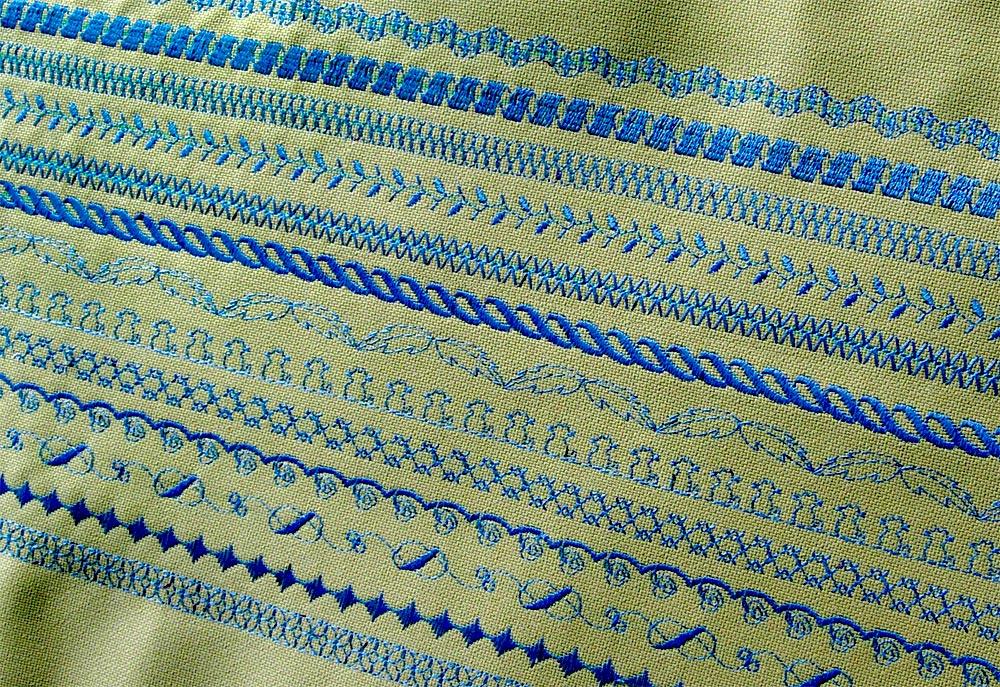
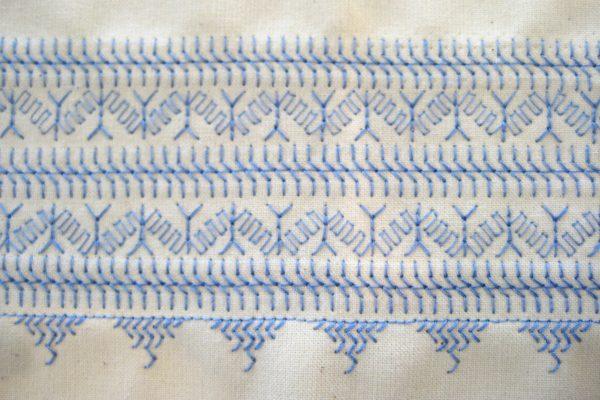
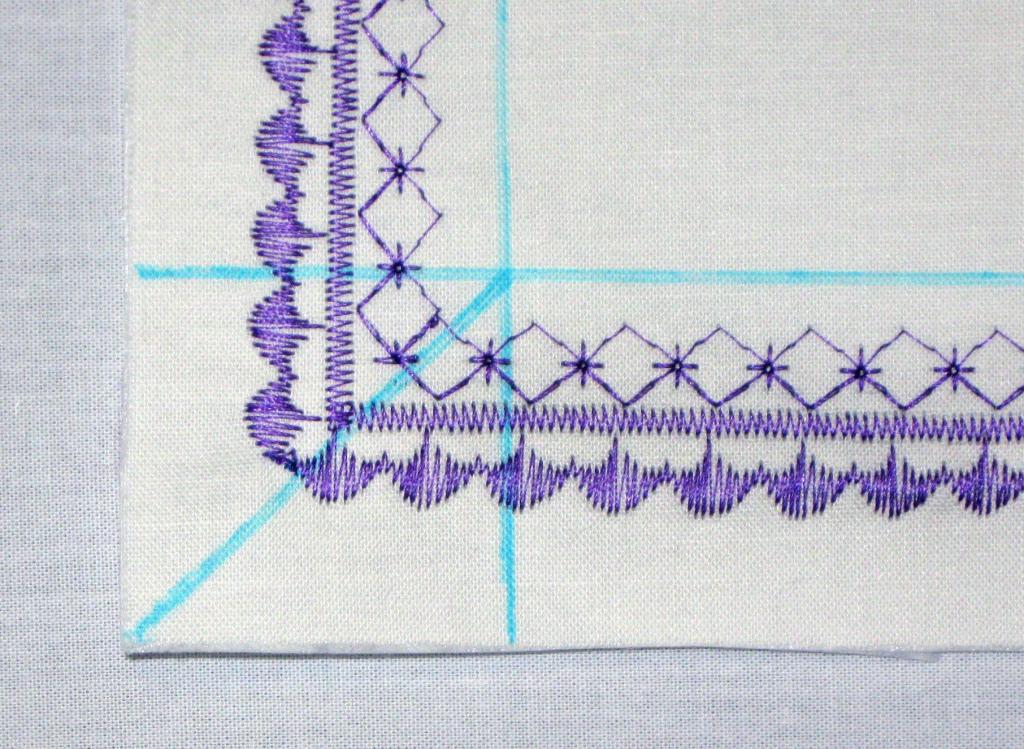
Creating a stitch sampler
A fancy stitch on your sewing machine is one thing, but seeing it on a piece of cloth with real thread is quite another. Organize your favorite stitches into a small sampler and hang it near your sewing machine for quick access. Check out this framed selection of some of our favorite pieces. A wooden embroidery hoop or a thick piece of cardboard can alternatively be used to showcase your finished sample.
Use a fabric marking pen to create a circle or rectangle on your cloth that is larger than the hoop or frame if mounting in a hoop for frame. Draw a rectangle of whatever size you like on cardboard for a simple mount.
With a ruler, fabric marking pen, and a clear ruler, draw parallel lines an inch or so apart across the circle or rectangle you created on the cloth
Stabilize your cloth by pressing it or using a stabilizer. Each line should be stitched with a distinct ornamental stitch. This step looks great with a variegated thread.
At least an inch beyond the far edge, begin sewing a few inches from the nearest edge of the circle/rectangle. It is now possible for the sample to cover the entire hoop or rectangle.
Cut out the circle or rectangle and attach it once you’ve completed stitching. To conceal the raw edges of the cardboard, wrap your fabric over the back and glue it in place.
A handy reference for when you’re sewing away at your sewing machine.
We’ve outlined the processes in further detail in our tutorial.
Stitch combinations
You can use this sampler idea to keep track of the decorative stitch variations you’ve created. Inquiring minds want to know: The repeat of decorative stitches can be customized on some machines. It’s possible to program stitch patterns into a sewing machine, such as the Memory Craft models from Janome. These patterns may then be used to sew a variety of different shapes and sizes using the machine’s built-in memory. This produces a one-of-a-kind design for everything from clothing to pillows.
Experimentation is the most critical step in properly sewing with ornamental stitches. Play with some fabric scraps!
Open Decorative Stitch Tips
- Make sure to use the correct stabilizer for your project before you begin stitching with decorative stitches. Using a stabilizer prevents the cloth from tucking or tunneling while the stitches are being sewn.
- Make sure to use a new needle type and size for the fabric you are sewing on your sewing machine.
- You can use the same thread in the bobbin that you are using in the top thread since open stitches do not generate a dense or thick bundle of thread on the object.
- Always begin with a practice stitch. To check that your thread tension is correct, use a scrap of stabilized fabric from your project. You may need to adjust your needle’s thread tension.
- The final appearance of the ornamental stitch can be altered by varying the stitch length or width. Changes to your sewing machine settings should be documented in case you ever need to recreate that stitch again.
- Some sewing machine types allow you to fine-tune your ornamental stitches if they don’t seem just right. Find out how to balance ornamental stitches if your sewing machine has this feature by checking your machine’s handbook or asking a BERNINA expert for guidance.
Types Of Decorative Stitches
Chain stitch
Chain stitches are commonly used to fill huge shapes. From the top of the line, draw the thread out toward the front of the cloth.
Holding the thread, insert the needle into the material and pull it out quickly. To construct a loop, pull the needle through the fabric and work the thread beneath it.
Xem thêm : How To Make Curtains Without A Sewing Machine? Step by Step Instructions
Begin the next stitch by inserting your needle into a loop of yarn.
Cable stitch
When working with woven textiles, the cable stitch comes in handy as a decorative stitch. This stitch can also be thought of as a form of embroidery, with the result being a textured design that is often utilized as the centerpiece of the garment.
The cable stitch is worked from left to right, alternating the location of the thread in the cable stitch.. You can do this, for example, by starting with a straight needle, bringing it out halfway, and then working the next stitch.
Chevron stitch
The diagonal lines do not cross in the chevron pattern, unlike the herringbone stitch. Hand embroidery is known for its use of decorative stitching to enliven the seams.
Herringbone stitch
The herringbone stitch is widely used in hems and seams because it is done from left to right along two parallel lines. Because it resembles fish bones, it is referred to as such.
French knot
The French knot is a simple decorative stitch. Stitched flowers frequently have this knot in the middle because of its resemblance to a knot.
A few trips around the needle is all the thread will get. To tie a French knot, bring the needle all the way back to the beginning of the material.
What Are The Uses Of Decorative Stitches?
Visual interest
Decorative stitches, as the name suggests, are used to enhance the aesthetic appeal of sewing items. They offer visual appeal and variation to the otherwise monotonous material.
Decorative stitches can also be used to provide depth and dimension to the cloth. The blanket stitch and the straight stitch, on the other hand, are typical stitches that can be considered decorative.
Bindings and applique
You can use ornamental stitches to connect bindings and appliques. It’s a time-saving alternative to hand-stitching while still looking good.
Decorate the edges of your appliques in the same manner you would finish seams and hems.
Stitch in the ditch alternative
With a sewing machine, stitching in the ditch is a rather simple process. However, you can use a decorative stitch to both prevent deformation and support your fabric.
Conclusion
And that’s all there is to it! Using ornamental stitches on a sewing machine isn’t all that different from conventional sewing, as we just discovered.
It is possible to add embellishments such as decorative stitches to seams, a focal point, appliques, and bindings. Make sure to sew on a scrap piece of fabric to get a feel for any alterations you need to make.
Nguồn: https://spasifikmag.com
Danh mục: Sewing Tips


