When it comes to water-damaged cabinet sides, you should read this post. We’ll walk you through the process of repairing your broken cabinet in the shortest time possible. To prevent making the same mistake again, keep up with this excellent read and read the helpful recommendations we provide with everyone.
- How Long Before Wood Gets Damaged From Water? What You Need to Know
- How To Fix Water Damaged Swollen Wood Table? Step-By-Step Guide
- How To Repair Water Damaged Camper Ceiling? Step by Step Instructions
- How To Repair Water Damaged Base Cabinet Under Sink? Troubleshooting and Repair Guide
- How To Fix Water Damaged Paneling? Step-By-Step Process
What Are The Materials Needed?
Make sure you have all of the necessary supplies before beginning the procedure. You’re ready to go when everything is in order.
Bạn đang xem: How To Save Water Damaged Cabinet Sides? Complete Step-by-Step Guide
- Sandpaper with a 120-grit abrasiveness.
- 3M Scotchbrite 220
- a pair of protective gloves
- In this case, we’re referring to the
- Cloths can be dropped.
- An oil-based shellac primer.
- Knife made of putty
- Sealant or varnish that is impermeable to water
Steps To Save Water Damaged Cabinet Sides
Step #1. Use shellac-based primer on wood
Purchasing shellac-based primer from a local hardware shop is an option if you don’t already have any on hand. The purpose of this material is to restore damaged or discolored wood furniture.
In order to restore the cabinet door’s surface, you’ll need to apply one or two coats of the wooden cabinet to the damaged areas. Priming the cabinet’s surface will make it more even, but painting it will help it adhere better.
Step #2. Apply plastic wood filler if necessary
Water damage can be repaired and the cabinet sealed with plastic wood filler. This step can be skipped if desired.
Use your putty knife to smooth the filler after applying it directly from the tube to the afflicted areas. There is no one-size-fits-all answer to how much filler you’ll use.
Step #3. Get sanding on that cabinet door
If your cabinet has been damaged by water, it will need to be sanded. Make sure there are no places that are swollen or bubbly. Cabinet doors should be sanded using 120 grit sandpaper.
Keep in mind that you don’t want to go overboard with sanding. The more you sand it, the more likely it is that it will not seem even. After you sand it down, make sure it doesn’t look too damaged and smooth it out.
Step #4. Repeat the previous steps if necessary
It may be necessary to repeat the previous methods above a few times if your cabinet has been significantly damaged by water. Primer, plastic wood filler, and the sanding technique that damaged the cabinet door can all be reused here.
Step #5. Start painting the cabinet
It’s time to begin painting the surface once the water damage has faded and the surface is nice and flat. The priming effect of the shellac will enhance the aesthetic appeal of the final coat of paint.
A little paintbrush can be used to touch up any minor imperfections on a large cabinet door that was painted with a paint roller. Let the paint dry once you finish painting.
It will take many hours for oil-based wood paint to cure if you’re using it.
Step #6. Sand the painted cabinet doors down
For this repair, you’ll want to use 220 grit sandpaper. Finishing the paint to a smooth surface is your ultimate goal. Using sandpaper to sand down the cabinet’s surface will help the paint coats adhere properly.
Sand the painted wood, and if you want to keep the paint job looking good, do it by hand.
Step #7. Apply a final coat of paint down
Xem thêm : Who Can Repair Water Damaged Ceiling? Comprehensive Guide
Once dry, sand it down with sandpaper to remove any imperfections that may have formed while the paint was drying. Almost all repairs are completed if there is no evidence of water damage or paint chips.
Step #8. Apply waterproof varnish or seal
To avoid the same issue in the last phase, we recommend that you apply a final topcoat or any clear coat to assist in keeping it away from water. Select a piece that complements your existing cabinet.
Protecting the cabinet from being damaged by water
Get them laminated
Water damage can be prevented by laminating the cabinet and then laminating on top of it. You can smooth down the surface of a layer by laminating. Remember, laminated cabinets are not completely waterproof, but they do their best to keep water from permeating the wood’s underlying structure.
Use waterproof varnish or a clear coat
Keep your cabinet waterproof with a variety of clear coatings. Depending on the paint and wood used, a weatherproof coat or varnish may be necessary.
Make sure that the finish you choose matches the cabinet you’re working with.
Get better ventilation or dehumidification
If you open your windows or utilize dehumidifier-like fans to dry out the cabinets, you’ll be better off. Opening a window, on the other hand, will do.
What Are the Benefits of a Free-Standing Kitchen Cabinet?
Portability
Rearranging the free-standing cabinetry in a kitchen can give it a whole new look without spending a lot of money. When painted a vibrant color, portable cupboards become eye-catching accents that may be readily moved to a more advantageous location. With free-standing bottom cabinets, less attention is focused on matching bottom cabinets to top cabinets than on designing around existing cabinet arrangements. So go with brightly colored bottom free-standing cabinets or open shelf cabinets with bottoms and sides painted in a different color.
Opens Space
Small kitchens can benefit from free-standing cabinets, which allow you to expand the room in crucial spots to accommodate a kitchen aisle, a table, or extra seating. If a kitchen aisle is clogged with cabinetry, freestanding cabinets can be moved to free up space. Additionally, in homes with open floor plans, the rear of a high, open, free-standing cabinet can act as a demarcation line or partition, allowing you to enlarge the size of your kitchen or a neighboring room with minimal money and effort.
Accent Color
With a simple swing of a door, you may change the color of a freestanding cabinet. In traditional cabinets, the door is hinged and closed, but in free-standing cupboards, the door is commonly left open, allowing the shelves to be brightly colored. It’s easier to see the vibrant shelf when the exterior cupboard is painted white. Open-shelf cupboards, lower cabinets with open shelves, and glass-front cupboards all benefit from this strategy.
Atypical Format
Long horizontal drawers in freestanding bottom cabinets are more common than typical, hinged doors. Chrome-handled free-standing cabinets at the bottom lend an ultra-modern or industrial kitchen a sleek, streamlined appearance. Free-standing bottom cabinets look more informal when paired with open shelves in a different color than wall-to-floor cabinetry in the same wood tone or hue. Furthermore, a sense of cohesion is created when the open top shelves of lower cabinets match the countertops on the lower cabinets.
9 Cabinet Ideas for a Low-Maintenance Kitchen
Avoid Excessive Detail, Dimension, and Fancy Finishes
Before making a final decision on kitchen cabinet doors, think about how easy it will be to clean them when you first go shopping for them. It’s easy to clean slab or Shaker doors with a sponge or towel because they’re made of a smooth, solid material.
This is especially true for doors that have carved or raised panels or beadboard inserts. Things like lattice and shutter-style elements look great, but cleaning them would be a major hassle.
Choosing the right paint color for your cabinets can also make them easier to clean. Avoid using creative techniques like crackle paint and opt for satin or gloss finishes instead.
Avoid Using Excess Trim and Add-on Features
Cabinets with little trim or features, such as light rail molding, corbels, crown molding, and legs or feet for the bottom cabinets are an additional option in addition to smooth doors. Even though they’re eye-catching, all of these surfaces demand a lot more work than simple ones. Open areas on the sides or behind 3D alternatives, such cabinet legs, are especially problematic.
Well-sealed Stain Makes Cleaning Easier than Paint
Glossy paint may make splatters and grime easier to see and clean up for certain people. You should think about how much dirt will show up and how easy it will be to fix the finish if the finish is damaged in any way when picking the finish for your kitchen cabinetry.
Xem thêm : How To Protect Cabinet Doors In Water Damaged Kitchen? Ultimate Guide
Not only is it simpler to undertake a weekly deep clean with a low-maintenance kitchen, but it also makes it easy to spot clean. The finish of cabinetry can be damaged by excessive scrubbing. It’s easier to overlook a stain. You may simply acquire a touch-up kit or even use a permanent magic pen to cover up scratches on the cabinets.
The Right Wood Grain Can Camouflage Dirt and Stains
Even though you should clean your kitchen on a regular basis to maintain it looking good and keeping your family healthy, stains or grime on cabinets may resist your best efforts. Instead of highlighting grime and stains like white or light-colored paint would, use cabinets that conceal them to keep your kitchen looking its best for longer.
If your cabinets are constructed of hickory or oak, which both have distinct grain patterns, you’ll want to go with a dark stain. Even while maple is a popular choice for kitchen cabinetry, its finer texture makes stains and damage more apparent than on other woods. In addition to being visually appealing, wood grain reduces the time it takes to clean and maintain a property.
Choose Flush Cabinets Ends Instead of Other Options
In order to provide a smooth end to the cabinet’s corners and front, plywood or whatever wood your cabinets are constructed out of are used. Because there are no protrusions or varied surfaces to deal with, cleaning is easier.
Cabinetry with “matching ends” is another common design for kitchens. To match the cabinet doors, these sides feature three-dimensional or raised-panel construction. Similar to the time it takes to clean a fancy cabinet door, the time it takes to clean the end of the cabinet is also lengthier.
Always Use Functional Hardware on Cabinet Doors
To put it another way, a cabinet door with no knobs or handles is more likely to get dirty or break than one with them. When you’re in the kitchen, your hands are likely to get dirty, oily, or covered in crumbs at some point. All of that energy is transferred to the cabinet door when you open it without a handle.
Having hardware on your cabinets not only helps keep them clean, but it can also extend the life of your kitchen’s aesthetic. When it comes to fingerprints and water spots, metal surfaces like chrome and stainless steel are far more susceptible to smudges and smears.
Never Choose Glass Cabinet Doors
As previously indicated, the type of material you use for your cabinet doors has a significant impact on the amount of upkeep necessary to keep them looking like new. Glass demands the most thorough cleaning and polishing. As a result, messes like smudges and greasy marks will show up on the cabinets considerably more quickly than they would on wood. Multiple panes of glass separated by metal or wood trim exacerbate the issue.
Glass cabinet doors are popular with many homeowners because they provide an appealing and open look and allow their beautiful dishes to shine through. If you can’t create the same effect in your kitchen with a material that is completely transparent, there are other fantastic possibilities.
Avoid Open Cabinets and Shelving
There’s a good rationale for having cabinet doors in the first place. Keep your groceries and dishes out of sight, but also keep them clean, with the help of these storage solutions. If you place open shelving or bins in your kitchen, all the spatter, grease, and other dirt will land on your plates and bowls rather than the cabinet door.
If you want your dishes to be pristine, you’ll need to clean every plate and bowl before and after each usage. You’ll also need to clean the shelves and cabinets on a regular basis. Put out a few of your most eye-catching plates and bowls as a table centerpiece if you want the world to see them.
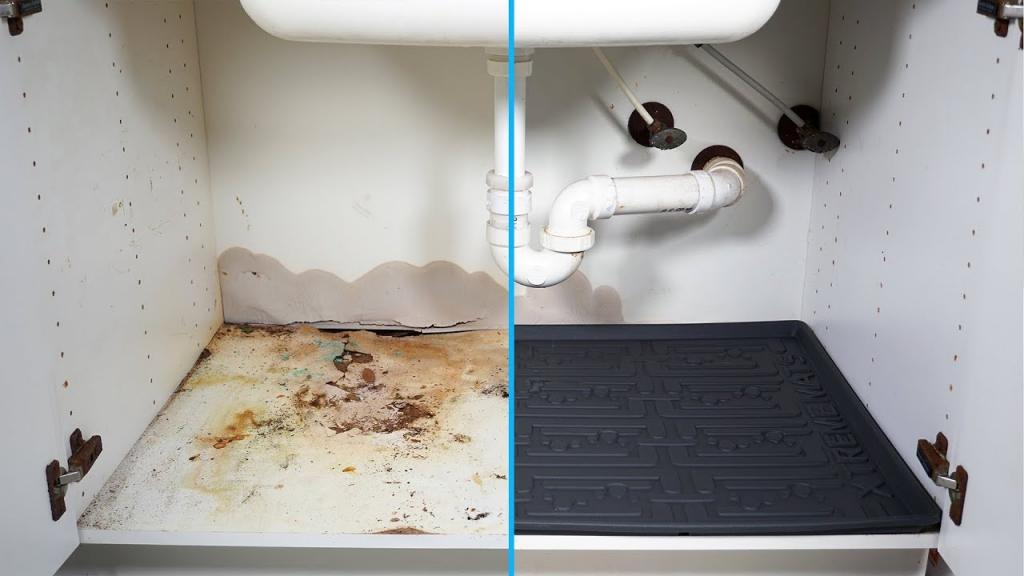
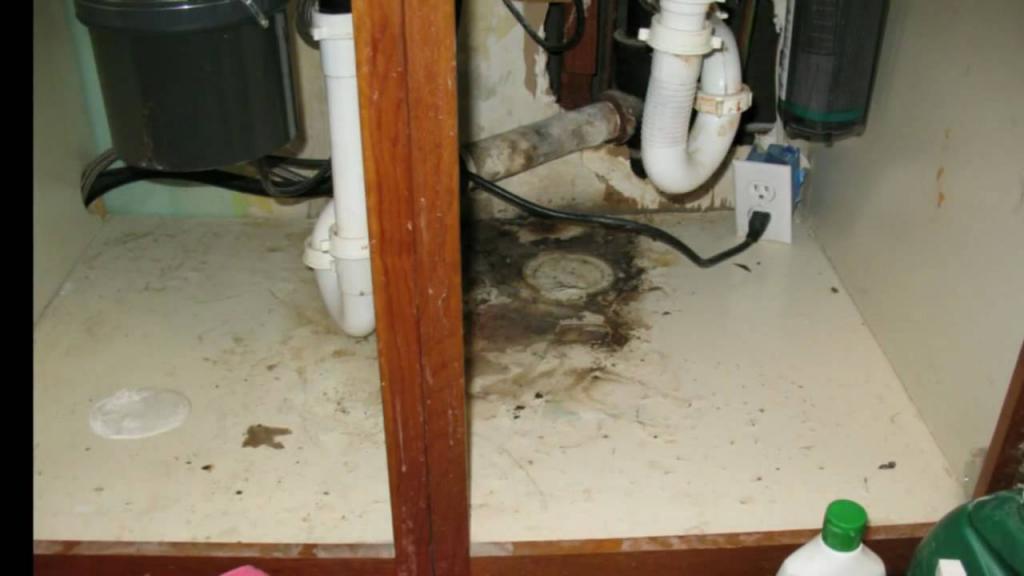
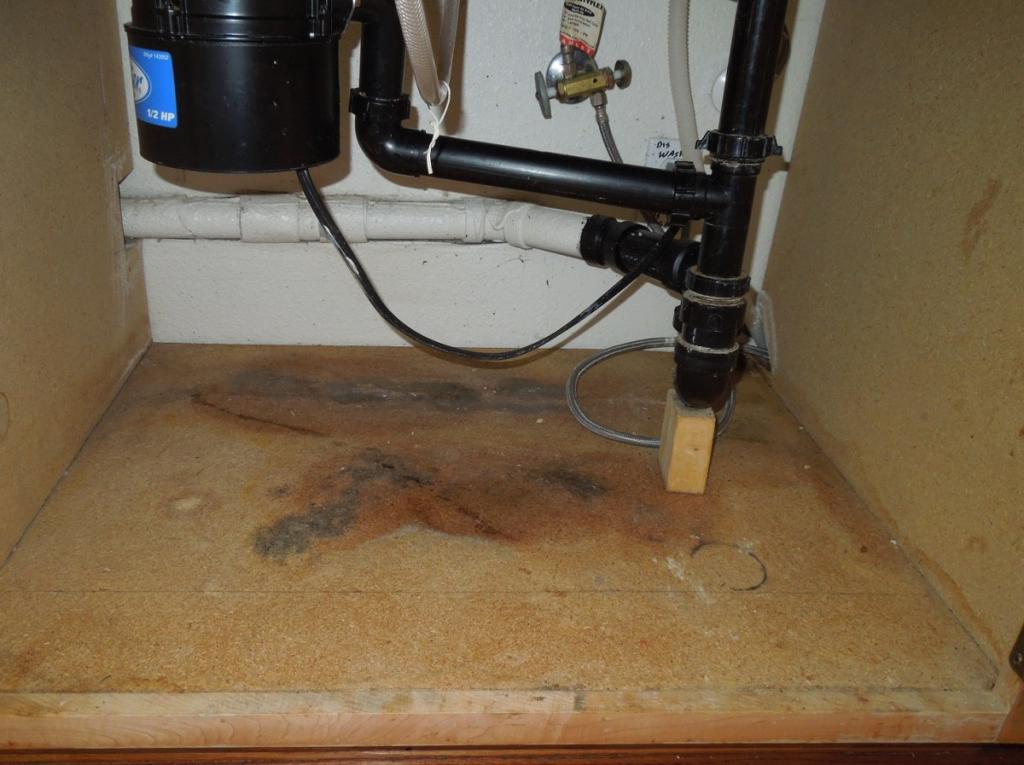
Prevent Dirt, Grease, and Moisture to Minimize Maintenance
Preventive steps to prevent dirt, crumbs, grease, and moisture from reaching your cabinets have the greatest impact on the amount of kitchen maintenance and cleaning required. The sink cabinet is a good example of this because of the potential for water damage. In order to avoid significant issues like rot and mold in the wood, make sure there is no water in the wood.
To prevent smoke and grease particles from reaching the cabinets, install a strong cooktop hood. Using a splatter screen or a pot cover is a good idea. The sooner you clean up a spill, the less likely it is that it will become stained.
If you want to spend more time with your family and friends rather than cleaning up messes, it’s important to take preventative measures and choose low-maintenance kitchen cabinetry.
Conclusion
That you’ve come this far in learning how to salvage water-damaged cabinet sides makes us happy. Following these instructions and taking note of some helpful hints will ensure that you don’t make the same mistake again. The problem with your furniture isn’t even covered by your homeowner’s insurance, and you have no recourse but to file a lawsuit.
Nguồn: https://spasifikmag.com
Danh mục: Damaged


