In order to repair a water-damaged aerator, all you’ll need is vinegar, as explained in this article. Prior to getting into the heart of the topic, let’s first define what an aerator is and the many parts that make up one. When we’re done, we’ll know how to choose a replacement aerator.
- How To Repair Water Damaged Cabinet Doors? Complete Step-by-Step Guide
- What To Do With Water Damaged Hardwood Floors? Helpful Tips To Remember
- How To Patch A Water Damaged Ceiling? Complete Step-by-Step Guide
- How To Fix Water Damaged Lion Claw Table Feet? Complete Step-by-Step Guide
- How To Spackle Water Damaged Ceiling? Easy Step-by-step Guide
What Is An Aerator?
Using an aerator, you may add oxygen to the water coming out of your faucet. To avoid unwanted splashing and wasting water, it is vital to follow these steps. The water pressure from an aerator-equipped faucet is identical to that of a faucet without one.
Bạn đang xem: How To Fix Water Damaged Aerator? Easy Step-by-step Guide
The parts of an aerator
There are threads on the faucet aerator, which you can see when you take it out. It is possible to utilize a female thread on a male thread kitchen faucet. Bathroom faucets, on the other hand, typically feature female threads and hence necessitate a male thread.
An aerator’s threads are located on the outside of the device. Other components are housed in the outside shell, which can be plastic or metal.
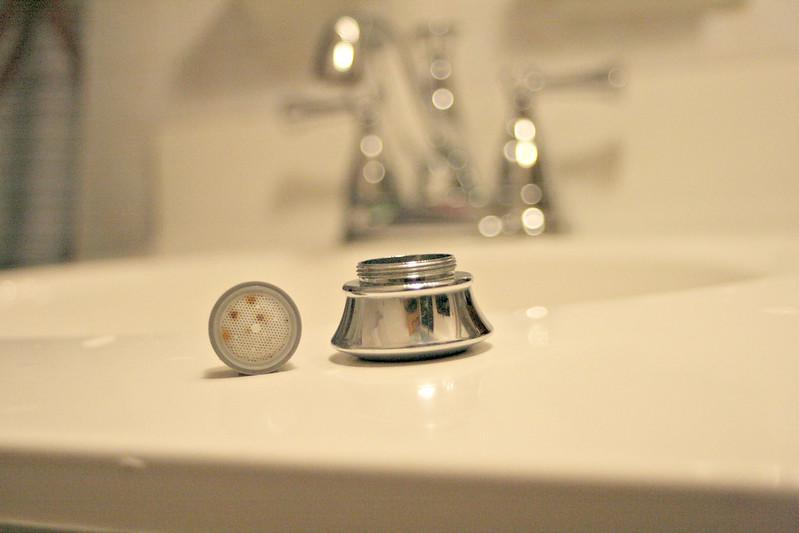
Plastic makes up the inner housing, which sits inside the exterior casing. The screen is held in place by a ridge on the back. The screen is the aerator’s primary functional component, and it filters the water that flows out of the tap.
A screen bushing is added to an aerator to keep the screen in place. In order to keep the bushing from leaking, a rubber ring seals it to the faucet.
How do Tap Aerators Work?
The nozzle of a tap aerator contains a large number of tiny holes. As a result, air can combine with the water, raising the pressure and reducing the amount of water you need to use. For less water, the nozzle sends these numerous streams in the same direction, which results in a stronger flow. What a clever piece of research!
It’s possible to cut water flow by up to 10 liters per minute, bringing the flow rate down from 18 to merely 8 liters per minute. Using the taps costs about £0.03 per minute, with hot water costing significantly more. Most individuals need all the support they can get when it comes to saving money on their water or heating bills..
There are numerous applications for aerators, including kitchen and bathroom faucets, shower heads, hot tubs, hoses, and pond pumps. A product that can be used in a variety of ways!
What are the Benefits of Tap Aerators?
There are a number of advantages to using a tap aerator, all of which are intended to assist you and the environment. The first of these is a rise in water force. The pressure rises as the water and air interact. As a result, you’ll just need a fraction of the amount of water to get the job done!
A tap aerator reduces your water use by raising the pressure. Because you can wash your hands thoroughly in one minute rather than five, you’ll need to run the water for less time. You’ll save time and money by using less water, and you’ll save money on your heating bills by using less hot water.
Tap aerators can now help save the environment, which is great news for green activists. Saving water before it is used can help reduce CO2 emissions because fresh water is becoming increasingly scarce. In order to ensure that you are doing your part without even thinking about it, you should invest in a tap aerator
As a final benefit, tap aerators will prevent water splashing. In taps without an aerator, water might flow irregularly, which can be messy and inconvenient. Aerators are designed to send water in a single downward stream, so there will be very little splashing.
Here are three of our favorite aerators before we get into the nitty-gritty and the how-to.
How can I Install a Tap Aerator?
Installing a tap aerator is a piece of cake for do-it-yourselfers. The aerator can be unscrewed from the tap by turning it anti-clockwise until it comes loose from the tap. Just make sure not to overtighten the new aerator when screwing it in. Turn on the faucets and raise the pressure to make sure it’s properly installed.
How Often Should I Change a Tap Aerator and How?
Limescale can build up on tap aerators if they aren’t cleaned or replaced frequently. The aerator’s small openings can easily become blocked, resulting in obstructions. Cleaning your aerator once a month is all it takes to keep it from needing to be replaced, and it isn’t all that fascinating.
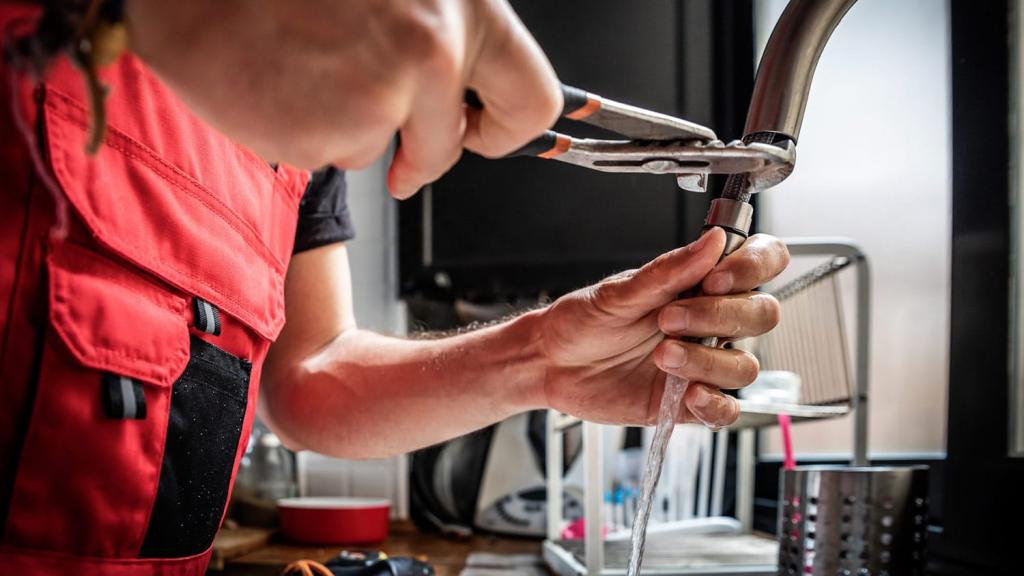
You’ll have to replace your aerator if you wait until it’s too late and it’s already showing signs of wear. If you can’t unscrew the aerator by hand because to limescale buildup, you can use pliers to remove it. Hold your tap tightly when attempting to unscrew the aerator to prevent injury. A new tap may be necessary if you break the aerator by using too much force (although we are strong advocates of ‘any excuse for a new tap!’). Following the instructions above, screw on your new tap aerator.
Male vs Female Aerators
There is no need for your tap aerator to be made by the same company as your tap, but it does need to be the proper part. As with the male and female spouts on your faucet, aerators are available in male and female versions. The aerators for men fit the spouts for women, and the other way around.
In plumbing, a female spout is one in which the hole is hidden beneath or within a cover. A male aerator is all that is needed for this. It’s necessary to use a female aerator if you have an outside tap hole. Tap aerators come in three sizes: standard, junior, and tom thumb. Before you head out to get an aerator, make sure to double-check the fit and the size.
Repairing Your Water Damaged Aerator
Step #1. Remove the aerator
Removing the aerator from the faucet spout is the first step in cleaning it. By hand or with pliers, you can achieve this.
Xem thêm : How To Fix Small Water Damaged Hole Drywall Ceiling? A Step-by Step Learning Guide
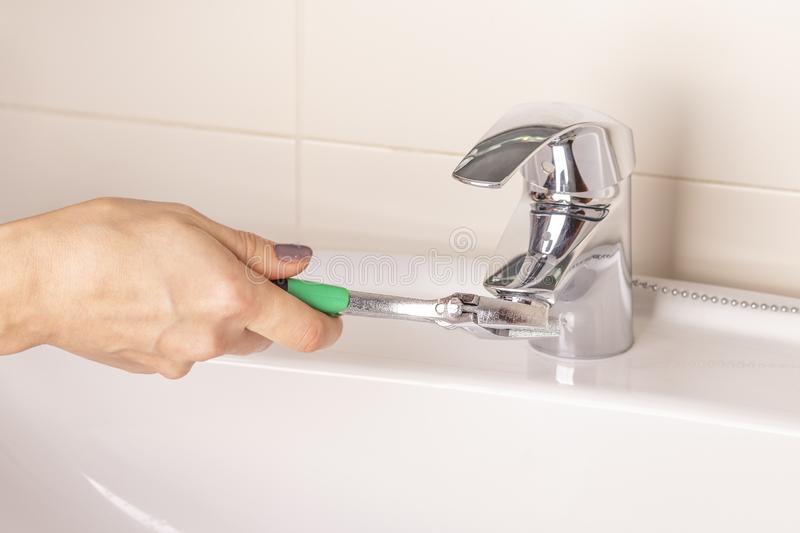
To prevent damage to the aerator’s finish when working with pliers, use masking tape or a rag to cover the exterior casing. Keep in mind that excessive pressure on the plastic casing could cause it to break.
Step #2. Remove the scales
Holding the aerator upside down and running water will help remove mineral deposits from the screen. In order to remove any loose material from the screen, you’ll need to do an additional step.
After that, use a paperclip or sewing needle to physically remove any debris that is preventing water from flowing through the screen. Additionally, the inside of the faucet must be thoroughly cleaned to avoid clogging the aerator in the future. As an alternative, you can use a screwdriver to remove scales that have become lodged in the faucet.
Step #3. Soak the aerator components
All of the aerator’s components except the washer should be soaked in white vinegar. As a result, the residual debris will become more pliable. If you can’t soak overnight, wait until the scales are soft enough to remove with a toothpick or a used toothbrush before rinsing them off.
Step #4. Re-assemble the aerator
Turn the faucet on to remove any leftover debris before reinstalling the aerator. Before returning the aerator to its original position, put the washer back in place. Return the items in the same order that you received them.
Use your hand to tighten the aerator. Using pliers, secure the item. Turn on the faucet to check for leaks and tighten as needed.
How to buy a faucet aerator
If your current aerator is beyond repair, you’ll need a new one. You may have never had an aerator installed in your faucets before. In any instance, you may have to buy a new one from a hardware store.
An aerator can be selected in several ways. In the ideal case scenario, you should bring your previous one with you for reference. However, there are alternatives that don’t necessitate an old aerator to accomplish this.
The following are the three coins you’ll need: See which of these three fits your faucet’s opening dimensions.
A regular-sized aerator is needed if it is the same size as a quarter. In this case, you’ll need a junior-sized nickel. Finally, a ‘Tom Thumb’ aerator is an option if it’s around the size of a dime.
In some circumstances, none of the coin sizes mentioned will fit your faucet’s diameter. As a result, metric measurements are required rather than imperial measurements.
Measure the faucet opening’s diameter with a ruler or measuring tape in this case. Choose an aerator with the same outside diameter as the pipe.
How to Replace a Faucet Aerator
Tools and Materials Needed:
- $15 for a pair of rubber-coated, expandable pliers.
- Old toothbrush or wire bristle brush, $9
- Screwdriver with a slotted head: $12
- $11 for a tube of either Teflon or silicone lubricant.
- Clean deposits with $7 worth of white vinegar
- You can also use old rags or paper towels as a substitute. $0
- What aerator do you need for your particular faucet? varies
1. Remove the Old Aerator
Faucet aerators, fortunately, are cheap and simple to remove. You don’t need to employ a plumber if you can do it yourself. There are occasions when a little elbow grease or modest tools may be required. If you want to get rid of a cache aerator, you’ll need an appropriate tool. Your new aerator will come with the device, which is size-specific.
Remove It By Hand
By hand, unscrew the aerator from the faucet. With their threaded design, aerators tend to come apart rather readily. Check to make sure there is no water in the spout of the faucet.
Try Pliers
If removing the aerator by hand isn’t successful, you can always use pliers. Make sure the pliers have rubber jaws to protect the surface of your faucet spout from being scratched. You can also use masking tape to protect your fixture.
Remove the aerator from the spout by turning it counterclockwise. Try unscrewing it from a different angle if it doesn’t move. The metal of the aerator can bend if you grip it too tightly, making your task more difficult.
Heat It Up
There are times when you’ll have no choice but to use heat in order to get the aerator to move. You may be able to dislodge the metal aerator with a hairdryer if you heat the metal. Rubber washers and plastic parts may melt if you use this method on plastic aerators or if you apply extreme heat.
Grab the Oil
Try WD-40 or a comparable substance, which costs approximately $6 at your local hardware shop, for lubricating your tools. Allow it to sit for a few minutes on the threads before removing the aerator with pliers. It may take a few tries because the metal is slick because of the oil.
2. Find the Right Type of Aerator For Your Faucet
You should get a new aerator assembly if the metal screen or other components are rusted or damaged. If you’re looking for a new faucet, you’ll have a wide range of choices at your local hardware store.
Stationary Aerators
Most people use these. Screw these into the spout and they won’t budge, as the name says.
Male or Female Aerators
A female aerator is one with internal threads. Male faucet spouts with threads on the outside can accommodate female aerators. External threads indicate that the aerator is male and should be used with a faucet spout that has internal threads.
Dual Aerators
Threads for both male and female can be found in the same aerator, which is normally divided by a split washer.
Standard Aerators
This is because the aerator extends from the faucet spout.
Cache Aerators
Xem thêm : How To Sell Water Damaged House? Comprehensive Guide
This type of aerator is often seen in more expensive faucets, where it is tucked away high into the handle.
Swivel Aerators
Using a swivel aerator, you may route the water in a variety of ways, either by retracting or pulling the aerator. Faucets with swivel aerators are typically seen in more up-to-date models of both the kitchen and bath. A little outlet on the side of some swivel aerators allows you to connect a hose. The aerator can still be used while water is diverted to a filter.
3. Determine the Right Size Aerator
Not all faucets have aerators. Before you buy a new aerator, you’ll need to know how big your old one was.
Standard Aerators
There are three standard sizes of standard aerators available. Remove the old aerator from your faucet and place it next to a quarter, dime, or nickel on a flat surface to demonstrate the concept.
- Tom Thumb-sized aerators may be needed if the aerator is the size of a cent. The typical price ranges from $3 to $5.
- If the old aerator is the size of a dime, you will need a junior-size aerator. The average price is $4–$8.
- If the old aerator is the size of a dime, you will need a junior-size aerator. The average price is $4–$8.
Cache Aerators
Your old aerator will be too small for the junior-sized version. The average cost is between $4 and $8..
4. Choose the Water Stream You Need
There are three types of water streams to consider depending on what the faucet is used for.
Aerated Stream
Faucet aerators of this style are by far the most frequent. They create a whiter and wider stream by infusing air into the water.
Spray Stream
Widespread coverage is provided by spray stream aerators.
Laminar Stream
There is no air in these aerators; they are all water. They are normally non-splashing and are best suited for faucets that require a lot of water flow.
5. Replace Your Faucet Aerator
To enhance water flow, you may only need to replace the aerator on your kitchen or bathroom sink faucet, rather than the entire fixture. To install your new aerator, follow these instructions once you’ve removed your old one and identified the proper size and type for your faucet.
Plug or Cover the Drain
Finally, you don’t want your new aerator to end up in the garbage disposal after all your hard work.
Run the Water
Turn the water on full blast for a few seconds to flush out any remaining particles in your faucet.
Screw in the New Aerator
To avoid bending, denting, or cross-threading the replacement aerator, screw it in slowly.
Tighten
Tighten your new aerator with your fingertips as much as you can. Turning on the faucet a little at a time will show you how much water is flowing. Use rubber-coated pliers to tighten the aerator a little more if you see leaks around the threads. Protect the finish of your faucet and aerator by wrapping the ends in tape.
To tighten the cache aerator, you’ll need the special tool that came with the aerator when you replace your old one.
FAQs
How often should you change faucet aerators?
Aerators and screens on faucets should be cleaned regularly to remove buildup. How often should I clean the aerators in my air conditioning system? — The aerator should be replaced every year and cleaned twice a year, according to the manufacturer’s recommendations.
Do all faucets have removable aerators?
All modern kitchen and bathroom faucets come equipped with aerators. Separate faucet aerators, on the other hand, can be purchased and installed on faucets that do not already have one.
How do you separate an aerator?
In order to remove the aerator, all you have to do is unscrew it. Once the screws are removed, you can begin dismantling it. These are the parts: All of the aerator’s components are housed inside a plastic or metal exterior casing.
How much does faucet aerator cost?
Aerators for low-flow faucets range widely in price. Low-flow shower heads can cost anywhere from $8 to $50, depending on features like flow adjustment dials and designer style. Fixed models are more expensive than those that are portable.
Can you soak aerator in vinegar?
The aerator can be cleaned by soaking it in vinegar. The longer you soak it, the better, but even just five minutes will be beneficial. It’s simple to clean the interior of the mouth using a toothbrush.
Conclusion
Aerators are a need in the average home. As a first step, it keeps the sink free of splashes that might otherwise encourage the growth of bacteria. For one thing, it saves water, which is excellent for the environment and your budget.
Aerators, like anything else, may not perform to their full potential at times. For example, it could be a result of a lengthy period of use, wear and tear, or just filth. There are two ways to fix an aerator that has been damaged by water.
Nguồn: https://spasifikmag.com
Danh mục: Damaged


