How can I clean the water tube in my refrigerator’s water dispenser? Having a refrigerator at home is a necessity today because it extends the shelf life of perishable items like food and drink. Also, keep an eye on your fridge and clean it whenever it seems dirty if you want it to last as long as possible. Now, how should I go about disinfecting the dispenser tube in my refrigerator?
- How Much Does A SubZero Fridge Cost? Perfect Information For You!
- How Long Should You Wait To Plug In A Fridge After Moving It? 10 Steps to Move a Fridge Safely
- Why Does My Whirlpool Fridge Leak Water? Comprehensive Guide
- How To Fix A Fridge Door That Had Dropped? Troubleshooting and Repair Guide
- How To Replace Fridge Gasket? Easy Step-by-step Guide
Although most people have a general understanding of what a refrigerator is for, there may be a few who are clueless; if that’s the case, I’ll fill you in on its many functions and advantages. Food is typically stored in them, but in a way that prevents spoilage. The emission of a refrigerant within makes this possible.
Bạn đang xem: How To Clean Fridge Water Dispenser Tube? Step by Step Instructions
As a result, the in-house mechanisms consistently deliver productive results. But there could be a problem with your fridge if it doesn’t keep your food cold. This is commonly the result of a filthy appliance part.
There is no telling what could happen to your refrigerator if you don’t check on it as soon as possible to make sure it is in good working order. It may need a thorough cleaning or repair.
Please keep reading so that we may have a deeper understanding of this matter and the issues surrounding it.
Cleaning A Fridge’s Water Dispenser Tube The Correct Way
How can I clean the water tube in my refrigerator’s water dispenser? As a general rule, you should always begin by turning off your unit and disconnecting it from its power supply. Then, take a few moments out of your day to read over the manual, as it may provide the solution to your predicament.
You can put these pamphlets to good use. Most individuals neglect these features when shopping for new appliances because they don’t believe they will be useful to them. Since they come from from the box and the business, these directions are the most reliable option.
Since no two refrigerators have the same system or design, each has its own set of instructions. Although online sources can be helpful, nothing beats the freshness and efficacy of the ones you get in the package.
You can use these as a foundation, but we have no way of knowing if they are as reliable as the ones we have provided. Also, some parts may react badly to specific conditions, so it’s best to refer to the manual before attempting any repairs.
When you’re done, you’ll be able to rest easy and worry about nothing else, but if any issues related to this ever arise with your refrigerator, you can always refer back to this article for help.
Step #1. Readying for the process
You should be prepared to complete the entire procedure before beginning work on your refrigerator. That way, there won’t be any room for misunderstanding, and you won’t have to spend as much time or energy trying to track down the necessary supplies.
After disconnecting the refrigerator from the wall outlet, the water supply to the cooling system must be shut off to prevent water from dripping. When it’s switched off, you know it’s secure.
Step #2. Cleaning the tube using household items
Now that everything is set up in the fridge, pour some distilled vinegar into a cup, check to make sure it’s full, and pour it through the tube. Vinegar’s antibacterial and antiseptic properties make it ideal for clearing up line buildup and debris.
The ice maker, if present, should also be activated so that the vinegar can clean its components.
You are doing more than just cleansing your tubes in this method. An added benefit is that you get to clean your ice makers while you’re at it. To finish, pour some vinegar into a bottle and soak the end of a bottle brush in it. If you want to stop problems in their tracks, you should try cleaning out the water sprout from the inside and the back.
Step #3. Final cleaning of the fridge
Making sure the fridge is completely clean before turning it back on is the only thing left to do. To do this, you need to make sure there is no more vinegar sitting in the tubes. If so, dilute the vinegar odor with water until it disappears. Vinegar has a somewhat long shelf life, so it’s important to properly store and maintain it. To make advantage of this method, you must first learn how to clean your refrigerator with vinegar.
Xem thêm : How To Level Fridge Balancing? Step by Step Instructions
When everything is in its proper location, you may reconnect the water supply and switch on the water. The same is true for the unit itself; testing it right away will reveal if the issues persist. Good for you if there is nothing to worry about, hypothetically speaking.
How Often to Change a Water Filter
In order to keep the water supply safe to drink, it is necessary to replace the filter on a regular basis. We’ve broken it down by category below.
1. Refrigerator Filter
Having filtered water readily available in a cool refrigerator is a huge convenience. However, if the filter is not replaced on time, germs and other impurities that were not absorbed by the filter will be able to pass through. If this occurs, water contamination is likely to occur due to leakage.
How Often Should It Be Replaced?
Experts and manufacturers recommend that you change the refrigerator filter at least every six months. It’s important to keep in mind that the answer to this question is context and usage dependent.
2. Whole House Filter — Well and Municipal
Filtering all of the water that enters a home is the job of a whole-house filtration system. This ensures that all used water, including that produced by dishwashers and washing machines, is clean and safe to drink.
People with compromised immune systems can benefit greatly from installing a whole-house system, as it can efficiently eliminate harmful pollutants and microorganisms.
These are also commonly found in homes where drinking water from the tap is unfit for consumption. It’s not uncommon to need a pro’s assistance when it comes time to replace these filters.
How Often Should It Be Replaced?
The sediment pre-filter should be replaced every six months. However, it is possible that every three months you may need to replace some of them. Whether you use municipal water or a well, the answer will vary.
Due to a greater potential for contamination, well water must be replaced at greater intervals.
3. Under Sink Filter
Water filters that fit under the sink are called “under sink” filters. These are attached straight to your house’s cold water supply, making it crystal clear when they need to be replaced.
Because this water is so critical to our daily life, it must be protected.
How Often Should It Be Replaced?
Replacement intervals for under-sink water filters vary according to water quality and volume of use. In more polluted regions, the filter will be able to trap more contaminants. In most cases, you should aim to replace it every nine to twelve months.
4. Countertop Water Filter
In the United States, countertop water filters are currently all the rage. These units are efficient, can be set up quickly, and take up very little space. Filtration methods include things like activated carbon blocks, alkaline media, and even coconut-based shells.
They attach to your sink’s faucet using a short hose and a quick-connector. The water is filtered as needed, and switching between filtered and unfiltered water is simple.
How Often Should It Be Replaced?
Filters that sit on top of the sink are a little different than the others. Some of them can only filter a certain amount of gallons before they need to be replaced. Some types can filter up to 10,000 gallons of water, for instance.
The average lifespan of a countertop water filter is three to twelve months. The quality of the filter, the reliability of the manufacturer, and the purity of the water all play significant roles. A few models feature see-through housings that allow you to inspect the filter from the outside.
5. Faucet Water Filter
Xem thêm : How To Install A Water Line To A Fridge? Step-by-Step Tutorial
Water filters for faucets attach to the spout itself. As the water flows out of the faucet, it is efficiently filtered. These are widely used around the world to filter out harmful substances like fluoride and lead.
They don’t need any special plumbing or wiring to be installed. These can have the undesirable side effect of drastically slowing the flow rate.
How Often Should It Be Replaced?
It may be required to replace the filter every three to five months if you have a large household. Replacement every six months is sufficient for households with fewer members.
6. Pitcher Water Filter
Water filters that may be placed in a pitcher are convenient and simple to use. You can start drinking clean water immediately; there’s no setup involved. These seem like standard water pitchers, but they include two parts: a filling reservoir and a storage tank.
Water is added at the top and filters down through the unit. Activated carbon is the standard filtering medium.
How Often Should It Be Replaced?
Pitcher water filters should be changed at least once every six months, according to experts and manufacturers. Multiple daily uses will increase the frequency with which it must be replaced.
Tell-Tale Signs a Change Is Needed
Regardless of the lens you’re wearing, here are some warning indicators to keep an eye out for:
- False pleasantness.
- Unpleasant odor.
- Contamination of the water supply or a malfunctioning filter.
- Reduced water pressure.
If you observe any of these symptoms, it’s time to replace your filter. As a general rule, if you first discover a decline in quality after it has already progressed, it may be too late to do anything about it.
FAQs
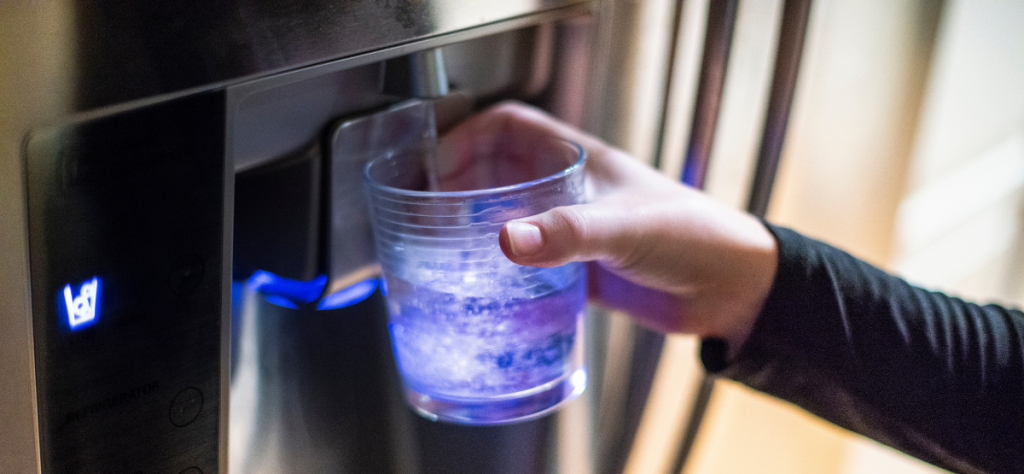
How do I clean my refrigerator water dispenser tube?
Distilled Vinegar should be poured into a cup and then poured through the tube. (If your refrigerator contains an ice maker, you can use the vinegar to clean the ice maker system as well by turning on the ice maker.) If you can get your hands on a bottle brush with a pointed end, you can use vinegar to clean the inside of the water sprout as well.
How do you get mold out of a refrigerator water line?
Vinegar is an all-natural, effective solution for descaling your water dispenser and eliminating mold in the water supply line to your refrigerator. It is recommended by Reno’s Appliance that 3 cups of vinegar be added to the water supply line through the copper water supply pipe connected to the water tank.
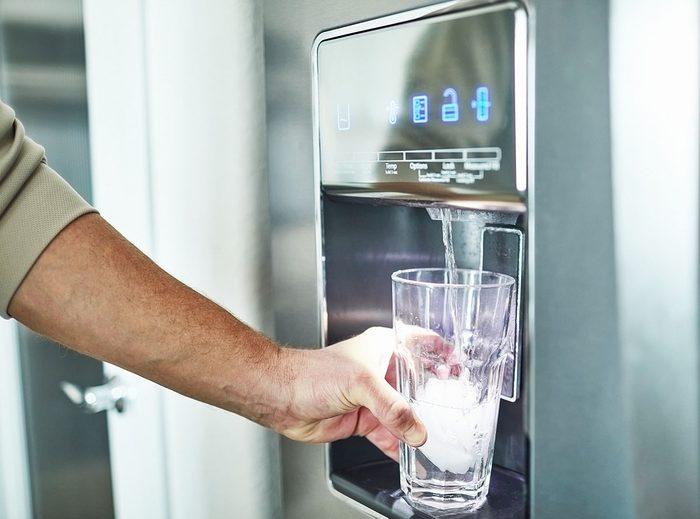
How often should you clean your fridge water dispenser?
While cleaning the kitchen, a water dispenser in the refrigerator is a nice bonus that is often forgotten. However, thorough cleaning is necessary to guarantee that the water you consume is free of harmful microorganisms. The water dispenser should be cleaned at least once every two months to ensure it is always in good working order and free of any potential health hazards.
How do you clean a water dispenser with vinegar?
Fill the cooler’s reservoir with a solution made of 1 cup of distilled white vinegar and 3 cups of hot water. (If you have really delicate skin, gloves may be a good idea.) Use this solution and a microfiber cloth to thoroughly scrub the inside of the reservoir.
How do I clean my Frigidaire refrigerator water line?
Vinegar can be used to quickly and cheaply clean the water line in a refrigerator. It’s mild enough to avoid damaging the plastic water lines in your Kenmore or Frigidaire refrigerator, yet powerful enough to eliminate odors, germs, and other contaminants.
How do you remove limescale from a refrigerator water dispenser?
Mix a small amount of dish detergent with water. Saturate a soft cloth with water and use it to wipe off the area to get rid of any lingering chemicals. If necessary, this process can be repeated. Rinse thoroughly with water.
Conclusion
Combine some dishwashing liquid with water. Use the water to dampen a soft cloth, then wipe off the area to get rid of any lingering contaminants. If necessary, please state again. Rinse it all out with water.
Again, one of the simplest and most cost-effective ways to get the job done is to use vinegar to clean the tubes. Cleaning your appliances while saving money is possible.
Nguồn: https://spasifikmag.com
Danh mục: Fridge